Background
One fine day, I successfully exchanged a muffle furnace, which turned out to be unsuitable for my professional purposes for a number of reasons. In order for the oven to still be useful, I decided to try making products using the fusing technique, I remembered about the products I saw on the Internet, read about it and started trying.
Now, after completing six months of practice, I remember that I could not find information on the Internet that described the technology at the level of knowledge and materials used available to me. That is, I initially decided to use only easily accessible or cheap materials. Therefore, everything had to be checked experimentally.
How to make a simple pendant?
Making a regular pendant for a chain is quite simple. Let's look at all the stages of work:
- First you need to prepare a furnace for melting glass. The preparation is quite simple: cut out a piece of heat-resistant paper and place it on the stove stand, as mentioned above, the paper will prevent the glass from sticking to the stove.
- We cut out a square of colored glass (or a rectangle, whichever you prefer), place it on an already prepared stand and cover it with a piece of transparent glass of the same size, which acts as glaze.
- Close the fusing oven and put it in the microwave for 15 minutes, with the power set to half.
- After 15 minutes, remove the oven from the microwave. Attention! The oven temperature will be high, so wear heat-resistant gloves or use oven mitts to avoid serious burns.
- After the glass has cooled, use a drill or screwdriver to make a hole in it for the cord. That's all - the pendant is ready.
To visualize everything clearly, you can watch the production process in the video.
Of course, the pendant you and I have turned out to be the simplest. To be original, you should experiment and awaken your imagination. For example, you can alternate strips of colored glass, combining colors, red and blue, yellow and green. Or by making molds and filling them with glass chips, you can give the product any shape and appearance. You can also use colored glass beads instead of crumbs. It is usually embedded in plain glass.
Fusing may well become a source of income, because if your imagination allows you to create truly beautiful and unique things, there is a huge chance that they will definitely be bought.
Time and feasibility
When I arrive, I spend about ten minutes preparing the glass for sintering, that is, I prepare the glass, lay out the design and load the oven, then turn on the oven and after two hours I turn it off and that’s it. So the entire time spent is ten minutes. During the two hours that the oven is on, I do my direct work. In terms of electricity costs, a stove for two hours consumes $0.2 worth of electricity - generally inexpensive. Seeing as this is my hobby, I mainly make products for gifts, although I donated them to the municipal gallery and they also earn money for beer. Although if you do this professionally, then this is a good business; you can find prices for fusing on the Internet.
Unusual techniques
There are several techniques that craftsmen use to create fusing works:
- “white light” technique - white glass is used to create mainly three-dimensional figures;
- staining glass with iodine;
- fusion of colored glasses.
The last technique is considered the most common and interesting. In addition, at home, craftsmen work with colored glass.
In this article we will look at a master class on creating a decorative item from colored glass at home with your own hands.
Related article: Do-it-yourself clothes for Baby Bon with knitting needles with photos and videos
Fusing furnace
As I already wrote above, I got the stove for free, and there are many similar stoves in the post-Soviet space, and maybe you will be lucky enough to get one, or you already have one. A search on the Internet showed that the stove accelerates to 900 gr. has adjustment, power consumption 2.4 kW.h. The fusing technique involves, when cooling sintered glass, step-by-step cooling, which is achieved with the help of expensive programmers for furnaces, but our method is not expensive, and lo and behold, it turned out that if you do not open the furnace until it cools completely, everything will work out too. I proceed as follows: after loading the oven, I immediately turn it on at full power and after one hour and forty minutes have passed, I begin to look into the viewing window, when the glass floats to the state I need, I simply turn off the oven, as a rule, the total time is two hours. I receive finished products only the next day.
Fusing technology
Once pieces of glass are placed on a substrate, and it is placed in a furnace with a horizontal base, stained glass windows can be obtained exclusively flat or in several parallel sintered layers. This limits the imagination of designers.
Therefore, they came up with a type of fusing - bending. This is the spreading of softened glass over a three-dimensional blank form. The mass spreads under the pressure of its own mass. A temperature of 700 degrees is sufficient.
In order for glass to effectively flow down when bending, an acceptable radius of curvature of the matrix is needed. It is 15 centimeters. The standard is set for glass with a thickness of 10 millimeters.
Since bending uses a single piece of glass, calling the technique sintering is not entirely correct. Therefore, let's return to classic fusing. The material for it is cut with a regular glass cutter.
The pieces are selected in accordance with a pre-drawn sketch. The base sheet is also cut out in accordance with it. If the shapes are curved, use a jigsaw.
Preliminary bonding of the glass composition to be laid out is done using special glue. He attaches the fragments to the base. If the composition is complex and large in width, they resort to a sandwich, covering it with float on top.
The option is acceptable for single-level fusing. If in some places there is a layering of elements, two base sheets are stacked one on top of the other at the bottom of the picture.
Fusing sintering is done slowly. First, slowly heat up to 900 degrees. Afterwards, the workpiece is kept at maximum temperature for from 30 minutes to several hours.
The fusing is quickly only cooled by opening the furnace lid. This allows you to lower the bar to the annealing temperature - the next stage of sintering. It is carried out at 580 degrees. The original colors return to the previously reddened glass. The shape of the product is already established. All that remains is to naturally cool to room temperature.
Finally, we note that in addition to sheet glass, sticks and beads are made for fusing. There are even glass chips. Sprinkling compositions with it gives flashes of color comparable to stars, tears, and glare of the sun.
It all depends on the author’s idea and the color set of the stained glass window. Abstractions are the easiest for novice masters. For them, even sketches are not required. So, when you decide to do home fusing, you should start with abstract subjects.
Separator and forms
Professionals use special paper, liquids, and powders, which must be purchased somewhere. But you can also use regular powdered gypsum. I made a small stainless steel container about a centimeter high, into which I poured the plaster. Before laying the glass, use a soft wide brush to fluff up the powder by lightly tapping it. After which I very carefully lay the glass. If you need a textured back surface, then we stop there, but if you need a smooth back surface, then you need to carefully press the glass into the plaster, the glass will compact the plaster and we will get a flat surface.
Glass also lends itself well to shaping, the principle here is that we make a mold and place glass on it; when heated under its own weight, the glass bends, filling the recesses in the mold. This way you can make, for example, ashtrays and plates. Again, I repeat that you can buy special forms or materials for their manufacture, but it works very well to make them from fireclay bricks (this brick is used for the manufacture of gas and electric furnaces, is very light in weight, can be easily processed, for example with a file, and is not afraid of repeated heating). It is imperative to use a separator, otherwise our product will stick to the mold. I sprinkle the mold with powdered plaster, making sure that the plaster completely covers the mold.
What do you need for fusing and where to start?
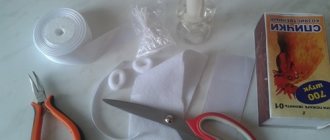
The list of items that will be needed in making crafts is quite small and almost everyone has most of these items; as for the rest, buying them is also not difficult. And so you will need the following:
- microwave;
- fusing furnace. This is one of the few must-have items that costs around $80;
- glass cutter, needed for cutting glass;
- pliers, needed to break off glass;
- safety glasses to protect eyes from glass fragments;
- a respirator to protect the respiratory tract from glass dust and fumes coming from molten glass;
- heat-resistant paper, used as a layer between glass and oven, preventing glass from sticking;
- colored and transparent glass (You should also buy this, usually it comes either in sets. You can also use glass beads).
Important! Don't forget about safety precautions, as working with hot and sharp materials can be dangerous. Remember to wear heat-resistant gloves and goggles to protect your eyes and hands. Do not neglect a respirator and carry out all work in a ventilated room or area.
Selection and preparation of glass for fusing
The essence of glass selection is that different glasses have different coefficients of thermal expansion. The problem is that products made from glass that does not match each other crack. To find out whether the glass is suitable or not, you need to do a test sintering. The product requires a base glass on which the design is laid out; the most affordable is simple window glass. Therefore, you need to select the glass that is suitable for it.
Of all the readily available glass, the following are suitable: green color - green bottles brown color - brown bottles yellow color - fog lights and glass for doors and cabinets. All the blue and red glass available to me, as well as glass for welding helmets, turned out to be unsuitable.
You can use colored glass for stained glass, which is currently produced specifically for fusing. The most popular at the moment are Moretti glasses with COE 104, system 96 with COE 96 (SPECTRUM, UROBOROS, etc.), a group of glasses with COE 90 (BULSEYE, ARTISTA, etc.), and Float. with COE 82-84.
Preparation in my case comes down to: Cutting the main glass. It needs to be wiped well because the dirt gets baked into the glass and then it can no longer be cleaned.
I break multi-colored glass with a hammer to the fraction I need, after which I wash it to remove small fragments, dust and dry it.
Next, we lay out the drawing so that the fragments are kept in place using a syringe, you need to drip water under them. Water holds the pieces in place due to surface tension, and we can transfer the workpiece into the oven without disturbing the design. You can also use liquid glass for this; this is convenient if we are preparing a lot of pieces. The finished product may be a little cloudy. To prevent this, it must be treated with a brush with a composition consisting of water to which you need to add borax (it is sold in medical equipment stores and on the market, used as a flux for high-temperature soldering) in the proportion of a teaspoon per glass of water.
Description and features of fusing
The fusing technique is characterized by the direct fusion of pieces of colored glass. In the stained glass windows of the past, they were embedded in a metal frame. Reminiscent of cloisonné enamel used in jewelry. A mass of melted silica is attached to walls made of precious or jewelry alloys. This allows you to work at temperatures of about 800 degrees.
Glass for fusing is sintered at almost 1000 degrees. The colored fragments must connect directly and become one whole. To do this, a composition of pieces is laid out on a support sheet. It is also made of glass and is produced using float technology.
The sheet is formed on molten tin. The metal floats in a bath with a protective layer of a mixture of hydrogen and nitrogen. The glass melt enters there, spreading over the tin cushion in an even, thin layer. It remains to cool.
Float glass can be colorless or colored. Color is added superficially, or during the preparation of the mass. In the latter case, the substrate is painted over its entire thickness.
The glass used for drawing can be of any kind. Even fragments of bottles are used. Only the expansion coefficient of the material is important. The indicator is designated by numbers with the letters COE. Fusing stained glass windows are made from glass with a grade of 90 and above.
The first company specializing in the production of such was Bullseye. This is an American company. The company's specialization in fusing gave the world compatible glass. Third-party companies began to echo. They produce samples of “one blood” that match each other when sintered.
In Russia, fusing-compatible glass did not immediately become available, and when it appeared, it was intimidating with the price tag. Domestic craftsmen practiced their technique using the products of the Bryansk plant. He specializes in light filters.
In stained glass windows measuring 40 by 40 centimeters, their pieces are sintered successfully, especially when using red, yellow and orange fragments. Blue and blue ones set worse. If stained glass windows are larger than the specified sizes, only specialized glass is needed that passes a compatibility test using a stress meter.
The high temperature required for fusing limits its spread. For creativity you have to buy industrial ovens. They are shaped like a suitcase or a box. There is a solid recess in the lid.
It contains heating elements. By pressing them to the lid, the fusing furnace sinteres glass with a thickness of more than 1 centimeter. The composition on the substrate is loaded into the lower compartment of the unit.
To save money, some do fusing in the microwave . They even produce specialized glass sets for this purpose. The oven is pre-washed to remove dirt.
The melting time has to be selected experimentally. One glass is connected in 4 minutes, and the other in 9. However, specialized fusing glass does not lend itself well to microwaves.
Fusing manufacturing process
As I already wrote above, after installing the furnace, turn it on at full power and do not touch it for one hour and forty minutes, after this time the furnace has gained 500-600g (a red glow appears), then the furnace gains temperature more actively. We begin to control the process through the viewing window. When the glass looks like wet candy, sintering has already occurred and if we need the same result as we see in the oven, we can turn it off, but I like it better when the edges of the glass melt, so we wait some more and turn it off when the edges melt. If you wait a little longer, you can sinter the glass to the point where our components merge into a single plane (but at the same time the brightness of the colored glass is slightly lost).
When forming glass, the process is also controlled visually. When we turned off the oven, we can open it to inspect the product in more detail, maybe something was not inspected through the viewing window. But don't take it out. If upon inspection it turns out that it needs to be heated more, then close it and turn it on again. The main thing is not to open the oven or remove the product after the glow from the product has disappeared. At this moment, the stress in the glass is relieved.
Here are my examples of products, I do not claim any artistic value, these are all some of my experiments.
Making stained glass
Stained glass is transparent drawings, patterns, images that are created from fragments or on a glass object. When making traditional stained glass windows, a metal profile is considered a mandatory part. Colored fragments of material are combined with each other using small broaches that hold the entire craft intact. The entire history of this art has given rise to many different options for making unique jewelry. There are hundreds of new techniques for making stained glass.
The fusing technique is one of the glass processing methods . The name of the art correctly reflects the meaning of the whole process. Under the influence of high temperatures, several glass parts can be firmly connected to each other into an original colored craft.
Such products were known to the ancient inhabitants of Egypt back in the 1st century BC. But for a long time this technique was almost not used in stained glass art.
Fusing equipment
It's time to pay attention to what brings all the beauty of fusing products to life.
Of course, fusing equipment. Industrial and “home”, professional and amateur. The choice is very wide, and this is good news. After all, this fact provides, firstly, freedom of choice, and secondly, the opportunity to choose the equipment that is right for you. Here you can get acquainted with fusing equipment.
Happy choosing!
Fusing techniques
Although the work algorithms are similar, several different fusing techniques can be distinguished:
- Density sintering
. The most popular type. When using this technique, a flat product is obtained that can be used as an independent decoration or as a basis for a three-dimensional composition. - Combined combing
. This technique involves changing the shape of the product while it is hot. A special tool is used for this. - Fire polishing
. This technique is aimed at making the product smooth and shiny. Use it to make the edges rounded.

