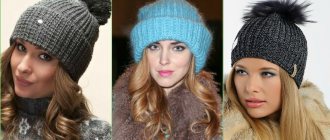
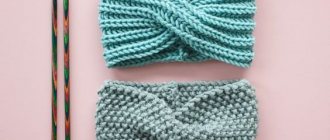
to knit a fashionable earflap hat ; the main thing is to choose the model and yarn you like. The hat, as a rule, is simple in design, with very simple patterns, but the products turn out to be simply delightful and, importantly, modern.
Last year, these catalog models of hats were on sale, mostly from Polish manufacturers, but for craftswomen these models do not pose much of a challenge.
In addition, I tried to select useful videos and a basic description, based on which you can model a hat to your taste. And also in this publication you can find a beautiful fur hat with earflaps with a description.
The hats are very similar with their ears. Although the patterns on them vary, which is generally good; You can present your product and choose the option you like:
- with garter or face stitch,
- decorated with small or large flowers,
- buttons or brooches.
How to knit the first hat and the next two are in this video:
In the video master class on knitting a hat, the “star” pattern is used, but I want to offer another, no less beautiful pattern for such a headdress, the “honeycomb” knitting pattern.
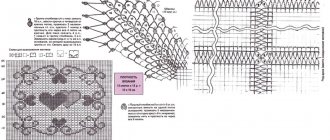
I don’t presume to say, but it seemed to me that in the photo of the catalog hat with earflaps, there was something very similar to this particular pattern:
How to crochet small flowers, for example, for the first earflap hat:
Master class on knitting hats with earflaps for women
A women's hat is knitted from one skein of thread. Although it all depends on the knitted density of the hat with earflaps. You will also need knitting needles number 3, which will make the product quite dense and warm. If you are comfortable working with circular knitting needles, then use them.
The knitting master class for women will begin with a set of six stitches from which garter stitch is made. In new lines, the links should be increased by one piece on both sides. Continue knitting until the number of links increases from six to twenty. There is no need to make additions after this. Continue to complete the master class until the length of the eyelet that you need. The photo shows this stage of work.
Then the main part of the product begins. To do this, cast on seventeen buttonholes with knitting needles, then grab twenty pieces for the first eye, and then there are thirty-seven pieces of the central part and twenty loops of the second eye. Add 17 additional buttonholes. The four stripes need to be knitted again using garter stitch. The number of stripes should be equal to the depth of the hat with earflaps. You can do knitting like knitting. loops, and the pattern you like. In the photo you can see the knitted star pattern. For beginning needlewomen, this pattern will be very easy to repeat. In each line you need to knit 2 faces. p., then 3 p. are performed as one knit stitch, yarn over and knit 1 again. etc. Such manipulations must be performed to the very end, completing the row with a purl loop.
Now let's start knitting the upper part of the hat with earflaps. The master class involves knitting only faces. loops, as well as reducing them on the sides. Simply put, you must knit the loops together until their total number reaches thirteen. After this, you need to pull them together and make a connecting seam on the back of the hat. The lapel of the headdress is very simple to do. Cast on thirty-three loops along the edge of the frontal part of the product and tie them face down to the desired height, as shown in the photo.
For beauty, make 2 stitches in the last lapel strip and close the links. Decorate the hat with knitted flowers. As you have already seen, a hat with earflaps for women is very simple and quick to make.
Video: Knitting a hat with earflaps
Tools and materials
Knitting yourself is a fascinating, creative, and most importantly economical process. To do this you need to choose tools and yarn.
To make a hat for a girl with knitting needles you will need:
- approximately 150 g of yarn. Hypoallergenic composition (acrylic or cotton) is suitable for babies;
- a set of knitting needles for circular knitting;
- meter tape;
- scissors.
Experienced needlewomen can choose their own knitting needles. If for some reason it is easier to knit such a model with regular knitting needles rather than circular knitting needles, then you can use them.
Knitted men's hat with earflaps
The next master class will teach you how to knit a men's earflap hat. The scheme of work will also appeal to beginning needlewomen. In your work, use yarn consisting of wool and acrylic, as well as knitting needles number 4. Garter stitch is performed by alternating knit and purl rows with knit stitches.
Cast on twelve links and knit in the manner described above, adding one piece to each strip on both sides until you have twenty buttonholes. Next, knit 16 r. in a straight line. Start a new row by casting on eight buttonholes, and then knitting another twenty-two rows in a straight line. Set the work aside and complete the second eyelet in the same way.
To knit the visor, you need to cast on twenty-two loops and also make the pattern described above, adding two pieces to each strip on both sides. You should have a total number of buttonholes - thirty pieces. Then knit twenty-six r. in a straight line, as shown in the photo.
The men's hat with earflaps is not finished yet. You also need to connect the blanks according to this diagram: the right ear with the visor and with the left ear. Knit straight forty r. In the first strip, you should cross the loops at their junctions to avoid the formation of holes. Then make a uniform decrease in every 2 r. seven buttonholes each. You should have nine left. Pull them together with thread, and then make a seam by bending the visor. The edges of the earflap hat should be crocheted with single crochets. This completes the master class, and a simple men's earflap hat is completely ready.
LiveInternetLiveInternet
Thanks to the author of MK - ViSpod
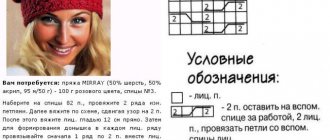
I knitted it for a head volume of 56 cm. So, Lana Gold Alize yarn (240m/100g). Color - dusty rose. 1 skein was enough for me. Knitting needles No. 3. I got the knitting density: 20 loops - 10 cm. Let's get started! Ears: cast on 6 stitches onto knitting needles. We knit in garter stitch, adding 1 stitch to each front row at the beginning and end of knitting. I knitted two ears at once - it’s more convenient for me
When the number of loops reaches 20, we stop adding loops and knit an ear of the required length. I got 17 cm. The width of the ear was 10 cm. Having tied both ears, we proceed to the main part of the hat. The loops will be distributed as follows - on the front of the hat you need to cast on 36 loops + 1 for symmetry = a total of 37 loops (19 cm). Two ears with 20 loops (10 cm). And the back of the hat has 32 loops + 2 edge loops (17 cm). Total - 17 + 20 +37 + 20 +17 = 111 stitches. We cast on the first 17 loops, add the first ear, cast on the central 37 loops, add the second ear, cast on the last 17 loops. There are 111 loops in total. We knit all the stitches in 4 rows using garter stitch.
Let's proceed to the main pattern - this is “Stars” https://www.stranamam.ru/post/4227000/%22 Thank you very much Rukodelochka!!!
The number of loops is a multiple of 3 + 1 for symmetry + 2 edge loops. For us it is 36*3+1+2= 111.
The pattern report is a multiple of 4 p. Plus 3 p. for the symmetry of the pattern. Plus 2 edge stitches.
- 1st row - knit with facial loops. Edge stitch (remove), *knit 3 stitches from 3 stitches, knit stitch*, repeat the report between the stars, knit 3 stitches from the last 3 stitches, edging stitch.
- Row 2 - purl all stitches
- 3. row - edge stitch, knit 2 stitches, *knit three out of 3 stitches, knit stitch*, repeat the report between the stars, at the end of the row knit 2 stitches, edge stitch
- Row 4 - purl all stitches
We repeat knitting from the first to the fourth row.
We continue knitting (12 cm was enough for my hat depth).
Then we move on to knitting the top of the hat - this is where the fun begins... Row 1 - all knit stitches (all purl rows - knit stitches) 109 + 2 cr. Row 2 - knit 2 together. - to the end of the row 98 + 2 cr. 3rd row - 2 together 7 persons. - to the end of the row 87 + 2 cr. 4th row - 2 together 6 persons. - to the end of the row 76+ 2 cr. Row 5 - knit 2 together. - to the end of the row 65 + 2 cr. 6th row - 2 together 4 persons. - to the end of the row 54 + 2 cr. Row 7 - knit 2 together. - to the end of the row 43 + 2 cr. Row 8 - k2 together. - to the end of the row 32 + 2 cr. Row 9 - knit 2 together. - to the end of the row 21 + 2 cr. Row 10 - 2 together - to the end of row 11 + 2 cr. We tighten the remaining 13 loops and sew the hat (I do this with a mattress stitch https://www.stranamam.ru/post/3704581/ Thank you 8 Lena 8!!!). Consider half the job done! Now we knit the lapel - we cast on 35 stitches along the bottom of the front part of our earflaps and knit with garter stitch to the desired length (we try on our favorite one along the way).
I got 7 cm. Then, in order to round the edges of the lapel, I decreased 1 loop on both sides four times (that is, at the beginning and at the end of each row I knitted two together). Close the lapel loops. Now it's time for the flowers
There are different flowers - large and small, as you know... I liked the flower according to the pattern from the tatispain album (thank you!) pattern No. 1316 https://www.stranamam.ru/photo/4087278/#photo I sculpted three pieces and sewed them to the lapel. I sewed a bead into the center of each flower. (This was done later, so it’s not visible in the photo). For tassels - cut 50 pieces of yarn 30 cm long (this is for two tassels). The number of threads can be varied according to your own taste and desire. Fold it in half and attach it to the edge of the ears using the fringe principle.
We cast on knitting needles 6*3 + 1 + 2 cr. = 21 loops and knit with the main pattern “Stars” 4 cm. Close the loops, sew
We put it on the tassel, masking the places where the fringe is attached. We fasten it tightly with a few stitches. We repeat the procedure again with the second ear... Voila - the hat is ready!!!
Source
Knitting a baby hat
A children's hat with earflaps is knitted for a boy in the same way as for a girl. The only difference is the choice of yarn color, as well as the creation of a beautiful decor that little fashionistas love. Therefore, we offer you a short lesson on knitting a headdress for a boy. The children's work scheme will be clear even to beginners.
Cast on seventy-two buttonholes using size 3 needles. Next, knit an elastic band two by two. Its height should be fifteen centimeters. Then knit 3 purls together in the new strip. p. Then knit 2 knits together. p. You should have an elastic band one on one. In the fifth row, follow the pattern according to the drawing. In the sixth, you need to knit all the buttonholes in two pieces. Transfer unused links to an additional tool and tighten them.
For the ears you need to cast on five pieces with knitting needles number 4 and knit using the garter method. In the third, fifth, seventh, ninth and eleventh row, add 1 stitch on each side. Then knit fifteen lines again in garter stitch. Having set aside one workpiece, proceed to the second. Between the finished ears, you should cast on ten yarn overs and switch to knitting needles number 3. In the first line, add 3 stitches from each side and knit a two-by-two elastic band. Having completed four centimeters, close the links.
The boy's hat is not finished yet. The last thing to do is the visor. The visor must be made with double thread. Cast on 25 stitches and make garter stitch eight centimeters. Make decreases in the last strip, and then close the buttonholes. All that remains is to sew all the blanks of the hat, and we can assume that the boy’s headdress is ready. We invite you to watch the video material from which you will learn how to knit a winter hat with earflaps for a boy.
How to decorate a product
You can decorate a girl's earflap hat with buboes or fur, or decorate it with knitted flowers, ribbons or leaves, beads or rhinestones.
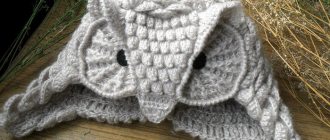
Kids love hats in the shape of animal faces. The choice remains with the needlewoman.
A knitted earflap hat for a child can be made with patterns, colored or combined yarn, with a fur trim or fluffy buboes.
To make the hat warmer, it is complemented with a fleece, fur or knitted lining.
