Classic recipe
The minimum set of ingredients will be the safest for small children. This test can be used for children as young as one year old. Even if a child bites off a small part, it will not cause any serious problems.
This is certainly not the most pleasant outcome of events, but anything is better than swallowing the chemical composition of store-bought products. A large number of photos of salt dough can be found on the Internet.
Preparation
Prepare a bowl for mixing all ingredients. Sift flour and add salt. Mix thoroughly until smooth.
Gradually pour cool water into the bowl in a thin stream. Stir the mixture until smooth and the dough no longer sticks to your hands.
Note. If your mixture is too liquid or the dough still sticks to your hands after kneading for a long time, you need to add flour a little at a time. If your mixture is too thick and dry, you can add a little vegetable oil.
After kneading, you should have a dense and elastic mass. After cooking is completed, the finished dough must be placed in a plastic bag and refrigerated for about 2 hours.
How to make salt dough for crafts using a simple method
It's time to look at proven recipes. Let's start with the simplest thing. For it they use:
- salt and flour (use 200 grams each);
- a quarter glass of water;
- If desired, prepare dye for coloring.
In addition to “Extra” salt, it is important to use high-grade flour so that the result is white. Be sure to cool the water in the refrigerator. The cooking process will look like this:
- Add salt to flour. Gradually pour in the liquid.
- Knead the dough. You should have a base. If the composition turns out to be liquid, add flour and salt; on the contrary, if it becomes stiff, you can add a little water.
Please note that when making salted dough for modeling according to this recipe, you can change the proportions of the components.
Dyes can be added for color. They can be mixed with water and a ready-made consistency. The second method is more convenient, since there will be no unclaimed pieces left.
Dough with PVA glue
To ensure that the mass is strong after drying, PVA paper glue is added.
Note!
- Plasticine dinosaur: TOP-170 photos of creative DIY modeling solutions. Methods for making a dinosaur + simple master class
Plasticine machine: simple diagrams and non-standard ideas for crafts made from plasticine. Step-by-step instructions for making a machine with your own hands with photo reviews
What can be molded from plasticine - a master class on creating crafts from plasticine with your own hands. Creative modeling ideas + photo examples of the best works
Salt dough recipe for children:
- you will need 1 glass of salt (fine or coarse grind is suitable);
- 1 cup flour (it is better to take wheat flour);
- half a glass of water;
- tablespoon PVA.
Preparation: Prepare two bowls. Mix flour and salt in one, and water and PVA in the other. Gradually pour the second bowl into the first and stir constantly. The liquid should be added gradually, since different flours take up different amounts of liquid.
Methods for preparing salt dough
The simplest recipe for preparing salted modeling dough at home is to combine salt, flour, and water in different proportions. We will need:
- one glass of “Extra” salt;
- two glasses of flour;
- 3/4 cup of water must be cold.
Stir the dough until it turns into a homogeneous mass. This activity is not entirely for children. Adults can handle it better.
Tip: When you prepare the dough, add a little hand cream or vegetable oil. Then the mixture will be more plastic.
To check if it can be worked with, tear off a small piece and use it to sculpt a small piece. The dough should not crumble, otherwise the crafts will not work.
Some experts advise first combining salt and the required portion of flour, and then gradually adding water. Others first dissolve a portion of salt in water and only then add flour.
The secret of another recipe is in different proportions and a secret ingredient. To make play dough you need to mix:
- one glass of wheat flour;
- one spoon of wallpaper glue;
- two glasses of fine salt;
- one glass or so of cold water.
Tip: Try not to store the finished dough for too long. Otherwise, it will acquire a grayish tint, which will affect the quality of the crafts.
Some masters experiment with different types of flour. For this use:
- three glasses of wheat flour;
- one glass of rye;
- one and a half glasses of cold water;
- two glasses of salt.
Combine the components into a homogeneous composition in an already known order.
Tip: Dough made from a mixture of rye and wheat flour is easier to process.
The mixture for modeling crafts has the desired consistency if it:
- does not crumble;
- does not tear;
- comes off easily;
- quite dense.
INTERESTING: Master classes on sculpting miniature doll food
You can knead the dough using a mixer. It's okay if the mass turns out to be too soft. Mix a little more salt and flour, add to the existing dough.
Dough with starch
The recipe for salted dough with starch is considered one of the universal recipes. With the addition of starch, the dough becomes more plastic. This recipe for salted dough for crafts makes fine details (flower petals).
You will need:
- 2 cups of flour;
- half a glass of starch;
- a glass of salt;
- water.
Mix all components until smooth. If the consistency turns out to be liquid, you need to add a little flour.
Note!
How to make slime - the best ways to make slime at home. Simple and quick recipes with a step-by-step master class for children (150 photos)
- Plasticine dog - TOP-180 photos of unusual ideas for creating crafts. Detailed master class on DIY modeling for children
- Clay products: basics of modeling, tips for beginners. Master class on making clay crafts + photo reviews
Classic salt dough recipe
Modeling from salt dough is not a new activity. The origins of this type of creativity are lost deep in the history of our culture. Just remember Kolobok from a folk tale and the custom of baking larks for Candlemas. Keep the basic recipe for salt dough for crafts - continue the traditions of your ancestors with pleasure!
To prepare salt dough you will need:
- 1 cup fine salt,
- 2 cups of flour,
- half a glass of water,
- 5 tbsp. l. sunflower oil,
- natural juice or gouache (optional).
Get to the point!
In a deep container, mix the dry ingredients: salt and flour. Add sunflower oil and pour some water. Knead the dough. To give the mixture a certain color, carefully stir in carrot (beetroot) juice or gouache diluted in water. If necessary, add water or flour in small portions to adjust the viscosity of the dough.
Important! It is best to store the finished dough in the refrigerator for no more than a day, tightly wrapping the mass in cling film.
DIY Play-Doh
There is a simple recipe that will replace the expensive original Play-Doh. Below is a recipe for homemade salt dough.
Recipe:
- 350 gr. Flour;
- 180 gr. Extra salt;
- 180 ml. Water;
- 30 gr. Gelatin;
- 25 gr. Citric acid;
- 50 ml. Vegetable oil.
To prepare this recipe you will need a saucepan. Put it on the fire, pour out the water and add gelatin. The dough can be colored by adding a little food coloring to it.
Pour in vegetable oil and add citric acid and salt. It is very important that the last ingredient to go into the pan is flour. To avoid lumps, mix everything well.
All this should be kept on low heat until the mass begins to peel off the walls of the pan. After this, stir the mixture with your hands and let it cool. You can wrap it in cling film or put it in a container for storage.
Salt dough recipe for delicate works
If you plan to make thin relief figures or miniature products from salt dough, you will have to add a secret ingredient to the classic recipe. Which? Read on - I'll tell you everything!
To make salt dough according to a special recipe you will need:
- 1.5 cups flour,
- 1 glass of salt,
- 125 ml water,
- 1 tbsp. l. PVA glue or starch,
- food coloring.
Get to the point!
Prepare a deep container. Mix salt with flour and add 125 ml of water. Mix the ingredients thoroughly. Now add a tablespoon of starch or PVA glue. Starch increases the plasticity of the mass, and glue increases its strength. PVA can be replaced with 2 tsp. wallpaper glue diluted in water, according to the instructions. At the end, add food coloring and knead the dough well. If you need a lot of different colors, divide the dough into several pieces and add the necessary dyes. Happy creativity!
DIY colored dough
The salt dough product does not have a very attractive color. And the child will not be interested in playing with a monochromatic gray lump. Multi-colored funny lumps are another matter, and the colorful variety of dough makes the child’s imagination work.
Note!
Animals made of plasticine - a master class on creating crafts with your own hands. Unusual modeling ideas + photo examples of finished works
Plasticine crafts for grade 4 - reviews of creative ideas. New products, step-by-step master classes for schoolchildren + 150 photo examples
Plasticine tank: step-by-step modeling instructions with simple work patterns. Master class for children on creating a tank with their own hands + photo reviews
There are two options:
- You can paint the finished product (acrylic, gouache, any paint will do);
- You can make multi-colored dough at once.
You can use any dyes, but for bladeless use it is recommended to use food dyes or natural juice (beetroot, carrot, spinach).
The saturation of shades can be adjusted based on the amount of addition. After drying, the product will be slightly lighter.
For uniform coloring, dry dyes are pre-diluted with water. Then you will need to reduce the amount of water added. By mixing basic colors you can get additional shades.
How to dry crafts
Drying products or baking them is the most crucial moment in working with dough. Even more important than kneading the material. If you do not adhere to the drying rules, then all the efforts and labors of your creativity will end up in the trash. There are three ways. to dry salt dough products.
INTERESTING: How to make a pony from clay or mastic
- Natural. We leave the play dough at room temperature and forget about it for a couple of days or even weeks. You cannot speed up the drying process using hot radiators or fireplaces.
- In the oven. This procedure reduces drying time to one to two hours. However, it all depends on the thickness of the craft. It is important to start drying the salt dough in a cold oven, gradually increasing the temperature. Don't forget to turn the products over so they bake evenly. At a temperature of 50 degrees, the craft is ready in 1-2 hours.
- Combined. You can leave the products at room temperature for a while and then dry them in the oven. To brown it a little, raise the oven temperature to 200 degrees.
Salted play dough that you can make yourself is not much different from store-bought Play Doh and has several advantages. It is safe to swallow if you do not add any glue as per the recipe. It is easy to prepare, you can dry it yourself and paint it with any colors. Varnish coating guarantees the safety of the product for many years.
Oven
Dry in an open, preheated oven at a temperature of 35-55 C. Depending on the volume, the figurine can dry for an hour or longer.
The second method is oven drying. The product must be placed in a cold oven and heated to 150 C. After reaching the required temperature, turn it off. Leave until completely cool.
How to make salted play dough and how to work with it?
The composition of salt dough for making crafts is simple. It has only 4 components: salt, flour, water and vegetable oil.
When you make a dough craft, dry it well. If your figurine does not dry well, it will most likely crack. Take your time!
It is better to dry crafts at room temperature, but this may take several days. Drying them in an oven at low temperature and with the door ajar will help speed up the process of making toys. However, even in this case, you need to dry the craft in several stages, about 3 times for 1.5 hours each. Between them, the crafts simply lie in the room for several hours or even all night.
Oven drying time:
- 1 hour – at 50 degrees,
- 2 hours - at 75 degrees,
- 30 minutes - at 150 degrees.
If the craft turns out to be voluminous, you can remove the excess dough from the back side, then it will dry faster.
Another piece of advice: if any element falls off during the drying process, don’t be upset! PVA glue will come to your aid.
You can color the dough in different ways: at the kneading stage or the finished figurine. When coloring the dough during kneading, food coloring, gouache and watercolor are used. When decorating finished figures, any paints are used: gouache, watercolor or acrylic. To make the finished craft bright, it is coated with varnish: artistic, acrylic or water-based construction.
How to make pictures
You can use this material to color pictures. Such a pastime will greatly delight the children. After all, it was very exciting when, instead of boring felt-tip pens and pencils, elastic dough fell into your hands.
For work, you can take any coloring book or draw it yourself. You can completely paint over the picture with different colors, in an even layer, or you can pinch off small lumps and glue them to the picture, it will also turn out very interesting.
Three-dimensional pictures also turn out interesting and unusual, you just need to take a little more dough. This activity develops fine motor skills very well and develops imagination. You can create a beautiful panel that will decorate your child’s room.
Children are able to sculpt dough themselves; they just need a little guidance and show them how to work with the dough.
How to make figures
You can make a large number of different toys from dough with salt, as long as your imagination is enough. You can use baking molds. And by making small holes and inserting a string, the toy becomes a New Year's toy.
What if you glue a magnet to the back? This makes a beautiful magnetic souvenir for the refrigerator.
The most touching version of a fake made from flour would be a cast of the hand or foot of a newborn baby.
A short master class on creating salt dough and creating a dog figurine.
You will need:
- Salt;
- Flour;
- Water;
- Foil;
- Brushes;
- Paints;
- Black marker.
Recipe for salt dough for sculpting crafts: first you need to combine flour and salt in equal proportions, gradually add water and mix the mass until smooth.
For better elasticity, you can add a tablespoon of PVA glue or vegetable oil. Leave to set in the refrigerator for about two hours; the dough must be placed in a bag, cling film or container.
After the required time has passed, take the lump and divide it into parts: 1 large (body), small ball (head), 4 balls (paws), leave a small lump (for ears, eyes, tail and nose).
In order not to waste a lot of dough and have a voluminous lump inside the body, you can place crumpled foil and cover it with dough. Make a head from a small lump, add a nose, eyes and ears. Glue the head to the body using water.
It is necessary to lubricate the two surfaces with water and connect them. Make beautiful paws from four pieces and also glue them to the body. All that remains is to crochet the tail and that’s it! The dog is ready.
Simple crafts made from salt dough
Puzzles
To make them, you need to roll out a thin layer of salted dough, then apply the contours of the future puzzle using a toothpick, and paint with gouache. Then you need to cut it into pieces with a knife or a stack and dry it.
Beads
We make balls from the salt dough prepared according to one of the above recipes, trying to make them the same size (for example, 3 centimeters in diameter), and then string them on wire or twine after painting with gouache or acrylic and drying the paint.
You can flatten them a little. You can color the beads in batches of 5. one color or apply an ornament. After covering the beads with acrylic varnish, the product will become stronger and take on a more aesthetic appearance.
Do not allow your child to play with the beads on their own unless they are supervised to ensure they do not accidentally swallow them.
The beads are ready, you can try them on!
Mushrooms
First, we make a sausage-shaped leg from salt dough, then we make a mushroom cap. You can use the lid, sprinkle it with flour to make it easier to remove. It should be noted that when drying the dough will settle a little, so it is better to make the hat a little larger.
The finished mushrooms can be placed on a baking sheet, which has been previously covered with foil, and placed in the oven (at temperatures up to 100 degrees Celsius) to dry. Turn the mushrooms over from time to time until the products harden.
Then comes the painting stage: you can, for example, paint the bottom of the cap, and then the stem with acrylic paint or gouache (mixed with PVA) white, and the top of the cap with light brown, dark gray or dark red paint.
When the product is dry, glue the caps to the legs using Moment glue. When the mushrooms are dry on the balcony, veranda or loggia, they are ready for use in the game.
Roses
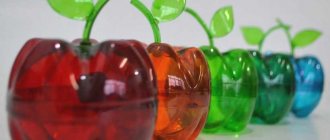
Squeeze out circles from the dough prepared according to one of the recipes using a glass or cup from a set of toy dishes. These are rose petal blanks. Let's form the center of the flower with our hands. Then add 1 petal to the center one by one.
When you have collected all the petals, leave the rose to dry for a day in a dry room (not on a radiator, to avoid cracking). The cup can be used as a stand. After drying, you can paint the flower by applying gouache of different shades of red to the petals, starting with crimson.
Christmas decorations
Using a cocktail tube, you can make holes in the dough for an openwork pattern.
You can decorate Christmas tree decorations made from salt dough using beads. Please note that when using plastic beads, drying the product in the oven is not suitable, otherwise they will melt.
Instead of beads, you can take shells, pebbles from the bottom of the sea, cereals, buttons, even... shards from broken pottery will do. Ribbons and floss will also be used to decorate crafts.
Do you have the necessary mold for sculpting a figurine of the appropriate size on your farm? Take a cardboard stencil for cutting salt dough for a Christmas tree decoration.
The finished product can be decorated with sparkles by first applying glue to them.
You can stick a picture from a napkin or a sticker on a craft. Use PVA diluted 1 to 1 with water. Cut out a pattern from a napkin, remove the topmost layer and stick it onto the dough product. On top of the picture you need to apply 1 more layer of PVA.
A very original way to decorate products made from salt dough is to make prints with various objects that have an interesting texture that are at hand. For this purpose, baking molds, plasticine molds, ice molds, children's dishes, from a toy sandbox set, etc. are suitable. It is also interesting to sculpt by hand!
For decoration, it is recommended to prepare acrylic paints of different colors or mother-of-pearl paints, gouache mixed with PVA, glitter, acrylic varnish, stained glass contours, gold and silver glitter, ribbon, braid, twine, cotton and acrylic threads, iris, sequins, lace , rhinestones, etc.
Required Tools
To create beautiful masterpieces, tools will come to the rescue. You can use any available means.
Tools:
- rolling pin (for rolling out dough);
- modeling board;
- knife (suitable from a plasticine set or a regular plastic one);
- tube (for creating holes);
- brushes (for lubricating with water or painting the product);
- a jar of water;
- various molds;
- Any available items (lace, textured fabric, beads, buttons) are suitable for prints;
- paints;
- marker (to highlight the necessary lines);
- decorations (beads, rhinestones, cereals, beans, pebbles, shells, pasta, pine cones).
What can be done
Salty play dough will help you get closer to your child and find a new exciting activity to do together.
Invite your child to stick around the jars. You can use jars that are left over from baby food. You can decorate with voluminous details, rhinestones or shells. Color with paints together with your child. In such beauty you can store pencils, markers, brushes.
You can roll balls and use a straw to make holes. Dry and let your child paint. You will get excellent beads that your child can string on a thread.
An interesting activity for older children would be sculpting letters or numbers. After drying and painting, they will become an excellent material with which it is fun to learn the alphabet and counting.
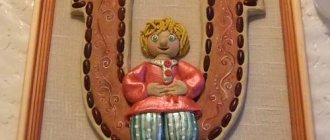
You will need a lid from a box of chocolates. Invite your child to stick to the bottom. This will be the beginning of a beautiful panel, and then it’s a matter of taste. You can depict a beautiful forest, a hedgehog with voluminous apples and mushrooms.
You can stick different animals. The child will be very interested in learning something new. Especially when he did it himself.
Roll up a ball and stick different twigs, needles, grass, and pebbles into it. Get a small island of forest right at home. And if you decorate with flowers, you will get a small flower meadow.