After deciding that there should be flowers on the table, I thought about the question of how to make topiary with my own hands, because... Constantly changing flower arrangements in January is expensive. Topiaries came to us from the times of palace luxury. When gardeners trimmed the crowns of trees and bushes in the form of balls, figures, birds. In floristry, giving an ideal shape to a bouquet by trimming is also very popular. Well, our housewives have learned to create a cozy atmosphere in the apartment with the help of mini trees. They set off the interior if they are made in appropriate colors and look unusual.
How to make topiary with your own hands
Topiary made of coffee (coffee beans)
This tree looks quite unusual, ideal for the kitchen, because... it eliminates food odors and freshens the air.
DIY coffee topiary
We will need:
- Any vertical base for the trunk (stick)
- Styrofoam ball
- Pot, cache-pot, cup or flowerpot
- Coffee beans
- Twine
- Ribbons of different widths
- Sackcloth
- Thermal gun
- Construction gypsum
- Water
First you need to wrap the stick with twine. To do this, coat one edge of the stick with a heat gun and glue the end of the twine.
Choose the length of the stick yourself, depending on how tall you want the topiary to be. The end of the twine also needs to be secured with glue.
Let's start decorating the pot. To do this, take our burlap and begin to wrap the pot.
Coat the pot with glue and wrap it with burlap.
Excess around the edges can be trimmed off.
To avoid any white gaps, paint the foam ball black.
We cut a hole in the ball for the barrel. Lubricate the end of the barrel generously with glue.
Let's start covering the ball with coffee beans. You can do this in different ways.
For example, we apply glue to the ball, and then put a lot of coffee beans in a handful, pressing them to the surface.
But all the grains that are not fixed will scatter in all directions.
You can do it differently. Glue one grain at a time, which will take longer, but be more accurate. You need to work quickly because the glue cools quickly.
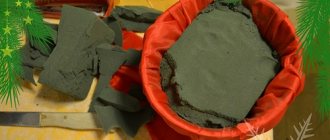
To make the pot stable, we will fill it with plaster. To do this, pour water into the plaster and stir.
After filling the pot with plaster, you need to insert the tree into it and hold it for a while so that it is fixed.
The plaster will dry in ten hours. We begin to decorate the finished composition. We make bows from ribbons and glue them to the trunk.
You can use beads, twine bows, dried lemon, cinnamon sticks and other decorative materials.
Instead of sticks for the barrel, you can use skewers; they are sold in grocery and hardware stores.
Preparing to work on shell topiary
It is better to work from a photograph or picture that shows the desired version of the craft.
This tree will decorate your home interior.
This will save you from mistakes. By comparing your actions with the image, you can immediately see how the work is progressing. If you are doing topiary for the first time, then it is better to do it according to printed instructions, where everything is described step by step. You should work at a large table covered with oilcloth. You should place a trash bin next to it. If there is a carpet under the table, it is better to remove it so as not to get it dirty. Then you need to check all tools and containers for strength and integrity. If something breaks during the work, you will have to start all over again.
Topiary made of stones and shells.
To work you will need:
- Shells for decoration (preferably flat).
- Plastic cup or small flower pot.
- Sticks.
- Glue gun.
- A solution of gypsum or putty.
- Twine.
- A finished foam ball or tennis ball.
- Beads.
- Sea-colored satin ribbons.
- Blue paper.
The work will take approximately two to three hours.
Everything in this work reminds us of the sea.
Algorithm for creating a simple topiary:
- First, a tree trunk is made from sticks tied together. This structure is wrapped with twine.
- An already prepared foam ball is used as the basis for the craft.
- You need to lubricate the inner surface of the plastic cup where the tree will stand with glue. After this, you need to pour a gypsum solution or putty mixture into a glass and stick the trunk of a tree made of fastened sticks into it. Next you need to wait until the mixture hardens, and then start creating a crown
- To make a tree crown, make a small hole in a foam ball. With its help, the crown will attach to the trunk.
- Then the foam crown must be covered with blue paper. This will make it easier to attach various decorations made from beads, satin ribbons and shells. To make the basis of the composition unnoticeable, you need to take more shells.
- The final stage of the master class is decorating the cup. It can be decorated in the same way as the base. Sea-colored ribbons, which can be associated with waves, will look especially interesting. If you want to make your topiary unusual, you can wrap the crown of the tree with thin twine.
Shell topiary
Master class: topiary from napkins
Napkins are always at hand. And they have a huge number of functions, so why not make a topiary decoration out of them? Let's look at a simple method and an effective master class.
Topiary made from napkins
We will need:
- Flowerpots
- Round cable channel (stick, skewers)
- Newspaper
- Thermal gun
- Napkins
- Decor
- Alabaster
For the topiary ball you will use newspapers.
Materials
First you need A4 size sheets. We crumple the first sheet into a ball.
We wrap the second and subsequent ones around it.
The large ball needs to be wrapped with thread so that the edges of the newspaper do not protrude.
Now we make a hole in the newspapers with scissors and insert the barrel into it, securing it with hot glue.
A foam ball of this diameter will cost you 50 rubles in the store.
Take napkins and fold them in half.
Napkin flower
And again in half. And cut along the second fold line.
We fasten it in the middle with a stapler.
We cut each piece into a circle shape and bend each layer towards the middle, so we form a flower.
We wrap the topiary trunk with tape; to do this, attach one end of the tape to glue and wrap it around the trunk in a spiral.
Glue flowers onto the ball. To do this, apply hot glue to each flower.
You can decorate with ribbon rings. To do this, wrap the tape around your finger, maybe twice, and glue it at the base. You can use a needle to attach the ribbon ring to the topiary.
We put the alabaster in a flowerpot, insert the topiary in the middle and wait for it to dry.
Alabaster can be covered with the same flowers from napkins. We wrap the trunk with ribbon and make a beautiful bow.
If there is room left, you can put sweets in the pot.
Twisted roses
The roses for this topiary are created in a non-standard way, so the finished work looks quite original.
For the creative process you will need:
- single paper napkins in three colors (yellow, red, green);
- scissors;
- knitting needle;
- glue gun;
- wand;
- corrugated paper;
- empty cream jar;
- spool of thread;
- newspaper.
First of all, the main elements of the product are made - flowers. Red and yellow napkins are prepared for them. The napkin is cut into 4 parts along the fold lines.
One of the parts is placed on a flat surface. The knitting needle is located along the edge of the napkin. The paper is gradually wound onto the knitting needle.
When there are 3-4 cm left to the edge of the napkin, twisting is completed.
The paper located on the knitting needle is shifted to the center. The knitting needle is removed, and the resulting tube is rolled up in the shape of a rose, as shown in the photo.
Popular articles Silver birch
To make the flower look lush, it is advisable to use at least three napkins twisted in the described way for one rose.
The lower edge of the flower is wrapped with thread, the excess part of the napkin is cut off.
All other roses are formed in a similar way. Work moves on to making leaves.
A green napkin is cut into four parts, two of which are placed at an angle to each other.
The parts need to be taken in the center and all corners raised up. It looks like a little bag. You need to secure the napkins with threads at the bottom.
A ball is formed from an old newspaper and wrapped with thread. Prepared roses are glued onto it in a chaotic manner. Green leaves are placed between the flowers. The composition is strung on a stick - a tree trunk.
Sculptural black plasticine is placed in a cream jar, after which the barrel is inserted. The jar is decorated with decorative braid. The plasticine is covered with the remaining green blanks.
A master class on creating a “snowy” tree will help you understand the nuances of making the product.
Topiary made of satin ribbons step by step
Ribbons can give your topiary a festive look, but they also make beautiful roses. There are a lot of ways to make flowers from satin ribbons and this art is called kanzashi. We will consider only one option, but the easiest one.
Topiary made of satin ribbons and organza
A foam ball can be purchased in Chinese online stores, fishing stores, and craft stores.
Materials:
- Ball
- Ribbons
- Glue gun
- Flowerpots
- Pencil, twig for the trunk
- Alabaster
Take a pencil and determine the middle in the ball. We make a recess and fix the pencil with glue.
Wrap tape around the trunk of the topiary. Periodically lubricate the barrel with hot glue.
For ribbon roses, we use satin ribbons 5 cm wide and 2 meters long. This length is enough for 4 flowers.
Glue the flowers with hot glue. We fill the gaps between them with ribbons and ribbons of other colors and textures.
Making roses from satin ribbon
To make roses, take a ribbon and bend the edge at an angle.
From the end of the ribbon, fold the ribbon inwards, forming a bud.
Add glue to the bottom to prevent the rose from blooming.
After this, we tuck the ribbon under itself and we get a petal.
This is how you get a rose, lubricate the edge with glue more often. Make sure that the flower does not turn out square.
The resulting roses are very delicate.
Manufacturing
For a medium-sized craft, you need to prepare approximately 40 roses, which will subsequently be glued onto a piece of newspaper. You can make a topiary by following the presented sequence:
- You need to cut strips from corrugated paper to make roses.
On average, the sizes of the strips should be between 3.5-4.5 cm in width and 40 - 50 cm in length. Cut strips to make roses - Each strip now needs to be processed - given shape.
To do this, first bend one upper corner, and then make another bend along the entire width. Holding the upper bend with your left hand, lift the lower one with your right hand. The movements are more reminiscent of twisting a candy wrapper. Similar actions with the right hand are carried out along the entire length of the strip. It turns out to be a beautiful edge like a pie. Shape the stripes - The entire strip is rolled into a tube.
The free end is secured with glue, and the base of the resulting rose is twisted with wire. This is what needs to be done with each piece. If later the finished roses remain or there are not enough of them, the situation can always be corrected. All strips are rolled into a tube - Now they start making the base.
Crumple the newspapers into a ball. Make the ball a little larger than the intended size, because then you need to tie it tightly with twine, and this can significantly affect the diameter of the workpiece. Shape a rose - Tie the resulting ball with twine and begin making the barrel.
Making the base - If you use Chinese sushi sticks, it is better to secure them together with tape.
To do this, carefully fold the sticks according to the required parameters of the trunk, and then secure them with tape. Making the trunk of the future topiary - Now wrap the trunk with adhesive tape or make blanks from corrugated paper.
Cut out several thin long strips of paper, and then wrap them around the barrel “overlapping”, gluing them with PVA glue. If the chosen style of topiary allows, you can wrap twine around the prepared trunk. Installing the trunk into the ground - Place the trunk in the ground.
For the ground, you can take polystyrene foam, which is cut exactly to the size of the flowerpot. Remember: you need to insert the barrel into the foam the first time. Additional reinforcement may also be required. Therefore, it is better to use alabaster. It is diluted according to the instructions given. First, install the trunk in the flowerpot, and then pour in the composition, not reaching the edge 2-3 cm. You should hold the trunk for several minutes until the alabaster is completely dry. Barrel installation - While the alabaster is completely dry, you can start gluing the roses to the spherical blank.
Determine where the connection between the ball and the barrel will be. The ball can simply be glued or “planted” if the newspaper allows it. Cover the balloon with roses - Roses are glued in a chaotic or checkerboard pattern or in a circle - it all depends on the imagination and the number of shades used.
Monitor the quality of gluing so that the topiary does not “throw off” the inflorescences later. Ready ball with roses - Once the entire ball is covered with roses, you can safely glue it to the trunk.
Ready-made topiary with corrugated paper roses - Cover the bare ground - lay out beads, stones, seed beads and other materials.
You can use New Year's tinsel or textiles. Topiary in the interior
Popular articles Merry sheep
This concludes the making of topiary. Finally, you can decorate the roses with beads, pearls, and wrap the trunk with a satin ribbon. Show your imagination and add a unique twist to your craft.
Corrugated paper topiary
For more information on how to make various flowers from corrugated paper with your own hands, see here.
Corrugated paper topiary
Corrugated paper allows you to make flowers of extraordinary beauty. Fold over each leaf.
Materials:
- Styrofoam ball
- Flowerpots
- Glue gun
- Barrel base
- Corrugated paper
- Decor
- Alabaster
As in the previous instructions, you need to wrap the barrel with tape and glue it to the ball.
We make preparations for flowers. We cut out the petals from corrugated paper. We stretch them across so that they take a beautiful bend.
We glue the flower to the ball and decorate the structure.
How to make flowers?
Creating roses is the most labor-intensive stage. But the master class on creating paper roses will certainly come in handy in the future in a variety of creative arts. For example, to decorate the lid of a surprise box or a chocolate card. The following photos show the entire process in detail.
1. Take 30 cm of corrugated paper and cut it off the roll. Now cut lengthwise into strips 30 cm long and 5 cm wide. 2. Use your fingers to slightly stretch the strip of paper, making the edge uneven. We bend a third of the width inward along the entire length, again slightly stretching the edge. The photo shows how uneven it turns out in the end.
3. Now roll the strip into a flower, holding the bottom with your fingers, forming small folds. You need to twist it loosely and not too tightly (as in the photo). From time to time I fix the layers at the bottom with a drop of hot melt glue so that everything stays in place. 4. Now we need to make many, many paper roses so that there are enough of them for our entire ball. There are several more ways to create paper roses. For example, the original version describes in detail the following video master class.
Topiary for beginners made from artificial flowers
Topiary can be made from purchased flowers. This is the fastest option for making a tree. The main thing is to choose flowers of the right shades that combine with each other.
Topiary made of artificial flowers
It is very beautiful to use not the usual trunk, but a crystal candlestick.
Materials:
- Styrofoam ball
- Flowerpots
- Glue gun
- Candlestick (glass)
- Corrugated paper
- Decor
To do this, simply cut off the buds and insert them into the ball.
Sisal topiary
Craftswomen began to use isal not so long ago; it is great for decorating topiary and gives an unusual look and style to your tree.
Sisal topiary
Materials:
- Sisal
- Artificial flowers
- Barrel (stick)
- Glue gun (thermal gun)
- Newspaper
- Decor
They made a ball out of newspaper and wrapped it with rope. We wind balls of the same size from sisal.
We separate artificial flowers and cut off the buds, insert them into a ball.
We fix everything with glue.
To decorate the pot, you can use any decor; rhinestones, braid, adhesive ribbons made of rhinestones, various pendants and keychains are perfect.
Topiary ideas
When making topiary, you can combine several decoration options, for example, use purchased artificial flowers and organza.
Coffee topiary can be glued to a candlestick.
Candy topiaries can be given as a holiday gift to women of all ages!
The main thing is to use expensive and tasty treats.
You can make a tree that is not round and has a non-standard shape. Just using half of the ball.
Organza topiary looks very easy.
Topiary made from polymer clay looks luxurious and very realistic.
Topiary made of beads looks very delicate, an excellent wedding gift.