Needlework
07/01/2018 Anastasia Prozheva
Many European peoples believed and still believe today that a horseshoe is a symbol of good luck and happiness. They believed that evil spirits walked in circles, and when they reached the end of the horseshoe, they turned back. Previously, great importance was attached to the horseshoe; it could be seen not only at the door, but also near the fireplace, window and stove. Where evil forces could enter the house. Nowadays, a horseshoe is kept in the house as a souvenir or gift. In souvenir shops you can find horseshoes made of various materials and for different prices. But we can make a horseshoe from puff pastry ourselves.
This master class will help you not only make a horseshoe from dough, but also make an excellent souvenir for your loved ones.
Panel for good luck and happiness
To make such a panel we will need:
- flour, water, salt;
- pieces of foil;
- cardboard for template;
- frame;
- fabric, thread, needle;
- cereals or beans, whatever is at home;
- glue;
- colored paints.
We will make the dough from two types of flour - wheat and rye.
We form the rye dough in the shape of a horseshoe.
We apply the pre-prepared template to the dough and roll it out a little.
Cut along the edges.
Initially, place the workpiece on foil.
And we begin to decorate the horseshoe with various cereals, grains, beads, spices, etc. In this case, we used beans.
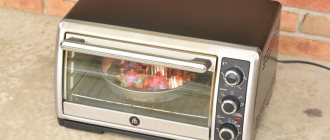
If the dough dries naturally, then simply press the beans a little into the dough, but if in the oven, the beans will fall out and you will have to glue them.
Let's start forming the brownie.
Hair can be done using garlic hair.
We sculpt the body and carefully smooth out the curls so that the dough does not crumble.
Related article: DIY Mother’s Day cards: master class with photos and videos
We form the facial features and glue on the nose.
We make him clothes and bast shoes.
Then we make the arms and sleeves.
All this is easy to do, remember your modeling skills from school.
Don't forget to add eyes.
And let's start coloring our amulet.
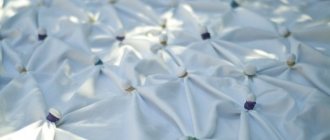
Now let's start making the background.
We sew or glue the weave to the cardboard paper, as indicated in the photo.
And we fix it in a frame.
Apply glue to the back of the craft and glue it to the canvas.
We make a loop for convenience.
Such a talisman, and even made with your own hands, will definitely bring good luck and happiness.
Horseshoe made of salt dough
Horseshoe made of salt dough
Our small house with all its inhabitants, namely me and my two daughters, began New Year's preparations. One of the expected gifts will be a horseshoe made of salt dough. We will give these horseshoes to all married couples of our friends, acquaintances and relatives. Since ancient times, our distant ancestors considered a horseshoe to be almost the most important talisman of the house. By hanging a horseshoe with its horns down over the front door from the street side, our ancestors believed that all evil spirits would slide down these horns, but would not penetrate the house. But in the house, the horseshoe was hung with its horns up, thus forming a bowl. Such a horseshoe was decorated with various decorative elements, each of which had its own symbolic meaning. They never made a horseshoe for themselves; they made it as a gift to someone whom they wished happiness and prosperity. When making a horseshoe, your thoughts should be bright, kind, and preferably think about the person for whom the amulet is intended.
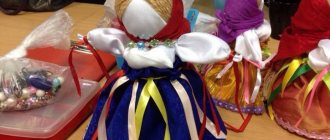
Together with Sofia, we made horseshoes in three main themes: Kuban flavor, brownies, and simply decorative elements of horseshoes. The brownie Nikifor greets you from the photograph. Say hello to him and smile at him. Although he is old, he is still a mischievous person.
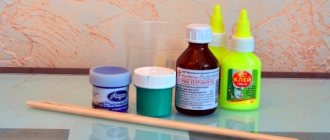
Necessary equipment and materials for making a horseshoe from salt dough:
– salted dough You will find a variety of dough recipes in the article Recipe for salted dough for modeling
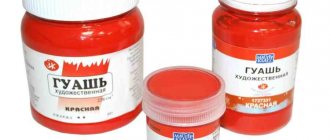
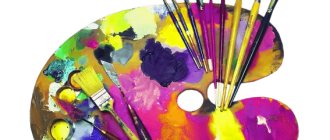
– gouache paints, brushes with soft bristles and various thicknesses
– acrylic metallic paints
– a horseshoe-shaped soap mold or a horseshoe template cut out of cardboard
– coins of different denominations
– baking sheet, knife, glass, toothpicks, wooden barbecue skewer, rolling pin
– satin ribbons 6 mm wide in different colors, one horseshoe takes approximately 50 cm
– acrylic varnish for artistic and decorative works
– eyes (can be purchased at a sewing supply store)
How to make a horseshoe from salt dough
1. Using a rolling pin, roll out a layer of dough. The thickness depends on your ideas. For me it varies from 0.5 mm to 10 mm. horseshoe.
Another craft: Making lemonade or children's champagne for the New Year
Many salt dough masters recommend using a specially made cardboard template to make a horseshoe. I also went this route, but I didn’t like the result. A soap mold appeared before my eyes, at the same time I was making soaps for gifts for the New Year, and the decision came by itself. I pressed the mold onto the dough, and there you have it, the finished template.
2. Now, using a sharp knife or a stick, cut out the horseshoe along the contour.
3. You see, the edges of the horseshoe are not quite even. Use a stack to straighten the edges on all sides. Transfer the horseshoe to a baking tray in the oven.
4. Using a wooden kebab skewer, make holes in the horseshoe. Transfer the horseshoe to a baking tray in the oven.
5. We will bake the horseshoe in the oven until it is nicely brown.
6. Let’s cool the horseshoe and only now start decorating it with different elements. I won’t describe the process itself; it will be clear to everyone by looking at the photographs at the end of the article. I'll add just one thing. Before starting work, cover the baked horseshoe with a thin layer of PVA glue.
When connecting the elements together, I glued them with a small amount of PVA glue for better adhesion of the layers
7. I suggest you finish drying the horseshoe in the open air near heating devices. As soon as the horseshoe is dry, we move on to the painting stage. I recommend painting the horseshoe itself first; I did it with metallic acrylic paints.
8. These paints dry very quickly, so you can immediately proceed to painting the elements of the horseshoe. You can use any paints for painting, I used gouache, but most of all I like acrylic paints. Now I will explain why. When the product was subsequently coated with varnish, the gouache paints could slide behind the brush with varnish, and this is not good, all the work is a waste. But acrylic paints behave absolutely calmly with any varnish. I used acrylic varnish for artistic and decorative works and ruined a couple of horseshoes because I covered the elements of the horseshoe with gouache.
More crafts New Year's candy tree
So the choice of paints and varnishes is of no small importance
You can cover horseshoes with oil paints; the result will be rich colors, but they will take a long time to dry. And such horseshoes do not require further coating of the product with varnish. I do not recommend covering horseshoes with watercolor paints; after subsequent varnishing, the horseshoe will become sticky. It will not be pleasant to pick up such a product, and you certainly shouldn’t give such a thing as a gift.
9. As you understood from the previous paragraph, after painting and drying, the product should be varnished. We do this in order to give the product additional strength, protect it from moisture, and add shine to the craft. If you covered the craft with acrylic paints, then you can use any varnish for coating.
10. The next activity, and this is the most important one, is to tie ribbons on a horseshoe and pack them in a beautiful package. I will definitely tell and show you what packaging I made for these horseshoes.
These are all on the theme of Brownies, I glued a tag to the back of each horseshoe with an explanation of each element.
And these are fruit and berry trends. Here is the first horseshoe made from a cardboard template, I didn’t like it, it turned out crooked and clumsy.
Well, this is our Kuban flavor. Cheerful and hospitable residents of the sunny region. At this point I will finish my story about options for New Year's gifts. Of course, this is not all from my arsenal, I will tell you further. And if you haven't subscribed to blog updates yet, don't forget to do so. Although I write rarely, I think it’s accurate. Good luck to everyone, I look forward to your comments and assessments of my work with great impatience.
voice
Article rating