Backgammon is an ancient Eastern game. The exact place of their origin is unknown, but they are already about 5,000 years old, which is confirmed by historical manuscripts. The oldest board for the game was discovered in Asia Minor, in the town of Shahri-Sukhte. Scientists have determined that the thing was created approximately 3000 BC. e. The same board was found in the tomb of Tutankhamun.
One of the legends says that one day the inhabitants of India decided to test the resourcefulness of the Persians and presented them with chess. They believed that they would not understand the rules of this unusual game. However, the sage from Persia was able to reveal the secret and in response sent them his game, which the Indians could not solve for 12 years. Bozorgmerkh sent them nothing more than a game of backgammon (translated from Persian “backgammon takhte” means “fight on a wooden board”).
The game spread to Western Europe thanks to the Crusaders in the 12th century. It gained popularity in the Middle Ages in European countries, where it got its name - backgammon. It simulates the impact of bones. The name "backgammon" was used among kings and nobles.
The game has gained considerable popularity in our time. Many craftsmen never cease to amaze with their new, original designs of inlay. This article will describe how to make backgammon with your own hands.
What does the board look like?
The board has a rectangular shape. It has 24 points (12 on each side). The board consists of two sides. Each point, as a rule, represents a narrow elongated triangle, the base of which is located along the edge, and the height reaches half the board. Six points on one side are called the player's house. Its location depends on the rules of the game. The board is divided down the middle by a vertical stripe called a “bar.” Usually knocked down checkers are placed there. Each player has 15 of them. The move is determined by a pair of dice - the charge. There are also two pairs for each player, as well as cups for mixing the dice.
Rules for playing long backgammon
The game begins with the first move. Opponents distribute chips among themselves according to color preferences. Everyone takes a die and throws it on the board where their pieces are located.
The right to move first is determined by rolling the dice.
After discarding, the player with the highest number on the dice (from one to six) starts the game. If the opponents have the same number, then the reset continues until someone gets a higher number.
Location of chips
There are 24 cells on the game board, each of which represents one step. The left half of the board, connecting the 1st to 6th triangles, is called the “house”. The right part, including peaks from the 7th to the 12th, is the courtyard. The other 12 points for the opponent are divided similarly.
The placement of chips in long backgammon.
Checkers are placed in a column in the upper right corner on a peak in the amount of 15 pieces. This area of the board is called the "head". In the lower left corner there are the same number of chips of a different color.
The movement of the figures is counterclockwise. The player’s task is to get the checkers into his house faster than his opponent.
Roll of the dice
For the first move after drawing lots, the dice must be discarded again.
The player discards two dice onto his side of the board. You need to reroll the dice if:
- the cube rolled onto someone else's field;
- the dice ended up on different boards after being thrown;
- fell on top of the chip;
- stood upright.
It is customary to mix the dice in a special glass lined with fabric, although for amateur games you can use your hands.
Chip movement
At the participant's discretion, two or one checkers are moved. For example, the dice showed “5” and “2”:
- you can move one checker five cells, and then the second one two;
- or move one piece a total of seven steps.
If a double is rolled, the player makes 4 moves with that number of steps.
If the dice have the same values, the player can make 4 moves at once with that number of steps. This situation is called a jackpot, a gauche or a double. When the numbers 6-6, 4-4, 3-3 appear on the dice at the beginning of the game, two chips are removed from the head, since it will not be possible to make a full move due to the opponent’s checkers on the head.
For each move, the player makes from one to four moves with the chip, depending on the points scored on the dice. In all cases, movement is carried out in exact accordance with the value obtained on the die. You cannot move to two cells if the die rolls five.
Restrictions and illegal movements
There are the following restrictions when moving checkers on the board:
- You cannot occupy a triangle on which your opponent’s piece is already located.
- If it is possible to play with a checker on both numbers drawn, the movement is carried out in accordance with the larger value.
- Full Move Rule: You cannot move only one value on the dice if you can use both numbers.
- If it is impossible to move by any of the discarded values, then the move is transferred to the opponent.
- It is forbidden to skip a move, even if such a move is unprofitable for the player.
- With the exception of the first throw, only one checker is allowed to be removed from the “head” in one move. If one chip does not pass, then the second one is removed.
As long as the dice do not reach the opponent, the player has the right to change his move.
If a player breaks the rules and moves a piece incorrectly, the opponent may demand that the rules be followed and the move be repeated according to the number of dots on the dice. This is possible provided that the dice are not re-rolled.
Conclusion from the board
When 15 chips have gone all the way around and returned to the house, they need to be removed from the board. Figures are removed from the field according to the values rolled on the dice. For example, if the numbers 2 and 5 fall on them, then the chips from the second and fifth spades are removed.
The player has the right to use the numbers rolled on the dice at his own discretion: remove a chip or make moves in the house.
It is allowed to withdraw a checker from a hole of a lower level if the peak corresponding to the value on the die is empty. For example, 5 points are rolled. If the peak is free, then remove the checker from the fourth point. If there is no chip on this triangle, then from the third, etc.
End of the game and possible results
The game ends when one of the opponents removes all his chips from the field.
Game results:
- Oin . If the loser managed to remove at least one checker from the board, the winner is awarded 1 point.
- Mars. If the loser does not remove a single piece from the board, the score is 2-0.
For head-to-head tournaments, the concept of “draw” was introduced...
Initially, there was no “draw” in classical backgammon, but the Backgammon Federation considered it necessary to introduce this concept for head-to-head tournaments. The order is as follows: the owner of the white chips starts the game. If he is the first to discard pieces, then the player with black checkers is given the right to make the last throw. If he manages to withdraw the chips, a draw is declared. Each player is awarded half a point.
Tips and tricks
Over the long history of the game, they have managed to come up with universal tips that will help beginners in their first games:
- Try to take up as much space as possible in the houses - yours and your opponent's. On someone else's field you will be able to block the entry of new checkers into the game, but on your own you will not allow your chips to be locked up.
- Try to “spread” your checkers in a thin layer over a larger number of cells - this is more effective than building towers in two or three.
- Prepare in advance for a double, when you can make 4 moves at once. If you don't think about it, you may miss the advantage.
- Try to transfer chips from the second quarter to the third in one move - such a rapid attack will help confuse the opponent’s cards.
You will understand the remaining nuances during the game, because knowledge comes with practice. Don’t delay your training – you can find many online services on the Internet where you can fight with a real person online. This way you can look at other people's tactics and experiment with your own.
What is the main thing when carving on a backgammon board?
In most cases, carved backgammon, the dimensions of which are indicated above, are made in the classical style with its inherent flat reliefs. Even beginners will be able to do this kind of work. Half the success lies in the right design. Ornaments with plants or arabesques became widespread.
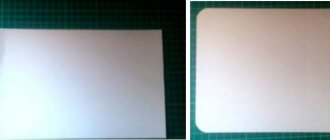
For example, consider panels made of alder. On one side they are veneered with ash. If you want to do this part of the work yourself, it should be noted that the veneer is applied only on one side. After drying, the panel will bend towards the veneer. To avoid getting a similar result, you should glue plain paper, or even newspaper, on the opposite side. When the glue dries, there will be no deformation in this case. When working with panels, it is recommended to place them on polyethylene from packaging with soft inflatable pimples. This will protect parts from damage during operation.
The film is placed with the smooth side facing the workpiece, otherwise during operation the chips will get stuck in the pimples and can damage the surface. When applying tone to a material, you may get an undesirable effect.
Make a triangle pattern
Carefully and tightly connect the triangles to each other using small pieces of masking tape, which will be removed before sticking the set onto the base.
1. Take a straight strip of veneer with straight edges, which will serve as a ruler to align the triangles when assembling. To assemble each quadrant (quarter) of the game board, first use masking tape to adhere one of the light maple triangles, pressing its base against the veneer ruler. Now carefully glue the walnut and maple triangles together in pairs to form parallelograms. Tape them first to the edge of the ruler (photo F ) before connecting them to each other. Continue assembling until each quadrant consists of seven maple and six walnut triangles. The side free from masking tape will subsequently become the front side of the ornament.
Quick tip! Maintain the orientation of the triangles as you remove them from the stack and place them the same way they were placed: top side up, bottom side down. Any angular deviations when cutting out the narrowings will be mutually compensated when you assemble the parallelograms. Carefully remove the masking tape connecting the quadrant to the veneer ruler. In the same way, assemble the other three quadrants.
2. For the dividing strips (Fig. 1) , take two pieces of maple veneer measuring 80x230 mm. Read the Expert Tip and follow the directions to straighten the edges. Use the same method to align the maple veneer on the edges of the playing field halves.
3. Glue one quadrant to the edge of the divider strip, centered. The side with the adhesive tape (bottom) should be facing up. Transfer the triangle vertex position marks to the other edge of the dividing strip (photo G) and glue the second quadrant, aligning it with the marks.
Place the set sheet on the edge of the workbench and, aligning the square with the vertices of the dark triangles, make marks on the other edge of the dividing strip.
Selection of background for thread
At such a stage as selecting the background for the thread, there are two methods:
- The classic method involves cutting along the contour of the design with a knife, followed by sampling the background using flat chisels. It should be noted that when working, the knife must enter the wood at an angle of 90 degrees. If you cannot keep the knife perpendicular to the material being prepared, then it is permissible to tilt it slightly at an arbitrary angle away from the leaves of the ornament. Then, when working on the thread, you can correct the design that is distorted for this reason.
- The second method is to select the background using a hand router and a finger cutter. The undoubted advantage of this method is the speed of execution and the accuracy of maintaining the required right angle along the edge of the ornament. The selection of the background around all elements is carried out clearly and at the same level. Hands do not strain during such a labor-intensive process. The disadvantages include the need to use a router. Working with it is only possible in a carpentry workshop, as it is noisy and creates excessive dust. The depth of the background pattern is approximately 5 mm. Those places where the cutter could not reach should be trimmed with a knife or flat chisels. Here the rules given in the first method are followed. You will still need to work with your hands.
Arabesque processing
After sampling the background in all hard-to-reach places, you should start working on the ornament. Start from the bottom and top edges of the panel. The intersections of the parts are cut with a knife. The depth is taken to be 2 mm. By trimming with a flat chisel, the lower and upper points of the design are revealed. Thus, the ornament will be intertwined.
Then future profiles of the drawing are drawn. Using a knife or a flat chisel, a convex part of the profile is formed. Then, using semicircular chisels, the concave parts of the profiles are processed. The operation should be repeated with the central part of the ornament. The drawing needs to be worked on a second time, correcting all the shortcomings.
Adding tone
Do-it-yourself backgammon involves tinting. For this process, you can use water stains. Usually one color is used, which is diluted to three shades: light, medium and dark. In this case, two types of wood were used: ash and alder. To emphasize the beauty of each of them, two stain colors were used: dark oak and teak. Teak is suitable for ash, and dark oak is suitable for alder.
First of all, the carved panel must be tinted. The lightest paint covers all the carvings. Then, without allowing the stain to dry, a medium shade is applied to the milled edges of the panel.
The next stage involves coloring the background. It is covered with the darkest tone. They do this with caution. The paint is applied with extreme care so as not to get on the light part. Painting should begin from the center of the selected background area, moving to the rising carved parts. In this case, a minimal amount of dye is taken with the brush.
The wooden surface should be allowed to dry, and then the other side should be coated with teak stain on the ash veneer. The carpentry components of the boards are coated with the same tone.
After the stain has dried, the raised lint is removed using sandpaper. The main thing is not to damage the paint on the sharp edges that remain on the threads after working with chisels.
The entire board is coated with colorless varnish. For this purpose, a two-component matte varnish is used.
Plywood product
This master class is more likely for men, but lovely ladies should not be upset, since you can try to make backgammon, but under the strict guidance of a man.
So, to create we need:
- maple or walnut veneer;
- plywood with a thickness of at least 6 mm;
- brass screws;
- necessary working tools;
- sawing machine;
- magnets;
- patterns in pictures for decoration;
- perseverance and hard work;
- good mood.
Once you have prepared everything you need according to the list, you can get to work.
The most important thing is to prepare the veneer. Measure the maple and walnut block to measure 3.8 x 19.1 cm using a ruler. Cut out carefully. Now you need to make the upper plates, the dimensions of which are 3.8 by 25.4 cm and the lower ones 5.1 by 25.4 cm. This is done by cutting out 13 mm wood.
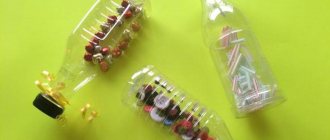
Measure a distance of 250 mm from the ends of the upper plates and make mounting holes. Their diameter should be about 4 cm. Cut out the veneer strips, 15 pieces each. You should have four stacks.
Carefully align them along the edges and sandwich them between the bottom and top plates. Use brass screws to secure the top plates. Now you need a sawing machine. You need to go along each edge of the bag. It is better to take 60 teeth. Now turn the bag in the opposite direction and press it with its straight edge against the longitudinal stop. Use the machine to file the second edge of the bag. You should achieve 33mm width.
Repeat the entire algorithm with the remaining packets. Apply strips with tape on all sides of the bag and saw off the marked end, shortening the bag by 20 cm.
Take note! To make it easier, use a miter gauge that is rotated 5 degrees.
Do the same with the remaining packages.
Place new marks: 32 mm on the end and 165 mm on the side of the package, saw off the veneer package. What is backgammon without ornament? Take a strip of veneer, it is necessary to align the pattern. Assemble the square of the field and glue alternately light and dark triangles with oil tape.
When you count 6 dark and 7 light triangles on your field, then the square is completed. Make 3 more squares and remove the tape. Take two pieces of maple veneer, attach and align.
Carry out the entire algorithm for decorating the second side of the backgammon. Trim the playing field pieces so that the width is 191mm. Make side boards from maple and glue them to the base with glue. Make 4 MDF boards and two bases. Apply glue to the base and place the sheet on top. Press the bag between the MDF (2 cm thick). Check the field for evenness and, if necessary, level the playing field.
Mount the 6mm cutter in the machine. Route all sides. Label the playing field. Set up a 32mm wide saw and divide the box into two parts and cut out 2 partitions. Do the same for short partitions. Make a blank for loops on one half and drill 4 holes with a diameter of 1 cm. Thoroughly sand all blanks and varnish.
Our backgammon is ready!
The second option for making backgammon
The manufacture of such a product as carved backgammon was described above. Another method involves burning patterns.
To make backgammon with your own hands using the second method, you will need:
- sanded plywood (two sheets of light wood with a thickness of 4-8 mm, size 480x240 mm);
- two wooden slats measuring 30x10 mm, 220 mm long for holes;
- PVA glue;
- stain;
- varnish;
- jigsaw;
- burning apparatus.
Origin of the game
Backgammon is a very old game. According to scientists, it appeared in the Ancient East about 5,000 years ago. The very first board was found in Shahri-Sukhta (region of Asia Minor); research suggests that it is about 3000 years old.
Backgammon came to Persia from India. There is even a legend about this. A long time ago, the Indians decided to test the Persians and sent them chess , believing that they would never solve this game. But one Persian sage understood its meaning and, in revenge, sent the people of India his game - backgammon, over which they puzzled for about 12 years. “Nard Takhte” translated from Persian means “fight on a wooden board,” characterizing the complexity and intensity of the game.
In the Middle Ages, thanks to the Crusaders, it spread to Western Europe, and also gained popularity in European countries in the 12th century. It was then called backgammon, which meant hitting the bones. Representatives of kings and nobility played it at the courts.
This fascinating fun has reached our time. If you study the diagrams on how to make backgammon with your own hands in pictures, you can understand that this will not cause any difficulties. The main thing is to choose the right materials and make the drawing correctly.
Progress
The process of making a backgammon board in this case involves the following steps:
- The work begins with the design of the external and internal sides. The prepared drawing is burned on both sides according to the selected cliche.
- Wooden slats are glued into a tenon and glued along the perimeter of the board.
- Holes for chips are cut out in wide slats and also glued.
- Next, the hinges and lock are installed.
- Finally, the board is coated with three layers of colorless varnish.