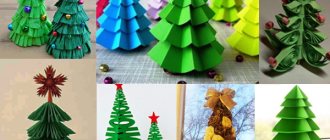
We have been collecting for you the most interesting ideas for New Year's crafts and festive interior decoration for a whole year, and now we are pleased to present 80 of the coolest and most original New Year's craft ideas for the New Year 2017-2018 season.
Let's take a look at this exciting collection of ideas.
Decorative Christmas tree made of peacock feathers. Feathers can be bought on Aliexpress.
On clay Christmas trees, patterns are applied on top using the imprint technique, and in the photo below the Christmas trees are additionally painted with paints.
Stylish decorative pendants made from cocktail tubes strung in a certain sequence on a cord. The tube can be painted gold or silver using spray paint.
Drawings on stones have been a popular topic in recent years. So why not put New Year's pictures on the pebbles you brought from vacation?
It is better to practice drawing in advance so that the result meets your expectations.
For this purpose, you can use a drawing board, which allows you to draw comfortably and repeatedly using a stylus and other available tools, and besides, it is perfect for children's creativity.
You can buy such a board in the 3D-TOY online store in this section: https://3d-toy.ru/catalog/school-and-work/drawing-board/.
The next idea is New Year's embroidery on perforated cards.
- Cozy fur inscription in the style of the New Year.
- Drawings on wooden saw cuts are an original New Year's decoration.
- A rug under the Christmas tree will allow you to beautifully arrange gifts and prevent needles from spreading around the house if you have installed a live Christmas tree.
- Nordic felt Christmas trees are beautiful home decor.
- Case for scissors in New Year's style.
- A paper garland of stars is a classic New Year's home decoration and a great way to recycle paper scraps.
- Felt Christmas trees for decorating the Christmas tree and interior.
Do you have unnecessary small children's toys? Cover it with spray paint or glitter with glue and - straight to the Christmas tree!
Decorate boring Christmas tree balls in your own way. Using unnecessary nail polish.
- Chalkboard style...
- Using beautiful yarn...
- A little painting...
- Or graffiti...
- More crystal beads...
- Or pompoms...
- Or better yet, feathers...
- Or sequins, finally.
Ordinary balls turn... into cute little animals. Nice gift, by the way!
- Cardboard and yarn - even a child can make this Christmas tree decoration.
- Leather stars - stylish and beautiful!
- Christmas balls made of felt with embroidery.
- Dedicated to Star Wars fans...
- New Year's balls in the "Parade of the Planets" style - both original and educational.
- Ideas on how to fill transparent Christmas balls.
- Christmas tree decorations made of thermomosaic.
- Unicorns made from Christmas balls - just add glitter and a little polymer clay.
- A few ideas on how to cozy decorate your home for the New Year using unnecessary sweaters.
- Knitted Christmas trees.
- New Year's decorations from the popular wire-felt construction set.
- Textile herringbone panel made of braid with fringe.
- Panel of Christmas balls.
Felt beauty, generously decorated with various elements. An improvised Christmas tree in the form of a wall panel made of wooden saw cuts.
- A couple of ideas for decorative Christmas trees made of felt and yarn.
- Christmas tree candlestick made of yarn and glue.
- Several ideas for festive New Year's wreaths for interior decoration.
- An idea for knitters - crochet New Year's balls.
- A composition in the shape of a Christmas tree from ready-made embroideries is an opportunity to show off your work done over the year.
- Christmas tree decorated with pompoms, a few more original ideas for impromptu Christmas trees...
- And this idea will allow you to use “children’s creativity.”
- Christmas tree stamps made from ordinary potatoes will decorate wrapping paper and much more.
- See also original ideas for New Year's decorations made using various techniques that do not require special training or extensive experience in needlework.
Source: https://otlicno.ru/dekor/80-samyx-krutyx-idej-novogodnego-rukodeliya/
Sewing tilda toys - a hobby for girls with a kind soul
Tilda is a doll with a soul that any girl can sew with a little patience. Be sure to try yourself in this hobby to fill your home with warmth and comfort. Funny and kind Tilda toys evoke incredible affection and leave neither children nor adults indifferent.
There is probably not a person who would refuse to accommodate this smile-inducing fairy-tale creature in their home. Sewing a good-natured doll is no more difficult than sewing a toy from a nylon sock or fabric.
This popular female hobby is suitable even for those who are not particularly persevering.
The history of the appearance of the tilde toy
Tilda toys were born not so long ago - in the late 90s in Norway. Their “mother” was the then unknown Scandinavian needlewoman Toni Finanger, who made the first rag doll from scrap materials and scraps.
Toni was so carried away by her cute creations that she could not stop at several works and in 1999 she published two thematic books “Tilda Christmas” and “Tilda Easter”.
In this way, the girl shared patterns and her own experience of making Tilda with craftswomen from different countries. From that moment on, real “tildomania” began all over the world.
The name “Tilda” quickly turned into a brand that sets a whole style direction in fabrics, accessories, clothing, and interior design. No one was surprised by the phrase “Tilde-colored dress” or “Tilde-style table setting.”
Gradually, a whole industry began to grow in Europe for the production of special fabrics, tools, accessories, and sets for needlewomen who are fond of sewing primitive toys in the “Tilda” style.
Tips for creating a tilde for beginners
The simplicity of the work allows everyone to start creating primitive toys: experienced craftswomen, beginners, and even those who have no sewing experience at all. The main thing is desire and a little imagination, which will make each craft unique.
Having decided to sew your first doll, you should not immediately run to the store for special fabrics and tools. It is better to first “comb through” the household bins that every woman has.
From old children's things it is quite possible to make original and beautiful clothes for tildes. All sorts of interesting buttons, ribbons, and appliqués will come in handy. The main requirement for materials is that they be natural, because naturalness and environmental friendliness are the distinctive features of tilde toys.
Set of tildot fabrics
To create a tilde with your own hands for beginners, we can recommend the following minimum set of materials:
- base fabric for the body (linen, cotton, calico, fleece, flannel);
- fabrics for sewing doll clothes (from silk and wool to knitwear and terry);
- well sharpened scissors;
- sewing needle and threads of suitable colors;
- stuffing material (sintapon, holofiber);
- accessories for decoration (beads, ribbons, flowers, etc.).
Sewing tilde: secrets of mastery
Sewing a tilde is a fun and simple process that calms you down and gives you a good mood, especially when you can see the end result.
Body tailoring
A special feature of tilde dolls is the use of beige fabrics for sewing the body. If you couldn’t find a suitable one, that’s not a problem.
Using coffee, you can dye any white piece of fabric in the desired shade. There is even a plus here - a doll sewn from such fabric will not only be beautiful, but also fragrant.
In some cases, the toy is specially scented by sewing scented sachets into them.
Having selected a suitable pattern, we transfer it to the fabric, cut it out, not forgetting the seam allowances, and begin stitching. If you have a sewing machine, that’s good, but if you don’t, we connect the parts manually with small, neat stitches, because the creator of the tildes makes them only by hand.
It’s not for nothing that tildes are called handmade toys and are not mass-produced in sewing shops. Most tildos have a seam in the middle on the body, so you need to sew it very carefully.
Head
The head of toys, as a rule, comes in one piece with the body, but the arms and legs need to be sewn on separately. When all the parts are sewn and stuffed, we put them together.
The handles can be sewn either with a hidden seam to the body or with the help of buttons that ensure their mobility.
The legs of dolls (not hares and rabbits) are sewn with several stitches in the knee area so that they can be bent and the toy can be seated in the desired position.
Cloth
Clothes for classic “primitives” are usually made from natural fabrics of pastel colors in small patterns, flowers, stripes or polka dots. It should be noted that tildes are real fashionistas! Every season, designers develop new collections of fabrics and accessories especially for them.
Patterns for overalls, jackets, dresses, hats can be found in Toni Finanger’s books, on specialized forums and websites on the Internet, or you can come up with them yourself.
Other New Year's toys
You can create many toys using this technique. A good addition to the collection would be a New Year's textile interior doll in the form of a snowman, angel or elf.
You can also make non-traditional toys. Any animals and characters can be decorated in a New Year's theme.
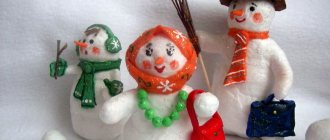
Tilda Snowman
There are simple options for sewing Tilda that a beginner can handle. The size of the snowman can be chosen arbitrarily, but the optimal option is 15-20 cm.
For sewing you will need:
- white fleece;
- grosgrain ribbon for scarf;
- pom-poms;
- wire;
- padding polyester;
- wooden skewer;
- buttons.
Work begins with a pattern. The body is transferred to a fabric folded in half, a seam allowance is left, stitched and then cut out. A small hole is left through which the toy is stuffed with padding polyester; later it is sewn up with a hidden seam.
After this, you can start making handles. They are also transferred to fabric, completely stitched and then cut out. The workpiece is turned inside out through specially cut holes, which are later stuffed and hidden.
When the body of the future snowman is ready, you can start making the nose. To do this you will need a thin wooden skewer. The sharp tip is carefully cut off and painted orange. Acrylic paint is better; dip a skewer into it and leave to dry. To make the color more saturated, you need to repeat the procedure twice.
The snowman will have warm headphones; you will need flat wire to make them. It can be taken from the folder. To keep it in place, it is well secured with threads on the sides. After this you can tie the scarf. It should also be secured with stitches, so it will hold more securely and lie beautifully.
At the final stage, headphones in the form of pompoms or small buttons are sewn on, the nose is glued on and eyes are drawn. You can also add a little blush to your cheeks.
Tilda Christmas Angel
Sewing such an Angel will take more time, but the result will decorate any home and create a festive atmosphere. The optimal pattern is on A4 sheet, but if desired, it can be enlarged or reduced.
As in all cases, the pattern is transferred to fabric that is folded in half. First the parts are stitched and then cut out. But it is important to leave the places where they will be fastened unsewn, these are the top of the legs, the top of the neck, the lower part of the body and the upper parts of the arms.
When all the parts are stitched, they can be turned out and stuffed. Holofiber is suitable for this; cotton wool cannot be used, because over time it gets lost and the toy loses its appearance.
First, the legs are stuffed and sewn to the body. They can be straight or clubbed, the only important thing is that the limbs are the same length. After this, they begin to stuff the body and sew all the parts together with hidden seams. When the body is ready, the clothes should be sewn.
This Angel will be wearing a dress, it is not difficult to make:
- the upper part is a rectangle folded in half;
- the skirt should be 2-3 times wider than the top, the length can be any;
- first the top part is cut;
- the bottom of the skirt is also hemmed and decorated with lace;
- then the belt is pulled together, stitched and the back seam is sewn.
When the skirt is ready, make the sleeves. They are sewn according to the pattern of the arms, but so that they are a little wider. They are then stitched and pulled onto the handles. After this, you can connect all the parts of the body.
Have you done this with a child?
Not really
Angel needs hair done. To do this you will need felting wool, hair foam and wooden skewers. Pour water into a small bowl, add a little foam and mix.
Then individual strands of wool are cut, the length can be any. Each curl is dipped into the prepared solution and wound on a skewer. These blanks must be completely dry. Then they are applied one by one to the head and stitched. To do this you will need a special needle with notches. Each curl is rolled in a checkerboard pattern one by one.
After this, you can start decorating. The Angel will have a small wreath in his hands. To make it, cut out a circle from thick cardboard, wrap it with ribbon and decorate with beads or beads. This Tilda will need wings. You can take fleece and stuff it, or use thick felt.
If desired, make a small stand for Tilda. First, take a wooden beam, cover it with acrylic and apply a napkin for decoupage. The excess part is cut off and the workpiece is varnished. Then they drill a small hole, insert a wooden stick into it and glue an elastic band that will hold the doll.
At the end, outline the eyes, mouth and add blush. They also attach the wings and give a wreath to the Angel.
Christmas gnome in Tilda style
To make a New Year's gnome, you will need cotton fabric, fleece, braid, padding polyester and decor. First, all the patterns are drawn on paper; you can draw them yourself or download ready-made ones from the Internet.
For the body, beige fabric is used. It is folded in half, pinned on top and outlined with small seam allowances. Particular attention should be paid to the legs, because they are immediately cut out with shoes. Mark the line where the two fabrics are sewn.
It’s not difficult, to correctly cut out the gnomes’ legs and shoes you need:
- lay out the pattern on the flesh fabric, taking into account the stitching line;
- mark the outline with a pencil;
- cut strips of fleece for shoes and pin them from the bottom to the parts of the legs;
- then draw a clear outline of the shoe with chalk, stitch and cut out.
After this, all the parts are turned out and begin to be stuffed with padding polyester. The sections on the parts of the arms and legs are folded and secured with pins. The lower part of the body is also tucked in and secured with pins. Then the finished legs are inserted, sewn on with hand stitches and the basting is removed.
Creating a gnome step by step
The handles are also sewn on in the same way. After this, you can begin making clothes for the future gnome. Patterns are made in the usual way and transferred to fabric. The parts are cut out with small seam allowances.
The lower part of the pants is decorated with braid, it should be stitched. After this, the parts are folded with the right side inward and the seams are sewn down in a convenient way. The finished panties are put on the doll and secured at the waist with hand stitches.
Then you need to sew a sweater. For this it is better to use burgundy fleece. The patterns are laid out on the fabric, secured with pins, outlined with chalk and cut out. A braid is also attached in the center for decoration.
After this, the sleeves are prepared:
- the parts are cut out and connected to the back of the sweater;
- stitched with a hand seam and machine stitched;
- the lower part of the sleeve is also decorated with braid;
- The product is folded right side inward and the seams are sewn down.
The finished product is turned inside out and ironed. A collar is attached to the sweater. To do this, take a small strip of fleece, pin it to the neck, stitch it and turn it right side out.
After this, a fleece cap is sewn. The part is cut out, decorated with braid and ground down. The end of the cap is folded into small folds and secured with a hand stitch.
Then they create hair for Tilda. Knitting threads or wool for felting are suitable for this. The material is separated into separate strands and sewn to the head using a hand stitch. After this, you can put the gnome in a cap and secure it with stitches.
The eyes are embroidered with black floss and a slight blush is applied to the face. The New Year's soft interior doll is ready and can be a good gift for loved ones.
Tilda bunnies
New Year's bunnies will be a successful addition to the toy collection. All details of the body and clothing are drawn on the sheet. For the torso, arms and legs, take beige or flesh-colored fabric, fold it in two layers, stitch it and cut it out with allowances.
The finished parts are turned inside out and begin to be stuffed with padding polyester. Then the torso and limbs are connected. When the body of the future bunnies is ready, they begin to make clothes.
The fabric for the pants is folded in half and the pattern is transferred to it, then the seams are sewn down and turned inside out. A stitch is made at the bottom for assembly, put on the doll and sewn on the bottom to the legs. Also fixed at the waist. The shirt is made of thin white fabric. A decorative braid is sewn in the middle.
Then the ears are made:
- the bottom is cut out of beige fabric, and the top is made of red;
- the resulting parts are stitched and the excess is cut off;
- turn the ears right side out and iron them;
- the finished parts are attached to the heads and sewn on with hand stitches.
The bunnies will need felt boots. They are made from red fleece, the parts are cut out, stitched from the inside out and put on the dolls. Then the eyes, mouth and nose are embroidered using floss. If desired, you can apply a slight blush to your cheeks.
Tilda Christmas tree
Christmas tree in Tilda style.
A fabric Christmas tree using the Tilda technique can successfully decorate your home for the New Year holidays. You can attach a loop to it and get an unusual pendant, or place it in a pot for indoor plants and use it as a table decoration.
It’s easy to make a pattern for this toy yourself, but you can find a ready-made one.
You will also need the following materials:
- you can choose any fabric, color;
- stuffing material;
- a pot for a houseplant;
- decorative sand or artificial moss.
To fix the finished product in the pot, take polyurethane foam, floral sponge or polystyrene foam. First, the pattern is transferred to fabric; the size of the fabric can be chosen as desired. Then the seams are sewn, leaving holes for stuffing.
The workpiece is cut out, ironed and stuffed with synthetic padding; to better compact the material, you can take a thin stick. Then the toy is strung on a stick, placed in a pot and fixed with foam or inserted into a floral sponge. These New Year's toys are covered with moss or artificial sand on top.
Christmas Tilde wreath
To decorate your home for the winter holidays, you can sew a small wreath in the Tilda style. For this you will need:
- thick cardboard;
- cotton fabric;
- braid, ribbons;
- buttons;
- threads
Example of a Tilda Christmas wreath
First, a pattern of panels and decor is made on paper. Then the contours are transferred to cardboard and the blanks are cut out. After this, take the fabric, apply a cardboard wreath blank to it and cut out the part. It is important to leave small allowances and the inside of the circle.
The outer cut is machine stitched and the central circle is cut out. The inner cut is also machine stitched. Then retreat 4 cm from the seam to the center, draw a circle, make a cut along it and turn the workpiece inside out. The seams are adjusted and ironed.
Now you can insert the cardboard blank into the panel. The incision is closed with small stitches, but a small hole is left for stuffing. Gradually fill the panels with padding polyester.
At the next stage, the production of decor begins. 4 large circles are cut out of the fabric and a smaller pattern is placed on the wrong side. Then the outer cut is processed with a stitch over the edge and tied together with thread. Through a small hole, the blanks are filled with padding polyester, a large button is sewn into the center and an improvised flower is obtained. Other decorations are sewn using the same rule, but different colors of fabric are used.
For decoration you can make small stars, for this you need:
- choose fabric, fold it in half and pin patterns to it;
- mark the contours with a pencil, machine stitch, leaving small holes for stuffing;
- the blanks are cut out and turned inside out.
Then they fill the stars with padding polyester, carefully sew up the holes and begin to decorate the panels. First, the braid is sewn on using hand stitches. Then you can attach stars and button flowers to the blank. Bows are made from thin ribbons and used to decorate a wreath.
All flowers are sewn on to your liking in any order. Then a large bow is made from red fabric as the finishing touch.
To do this, fold the fabric in half and cut out a rectangle of approximately 15x8 cm. Turn the right side inward and mark a stitching line and leave a small hole. Then turn the workpiece inside out and lightly fill it with padding polyester. The open area is sewn up with a hand stitch, a line is drawn in the middle of the rectangle and the gather is pulled along it to make a bow.
Next they make a ribbon. Cut out a small rectangle from the same fabric, fold its edges inward and iron it. Then the ribbon and bow need to be attached to the panel.
Tilda doll: 125 photos, patterns and basic rules for creating a stylish doll
As a child, every girl had a favorite doll. The baby grew up, became a mother, then a grandmother, but the darling was not forgotten. For girls of the 40-50s generation, baby dolls were made from scraps, rags and stuffed with cotton wool, sawdust and straw.
Nowadays, such creations are not just a toy - they are the author’s work, a decoration of a modern interior. The rag beauty received the name Tilda and firmly settled on sofas, shelves and chests of drawers.
If you are planning to make a miracle called a Tilda doll with your own hands, for beginners you can print out the patterns by downloading them from the Internet. The creation process is not complicated, you just need to stock up on sewing supplies, fabric and patience. And you will definitely succeed.
What does the doll look like
Children play with Tildushka with pleasure if they get their hands on it. But mothers buy it more as an interior decoration.
To create it, natural fabrics are used, and the sewing technology is extremely simple. It is done in the primitivism style, without unnecessary details. She has a small head, a plump body and long arms and legs.
The highlight of the product is rosy cheeks and tiny beady eyes. You can dress the beauty in modern clothes and give her any accessories. It is more of a decorative item than a toy, so it may have a scent.
We can safely say that the foreign guest is an environmentally friendly creation. To create it, cotton textiles (cotton, satin, flannel, jeans) are used, stuffed with cotton wool, padding polyester. And to make it look like a human body, the material for the body is painted in beige tones.
The birth of a soft girl
The history of its origin is the most ordinary. She was born in Norway in the house of designer Toni Finnanger in the nineties of the last century. The girl created it as a simple homemade trifle that adults and children would love.
Then several more Tildoks were born, and things got busy. Now it is not only a name, but also a trade brand, under whose name books, handicraft manuals, and sewing materials are published.
Fabric for doll
Most needlewomen who want to sew an angel with their own hands are concerned about the question of what fabrics can be used when sewing clothes and the body of an angel.
- Cotton is a universal material, characterized by relatively high strength, softness, and a sufficient degree of elasticity. If necessary, the product can be repainted. There is a drawback: it shrinks and turns yellow in the light;
Cotton option
- flax – characterized by high strength and resistance to rotting. Linen fabrics are stiff, and some varieties are expensive. They shrink slightly when washed;
- cotton-based knitwear is an elastic material characterized by wear resistance, not recommended for use in making dolls;
- calico - cotton material, lightweight, hygienic, inexpensive;
- Fleece is a synthetic non-woven fiber that is lightweight, does not require specialized care, and is not subject to biological degradation.
You may be interested in Ready-made patterns and sewing procedures for dog harnesses with your own hands
Fleece option
Attention! A novice craftsman can use material for sewing, from which the doll can be sewn easily and inexpensively. At the same time, there is no need to be afraid that the fairy will be sewn with errors, and some of the material will deteriorate.
When choosing fabric, you need to focus on the absence of slipping and stretching when sewing the product. The best choice is linen and cotton.
The body should not be made from materials such as silk, viscose, polyester, knitted fiber, flannel - the seams may come apart when stuffing the finished product.
Attention! The calves are sewn from non-elastic fabrics of natural origin.
New Year's tildes - patterns and master classes of tildes for New Year's Eve
New Santa Santa Claus Tilda gnome Tilda sheep Tilda hare Tilda lamb Snowman Tilda Polar bear Angel on skates Sheep with wings Mini lamb and deer Reindeer Tilda stars Tilda tree Tildas Wintergleder Deer Bambi Pinocchio Tin soldier Winter has come
, and with it the joyful feeling of what is to come celebrations. Gray weather and slush outside will not upset the hearts of true fans of the New Year holidays. Housewives are decorating their homes, children are joyfully expecting gifts from Santa Claus, and dads are buying up toy store shelves. Everything foreshadows the upcoming New Year. Do you want to surprise your family with a fabulous twist? New Year's tildes will help you congratulate your loved ones in an original way.
Already a month before the New Year, you begin to think about what to give your friends for the holiday. I don’t want to use ordinary souvenirs as a present; it is advisable to stand out with originality and originality. An excellent solution would be to sew your own New Year's tilde. You can do this thanks to the patterns presented on our website.
Tilda snowman, polar bear, Tilda sheep and hare, mini-lamb and deer will help you give your loved one a lot of positive emotions.
If you dream of creating more complex compositions with your own hands, we can offer you a tilde Christmas tree, a snowman, a new Santa straight from Lapland and the classic Father Frost.
On our website you will find patterns for New Year's fairy-tale characters - an angel on skates, a tilde gnome, cartoon characters - Pinocchio, Bambi the deer and the toy soldier. Any of these works will please your guest, since it will be done by your own hands.
Patterns for New Year's handmade toys are quite simple. They should be applied to bright fabrics, which you will have to choose yourself. The more interesting the print and color of the canvas, the more original the tilde will look.
Carefully cutting out the silhouettes of the future toy with sharp scissors, you will sew them according to the pattern. Next, after filling the toy with filler, you will make the last stitches. A wonderful New Year's present will be ready.
You can also use the tilde as a decoration for your holiday room.
Thanks to Tilda dolls, you will create a truly New Year's mood, and the warm comfort of your home will be ensured.
Just a little effort and a positive attitude, and even a beginner will cope with the task perfectly. Just imagine how proud you will be when the praise of your guests knows no bounds.
New Year's tildes during the chiming clock will wish you happiness and success and will become your amulets for the rest of your life.
If you didn’t find any New Year’s tildes in this collection, write in the comments. We will definitely add them!
Source: https://MirTilda.ru/novogodnie-tildy
DIY felt Christmas tree
A DIY felt Christmas tree will become a stylish decoration for the New Year tree. To make this Christmas tree, you just need to stock up on felt, thread, cotton wool and small decorations - beads, buttons, braid and so on, whatever your imagination allows.
Christmas tree made of triangular felts
Cut out two identical Christmas trees using patterns.- Sew on your chosen embellishments.
- Lightly stuff with cotton wool.
- Sew the two felt halves together.
- Sew on the stem and loop.
The Christmas tree is ready!
New Year's Tilda part 2 - December 1, 2021 - Tilda doll. All about Tilda, patterns, master classes
Comment display order: Default Newest first Oldest first
| 0 Spam 1 oks940 (06.12.2013 05:27) Everything is super))) |
| 0 Spam 2 Lenusik (06.12.2013 07:22) cool! I want a holiday! |
| 1 Spam 3 Natulkin (06.12.2013 10:01) How wonderful everything is!!! You can’t take your eyes off!!! Happy creeping New Year to you, needlewomen!!!! |
| 0 Spam 4 LENUSYA65 (06.12.2013 10:42) Wonderful! Thanks for the festive mood! |
| 0 Spam 5 Salimona (06.12.2013 11:07) Charming!! Thanks for the selection!! |
| 0 Spam 6 Rimmulin (06.12.2013 11:27) How beautiful everything is! Wonderful selection! |
| 0 Spam 7 Olyusya (06.12.2013 16:38) Thank you for the Christmas mood! And the white bear is beautiful! |
| 0 Spam 8 el-ka (06.12.2013 18:17) Everything is wonderful, beautiful, festive! |
| 0 Spam 9 CozyHouse (06.12.2013 18:43) Mmmmmmm... beauty!!!!! And Santa with a sack, like in our Tildamania... I've been looking at him for a long time! Handsome!!!!! Thanks for the festive mood! And the little bells now give us hats |
| 0 Spam 10 Happymama (06.12.2013 19:29) Really very beautiful and festive! Smells like New Year! |
The best New Year's Tildas
Tone Finnanger continues to delight needlewomen with his New Year's ideas. Who among us doesn’t want to decorate our home with cute Tildas for New Year and Christmas, instantly turning it into a magical corner of Lapland? So, we take out bright cuts and scraps from the bins and sew New Year's Snow Maidens and Santa Clauses in Tilda style!
Tilda Santa
Pattern Tilda Santa Claus
For tildomans, this doll is a great idea for the design of New Year and Christmas interior decoration. Your Santa can sit comfortably on a shelf, become a Christmas tree or door decoration, share company with Christmas gifts, or decorate the New Year's table.
In order to have time to congratulate all the kids in the world, Santa Tilda hurries across the sky in a sleigh drawn by eight reindeer. After all, he must have time to go down the fireplace on New Year’s Eve and please the children with pleasant gifts.
Therefore, our Tilda Santa with a deer, which in honor of the holiday can be dressed up in a bright ribbon bow and decorated with horns with a wreath)) Such funny toys will not go unnoticed by your loved ones and guests. It’s not for nothing that Santa Claus means Saint Nicholas.
A soulful doll with symbolic meaning is a great New Year's gift for family and friends!
By the way, Santa not only has a name, but also a real address: zip code 96930, Arctic Circle, Finland - they say that’s where he lives all year round with his gnome helpers.
- Below you will find patterns for a doll made from Tilda Santa fabric and patterns for clothes, a beard and boots for Tilda Santa.
Pattern Tilda Santa Claus Clothes pattern for Tilda Clothes for Santa Claus
The Santa pattern with a deer is given in full size, the height of Santa Tilda with legs is 26 cm. Download the pattern and save it to your computer.
Tilda Santa is made from natural fabrics: calico or linen, clothes are made from felt, felt or fleece. A beard made of any white yarn, but preferably a boucle or a knot.
Also sew the fawn from natural cotton fabric. Filling for dolls: padding polyester, padding polyester or holofiber.
Pattern Tilda Santa's reindeer
Source: https://tilda-vikroiki.ru/
MK: Tilda Santa Claus
Tilda Snow Maiden
If you already have Father Frost or Santa Claus, then, of course, he needs an assistant, Snegurochka! Below you will find a pattern for Tilda the Snow Maiden and learn how to sew such a cute rag doll with your own hands.
Doll body material : calico, cotton or linen. Clothing materials : cambric, fleece, lace, cords. Doll filling : padding polyester, padding polyester or holofiber
Snow Maiden Tilda New Year's Tilda Pattern Tilda Snow Maiden Clothes for Snow Maiden Tilda Sew Tilda Snow Maiden Sew clothes for Tilda Snow Maiden
Tilda Santa Claus and his assistant
The patterns of these wonderful Santa Clauses and Santa Claus Girls (as their creator, designer Tone Finnanger, called them) are taken from her 2011 book - Jildas Juleideer - Christmas Ideas. Here you will find tips on how to sew Santa Claus in the Tilda style with your own hands from scrap materials.
Doll body material : plain calico, cotton or linen. Clothing materials : plain and colored calico, cotton or other thin cotton fabric, ribbons. Doll filling : padding polyester, padding polyester or holofiber
See also a detailed master class with patterns and descriptions of sewing MK: Santa Claus from fleece>>>
Santa Claus Tilda
- Don’t be afraid to experiment with fabric colors and your New Year’s couple will turn out unique!
Father Frost and Snow Maiden in Tilda style Pattern Tilda Father Frost
MK: Santa Claus made of fleece
Assistants or Girls of Santa Clauses
Who these mysterious girls are can only be guessed at. Well, sewing such a cute Tilda doll will not be difficult.
Doll body material : plain calico, cotton or linen. Clothing materials : colored calico, cotton or other thin cotton fabric, lace. Doll filling : padding polyester, padding polyester or holofiber.
Tildas for Santa Clauses' assistants Patterns for Santa Clauses' assistants Tilda Angel
- See all MK on Tilda dolls>>>
- Source: Jildas Juleideer - Christmas Ideas, Tone Finnanger, 2011
- ———- If you really liked and found our review useful, please write about it in the comments, and don’t forget to share your favorite article on social networks!
- Be the first to receive all new articles from the site in your email! Subscribe to all DOLLS news>>>
tilda, Dolls, New Year
Source: https://all-dolls.net/tekstilnie/novogodnie-tildy
