DIY butterflies on the wall
simple butterfly
If there is no time or, as they say, both hands are left, then the simplest method will come in handy.
- Cut 3 rectangles from cardboard: 8 by 13 cm, 13 by 23.5 cm and 11.5 by 22 cm.
- Attach to the fabric and circle them, remove. Cut out the details.
- Fold the piece 12 by 23.5 cm in half lengthwise and iron it well.
- Now straighten and fold not lengthwise, but crosswise, and iron it too.
- Straighten and bend the long ends on both sides to the longitudinal fold line. Smooth.
- Without straightening the workpiece, do the same with the short ends. But fold it overlapping a little. Iron.
- Perform the same manipulations with a part 11.5 by 22 cm. You will get a double butterfly. But you can skip this step.
- The 8 by 13 cm part is the jumper. It needs to be folded in half lengthwise and ironed.
- Unfold and tuck the long tip to the fold line.
- Continue rolling until you get a narrow ribbon. Iron the workpiece.
- The two main parts need to be pulled together a little in the middle.
- Sew the edges on a small piece and make a ring out of it.
- Place two large pieces together, sew them in the middle and thread them through the ring.
The bow tie is ready.
Cut a piece from the elastic equal to the circumference of the neck. It is important that the final accessory does not dangle or press. We take into account that there will still be a fastener. Both buttons and hooks will do. Thread the elastic through the ring. Sew a fastener to the edges. That's it now.
DIY paper butterflies
You will need:
- floral wrapping paper (preferably fiber based)
- scissors
- paper
- needle
- threads
- cotton wool
- soap
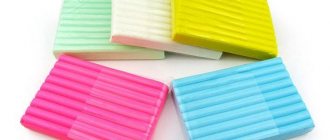
Felt butterflies
Oh, how pleasant the felt is to the touch. It’s a pleasure to create and create with this material! It does not tear, does not wrinkle. You can sew and glue various decorations onto it. In general, working with him is not difficult. How many different colors there will be is up to you to decide. We will look at making a felt butterfly from one color.
Let's prepare for work:
- felt sheet
- decorations with sequins, beads, ribbon
- piece of tulle
- glue gun/hot glue
- smylok (a piece of dry soap) or regular chalk
It is important to think through the design of the butterfly in advance and make a template from thick paper for work. Having attached the template to the felt sheet, we carefully outline it with smear. Then we remove the template and cut out a blank for our future beauty along the outlined lines.
A little secret: If your hand is full and you can cut it right away by attaching a template, this is not forbidden. The template itself can be saved so that you can later repeat the same butterfly in other variations and colors.
We cut out droplets from a piece of tulle, close to the shape of the wings, in the amount of four pieces. Lightly running the glue gun along the contour of the droplets, glue them to the wings, and then secure them on top with sequins and beads on the glue droplets.
We glue beads along the contour of the butterfly itself, in a line, one after another. To imitate the body, we place a lot of small beads on hot glue in the center of the butterfly. The antennae can be cut out of cardboard, or they can be made from wire, which can be easily attached to an almost finished butterfly.
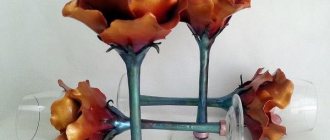
When you have easily coped with butterflies made of paper and felt, you should try yourself in making more complex options. For example, a plastic butterfly. For them you will need an unnecessary plastic bottle, scissors, a marker, nail polish and elements for decorations.
It is enough to cut out the base according to the template, bend it in the center part and start decorating with varnishes, drawing patterns on the wings.
To make even more complex beauties, you can familiarize yourself with interesting techniques on the Internet. There are step-by-step master classes on working with different types of clay. This is all complicated only at first glance, but in reality it’s all very exciting.
Volumetric paper butterflies
You will need:
- old coffee filter (can be replaced with paper)
- acrylic paints
- scissors
- pin
- decorations to taste
This simple but very original butterfly is made using a coffee filter. Of course, you can replace this material with thick paper, for example.
The filter or thick paper can be painted and then cut so that the shape resembles the wings of a butterfly.
Use a paper clip to pinch the material in the middle and let the paper dry.
Next, add a wooden clothespin frame, and you can decorate your butterfly to your liking. For example, you can use glitter, stickers, multi-colored threads, etc. as decorations.
Original models for practical use
Creating butterflies for crafts or decorative postcards is far from the only task of practical design and needlework. The most original, and at the same time, the simplest ideas for using figurines of exotic beauties will be presented further.
Butterfly pillow
It would seem that what could be simpler: sew a decorative pillow with your own hands? And indeed, today we will do this. Step-by-step master class for needlewomen:
- From any fabric you choose, according to the template, we cut out two blanks in the shape of butterflies.
- We sew them together, leaving a window for the filler.
- Turn the pillow cover inside out.
- Stuff with soft material.
- We suture the remaining lumen.
Whether or not to decorate this product is the personal choice of the artist.
We sew an original bow tie
This master class is designed to create an original children's model: bright and non-standard for the holiday. Step-by-step instructions for operation:
- We will cut out two blanks from the fabric: a larger size 10*20 cm and a smaller size 4*5cm.
- We will also prepare a piece of dublerin that will help the tie keep its shape.
- Using doublerin we glue a larger piece.
- Fold the large piece in half with the inside out, and stitch it.
- Turn the product inside out and iron it so that the seam is exactly in the middle.
- Fold the piece in half along the long axis with the seam facing up and sew it together.
- We lay out the workpiece so that the seam is again located in the center. Iron it with an iron.
- We bring the central points of our part together in the middle so that a fold is formed.
- Sew a smaller piece over the central notch.
- We decorate the bow tie depending on the chosen model.
Before use, be sure to attach an elastic band by running it along the back surface of the butterfly figurine.
Creating simple models of butterflies in needlework is the first step towards true mastery. Study photos, video lessons, train your imagination and your hands, and then a real exotic beauty butterfly will become a gift for you.
DIY ribbon butterflies
A light and delicate moth, always ready to flutter, is obtained using the Japanese kanzashi technique. The finished product can be used for hair, attached to a hairpin, to decorate the interior or clothing.
To create you will need:
- satin ribbons;
- scissors;
- lighter;
- glue;
- a thread;
- needle;
- beads;
- tweezers.
And now simple instructions on how to make a butterfly from a satin ribbon with your own hands:
1. Choose any colors of stripes and cut into squares. But remember: the upper wings are larger than the lower ones, so the blanks for them must also be larger.
2. We process two squares of the same size and color along the edges with a lighter.
3. Fold them diagonally and bend the resulting triangle in half.
4. Use tweezers to pinch the top and fold the edges. We fix the ends, cut them and draw them with a lighter. We clamp with tweezers so that they stick together.
5. Make a small hole in the wing: to do this, turn it over and cut off the folds. We process the ends again with a lighter. The upper wing is ready.
6. Repeat steps 2-5 for the second wing.
7. The lower ones are made in the same way. But at the last stage, the ends of the hole are processed with a lighter and connected together.
8. Prepare the internal parts. Fold two squares diagonally using tweezers and glue them.
9. Place the small square on the large one and connect it with a needle.
10. Similarly as with the upper wing, fold it in half, fix the position with tweezers, cut off the folds and process them with a lighter.
11. Glue the folds on the back side of each layer separately
12. The body and head can be made by analogy with any wing.
13. We connect all the parts together and glue them. The butterfly is ready. For additional decoration, you can glue beads.
DIY fabric butterfly
Nowadays, choosing a beautiful fabric is not difficult, and many people have an unnecessary piece at home from which they can sew a butterfly with their own hands. It doesn't take much time and goes great with your clothes. Examples for inspiration:
1. Fold the fabric square in half and iron it. Fold the resulting rectangle in half again and iron it.
2. Open the triangular pocket and turn it over. Repeat on the other side, ironing. We sew the middle so that the butterfly does not fall apart
3. Carefully unfold the wings.