Materials and tools for work
Decoupage (from the French découpage - cut out) is a simple decorating technique that allows you to make unique and attractive things for your home from simple things. The easiest way to decoupage a tea house is with napkins: it’s inexpensive and easy, and the work won’t take much time.
All you need to do is prepare:
- blank for a tea house made of plywood, cardboard;
- acrylic primer;
- napkins with interesting motifs;
- PVA glue;
- varnish
The tools you need are scissors, brushes for glue and varnish, and sandpaper (fine).
After gluing the motifs, the background can be completed with acrylic paints, then prepare your paints.
Master class: how to decoupage a tea house
First, the workpiece needs to be processed: “sanded” using fine sandpaper. It is necessary to remove all irregularities and roughness and bring the surfaces to an even, smooth state. Remove all sawdust with a soft cloth and coat the workpiece with acrylic primer.
It is better to apply not one, but two or three layers: this way the drawing will be brighter. After the primer has dried, sand the workpiece again until it is perfectly smooth.
Now prepare the material with which you will decorate the workpiece. It is better to choose pictures for decoupage of a tea house to match the style and colors of the kitchen design.
For decoration you can take:
- decoupage cards;
- special rice paper from which the desired motifs are torn out;
- ordinary paper napkins with an attractive and theme-appropriate design.
You can print the desired design on a color printer, only in this case the paper will have to be subjected to special processing - remove excess layers, leaving the topmost one with the design.
The necessary motifs are torn out (not cut out!) from a napkin or decoupage card. In this case, you need to remove the lower layers of the napkin, leaving only the top one. It will be very thin, so work must be done carefully.
For beginners, it is more convenient to decoupage a tea house using the so-called “file” method. To do this, prepare PVA glue, a stationery file or a medium-density plastic bag. Apply a thin layer of glue to the surface of the workpiece, apply the torn fragments, making up the desired composition from them.
The tea house has right corners, so decorate the sides one by one. Having applied a napkin, cover it with polyethylene on top and carefully, from the middle of the fragment to the corners, smooth it out to expel all the air. If necessary, you can go over the top of the napkin again with a brush with glue to glue all the edges.
When all the fragments are glued and dry, you can complete the background, and lightly tint the corners by going over them with a stamp pad or acrylic paint applied to a sponge. This way they will look more impressive.
Then you need to coat the surface with varnish. You need to apply not one, but several layers, waiting until the previous layer has completely dried. The more layers the better. The varnish will protect the surface from fading and mechanical damage and will give your work a spectacular look.
Making a tea house with your own hands
When starting to implement your plan, you want it not to take much time. I want all the work to be painstaking and take a minimum of time.
Do-it-yourself decoupage of boxes for beginners - tips, photo ideas
Decoupage Easter eggs - an overview of methods with photo examples
First, you need to decide what the final tea house will be like: will it be in the form of a box or will it look like Baba Yaga’s hut? If the kitchen interior allows, you can make a Dutch mill - for this you will need to first look for special napkins with elements of rural motifs.
Let's get started using decoupage technique
Decoupage can be used to decorate not only small items, but also large furniture. The most common options are decorating kitchen items.
Decoupage is considered the simplest and most accessible technique to perform. Translated from French - cut. The basis of decoration is to attach a pattern to the required surface. It is best to lightly tear the ornament out of special napkins and stick it to the desired product.
Do-it-yourself kitchen decoupage - choosing equipment, style, ideas
Original do-it-yourself bottle decoupage - step-by-step master class with photo examples
What you will need
The advantage of this technique can be considered hidden possibilities - thanks to decoupage, you can give a second life to old pieces of furniture and interior design.
To decoupage a tea house you will need:
- A blank made of cardboard, plastic or plywood.
- Special napkins for decoration.
- Glue (it’s better to take a special one. Unfortunately, PVA can turn yellow over time).
- Acrylic paints (it is best to have two options on hand: colored and white).
- Brushes or a small roller (depending on the size of the workpiece).
- Special napkins for decoupage.
- Varnish for final fixation of finished work.
Step-by-step instruction
Prepare all necessary materials in advance. If you choose a wooden workpiece, first prepare its surface for work. To do this, you need to process the material using sandpaper. The next step is applying the primer.
After the primer has dried, you can coat the product with white paint. Let the material dry well.
How to knit garter stitch with knitting needles - features, patterns, step-by-step instructions and photo examples
Do-it-yourself furniture decoupage – choice of equipment, recommendations, photo ideas
All sides on which the selected ornament will be applied to the workpiece must be treated with acrylic varnish. Leave to dry in the room. All actions must be done several times.
Popular articles Heart pendantThere are tips that you can cut out designs, but torn out ornaments look more harmonious than those that have smooth edges. After the top pattern of the napkin is laid out, you can carefully coat it with glue using a brush. If you accidentally applied a lot of glue, you can blot it with a napkin. At the same time, carefully smooth out any unevenness that may exist.
After the glue has dried, you can varnish the tea house. If necessary, it is allowed to complete small details using paints or simply outline the contours.
It is not recommended for people who do not have experience working with other materials to start working with ceramic materials.
How to decorate a tea house
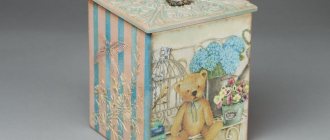
On sale you can find many different blanks for decoupage. They can have a simple appearance, imitate birdhouses, houses, huts in the old Russian or modern style, castles or oriental dwellings.
Depending on the style of interior design, you can choose the decor. In craft supply stores you can find a variety of voluminous decor that will help you decorate your tea house in an unusual way.
Rice paper for decoupage - step-by-step instructions for use, features and subtleties of use (110 photos)Decoupage of bottles - step-by-step instructions and description of the progress of decorating with various materials (110 photos)
- Napkins for decoupage - manufacturing features and tips for use (85 photos)
For example, a classic house can be complemented with voluminous flowers, an imitation of tiles on the roof can be made, shutters can be installed on the window, and a small figurine of a cat can be placed on the window.
Complement your favorite blue and white set with a house with Gzhel patterns, and in a Provence style kitchen it is better to create a composition in the same style. By looking at various photos of tea house decoupage on the Internet, you can use your imagination and create your own masterpiece.
We work with the lid quickly and easily according to the diagram with description
In the meantime, while our finished elements are drying, let's work on the roof. We will make the roof relief (tiles) in this way: apply a layer of putty (3-4 mm) with a spatula, and then use your finger to press holes in it in a checkerboard pattern, starting from the bottom edge and gradually rising upward (as in the photo). We leave it to dry for a day and return to the master class again.
Using a palette knife, we apply putty to the house in those places where we need protruding bricks. They applied a piece and drew bricks with a toothpick. And so on throughout the house.
To make the product even more realistic, use acrylic paints to apply additional decorative elements, such as greenery, lanterns or flowers, and paint the roof.
At this stage you need to apply varnish. The tea house can be coated with any acrylic varnish (you can use construction varnish, we use it, because the number of layers is usually 5-7, professional products quickly run out, and you can’t do without varnish).
Make your kitchen twice as cozy: decorate flower pots in the same style as the tea house!
Our magical tea house is ready! All that remains is to put the tea bags and put the wonderful thing in its place. And our master class has come to an end. Watch the video for more details.
