Mosaic is one of the most interesting and exciting toys for children of different ages. The size of the parts from which a certain pattern will be composed depends on the age of the player. The material from which individual mosaic parts are made may vary. It can be plastic, cardboard, wood, natural materials, even magnets. For the full development of a child, all kinds of puzzles can be used starting from a very early age, taking into account the size and number of parts in the set. Thanks to mosaics, children develop thinking, fine motor skills, imagination, creativity and fantasy, a holistic perception of the world, and also develop perseverance and concentration.
From the age of three, a child will be interested in making a mosaic on a template using various materials. Perhaps the most accessible among the possible materials intended for laying out a picture is eggshell.
Necessary materials
In order to make a mosaic from a shell, the first step is to prepare the shell itself:
- Break a few raw eggs.
- Remove the inner film.
- Place the shell in a soda solution.
- We rinse the workpieces under running water and leave until completely dry.
If the work (according to the instructions) requires multi-colored material, cover the dry shells with quick-drying paint. You can even use shells from colorful Easter eggs (don't forget to remove the inner film).
For convenience in work, we distribute the multi-colored blanks into different bowls.
Materials and tools for crafts made from eggshells
- eggshell
- PVA glue and brush
- thick cardboard or other surface (box, vase, etc.)
- tweezers
- a small wooden stick for pressing shells (a manicure stick is great)
- varnish
- acrylic paints if the mosaic is made from white shells
- napkin for decoupage (if necessary)
First you need to prepare the material. To do this, the collected eggshells are washed in warm water (and for better degreasing, you can even put them in boiling water with a soda solution). After this, the shell must be dried, the inner film removed from it and arranged by color.
Professionals use shells from raw eggs, because heat-treated shells lose their hardness and their surface becomes more friable. But for children's crafts, you can use any shell, including those left over from boiled Easter eggs.
Mosaic "Rainbow"
The proposed version of the mosaic is simple to implement, so it can be safely offered to novice craftsmen.
You will need the following:
- multi-colored and white crushed shells;
- PVA glue;
- glue brush;
- cardboard (base);
- a simple pencil;
- paper napkins.
Progress:
- Using a pencil, we schematically draw arcs (rainbows) and clouds on a cardboard base.
- Apply a layer of PVA glue to the upper arc with a brush.
- Place the pieces of red shell close to each other.
- To remove excess glue, carefully apply a napkin to the arc and press slightly.
- We do the rest of the rainbow arcs in the same way.
- At the bottom we glue the white shell into the outline of the cloud.
- Remove excess glue with a napkin.
To prevent shell particles from falling off, the work can be coated with colorless varnish after complete drying.
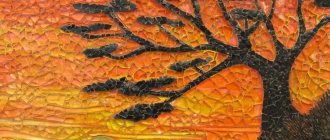
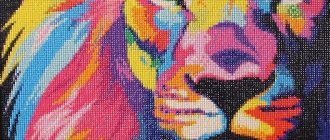
Mosaic “Underwater world”
The cracked shell is very reminiscent of fish scales, so this material is perfect for creating an underwater world with your own hands. To make fish, you will need painted shells, cardboard, white glue, paints or felt-tip pens.
The photo shows examples of finished works of varying degrees of complexity.
In addition, you can use various decor in your work: ribbons, buttons, ready-made plastic eyes, colored pebbles, shells and much more.
Mosaic on disk
You can use a regular CD as a base for the mosaic. The work process is similar to a regular paper-based mosaic. The only thing you should pay attention to is the glue. Regular PVA glue may not be suitable (the shells will not stick firmly to the disk), so choose a more reliable glue (Moment, superglue, in some cases even a glue gun will do).
After the pieces of the shell are glued to the disk and dry, you can either paint a picture on top with paints (gouache), or glue a plot picture from a paper napkin.
To make the work look more elegant, you should cover the top of the disc with transparent varnish. The varnish will add brightness and shine to the mosaic, and will also prevent small shells from falling off for a long time.
For the bravest
Girls can experiment with egg crumbs that remain from decorative work. Everyone knows that eggshell mosaics look good in the interior of a room. But this is not the only option for using this natural material.
All fashionistas take care of their nails. Every week they visit manicure salons to create their next masterpiece. Try to create a very interesting effect on your nails at home.
- treat the surface of the nails and give them the desired shape;
- cover the nail plate with a layer of transparent varnish, now apply crushed eggshell crumbs to the dry surface;
- cover the source material with any color.
This manicure will look interesting on your hands. And it’s very simple to do.
This is how you can use inconspicuous eggshells. Agree, each of these options looks creative and stylish. Experiment and create beautiful things with your own hands. Being original is simple: open up your creativity and you will succeed!
Decorative decoration “Star”
Souvenirs made using the crackle mosaic technique look original and original. To make the decoration you will need thick paper, PVA glue, shell fragments, paint and highly abrasive sandpaper. To make it easier to lay out small particles, it is recommended to use tweezers.
Step-by-step instructions:
- On a sheet of thick paper, draw a star (or any other shape).
- Apply glue to a small area of the figure.
- Place a small piece of shell on the glued area and press lightly. We try to crush the shell, as it were. Thus we seal the entire area with glue.
- Gradually, applying glue to the following areas and gluing the shell, we fill the entire figure. We coat the areas remaining free with glue again and, using tweezers, lay out small fragments of the shell.
- After the star is completely filled with shell, remove excess glue using a paper napkin.
- Apply bright paint to the workpiece. Acrylic paint, watercolor or gouache are suitable for painting. We try to paint over all the cracks and recesses.
- After the work is completely dry, we begin sanding (rubbing the top layer of paint with sandpaper)
- Shake off the dust and cut out the shape.
The decorative star is ready! The craft can be used as a stand for hot food (under a mug), you can decorate a New Year tree with it, or hang it on strings over the curtains.
Eggshell painting. Step-by-step master class
You need to start work by preparing eggshells. It’s good if the shell is of different colors and shades - then the paintings will not need additional coloring. It is advisable to use the shells of raw eggs, because when you peel boiled eggs, the shell pieces turn out to be very small. The halves obtained by breaking raw eggs are ideal for our craft .
Before use, the prepared shells are washed under the tap, and then immersed in a 10% baking soda solution for 2-3 minutes and dried. Only after this can you proceed directly to creating a mosaic from eggshells.
You will need:
- Eggshells come in two colors – white and brown.
- Colored cardboard or other thick decorative paper.
- PVA glue.
- Scissors, pencil or felt-tip pen, ruler, glue brush.
- Plain white paper.
First, you should take a sheet of plain paper, for example, from a children's album, and carefully coat it with glue, making sure that there are no gaps.
Then place half an eggshell on the paper and, pressing it forcefully with your fingers, press it tightly onto the paper coated with glue. As close as possible to this fragment, glue the next one and so on, trying to ensure that the shell evenly covers the entire sheet. Where large gaps remain, you can then glue on separate pieces of shell of suitable size. When all the shells are glued, the sheet with it is placed under a press for one to two hours.
Drawings of the details of the future painting are applied to the reverse side of our sheet. In this case, it is an ancient castle, the walls of which are made of white shell, and the roof, flag, door and base are made of brown. Therefore, two leaves are taken - separately for the white and for the brown shell.
Carefully cut out all the details of the design (the shell is very easy to cut with ordinary children's scissors).
This is what the front side looks like:
Further, all actions resemble working on a regular application. First, a fragment of the design, which is the basis of the composition, is smeared with glue. In this picture there is a castle wall.
Glue this fragment onto the base.
It can be any colored cardboard, velor paper and even wood.
The same is done with the remaining fragments.
Decorating dishes
Dishes decorated with shells turn out to be original and very beautiful. Every housewife has an ordinary empty glass bottle for wine or any other drink. You can make a kitchen decoration from such a bottle using ordinary eggshells.
To work you will need glue (for glass) and a shell. Apply glue to the glass base and carefully glue the crushed shell. After complete drying, you can paint with acrylic paints or decorate using the decoupage technique (using colored napkins).
Similarly, you can decorate not only bottles, but also plates, glasses, flower pots, and vases.
Eggshell jewelry
To make earrings from eggshells, you will need special blanks - 2 round wooden or plastic bases and a pair of accessories for making earrings. The process of work is similar to that described above: we place the shells tightly on the glue-coated base, and after complete drying, we cover it with paint. To add shine, you can apply a thin layer of pearlescent nail polish over the paint.
Using the proposed technique, you can make not only earrings, but also other jewelry: medallions, pendants, pendants, brooches.
Eggshells as a tool for unusual creativity
Medieval artists came up with the idea of using eggs to create paintings. Paints based on natural materials formed the basis of the most outstanding works of art. This master class offers a look at the egg as a tool for creativity from a new perspective. This time the shell will be used.
For the project you will need:
- eggshell;
- gouache of different colors;
- water;
- brushes for paint and varnish;
- clear varnish;
- tweezers;
- acetone;
- PVA glue
First you need to prepare the eggshells. If the eggs have traces of dirt, it is better to wash them before cracking. Dry the eggs with a towel and crack into two halves. Let the shell dry. Apply gouache to the dry shell halves. Fresh paint does not need to be diluted with water so that the layer is dense and uniform. Since you need different colors, make sure you have a napkin or towel on the table that you can use to wipe up traces of different colors.
Paint the entire shell. It is better to prepare it with a reserve. Instead of gouache, you can use acrylic paint, especially if you want to get a gold or silver shell. Wait until the paint is completely dry before applying varnish. Lift the shell halves with tweezers to avoid damaging the color and coat them with varnish. If you use aerosol varnish, you can spray all the shells directly on the table. If pieces break off during the process, cover them with varnish and paint - they will be useful for mosaics. When finished, wash the varnish brush and tweezers in acetone. Leave the varnish to dry.
After the shells are completely dry, break them into small pieces. It is important that they are almost flat. All that remains is to choose the surface that will be decorated. This could be a cardboard base with a printed design, a vase, or even a mug.
PVA glue is well suited for such mosaics. Apply the base and let it dry a little. Then apply glue to the colored piece of shell, holding it with tweezers. Post your chosen drawing.
You can also decorate large objects with shells, such as vases or flower pots.
You can complement the mosaic with other types of decor. On vases, pots and other objects that perform not only a decorative function, it would be a good idea to additionally coat the mosaic with varnish.
The mosaic made using this technique looks original on costume jewelry.
You can try to imitate the pattern of natural stone.
You can create interesting panels on any topic. For example, such a picture can decorate a bathroom. But for a damp room an additional layer of varnish is required.
You can take a color drawing as a basis, or create it directly as you work.
Create works of any level of complexity.