Needlework
07/08/2018 Anastasia Prozheva
Women love different accessories very much. Today in stores you can find various beautiful bracelets that every woman will like. Such things can be made of either precious metals or ordinary materials. But a DIY wire bracelet will be very original; it will always look unique, and besides, you definitely won’t find one like it nearby. Therefore, you need to learn how to make beautiful bracelets using ordinary wire.
Such jewelry is very popular, especially recently. After all, everything that is made with one’s own hands has always been valued more, and if it’s jewelry, then even more. Therefore, this article will present several examples of how you can make a beautiful bracelet with your own hands. In addition, such wire bracelets can be complemented with ribbons, beads and seed beads.
Decoration with beads
To make a bracelet from wire and beads, you need to have patience and the right materials. These elegant bracelets can be worn to any event or every day. At the same time, it gives a woman femininity and tenderness. Understanding some of the tricks of wire weaving, you can easily invent masterpieces, with this you can earn good money and have fun.
What we need to create the decoration:
- wire;
- large beads;
- connecting rings;
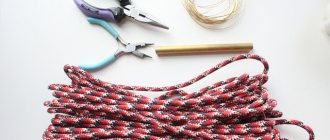
- round nose pliers.
We take a piece of wire and put a bead on it, after which we need to wrap the wire into a loop using pliers, this is necessary so that the bead does not fall out. But on the other side, take the wire and twist it, and then wind it around the bead. The loops need to be made tighter so that the bead does not twist.
Then, as part of the bead is wrapped, stretch the wire to the other edge, and then you need to wrap it around the buttonhole that was made earlier. We should have a blank for our product.
Note. You can change the amount of material. If you make it for an adult woman, you need about 7 beads.
Next we need to connect the bracelet with rings, which can be purchased at any hardware store, but you can also make such rings from wire. And for those who want to have a tighter bracelet, the beads can be connected to each other using the buttonholes that are formed near each bead. To do this, you just need to unbend one buttonhole near each bead.
Related article: Jewelry for a guipure dress
Now we need to make a hook using wire. To do this, you need to fold a piece of wire into two parts and then twist it using pliers.
Slim and graceful
Using wire you can make very interesting jewelry that can be combined with various decorative beads, ribbons, buttons, and pendants. This master class will help you learn how to make an interesting bracelet using wire.
What you need:
- a wire 25 cm long, the diameter of which should be 1.3 mm;
- 4 pieces of wire, the length of which is 16.5 cm, of the same diameter;
- wire 3 m long, diameter should be 0.4 mm;
- flat bead;
- round nose pliers.
Now we need to take the longest wire, then wrap it three times around a wire that is 25 cm long, then we need to move 5.8 cm to the left, this piece of wire will be our middle one.
Next we need to add one of the pieces, which was 16.5 cm long. Place this piece on top of the middle wire, then align all the ends. Now wrap thin wire twice around both thick pieces of wire, as indicated in the photo below.
Next, we must wrap a thin wire once around the central one, then add the next piece 16.5 cm long, placing it below the middle one. Wrap the thin wire twice around the bottom and middle pieces of thick wire.
Then, the thin tip of the wire must be passed forward, between the two lower pieces of thick wire.
Next we need to wrap a thin wire around the top and middle pieces of thick wire. Repeat steps 3 to 6, we do this until a distance of 6.35 cm in length has been braided. Wrap the tip of this piece three times around the middle part of the wire. Afterwards, the end of the wire must be cut off and passed inside.
Related article: DIY panel of leaves on the theme of autumn with photos and videos
Now bend the side wires and string the selected bead onto the middle one.
We take two pieces of wire that were not used, 16.5 cm long. Next we need to bend the wire thread 90 degrees, while retreating 5.8 cm from the end of each piece. We need to repeat everything that we did on the first side, that is, do steps from 1 to 7, while using the remaining thin wire. You need to start by wrapping the middle part of the thick wire three times, and then add the side pieces of thick wire, weaving as it was on the other side, until you get 6.35 cm in length.
You should still have 5.8 cm of thick wire that is free, which we have not yet braided, on both sides of the bracelet. If necessary, then to achieve equal length you need to trim off unnecessary pieces. But we must curl the middle wire into a snail on each side of the bracelet, as shown in the photo below.
Now we need to shape the spirals and other ends of the thick wire. This is not difficult, so this option is very original.
To give the bracelet a different color, there is one interesting method. You need to take a chicken egg and hard boil it. Cut it and put it in a container, put our bracelet next to it. It is not necessary for the bracelet to touch the testicle. The egg releases sulfur, causing the wire to darken. Next, you need to pull it out of the container and wash it under cold water. Afterwards, we must polish the bracelet using a washcloth or file. And now our bracelet is ready!
Such bracelets are very suitable as a gift in memory of yourself to a loved one.
DIY copper bracelet
Interesting on the topic
DIY leather bracelet with rock crystal
28.12.2018
Button bracelet
05.12.2018
Bracelet made of floss threads 7 shades of blue
08.04.2018
Copper bracelets are quite easy to make, and there are so many options!
The copper strips are sold six in a 6-by-1-inch package. Great size! You can forge them, stamp them, rivet them and paint them. The possibilities are endless!
Let's make a copper bracelet with our own hands with a green coating and flowers. It was really fun and quite easy! See below how.
This is all you need to work with metal (see below).
I used patina and ink to paint the metal.
Tools and materials:
- 20mm copper strip 6x1 inch;
- brass patterned sheet;
- hammer;
- steel block;
- metal file;
- pliers for bending bracelets;
- sulfur;
- various vintage patinas and alcohol inks;
- emery sponge.
DIY copper bracelet. Instructions:
Place the copper strip on the brass sheet, covering it with film.
Go over the copper with a hammer. You need to hit really hard to get the design imprinted on the copper.
Remove the copper from the brass plate. Look how the pattern has transferred to the copper. It's not perfect, but it's good. We are making our bracelet in a rustic style!
File the edges of the plate.
Use pliers to shape the plate into a bracelet shape.
It will take a little time to get it right.
Place the bracelet in the sulfur. To create sulfur gel, you need to mix sulfur with a small amount of warm water. Lower part of the product and let it blacken. This will take a few seconds.
When the bracelet is ready, remove it from the sulfur. Rinse it with water and dry it.
Polish the top layer with an emery sponge.
Add a vintage patina to the back of the bracelet.
Mix several colors to get what you want.
Using a paper towel, spread the colors over the entire surface.
Clean the top layer of patina with sandpaper. Then the paint will remain only in the recesses.
We recommend: DIY leather bracelet with rock crystal
Now add alcohol ink.
Using a paper towel or cotton swab, spread the paint over the entire surface.
Go through the sandpaper again.
The work is done! If you want, you can treat the bracelet with resin. It dries very quickly.
DIY floral copper bracelet with green patina is ready.
Great! Copper strips are truly a great material for any bracelet!
Author MK Tiffany

