Doll Home Maslenitsa
Homemade Maslenitsa or the “daughter of Maslenitsa,” as it is often called, does not look like a scarecrow at all. This little doll, about 20 cm tall, is decorated with bright fabrics and colored ribbons, her hair is braided and she is placed in a prominent place in the house. Her task is simple - to please her household and maintain peace in the family. Such a talisman will last exactly one year, until the next holiday. If there are children in the family, several dolls are made - for each child, and another larger one for the house.
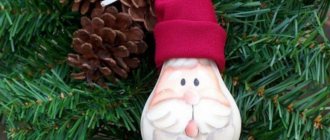
Photo Maslenitsa - doll
It is better to take natural materials for crafts - twigs, bast, straw, rags, natural fabrics and wool or cotton threads. If you are not going to use your creation as a talisman, you can use quite modern padding polyester and glue. Making a doll is very simple; you can do it together with your children. But if you decide to strictly follow the ancient customs, remember: the housewife must make the daughter of Maslenitsa herself or with the help of children, but without the participation of men. After all, the task of men is to make a large life-size effigy that will stand on the street for a week and burn on the last day of the holiday.
Master class: Maslenitsa doll
Homemade Maslenitsa usually does not have a face, and depicting it in any way is considered a bad omen - if the doll’s face accidentally turns out to be similar to one of the family members, that person may get sick. But if you don’t believe in omens, feel free to draw your face with felt-tip pens, or you can embroider it.
Maslenitsa: homemade doll
Throughout the year, Homemade Maslenitsa should protect peace in your home. If there is trouble, quarrel or resentment in the family, you can complain to the doll and tie a bright colored ribbon on it. A year later, the amulet is burned along with a large effigy. It is believed that when all the tied ribbons burn, all misfortunes will go away with them.
Dolls for a holiday in kindergarten
Two master classes were prepared by teacher Olga Pivneva, Gryazovets. These dolls, made from scrap materials, also participate in our competition.
You can make Maslenitsa or just a doll for kindergarten from scrap materials. The only difference is in the design.
“I bring to your attention a master class on how to make a doll with your own hands.
We will need:
- wooden blocks;
- screwdriver, self-tapping screws;
- plastic bottle (1.5 l.);
- round plastic ball;
- flesh-colored nylon sock;
- cotton pads (130 pieces);
- glue "Titan";
- sequins (eyes, nose);
- red self-adhesive;
- 2 white sheets of cardboard;
- black wool threads;
- small “crabs” (hair clips);
- beads;
- pan.
Execution, step by step
Make a stand - the basis for the doll, using thin wooden blocks. Cut it out and connect the parts using a self-tapping screw (photo 1 - 2).
Make the doll's head from a plastic ball. Cut a hole in it (the size of a bottle cap) (photo 3).
Put a stocking on the ball and insert the ball onto the bottle cap (photo 4).
Glue the doll's “hair” using black woolen threads: first the bangs, then the rest of the hair (30 cm long) (photo 5 – 6)
Make a dress from cotton pads. Paint the wheels in different colors (photos 7 – 8).
Glue the discs starting from the top. Make the sleeves of the dress in different colors: 1 sleeve – blue + red; 2nd sleeve – green + yellow (photo 9). Take care of your face. Glue the eyes, nose, eyebrows, mouth. Cut out the mouth from red self-adhesive paper.
Glue the paper frame for the hem of the dress from white cardboard (photo 10).
Weave 5 braids on the doll's head. Use the “crabs” to style her hair, arrange her braids beautifully, for example, like in the picture.
Glue the hem of the dress in rows: blue, yellow, green, red, yellow, purple. Place the beads on the doll.
Dear readers and contest participants! Each of you probably knows a wonderful holiday - Maslenitsa . The holiday is bright, cheerful, elegant, riotous and joyful, which lasts for a whole week. These are dances, games, fairs, songs, mummers, pancakes.....
The main participant of the holiday is the Maslenitsa doll. On the seventh day of Maslenitsa week, a fire of straw was laid out in a field and a doll was burned with songs. People said that all sorrows and sorrows “burned away” along with the doll.
This is what the Maslenitsa doll will look like. She should be faceless. Strengthen the pan in the hand of Maslenitsa.
I want to tell you and show you how you can make another doll.
We will need:
- wooden blocks;
- screws, screwdriver;
- plastic bottle (1.5 l.);
- flesh-colored nylon sock;
- round plastic ball;
- textile;
- white braid;
- sequins (eyes, nose);
- red self-adhesive;
- twigs from a panicle;
- wool threads (brown, yellow and black);
- glue "Titan";
- wire;
- hair elastic bands (7 pieces – red and purple);
- beads
Execution steps:
Use wooden blocks and a plastic bottle to make a base stand for the doll.
Cut a hole in a round plastic ball, put a stocking on it and place it on the bottle, putting it on the cork. This will be the head.
The base of the doll is the same as in the first version. Replace the doll's hands with branches from a broom.
Sew a blouse and a skirt for the doll. Edge the blouse on the sleeve and collar with white braid.
Make the doll's hair. Glue the bangs and hair at the back with brown woolen threads. Braid your hair. At the center of the head, using threads (brown, yellow and black), make a hairstyle in the form of “rays of the sun.” Tie a hair tie on each beam. (Modern doll - hairstyle with highlights!) Decorate the face! Glue on the eyes, nose, mouth.
Wear beads and a bracelet.
See also: Maslenitsa holiday script for kindergarten
Maslenitsa doll made from scrap materials
The author of the work is Alena Goncharova.
To make a Maslenitsa doll we will need:
- Glass bottle,
- padding polyester,
- scotch,
- a sock for the head and arms, preferably in light colors,
- fabric for scarves, barrels and aprons,
- wooden hand stick,
- scissors,
- glue gun, floss threads,
- ready-made eyes, mouth.
We put a padding polyester on top of the bottle, forming a head, on top of the padding polyester, pull the sock and secure it with hot glue.
We take a wooden stick and secure it to the bottle with tape, these will be the doll’s hands. The body of the doll is ready!
Now we cover the entire body with padding polyester so that the doll is fluffy and soft. We use a toe to tighten the edges of the stick; these will be the hands.
We cut out two identical rectangles from the fabric and sew sleeves from them.
We attach the sleeves to the doll with glue, the edges near the hands, gather them together and tie them with thread.
We cut out two strips of fabric and place them on the doll from the waist along the front, over the shoulders and on the back, forming a blouse.
We are making a skirt, for this you need to measure the length from the waist to the bottom and the width as much as you want for a fluffy skirt. Cut the fabric. We tie the long edge with thread to gather it. We sew the short sides together. The skirt is ready!
We put a skirt on the doll, tighten the thread so that the skirt stays tightly on the body and fix it with hot glue.
Cut out a square and a long strip, sew an apron. We decorate the apron as desired with beads, pockets, flowers, etc. We put an apron on the doll.
We take floss threads, cut off several threads about 12 cm long, tie them in the middle, and form a bang.
Hot glue the bangs to the head. If desired, you can weave braids from threads and glue them with glue. Cut out a triangle from the fabric, tie it on your head, the scarf is ready!
Glue on the eyes. The mouth can be cut out from a piece of leather and glued on. Our doll is ready! Good luck!
Maslenitsa of the Polyakov family - master class:
Felt doll
Video on how to make a paper doll:
A Maslenitsa doll made from threads is made in the same way as one made from straw or bast; even children can do this craft.
Now we put a toothpick in the middle and tie it with a red thread so that a head is formed and the toothpick is held at the same time.
We wrap the yellow thread around the palm again, but not so tightly (these are handles).
We remove the threads from the palm, tie them with red thread on both sides, tie knots and trim the ends.
Then we pass the handles through the middle of the body, so that a cross is formed. Handles are in place!
We take a red thread, put it under the head, cross it on the chest, tie it across the back and tie a bow in front. Maslenitsa is almost ready.
Let's cut out a triangle with long ends - this is a scarf for the doll.
We tie a scarf on the head of the Maslenitsa girl, tying its ends behind her back.
Similar to spring Martinique pupae:
Some even make dolls out of pancakes:
All site materials on the Maslenitsa theme can be viewed here:
DIY rag doll Maslenitsa: master class with step-by-step photos
Rag dolls were usually made for children at Maslenitsa. A child could play with such a doll for a whole year, and then independently throw it into the fire on Forgiveness Sunday. It was believed that this would save the baby from all the illnesses of the past year.
We invite you to study the master class of Novosibirsk craftswoman Zoya Pinigina and create a Maslenitsa rag doll with your own hands.
You will need:
- 1 piece of white fabric for the head 20x20 cm
- 2 pieces of white fabric for arms 10x12 cm
- 2 pieces of colored fabric with floral patterns for a skirt 20x20 cm
- 1 triangular piece of red scarf fabric with a long side of 22 cm
- a ball of cotton wool, rags or padding polyester for the head
- a ball of red thread, better than wool
Preparation method:
- Prepare everything you need for the doll. There is no need to hem the edge of the fabric, just fray it a little by pulling out a few threads.
- Place a piece of cotton wool or rags in the middle of the flap from which you will make the head.
- Form the doll's head and secure it tightly with thread. Remove all folds of fabric to the back of your head so that your Maslenitsa face is smooth and even.
- Fold the arm flaps into a corner and twist.
- Tie your hands to the finished head with thread so that they point upward.
- Tighten the thread and tie it into a knot after every two turns.
- Fold the flaps for the skirt in half diagonally and place them as shown in the picture to wrap the Maslenitsa skirt in the direction of the sun.
- Fold the bottom flap of the skirt to src=”https://strana-sovetov.com/wp-content/uploads/lucia/maslenica/kukla/kmas_4098v6c54_008.jpg” class=”aligncenter” width=”800″ height=”726″[ /img]
- Fold the top flap of the skirt down and around the doll from left to right.
- Now fold the remaining edge of the lower flap again to src=”https://strana-sovetov.com/wp-content/uploads/lucia/maslenica/kukla/kmas_30978v65_0010.jpg” class=”aligncenter” width=”800″ height= "637"[/img]
- And also fold the second edge of the top flap down, but behind the doll’s back. Wrap the skirt with thread and secure it well.
- Put on a scarf for Maslenitsa, tying it in one knot at the front.
Your rag doll is ready.
Why burn an effigy
The Maslenitsa effigy has a very deep meaning. This is not just an image of winter that is burned so that spring can come into its own, as many contemporaries believe. This is a symbol of negativity, evil, everything old.
The effigy was burned many centuries ago, during pagan times. Then it symbolized the Phoenix bird, which was reborn through fire. It turns out that the old was burned, and in order for the new to appear, the fields were sprinkled with ashes. Our ancestors believed that this would ensure a good and bountiful harvest.
Over time, they began to throw old clothes and things into the fire near the scarecrow, believing that this would bring new things and increase wealth.
Thus, the burning of Maslenitsa is not part of an entertainment program, but a way to expel negativity from your life, to let purity, light, and joy into it.
How to tell fortunes for Easter 2021 at home
When to bless Easter cakes and eggs for Easter in 2021
Program of events for Maslenitsa 2021 in Yaroslavl
Maslenitsa 2021 in Moscow - program of festivities
Making a Maslenitsa doll from bast, master class with step-by-step photos
Homemade Maslenitsa made from bast is no longer a toy for a child. It is usually larger than a rag doll and always has a wooden base, most often made of birch. It was placed in the house so that the housewife could tie her memorial ribbons on it. Such a doll was placed either in the red corner or in the kitchen. This amulet is changed in the same way as all others like it - exactly one year later.
You will need:
- birch stick 35-40 cm long
- a skein of bast (you can buy it at a flower or hardware store; brushes for whitewashing trees are made from bast)
- rags or cotton wool for the head
- piece of white fabric
- colored patches for clothes
- red or white threads
Preparation method:
- Wrap the rag tightly in a white piece and use threads to secure the doll's head to the stick. The wooden base of the doll does not need to be cleared of bark.
- Form a body from a bunch of bast; to do this, carefully wrap the bast to the neck. All tails of fabric from the head should be completely covered.
- Make hands from a bunch of bast, tying it around the edges like candy. You can insert a small stick into this bun to stiffen it, but this is not necessary.
- Place your hands in the middle of the bast bundle and wrap them tightly, tying them crosswise with threads.
- Dress up the doll as your imagination dictates. You can make a braid from colored ribbons. A full skirt is a must. You can make a shirt for the doll from a piece of paper cut in the middle. An apron is also often worn. This doll's scarf is tied at the back.
Making a souvenir from a broom
And the simplest way to make our craft is considered to be using a broom. After all, all you need is to take a ready-made broom and dress it up. Here, look how beautiful it is.
- Make the braid from a thin broom, and the body itself from a voluminous one
- If you still have fragments from the broom, then put them together and make a small doll like this
- Take the broom as a base and use cotton wool and fabric to give it a shape
And be sure to watch the video on how to make such a souvenir. An excellent option for burning stuffed animals in the country.