The animated series My Little Pony features many colorful characters, but perhaps Rainbow Dash is the most memorable. Charming beauties living in Ponyville behave like girls: they make friends and argue, gossip and give each other compliments, follow fashion and the cleanliness of their hometown. In general, there is a lot to learn from cute ponies.
If your child asks you how to make a Rainbow pony from plasticine, use the tips given in this lesson and engage in exciting creativity with him. Rather, this copy object will be of interest to girls.
Other lessons on friendship is a miracle:
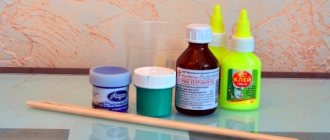
To work, you need a plasticine set, which contains all the colors of the rainbow: red, orange, yellow, green, blue, indigo and violet. And also small fragments will be made of black and white material. A plastic stack will help you make small cuts in the right places.
To sculpt the pony's head, prepare large and small blue balls.
Stick one ball on top of the other and turn the smaller piece into a bump. On the tubercle, mark the mouth and nostrils.
Prepare indentations on the face for the cute pony's huge eyes. To do this, pierce the plasticine in the right places with the back of the stack. Also make thin cakes from black, white and purple plasticine.
Put together adorable eyes like a sandwich. First stick black dots into the recesses, then white, purple, again black and two white dots. Frame your eyes with eyelashes.
Attach blue triangle ears to the head to finish it off.
To sculpt the body, prepare an oblong block. Make one side narrower and then bend it upward at a right angle to create the animal’s neck. Also prepare five matches to attach the head and four legs.
Make legs from small blue balls, stretching the parts into thin cones. Place a matchstick at the base of each leg as an anchor.
Attach the legs to the body with matches.
Add a head to the craft.
Make shaggy bangs, mane and fluffy tail from plasticine strips of different sizes and colors. It is necessary to reproduce the shades of the rainbow.
Attach colorful pieces.
Also, the fairy Rainbow should have wings. Make them from blue cakes, making small cuts in a stack.
- Attach the wings to the body.
- Attach an orange lightning bolt to the side - the insignia of the pony Rainbow Dash.
- The winged creature made of plasticine looks very cute; girls will definitely enjoy this lesson in sculpting their favorite cartoon character, conducted under the guidance of their mother.
Source: https://pulmix.ru/multfilmy/druzhba_eto_chudo/kak_slepit_poni_radugu_djesh_iz_plastilina_pojetapno.html
How to make a pony from plasticine, Pinkie Pie, from the cartoon “Friendship is Magic”
The cartoon about colorful ponies “Friendship is a miracle” is known to everyone. The heroes are no less famous. The main character is the pony Pinkie Pie, who introduces viewers to her world.
Therefore, we will tell you how to mold this horse using plasticine. Such activities are very interesting for the child, in addition, they help develop fine motor skills.
When preparing for modeling, you can prepare colored plasticine with your child, which will not harm the child’s health during the modeling process.
You will need: plasticine; modeling board; knives for plasticine; stacks; napkins; Step 1
Required Tools
Step 2
Parts
Step 3
Torso
Step 4
Legs
Turn the body over so that the neck is on top. We attach two pyramids to the lower part on the left. They should expand smoothly, so you don't need to press them too hard against your body.
We attach the remaining legs on the right side. Please note that your legs should be at the same level. Don't forget to smooth out the connection lines with the stack.
Step 5
Head
Step 6
Connection of the head with the body
Step 7
Base of the figure
At this stage we check Pinkie Pie's torso. Place the pony on a flat surface.
The horse must stand straight. If it's unsteady, straighten your legs.
Check the connection lines to ensure that parts do not accidentally become disconnected.
Step 8
Mane
For now, we leave the ponies and proceed to making the next parts. We will need a dark pink ball of plasticine. We divide this ball into two parts. One may be larger, we’ll start sculpting a mane from it.
We make a mane from one ball. It's similar to a mustache curl, but the left side is shorter because it's Pinkie Pie's bangs. The right side should be the same length as the neck.
Step 9
Tail
We turn the second ball into a tail. It is wavy and bends twice. The first bend is larger than the second.
Step 10
Attaching the mane
We attach the finished mane to the head. The lower part of the mane should lie on the back. You can press down lightly so that the part is securely fastened.
Step 11
Attaching the tail
We attach the tail to the pony's body. These details do not need to be smoothed, as the colors of the plasticine will mix.
Step 12
Eyes
Let's move on to the last part - the eyes. We divide the white ball into two parts and form small cakes from them. We also divide the blue ball into two parts. These cakes should be smaller and fit on white plasticine. The white color should be visible. We place very small black cakes on the blue plasticine. The eyes will turn out voluminous.
Step 13
Attaching the eyes
We attach the eyes to the left and right of the pony's head. Using a knife or stack, we form Pinkie Pie's nose and mouth. This must be done carefully so as not to spoil your head.
Step 14
Ready product
Pinkie Pie is ready. Double-check the connection of the parts, especially the eyes, mane and tail. Next time you can watch your child sculpt a pony on his own.
Source:
Source: https://ekran-stroka.ru/roscherk-03/3211-kak-slepit-iz-plastilina-poni-pinki-pai-iz-myltfilma-dryjba-eto-chydo
How to make a pony from plasticine
Materials you will need:
- Simple plasticine.
- Board for work.
- Sharp knife for plasticine.
- Stacks.
- Napkins.
Tools and their description
First, let's prepare everything necessary for the work process. We will need a huge ball of light pink plasticine, a small dark pink ball, tiny pieces of white, black and blue. Don't forget about the knife and the stacks. They will help when creating elements, for example, ears or mane. Let's lay out everything we need on our modeling board or on a piece of paper so as not to get the table dirty.
How to make a pony
Let's start our master class on creating pony crafts.
Divide the light pink ball into 9 parts. The first 4 must be the same size. We create cones from them. Let's make two more medium-sized balls and three small balls.
From one huge and one small ball we make the body of a pony. It is round, with one part of the body ending in a triangle - the neck. We will create the neck from a small ball. Having connected the elements, we smooth out the unevenness using a stack.
Let's turn the body over so that the neck moves up. We attach two cones to the lower particle on the left. They should expand slowly and evenly, so do not press them too hard against the body. We attach the remaining legs on the right side. Remember that your legs should be at the same level. Then you need to smooth out the connection lines with a stack.
Using the last light pink balls we will make a head. We will lengthen the huge ball, creating a muzzle. From small balls we will create ears in the form of triangles and connect them to the head.
- Attaching the head to the body.
Now we attach the horse’s head to the body. This must be done correctly so as not to spoil the appearance of our elements. There is no need to press the head tightly, otherwise the neck will become too short.
At this stage we will check Pinkie Pie's torso. Let's put the horse on the table.
Let's leave the ponies for now and start creating other elements. We will need a dark pink ball of plasticine. We will divide this ball into two particles. One will be larger, we will sculpt a mane from it. We make a mane from one ball. It looks like a curled mustache, only the left part is shorter, since it will be Pinkie Pie's bangs. The right particle should be the same length as our neck.
Let's turn the second ball into a tail. It will turn out wavy, bend it twice. The first bend is larger than the second.
We attach the finished mane to the head. The lower part of the mane will be on the back. You can press down a little so that the element is well secured.
We attach a tail to the body of the product. These elements should not be smoothed, as the colors of the product will mix completely .
Let's move on to the last one - the eyes. We will divide the white ball into two particles and create small cakes from them. We will also divide the blue ball into two parts. These cakes should be smaller and fit on white plasticine. The white tint should be clearly visible . Place very small black cakes on the blue plasticine. The eyes will then turn out big.
We will attach the eyes on the left and right to the head of the product. Using a knife or a stack, we will create Pinkie Pie's nose and mouth. We do this slowly so as not to spoil the toy’s head .
Pinkie Pie is done . Let's check the connection of the elements again, especially the eye, mane and tail. Using the same principle, you can step by step sculpt the pony Sparkle or Rarity.
If you want to watch a master class on sculpting these particular ponies, you can easily find video tutorials on the Internet.
And by the way, the ability to sculpt a pony from plasticine can also be useful to you in cooking - if you want to gradually fashion pony figures from sugar mastic to decorate a cake at a children's party.
How to make a “Friendship is Magic” pony from plasticine | Pony modeling master class
Before you mold a My Little Pony from plasticine, that is, one of the cute characters from the cartoon “Friendship is a Miracle!” “I would like to list the main characters of this so popular cartoon. As you understand, you can make any pony using analogues from our master class.
And if your child wants you to mold plasticine or help him make a rainbow pony, Fluttershy, Pinkie Pie or another pony, then you can do this easily and simply by completing the necessary elements that distinguish this pony from the rest. At the end of the article, after our plasticine MK, you will find pictures of all the heroines of this such an interesting cartoon for children. In the meantime, step-by-step instructions from our respected master.
See other interesting horse ideas with step-by-step MKs:
To make a little surprise for a girl who is a fan of the cartoon, we will need plasticine of several colors. From it we will make a cute pony in a funny hat named Applejack.
Plasticine pony: master class
So, first we need to make an oval body, a head, and four legs.
We connect these parts and smooth out the joints.
We make many thin strips from light plasticine and braid them. For ease of use, you can put the strips in the refrigerator for a while. We fix the braid on the head and make an elastic band at the end of the braid.
Next, we use three colors to make the eyes of the green-eyed beauty.
After that, we make bangs from the same thin strips and carefully arrange them. Next you need to make a hat. It is an oval and a small ball in the middle. We straighten the brim of the hat on our finger, raising it in front and lowering it in the back.
Next, we make ears from the triangle. Using a pencil, you need to make a depression in the center. Now we design the nose and mouth.
In the same way as the mane, we make the tail. You don’t have to braid it, but simply twist it several times and also decorate it with an elastic band.
If you make a pony from self-hardening plasticine, you will get a wonderful toy that children will definitely appreciate.
The seven main heroines of the cartoon “Friendship is a Miracle!”
| Pony Rainbow Dash |
| Sparkle |
| Pinkie Pie |
| Princess Rarity |
| Princess Celestia |
| Fluttershy |
| Applejack |
Source: https://mamaschool.ru/podelki-iz-plastilina/kak-sdelat-poni-druzhba-eto-chudo-iz-plastilina
Mastic pony
Characters from the cartoon "My Little Pony" will be a wonderful decoration for a birthday cake. It’s not difficult to make a little pony out of mastic; this master class will help you learn how to do this. You need to prepare:
- Mastic balls: three pink, one lilac or violet, two black and two white.
- Knife.
- Toothpick.
- Water to wet your fingers.
A pink ball is used to form the horse's head. You need to sculpt the nose, ears and mouth .
Make a body from the second ball of the same color, and make legs from the third, widened downward. There is no need to sculpt the hooves.
Attach the legs to the body, rubbing with your fingers the places where the connections of the parts are visible. Secure the head to the neck, then to the body, using a toothpick.
Make eyes from white balls. Stick circles of a dark purple hue on them, and place black dots in the center to create pupils.
To form the tail and mane, take the purple mass. Using a toothpick, create a textured surface reminiscent of wool.
Use the remaining fondant to make accessories in the form of hearts and flowers to decorate the cake. Similarly, you can make a pony figurine from other colors. It will look more realistic if the horse's logo is attached to the side.
Drawing Little Pony
Both adults and children love fairy tales, and each of us has our own favorite fairy-tale character. The animated series “Friendship is a Miracle” is considered an excellent educational example for children and shows the importance and value of friendship, but also develops the perception of aesthetics. After watching this cartoon series, many children and teenagers want to draw the characters they like, if you are one of them, then we will show you how to draw May Little Pony step by step. Let's start with Rarity.
In this article we will show you how to draw a pony:
- Rarity,
- Pinkie Pie,
- Rainbow Dash.
How to draw a pony - Rarity
What you will need:
- sheet A4 or A5;
- eraser;
- pencil with hardness from HB to B4 (optional);
- colour pencils.
First, let's draw Rarity's ear, outline of her head, and horn.
Making a plasticine toy
Beautiful plasticine ponies have always been popular. By following the standard recommendations for modeling techniques, you can understand how to make a pony from plasticine. The most important thing is to teach your child how to combine colors during the lesson. Description of work:
- Divide a block of plasticine of the same color into seven particles: head, neck, torso and four legs. Make a simple ball from a piece for the head, a cone-shaped one for the neck and an oval one for the body. Align all 3 elements, slowly leveling and smoothing the areas where the parts are attached.
- Start making the legs. For better stability of the craft, take four identical parts of the tube, which will have to be covered with plasticine. From below, create small horseshoes of a different shade. Hook your legs to your body.
- The most difficult thing in this work is the small elements: eyes and eyelashes. How to make a pony from plasticine with an unusual and funny expression on its face? Roll 2 small snow-white balls, give them a round shape, flattening them a little. This is the base for the eyes. Place two miniature black circles in the central part - these will be the pupils. Make a couple of thin eyelashes, and then the horse’s eyes will become brighter.
- Make two small ears from the triangular pieces. Make the mane and tail for the toy from several simple sausages of different lengths.
- Accessories. Each hero has his own special item that characterizes him. For example, for the pony Apple Jack loves apples: you can make a couple of beautiful apples for her, and magnificent wings for Rainbow. Job done, My Little Pony is done!
How to make a May Little Pony. How to make a pony from plasticine. Step-by-step master class
An animated educational series for children called “Friendship is Magic” tells about the adventures of miniature horses. Each of the horses has a bright color and fluffy mane.
This article will present several master classes with detailed instructions, after reading which young needlewomen will understand how to make a pony from “Friendship is a Miracle” out of plasticine.
Below is a selection of videos that will present methods for making the main and most famous cartoon characters from plasticine, and also needlewomen will show you their personal collections of plasticine miniature horses.
1 way
In order to make one of the cute miniature horses from the cartoon "My Little Pony", you will need plasticine of several colors, namely: brown, orange, pink, white and green.
First, you need to sculpt the main components from brown plasticine: an oval-shaped body, a head and four legs. Then all the prepared parts must be connected and the joints carefully smoothed out. Then you should cut out thin strips from the orange color and make a pigtail out of them.
It is advisable to put the twisted strips in the refrigerator for a while, then take them out and attach them to your head. You also need to make a hairpin from pink plasticine and attach it to the edge of the braid.
Next, you need to make a hat out of pink, to do this you need to first form a ball, give it an oval shape, then you need to straighten the brim of the hat.
After this, you should make two triangles out of brown, using a pencil you need to make indentations in the center, thereby creating ears for the future pony. Then you need to make an elongated nose and mouth, eyes. In the same way as the mane was done, the tail should also be done.
Method 2
In order to make another pony from the famous cartoon, you will need plasticine in pink, purple, white, black and blue, as well as matches or plastic tubes. Below we will describe the process of sculpting a pony step by step.
- First, you need to sculpt the main components of the pink color, namely: an oval-shaped body, a cone-shaped neck and a round head.
- Then the resulting parts must be carefully connected, smoothing the joints and pulling the front part of the pony's muzzle slightly forward.
- To make the craft stable, you can use either four matches, or cut a plastic tube into four parts, then cover each part with plasticine. Next, the legs need to be attached to the body, and to indicate the hooves, small sausages must be rolled out of purple plasticine and attached.
- After this, you need to make eyes from white and blue plasticine, make eyebrows from black plasticine, make a mouth from pink plasticine, and make ears from purple plasticine.
- In order to get a mane and tail, you need to form thin sausages out of purple and attach them in place of the mane and tail.
3 way
In order to make another cartoon character, you will need beige and pink plasticine, as well as a toothpick and a plastic knife. First, from beige plasticine, you need to roll a sausage about three centimeters long, one of the edges of which must be bent in order to mark the neck.
Then you should form a ball from the same color and stretch it out a little on one side to form a muzzle. To make the ears, you will need two small pieces of plasticine, which must be shaped into a flattened circle. After this, all the prepared parts must be connected, the ears attached to the head, and the head attached to the body.
Using a toothpick, you need to mark the lines of the nose and mouth. In order to get legs, you need to form four parts in the shape of a cone, cut the narrow parts diagonally using a plastic knife, and attach the legs to the body. Thin strips should be cut from pink plasticine and attached as a mane and tail.
At the final stage, you need to make almond-shaped eyes, and the product is ready.
One of the most popular shows for girls, My Little Pony has created six new children's idols. Applejack, Fluttershy, Rarity, Pinkie Pie, Rainbow Dash and Twilight Sparkle are charming little ponies living in a magical land.
Together they will cope with any villain, and will help everyone with the help of their wonderful magic of friendship. Surely young fans would not refuse a figurine of their favorite heroine. But making such a pony is not at all difficult. The main thing is to consistently follow each step of the instructions and not forget about your own imagination.
We will show and tell you how to make a pony from “Friendship is Magic” from plasticine in our article!
How to make a pony from “Friendship is a Miracle” out of plasticine will be discussed in this article.
Cheerful Pinkie Pie
The main color of the plasticine needed for this work is pink. There must really be a lot of it. Knead the plasticine in your hands, softening and warming it up. After this, divide the mass into parts: two balls and four oblong cones, from which the head, body and legs will then be molded.
Take a smaller ball and make a pony head out of it. Form a muzzle and ears, squeeze out with your fingers two symmetrically located shallow pits for future eyes. Use a plastic knife to mark the mouth.
Make eyes from small cakes of white, black and blue plasticine. Install them in a previously prepared place. Make eyelashes from thin threads of black plasticine and glue them to the edges of the eyes.
Using the second pink ball, roll into a sausage that tapers on one side. Bend the narrower end at a right angle and insert a match into it. Place your head on it.
Now attach four cones - hooves - to the body. You can also use matches or toothpicks as fasteners.
For the mane you will need a darker and richer shade of pink clay. In a pinch, red will do. Sculpt strands of hair and give them a wavy shape. Pinkie Pie has a curly mane, so try to make her hair fuller. Attach strands to your head and neck, throw it to the side. Make a ponytail in the same way.
All that remains is to make the insignia, which is on the side of each pony. Pinky has three balloons. Make them from flat small cakes of blue and yellow plasticine and glue them onto the side of the pony.
Fast Rainbow Dash
Here you will need a complete set of plasticine, including all the colors of the rainbow, and especially blue.
Let's start with the head. Roll two balls from a piece of blue plasticine - large and small. Glue them together and turn the small ball into a bump on the surface of the large ball. Draw a line for the mouth on the tubercle and indicate the nostrils.
Prepare indentations for the eyes on the pony's face. For convenience, use a stack. Make eyes from black, white and burgundy plasticine. First, place white plasticine pancakes into the recesses, then burgundy, again black and two white spots indicating highlights. Surround the eyes with cilia made of thin flagella. Place your ears in the form of triangles to your head.
How to make a pony from plasticine
Both girls and boys will want to know how to sculpt a pony from plasticine. Every child will be interested if he is given the opportunity to mold his own little animal from plasticine, and then name it. There is no need to make the horse one-on-one , like a cartoon character. You can choose the color scheme at your discretion.
Materials required for sculpting
To make a plasticine pony you will need the following:
- Plasticine, preferably wax. You can take any other mass for modeling.
- Stack.
- Sticks for making legs.
- Oilcloth or special board for modeling.
The procedure for making crafts
It is necessary to follow the basic rules of modeling technique in order to understand how to make a pony with your own hands. The creative process will help your child learn to combine colors. For example, you need to choose shades for the elements of the craft so that they match the color of the body. You can use a color compatibility map.
- Take a block of plasticine and divide it into 7 parts to make the head, neck, torso and legs.
- To make the head, you need to roll a ball out of plasticine. Make a cone-shaped blank for the neck, and an oval one for the body.
- Glue the resulting parts together and smooth out the joints.
- To make the legs, you need to take sticks and cover them with plasticine. Make small horseshoes from a material of a different shade. Attach the legs to the body.
- When designing a head, the most difficult part is creating small details such as eyes and eyelashes. To make the expression of a pony's face funny and cute, you first need to roll two balls of plasticine and lightly press on them to give them an oval shape. This is a blank for making eyes. You will get a pupil if you stick a black circle in the middle of the oval. Then roll it up and stick on the eyelashes to make the look expressive. Make ears from small triangles.
- Make the tail and mane from thin sausages of different lengths, formed from plasticine.
- Make accessories. Each cartoon character has certain objects that characterize him. For example, small apples are suitable for the Apple Jack pony, graceful wings for the Rainbow and a six-pointed star for Sparkle.
how to sculpt a pony from plasticine, friendship is a miracle for children PHOTO
Plasticine stucco molding has a very good effect on the development of children; when sculpting, hand motor skills , attentiveness, perseverance, and mental thinking develop, since the child has to use all his imagination to mold something similar to what he sees around him and what he likes , but at the same time individual, like sculpting a pony out of plasticine.
Like many children, my youngest daughter is very interested in a cartoon about ponies. I don’t really understand the names of the characters in this cartoon and what it’s about, although I saw out of the corner of my eye and understand that it’s about kindness and friendship, so I don’t forbid her to watch it sometimes.
In fact, I’m against children spending hours near the TV or computer, and that’s why I came up with this game: if you want to watch some kind of cartoon, or play a computer game, you have to blind or draw the characters of this film or game, as much as possible similar to the characters.
how to sculpt a pony from plasticine
What is needed for sculpting
For modeling, of course, you need plasticine. There are several types of plasticine. Regular plasticine, which is suitable for children over three years old and is used in lessons in schools.
There is sculptural plasticine, it is more suitable for art schools and professional sculptors, since it is less viscous and less susceptible to heat.
Also now there are lightweight plasticines that do not sink in water, springy ones that bounce off the floor like a ball when they fall, and a completely new ball-based one, consisting of many small balls. Plasticine also varies in color, from ordinary colors to fluorescent, very bright ones.
We decided to buy regular school plasticine, but with a richer color, which my daughter immediately began to break and sculpt into figures.
without letting me take a photo of the whole thing in the box. You will also need some kind of board, oilcloth or sheet of paper on which the child can sculpt without getting the table dirty.
After modeling is finished, be sure to wash your hands .
Let's make a pony
This time we agreed that we would show how to sculpt a pony out of plasticine. Friendship is a miracle. When my daughter made three ponies and brought them to me, I only realized that I had not photographed how she sculpted them, because the details are very small, and this is interesting.
I had to ask her to make another one, to which she happily agreed and made a pony to match the color of the tricolor (she says so, she heard it from an advertisement on TV).
It's amazing how a child can sculpt such small details. She started with the eyes, first making the whites.
Then I rolled it out
black plasticine in a thin roller
and made eyelashes and a pupil out of it. We got eyes.
This was the end of my observations. I had to urgently go on business. When I returned home later, all the details of the pony were ready. All that remains is to put everything together.
I got a little creative and stuck on a horn like a unicorn.
In general, there is something about unicorns that children love, since my eldest daughter also loved to draw and sculpt unicorns as a child.
Share the article on social media. networks:
Source: https://7ya-i-ya.ru/detskie-podelki/lepim-poni-druzhba-eto-chudo.html
How to make a rainbow pony out of plasticine.
Pony Rainbow is a cute pony from the girls’ favorite TV series “Friendship is Magic.” Of course, the main characters sometimes quarrel with each other, act up, and generally behave like real princesses. Despite the fact that all these babies are miniature horses, they are perceived by girls as young ladies and beauties. In this lesson we offer you a guide to sculpting a Rainbow pony from plasticine. Be sure to offer this interesting activity to your girl. We are sure that the baby’s joy will know no bounds, because it is much better to create your favorite toys with your own hands than to buy ready-made ones.
To sculpt the Rainbow pony you will need:
- basic blue plasticine;
- additional colors of plasticine of all colors of the rainbow;
- White and black;
- matches.
1. In principle, all the cute ponies - the heroines of your favorite cartoon - are sculpted almost the same way. You just need to get your bearings in terms of the color and shape of the mane, and then choose suitable blocks from a plasticine set and sculpt the same parts. Knead the blue plasticine and create small portions, the size of which is suitable for sculpting the head, torso and four legs of the cartoon. And also, you may want to make wings for your fabulous Rainbow, then you will have to provide the necessary amount of plasticine for this too.
2. Pull the plasticine into a long tube, gradually narrowing one side. Then gently curve to show the neck.
3. Attach a small, slightly elongated head to the neck.
4. Make the front and back legs: these will be narrow cylinders and backward curved pieces respectively.
5. Prepare multi-colored plasticine brushwood. At this stage, you should use all the colors of the rainbow to create a distinctive feature - the bright mane and tail of the Rainbow pony.
6. Attach the legs to the body. You will need matches here.
7. Attach a multi-colored tail to the back - gather several bright twigs into a bun.
8. Also collect sticks of slightly shorter length into a bun for bangs. Attach your bangs to one side and curl them slightly upward.
9. Stick one eye to your head. In principle, a pony should have two of them, but since the second eye will still not be visible behind the bangs, it can be omitted. Place blue and black ones on a white cake. The heroine's eyes should be big.
10. Attach small wing cakes and the Rainbow insignia - an orange lightning bolt - to the side.
11. Add a mane to the neck.
The bright and memorable pony Rainbow, a favorite cartoon for little girls, is ready. And we did it in a few simple steps that are worth repeating.
If you find an error, please select a piece of text and press Ctrl+Enter.
DIY pony | Crafts for children
The children called my wonderful horses ponies! Only later did I understand why, it was thanks to the cartoon My little poni - Friendship is a miracle.
The cartoon is very beautiful and kind, the action takes place in a magical land inhabited by ponies, pegasi, unicorns, alicorns and other mythical creatures.
They all have magic and some interesting stories happen to them all the time. To be honest, even I like this cartoon, and children even more so...
How I sewed a pony:
Initially, I sewed horses, but they also look a little like unicorn ponies. I used felt, fleece would also work.
Here you can download the pony horse pattern.
Cut out 2 main parts - the body and head and 4 legs. Unfortunately, the patterns do not include one more detail - a circle that needs to be sewn into the base of the hoof. It will give the horse stability and it will be able to stand without support.
For the mane and tail, I tried two options - yarn and felt. In my opinion, yarn is more durable, and felt is more attractive, it's up to you to decide. Yarn is probably better for children - it does not deform when washed and better retains its original appearance. I sewed several strands with one stitch using a backstitch.
- The legs are sewn on like a hinge, with buttons; they can move in different directions.
Plasticine pony. Applejack
Tags: Plasticine, from 5 years old
Our little children in their magical children's world have many favorite fairy-tale characters, whom they may have invented themselves, or fell in love with after watching some cartoon.
The heroine, the basis for our today's creativity, is the bright pony Applejack, from the cartoon “Little Pony”. You will say this character is for girls. But after watching our master class, you will be able to sculpt a thoroughbred horse for fighting in battles or for racing for your sons..
So, we will need the following materials:
Plasticine in the following colors:
Orange (we combine red with yellow), yellow, brown (mix black with red and white), red, green, black, white,
Stack, 2 toothpicks
So, let's begin:
From orange plasticine we roll a larger, medium-sized ball for the muzzle, as well as two small balls for the ears. For the body we sculpt a large oval and four sausages for the legs
To make ears: press down small balls and form a triangle shape.
For the muzzle, connect the large ball to the middle one and smooth out the joints.
We divide the toothpicks and insert them where the body parts should be attached: the head and legs.
To make the eyes we need a little bit of white, green and black plasticine. Roll balls from the flowers listed and press them down a little. On the white circle we place a green circle that is slightly smaller in diameter, moving it to the outer corner of the eyes and we put a black circle in the center.
How to make a landscape from plasticine? (picture on the left) - read here.How to make a mask from plasticine?
Crafts using plasticineography technique (we draw palms), here.
We form the body of the horse: we place the head and 4 legs on toothpicks and smooth out the joints of the parts (the left front leg is slightly raised).
Applejack's hairstyle is very simple: for this we roll three droplets of different sizes, a large droplet for the tail, a slightly smaller one for the mane, and a small one for the bangs and two small droplets to attach to the tail and mane.
Using a stack, we make cuts on the bangs and ends of the mane and tail.
Applejack decorates her hair with elastic bands that we make from thin red sausages.
Also, our fashionista never parted with her cowboy hat: we twist two brown balls and press them with different forces, we make a cutout in the shape of a semi-arc on the brim of the hat, you can use a pen cap.
Applejack's family lives on a farm and they grow apples. And the little pony often treats her friends to apple baked goods. Making an apple is very simple: take a red ball, attach a brown sausage branch, and a green leaf from a droplet. We attach our apple to the leg, which is slightly raised.
And don’t forget to highlight our horse’s smile with a stack.
So we created a playmate for our children.
comments powered by HyperComments
Other materials in the section
DIY New Year's train made from plastic dishes + game with tasks
New Year's origami. Origami Christmas tree, star, snowman and Santa Claus
Plasticine cow
How to sculpt a pony Sparkle from plasticine step by step
Svetlana · June 8, 2016
Plasticine Sparkle
The series “Friendship is a Miracle” won the hearts of little girls. The unusual heroines - ponies presented in the cartoon - are perceived as real princesses: they have a beautiful colored mane, large naive eyes and their own insignia.
Naturally, a small figurine of any pony is a desired gift for a child. You can make such a toy with your own hands from plasticine. All information is presented below.
In principle, all ponies are made the same way, you only have to change the colors of the plasticine to sculpt the body, mane and tail, and also draw different insignia.
Materials for sculpting the Sparkle pony:
- pink, lilac, purple and fuchsia plasticine;
- a little white, black and blue plasticine to decorate the eyes;
- stack;
- matches.
Stages of sculpting the Sparkle pony figurine:
Prepare the plasticine and start sculpting the head of the pony Sparkle
- If you look at the pony Sparkle, you can see that her body, head and legs are lilac, her mane and tail are purple with a bright pink stripe. We select the necessary shades of plasticine.
- First, you should divide the lilac block into parts in order to rationally distribute the mass. A 1cm wide piece is approximately enough for 2 legs/2 wings/head. You should cut off four portions of approximately the same size, and use the remainder to sculpt the torso and neck.
- Start creating the craft from the head. Roll into a ball.
- Grab the plasticine on the ball with three fingers and draw out the tubercle - the nose. Use a stack to make holes for the eyes.
We make the eyes and attach the head to the body
- Fill the hollows of the eyes with white cakes. This will highlight the big eyes of the cute pony.
- Next, start layering dark cakes, highlighting the pupils. Attach the blue iris cakes first, then the black pupils, using two pieces to make round highlights for each eye. Very thin black threads are suitable as eyelashes.
- Turn the largest portion of plasticine into a carrot. Bend the part to create a torso and neck. Insert half a match into the top point.
- Connect the head to the neck using a match designed to securely attach.
We make the pony's legs and attach them to the body
- Make the front legs in the form of regular sausages, slightly widening towards one of the edges - the hoof. Insert a match into each leg from the narrow edge.
- Attach the front legs to the body using the tops of matchsticks.
- The hind legs should be slightly bent (simulating a hock), but matches should also be hidden inside for strength and subsequent attachment to the body.
- Attach the hind legs to the craft.
We do the hair and attach the wings
- To sculpt the bangs, mane and tail, cut about 2 cm from the purple block. Make the base of the parts purple. You need to create flat triangular cakes and stick pink stripes on top of them.
- Using a stack, draw the structure of the hairs.
- Attach the details. Use the smallest one for the bangs, the medium one for the tail, and the largest one for the mane (attaching it to the back of the neck and bending it to one side).
- Make lilac wings from the remaining portion of plasticine.
Attach the ears and horn to the face, and the wings to the back of Sparkle the pony. Stick her insignia - a red star - on the right side of her thigh.
Plasticine pony Sparkle
Sweet pony is ready. In this color scheme we got Sparkle. If we use blue plasticine and seven famous colors, we get Rainbow, yellow and orange - Applejack, blue and purple - Rarity. All you have to do is buy more plasticine, and you can create a whole Ponyville!
Shared master class
Elena Nikolaeva
Source: https://hobby-mk.ru/poni-iz-plastilina-iskorka/
How to make a pony
Let's start our master class on creating pony crafts
.
- Parts.
Divide the light pink ball into 9 parts. The first 4 must be the same size. We create cones from them. Let's make two more medium-sized balls and three small balls.
- Torso.
From one huge and one small ball we make the body of a pony. It is round, with one part of the body ending in a triangle - the neck. We will create the neck from a small ball. Having connected the elements, we smooth out the unevenness using a stack.
- Legs.
Let's turn the body over so that the neck moves up. We attach two cones to the lower particle on the left. They should expand slowly and evenly, so do not press them too hard against the body. We attach the remaining legs on the right side. Remember that your legs should be at the same level. Then you need to smooth out the connection lines with a stack.
- Head.
Using the last light pink balls we will make a head. We will lengthen the huge ball, creating a muzzle. From small balls we will create ears in the form of triangles and connect them to the head.
- Attaching the head to the body.
Now we attach the horse’s head to the body. This must be done correctly so as not to spoil the appearance of our elements. There is no need to press the head tightly, otherwise the neck will become too short.
- The main part of the figure.
At this stage we will check Pinkie Pie's torso. Let's put the horse on the table.
- Creating a mane.
Let's leave the ponies for now and start creating other elements. We will need a dark pink ball of plasticine. We will divide this ball into two particles. One will be larger, we will sculpt a mane from it. We make a mane from one ball. It looks like a curled mustache, only the left part is shorter, since it will be Pinkie Pie's bangs. The right particle should be the same length as our neck.
- Creating a tail.
Let's turn the second ball into a tail. It will turn out wavy, bend it twice. The first bend is larger than the second.
- Attaching the mane.
We attach the finished mane to the head. The lower part of the mane will be on the back. You can press down a little so that the element is well secured.
- Attaching the tail.
We attach a tail to the body of the product. These elements should not be smoothed, as the colors of the product will mix completely.
.
- Creation of eyes.
Let's move on to the last one - the eyes. We will divide the white ball into two particles and create small cakes from them. We will also divide the blue ball into two parts. These cakes should be smaller and fit on white plasticine. The white tint should be clearly visible
. Place very small black cakes on the blue plasticine. The eyes will then turn out big.
- Attach the eyes.
We will attach the eyes on the left and right to the head of the product. Using a knife or a stack, we will create Pinkie Pie's nose and mouth. We do this slowly so as not to spoil the toy’s head.
.
- Ready product.
Pinkie Pie is done
. Let's check the connection of the elements again, especially the eye, mane and tail. Using the same principle, you can step by step sculpt the pony Sparkle or Rarity. If you want to watch a master class on sculpting these particular ponies, you can easily find video tutorials on the Internet. And by the way, the ability to sculpt a pony from plasticine can also be useful to you in cooking - if you want to gradually fashion pony figures from sugar mastic to decorate a cake at a children's party.
Gallery: plasticine pony (25 photos)
How to draw a pony Rarity (from the film Friendship is Magic)
Welcome, my friend, to a blog with drawing lessons for everyone!
In this lesson I will show you how to draw the pony Rarity from the cartoon My little Pony (Friendship is a miracle!).
To draw a sketch you will need a piece of paper, a pencil and an eraser, and for coloring - colored pencils, paints or felt-tip pens, whichever you prefer.
The lines that need to be drawn in this step are marked in red.
1. Let's start with the head. Outlining the shape.
2. Now we will show the nose, neck and mane of our pony.
3. We continue to draw the mane, and also outline the eyes, ears and horn.
4. Now we draw the torso and hooves.
5. Draw the tail. Let's make it curled.
6. Last step! All that remains is to color our beautiful pony with colored pencils, paints or felt-tip pens. You can follow my scheme, or you can be creative and choose the colors yourself.
Here we have such a beautiful pony Rarity.
Many amazing books and coloring pages about ponies from My little pony can be found here.
I hope you enjoyed this tutorial! All creative success!
Source: https://web-paint.ru/kak-narisovat-poni/kak-narisovat-poni-rarity-iz-mf-druzhba-eto-chudo.html
How to make a pony from “Friendship is Magic” from plasticine: funny Pinkie Pie
The main color of the plasticine needed for this work is pink. There must really be a lot of it. Knead the plasticine in your hands, softening and warming it up. After this, divide the mass into parts: two balls and four oblong cones, from which the head, body and legs will then be molded.
Take a smaller ball and make a pony head out of it. Form a muzzle and ears, squeeze out with your fingers two symmetrically located shallow pits for future eyes. Use a plastic knife to mark the mouth.
Make eyes from small cakes of white, black and blue plasticine. Install them in a previously prepared place. Make eyelashes from thin threads of black plasticine and glue them to the edges of the eyes.
Using the second pink ball, roll into a sausage that tapers on one side. Bend the narrower end at a right angle and insert a match into it. Place your head on it.
Now attach four cones - hooves - to the body. You can also use matches or toothpicks as fasteners.
For the mane you will need a darker and richer shade of pink clay. In a pinch, red will do. Sculpt strands of hair and give them a wavy shape. Pinkie Pie has a curly mane, so try to make her hair fuller. Attach strands to your head and neck, throw it to the side. Make a ponytail in the same way.
All that remains is to make the insignia, which is on the side of each pony. Pinky has three balloons. Make them from flat small cakes of blue and yellow plasticine and glue them onto the side of the pony.
How to create a quick Rainbow Dash in a master class
Here you will need a complete set of plasticine, including all the colors of the rainbow, and especially blue.
Let's start with the head. Roll two balls from a piece of blue plasticine - large and small. Glue them together and turn the small ball into a bump on the surface of the large ball. Draw a line for the mouth on the tubercle and indicate the nostrils.
Prepare indentations for the eyes on the pony's face. For convenience, use a stack. Make eyes from black, white and burgundy plasticine. First, place white plasticine pancakes into the recesses, then burgundy, again black and two white spots indicating highlights. Surround the eyes with cilia made of thin flagella. Place your ears in the form of triangles to your head.
Make the body of the pony from a cylinder tapering towards the end. Bend the narrow tip up - this will be the neck. Prepare five matches to secure the head and legs.
Sculpt the legs ending in hooves. Place a match in each leg.
Using matches, connect the head and limbs to the body.
It's time to create a rainbow! Make bangs, mane and tail out of rainbow shades. Collect multi-colored flagella of different lengths together in the order of rainbow colors. Attach the pieces to the main craft.
The rainbow flyer must have wings. Cut them out of blue cakes and stick them to the figure.
Don't forget about the insignia - lightning. Make it from yellow plasticine and glue it on the side.
Let's try to make another pony: hardworking Applejack
To make an apple-loving farmer, stock up on orange and yellow plasticine.
As always, we start with simple geometric shapes. Make an orange ball and then stretch it into an oblong “carrot”. Bend the sharper end upward. The body is ready.
Prepare a few more details: front and hind legs, and head. For the head, take half as much plasticine as for the body. Roll the ball, draw out the nose and ears. Cut out indentations for the eyes. Applejack's eyes are green, which means you need green plasticine. Consistently collect the eyes, add black eyelashes. Draw a stack of mouth and nostrils. Put all the pony parts together.
Now it's the mane's turn. Using yellow plasticine, roll out a thick sausage and shape it into a ponytail. Make bangs from short flagella. Make the tail from a voluminous roller and tie it with a red elastic band.
Glue three apples onto the side of the pony - a badge of honor. And where would Applejack be without her cowboy hat? Make it out of brown plasticine.
And how to gradually mold other characters from this kind and fabulous cartoon, you will learn from the following videos.