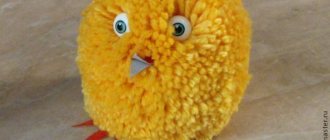
Increasingly, you can find handmade dolls in homes. For those who are interested in making toys, a master class on making eyes will be useful.
In a store where it would seem you can buy eyes for crafts, it is difficult to find a finished part. The work doesn't take much time.
Selecting material for work
The material used for the work is affordable. For the most part, all the necessary elements for work are found in every home.
Plastic spoons
The easiest way to make eyes is to use oval scoops from disposable plastic spoons. This item is suitable for a large soft toy and a large doll.
The work doesn't take much time. The surface of the oval part of the spoon is sanded, which will enhance the adhesion of acrylic paint.
The part is mounted on double-sided tape and is used to attach it to the surface of the cardboard. Future eyes are ready to be decorated with acrylic paints.
The first layer is a white tone. Next, green or blue outlines of the irises are depicted.
The pupils and the outline of the iris are painted in black. White paint is used for the highlights, and flesh-colored paint is used for the eyelids. The work is done.
Felt
The photo shows how felt is an excellent material for making eyes for crafts. These details are used to complete the look of handmade dolls.
- You need to stock up on: a piece of felt, cardboard, Moment adhesive base, small scissors, a simple pencil.
The desired eye shape is drawn on cardboard - this will be one cardboard template. The inside of the eye is drawn in a smaller size - this is the second template.
Eye stencils for crafts are cut out along the contour. A pupil is cut out on one of the templates. A blank is cut out of white felt to form the shape of an eye along the contour of a large template.
Using the dimensions of a smaller template made of green or blue felt, the inner part of the eye is formed for crafts. Two felt parts are connected to each other with glue.
Contours are drawn with a black felt-tip pen. The eyelashes are glued “instantly”. The work is done.
Epoxy resin
Beautiful eyes are made using epoxy resin. The starting material is diluted in accordance with the instructions. For tint, ink from gel pens is added. Any color can be selected.
It is necessary to prepare empty transparent containers for pills and baked plastic pupils. The black pupils are placed in a container of tablets and filled with epoxy resin.
You can use a toothpick to direct the pupil to the desired location. The parts are left in this state for 48 hours until completely dry.
After time, the container is cut strictly along the contour. You can match the eyelashes to your eyes.
Yarn and glue
You can quickly and easily make a part using yarn and glue. You don't need a lot of thread. A strand of yarn is laid out in a spiral to form a circle. This is the base of the eye.
There is a small black circle on top. Everything is covered with a drop of Moment glue. It is suitable for work because of its transparency. Leave to dry. The last step is to remove the excess strands of yarn with scissors.
Buttons and fabric
Round or oval buttons are also used to make eyes for crafts. The design is done with acrylic paints. Beads are painted using the same principle.
- To make the eyes, leather and fabric are used according to the method of working with felt.
Paper and glass stones
Volumetric eyes for handmade crafts are made of paper and glass stones.
A paper blank of the iris is made. The desired color is selected. Before you print out eye irises for crafts, you need to make sure that the diameter of the workpiece will not be larger than the glass stone.
Decoupage glue is applied to the flat part of the stone. The iris blank is applied with the front side to the surface of the stone with glue. Leave until dry.
It is important to use decoupage glue when working. It will not affect the transparency of the stone and will not distort the design.
A thin layer of glue is again applied to the dried surface. Threads of yarn are laid out on it, everything is covered with a white sheet.
You need to press it onto the paper with your finger so that everything sticks well. It takes some time to dry.
Excess paper and threads are cut off along the contour of the stone. You can use the eye blank for crafts.
Clay
Flat eyes are made from polymer clay. The material is rolled out and the desired eye shape is squeezed out of it. The parts are baked. Later they are painted with acrylic paints.
Before making eyes for crafts in volume, the clay is formed into balls and divided in half. Next, the material is baked and the iris is painted, and a black pupil is applied.
Crochet
Needlewomen crochet eyes. Such parts are used for knitted and soft toys.
Eyes for garden crafts
For garden crafts, plastic lids are used, which are decorated with paints.
You must first cut out the shape of the eyes from foam plastic, and only then apply the entire design. But since garden crafts are left outside for the winter, the old eyes will need to be replaced with new ones in the spring.
- It is possible to make decorative eyes for crafts in different ways using available materials and imagination.
Photo of a peephole for crafts
Did you like the article?
Source: https://podelki.org/glazki-dlya-podelok/
Step-by-step instructions for “doll” eye makeup
The main emphasis in this makeup is on the eyes. The doll has huge, wide-open, slightly surprised eyes. This is exactly the effect you need to achieve. Of course, a professional makeup artist will quickly and successfully solve this problem, but you can make eyes like a doll’s at home. This effect is achieved in several stages:
- For the base, light shadows are selected, which are applied to the entire eyelid. The lower eyelid is covered with white shadows, this will open up the eyes;
- Be sure to apply eyeliner. The upper line appears clearly along the entire length of the upper eyelid and extends beyond the upper edge, heading upward. Below the lash line of the lower eyelid, a second line is drawn, its curve goes down. This eyeliner will make your eyes slightly slanted and visually enlarge them;
- Now darker shadows are applied to the outer corner of the upper eyelid and slightly shaded. For eyelids, you can use a varied color palette. The main goal is to maintain the almond-shaped cut, so the outer corner should be much darker than the inner one. It is necessary to apply shadows up to the eyebrows, right up to the temples, seeing the line of eyeliner and applying shadows. This makeup can be viewed in more detail in the video at the end of the article;
- Glue on false eyelashes. If they are not there, then black mascara is applied in several layers. Before this, you should curl your eyelashes with special tweezers. In this case, you can first powder your eyelashes, then cover them with mascara, then powder and cover them again until you achieve the desired effect. When the eyelashes are dry, you should comb them thoroughly with a special brush to remove any lumps.
IMPORTANT TO KNOW: How to make foundation: lighter or darker?
Doll eye makeup will not look perfect without a doll look. Because everything should be harmonious: face, hairstyle, clothes and makeup.
MK. EYES FOR DOLLS. TWO OPTIONS
There are now a lot of tutorials on the Internet for making eyes for dolls. I decided to add my own version of the eyes.
- We will need:
- 1. Colored plastic
- 2. Sharp knife or scalpel
- 3. Sandpaper
- 4. Acrylic paints
- 5. Clear nail polish
First we will need cyan and blue plastic to make the iris.
Roll out a flat cake from blue plastic, and roll a “sausage” from blue plastic,
which we will wrap in a flatbread...
... and roll it well on the table to get a cylinder.
Bake the workpiece in the oven, but set the temperature a little lower than indicated in the instructions, since the plastic is thin and can burn quite quickly. I set the temperature to 120°, because... The diameter of my workpiece was 12mm.
Features of “doll” eye makeup
If previously the plastic Barbie doll was especially popular, now she has become the main character of many animated films and her popularity has skyrocketed. She is admired not only by little girls, but also by quite adult women. Therefore, the popularity of the “doll eyes” style in makeup continues to grow.
This style of makeup can hardly be called natural, which is why it has many opponents; some people consider it particularly vulgar. But everyone has their own taste, so there are more and more fans of the “Barbie style”.
Doll eyes look quite expressive, but they are more suitable for young girls and young women, adding sweet spontaneity and femininity to them.
This type of makeup is not suitable for all representatives of the fair sex. For example, such eyes would not look entirely appropriate on women of Balzac’s age or with a strong personality. The doll does not have a distinct character, so bright personalities should not use this style.
IMPORTANT TO KNOW: Satin lipstick: pros and cons, photo examples of use
Despite the fact that Barbie is blonde, girls with a different hair color can use this makeup, they just need a different color palette.
How to make eyes for nylon dolls from ordinary buttons
Dear lovers of nylon dolls, once upon a time I was asked to do a master class on how I draw eyes for dolls. I finally got it together) I hope you find my method of creating button eyes useful.
I use the following materials and tools:
- buttons
- acrylic paints
- toothpicks
- nail polish (white and clear)
- tassels
- pencil
- stencil ruler
These are the buttons I use for doll eyes. If the button has a protruding leg, then you can bite it off with wire cutters.
Cover the buttons with white nail polish. For 2–3 layers. Dry it well.
Using a stencil ruler, draw a circle with a simple pencil, which we will then paint.
We take acrylic paints. Use the main color (green, blue, brown) to paint the circle...
...without allowing the main color to dry, we take white paint and, starting from the center, highlight our iris. Due to the fact that the main color has not yet dried, it mixes with white.
The upper left part of the iris can be made a little darker, and the lower right part a little lighter. In the process, you have to work alternately with dark and white paint to achieve the desired effect.
Dry the paint and draw rays on the iris.
On blue eyes it will be blue and white, on brown eyes it will be yellow and brown.
Draw a pupil in the center with black paint. Since the white base is varnish, we can easily correct the contour of the iris by carefully wiping off the excess with a wet cotton swab wrapped around a toothpick.
You can't get doll eyes without a doll face.
Barbie has a delicate, smooth face, so for the doll's eyes to look good, the face must be perfect. This can be achieved using conventional makeup techniques:
- Cleansing and moisturizing the face with special products;
- Leveling the tone using a corrector;
- Applying makeup base;
- Applying a light-colored foundation;
- Dust with transparent powder.
IMPORTANT TO KNOW: Makeup for green eyes for prom: the secret of how to disarm anyone with a look
Blush is not used in this case. It is possible to use a different range of foundation to give the face a visual oval shape.
Making live eyes for toys
For the first time I saw such eyes in 2021 on toys of a famous master. I was surprised how realistic and cool they look. I found a craftsman who makes and sells them. Price per pair - from 100 to 1000 rubles,
depending on the size, I was a little confused.
I understood that it was essentially a picture + a piece of glass
. Actually, I have used glass eyes on metal legs before. Here is an example of a knitted bear with regular eyes. Not bad either, but not the same. Such eyes cost from 150 rubles.
For testing, I bought the most ordinary cabochons for scrapbooking and tore off pictures from them. A pack of 5 pairs cost a little more than 100 rubles. Now I’m buying packs of these transparent pieces of glass from Ali. Price per pair - 3 rubles
, or even less, depends on the size.
Now - the most interesting part - the glue.
What have I not tried! And instant gel, and epoxy resin, and instant glue - nothing worked. Bubbles would come out, the glass would fall off the picture, or the eyes would become cloudy. In the end, I accidentally found it - UHU glue, and it fit perfectly.
Now about the technology:
I print pictures on a regular inkjet machine, the paper is the smallest gram (thin), glossy.
Irises can be found on the Internet, no problem at all. I print whole sheets, I love it when there are a lot of ready-made eyes, you can share with someone and choose different ones for a toy. Sometimes the most unexpected color is perfect.
There are, roughly speaking, two types of glass cabochons: hemispherical and half-thin. The photo clearly shows the difference.
See how both options look on toys: here is a hemisphere, they come out with a tracking effect. No matter what angle you look at, the eyes are watching you.
these are bulging hemispherical eyes
There is a photo master class on this toy here.
But the eyes are less prominent. With them the look turns out more natural, it seems to me.
and here the eyes are less prominent.
You can watch a master class on such a face here
Now let's move on to gluing.
— The workpiece must be degreased and dried.
— Drop a drop of glue onto the printed picture,
not the other way around! — Carefully place the glass cabochon on a drop of glue
- Press lightly, but do not press. Otherwise, the glue will simply spread around the edges, and there will be a bubble in the center of the eye.
- Leave to dry for 1-2 hours. Better - for a day. This is what a dried eye looks like. The glue around the edges is almost invisible.
Cut with sharp scissors so that the paper is not visible at the edges. Here is the Cheshire cat's eye, completely ready for work.
And here are the eyes on the husky dog. They are also waiting in the wings. By the way,
Blue eyes 10mm, cat eyes 12mm
if you want to sew on the eyes and not glue them to the toy, then you need to make a loop leg. Such accessories are also sold on Ali or in jewelry stores. It looks like a metal platform with a wire leg.
You can glue it with instant glue, or with the same UHU. I work with the eyes by inserting them into the plastic base. A detailed tutorial on the toy is here. Therefore, I don’t need legs for sewing.
I hope the master class will be useful to you, and your toys will have bright eyes!
Subscribing
and liking the article are very pleasant for me!
Source: https://zen.yandex.ru/media/id/5aee0541799d9d07601545d8/5be6b4db1989d400a9b18bb2
glass eyes from cabochons for toys. Master Class
- Today I will show you how to make eyes that are perfect for felted toys and teddy animals.
- This master class is for information purposes, and I will be glad to receive advice, especially from experienced craftsmen who work with cabochons.
- We will need:
- - round cabochons of the required eye size;
- - base for stud earrings;
- - a printout of the iris of the eyes of the same size as the cabochon (I have it printed on regular paper, I suspect that you can use photo paper and thus achieve greater clarity, I would be glad if someone shares their experience);
- — my glue is titanium (UHU, E6000);
- — 6 minutes of free time;
- - scissors, toothpick.
I cut out circles - irises. I degrease the flat side of the cabochon with an alcohol-containing liquid, apply a thin layer of glue (with a toothpick) and firmly press the cut out iris “face” to the glue. My glue allows me to perform maneuvers for some time. I press it, move it in a circle if bubbles form. I make the second eye in the same way.
I wait a minute for the glue to set. The waiting time depends on the glue. Let's make a "leg". Here I make it simpler - I dip the base plate for the earrings in glue and press the eye to the glued piece of paper. Excess glue can be smoothed out with a toothpick.
Let's dry! And we are happy with the result. It took me 6 minutes to make a pair of eyes.
But then my inner Chinese pioneer did not sleep... and painted the cabochons with acrylic paint