Are you already dreaming about summer? In this article we want to bring you closer to this long-awaited time! And we will try to do this with the help of an interesting and not complicated master class on making the sunniest flowers - sunflowers.
You won't believe how quickly and easily you can make amazingly beautiful flowers! To make sunflowers, we suggest you use corrugated paper, because it is ideal for giving flowers a beautiful and realistic shape.
These crepe paper sunflowers look so pretty and fresh! Crepe paper sunflowers can be used for so many other crafts, and on top of that, they will stay fresh forever and never wilt!
How to make a sunflower from corrugated paper
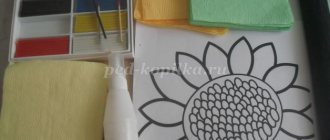
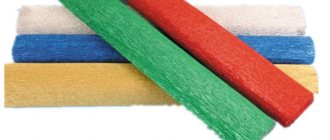
For the sunflower, prepare yellow, black and green corrugated paper made in Italy. Make the following preparations:
- 4 black stripes, 30 cm wide and 3 cm high each;
- 2 yellow stripes, 20 cm wide and 7 cm long each;
- 1 green blank 20×5 cm.
You will also need: wire for the stem, glue gun, ruler, scissors, toothpick.
How to make a simple sunflower out of paper with your own hands in MK
For this you will need:
- yellow and green paper;
- glue;
- scissors;
- cardboard;
- paper tube.
The future sunflower will consist of two parts. Each part will require eight petals. To make them you need to cut out eight yellow squares and fold them in half diagonally. The bottom corners need to be turned towards the fold line.
After the eight petals are ready, we connect them into a circle. To do this, you need to cut out a circle of a suitable size, onto which we will glue our petals, first in the first row, and then in the second. You can decorate the middle using black paper.
Next we make the sunflower stem. To do this, carefully roll the green leaf into a tube and fix the edge with glue. Let's start creating the leaves; they fold in the same way as the petals of a flower, but leave the bottom corner in place.
Glue the leaves and the flower itself to the tube. Our sunflower is ready.
There is another option for a beautifully shaped sunflower, which can decorate any craft or be used as an independent product.
You will need:
- orange or yellow paper;
- scissors;
- PVA glue;
- figured hole punch “hibiscus”;
- strips of brown and black paper.
For a sunflower, it is better to take paper of two colors to bring it closer to the original. Using a hole punch, we make five blanks and cut each of them into five hearts.
As you probably already understood, if you don’t have such a hole punch, you can completely do without it by cutting out the hearts by hand. Of course, you should make sure that they are the same in size, otherwise the sunflower will turn out uneven.
Next, on one upper part of each heart you need to stick a small piece of tape and, without peeling off the protective layer, slightly twist the petals around a knitting needle or hook “into an envelope.” After this, you can peel off the top layer of tape and glue the two upper halves of the heart together.
When all the petals are ready, you need to cut out a circle with a diameter of 30 cm from cardboard. Next, coat the lower tip of each petal and glue them onto this circle, first the first row, and then the second row in a checkerboard pattern.
Now let's start decorating the center of the flower. To do this, take four strips of paper, 1.5 cm wide: two pieces of black and brown. We make a fringe out of them, with a distance of 2 mm. One black stripe should be half as long as the others. After this, we first wind a short piece of black onto a skewer, then black and brown together, and lastly, black. We secure the edges with glue.
Straighten the fringe and glue the center onto the flower. Let the product dry and we can start admiring it.
The following paper sunflower master class presented is perfect for teaching small children in kindergarten or at home.
To make it you will need:
- colored paper;
- colored cardboard;
- scissors;
- glue;
- pencil;
- ruler;
- wire.
Cut out two circles from colored cardboard. The green circle should have a diameter of 9cm, and the black circle should have a diameter of 7cm. Next, cut eight strips of colored paper. Orange strips should be 18 cm long and 2.5 cm wide, yellow strips should be 15 cm x 2 cm, and pieces of pale yellow paper should be 12 cm x 1.5 cm.
After this, we fold all the strips as shown in the photo.
Now glue all the petals onto the green circle. From the beginning, glue the orange row, then the yellow one and the last one – the pale yellow row. We glue each subsequent row in a checkerboard pattern.
We wrap a piece of wire 15 cm long in spiral turns with green paper, and secure the tip with glue. We place this stem on the green center and glue the already prepared black circle on top.
The flower is ready and can now be presented as a gift for any occasion.
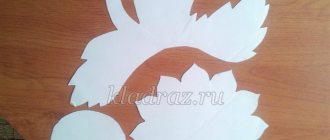
Preparing the center and petals
Cut each black strip finely from one edge so that about 1 cm remains to the other. Lightly twist the fringe with your fingers.
Cut the yellow strips into pieces about 1 cm wide or a little more. The distance to the opposite edge should remain 1 cm. Using small scissors, round off the ends of the petals, leaving a sharp tip. Bend the middle of each, slightly stretching the corrugation.
Form a sepal from the green strip by cutting triangles from one edge, as in the photo.
Assembling a sunflower from corrugated paper
Start assembly by placing a bead of glue on the end of the wire. Take one black piece and wrap it around the wire in a circle so that all rows are exactly on top of each other. Do the same with the remaining three black parts. Don't forget to apply glue as you assemble.
Spread the resulting black circle along the edges, pointing the cut ends to the sides. This is necessary so that the middle becomes fluffy.
Start with the petals. Wrap the yellow strips in a circle over the black ones so that they remain level at the bottom. Make sure the petals are evenly distributed. They should be in a checkerboard pattern. Apply glue often to ensure reliability. Then straighten the sunflower petals by bending them down. If you do everything correctly, the flower will turn out smooth and lush.
All that remains is to glue the sepals and tape the stem with a strip of green corrugation. Stretch each sharp tip of the green part in the middle. Stick it in a circle in two rows. The second row is located slightly lower than the first.
Take a narrow strip of green corrugated paper (1-1.5 cm wide) and wrap the wire along the entire length, remembering to use glue.
The corrugated paper sunflower is ready! It can be used for interior bouquets. I got this option.
I also recommend that you familiarize yourself with the tutorial on making poppy and chamomile.
I wish you success in your creativity and good mood! Create beauty with your own hands and enjoy the process and the result!
Subscribe to new articles on the site!
Sweet gift
A gift made of corrugated paper with candies in the shape of a sunflower can be of two options:
- a bouquet in which each candy is wrapped in its own sunflower flower;
- the candies are packed all together in the center of the flower.
Master class on the first design option. To work you will need:
- cone-shaped candies with one tail;
- corrugated paper in yellow, brown, green colors;
- polysilk;
- floral mesh;
- wooden skewers;
- green adhesive fabric tape;
- scissors;
- heat gun;
- threads
Prepare all necessary materials. Cut a polysilic square large enough to completely wrap the candy like a wrapper.
Related article: DIY autumn bouquets for school from natural materials
Twist the polysilk like a candy wrapper and tie it with thread. Do the same with the floral mesh.
From yellow corrugated paper, cut out a rectangle 9 cm wide and a length equal to two turns around the candy or more. Cut a petal-shaped fence on one side. Roll the candy into the paper so that the petals are staggered relative to each other. At the same time, use a heat gun to glue the strip to the wrapper.
Tie with threads. Turn the petals outward and shape the flower.
Insert skewer. Wrap part of the flower and stem with tape. Collect a bouquet. You can add green leaves, put it in a basket, or arrange it as a bouquet of fresh flowers.
The gift is ready!
You can also use chocolate coins instead of truffle-type candies. The principle of their manufacture is the same.
Master class on the second design option.
To work you will need:
- round candies in dark (black, blue or brown) wrapper;
- corrugated paper in yellow and green colors;
- green organza;
- Styrofoam;
- toothpicks;
- stationery knife;
- scissors;
- double sided tape;
- hot glue gun.
Cut out a circle of suitable size from foam plastic (candies will be placed on it). Cover it with green paper.
Cut a strip of orange paper with the width needed for the length of the petals and a length sufficient to cover the foam base 3 times. Glue the strip to the base.
Make transverse cuts on each layer of paper. Cut out petals from them.
Glue double-sided tape to the tails of the candies so that they do not stick out. Glue the candies to the base.
Cut green squares from organza, fold them in half, and glue them to the top of the toothpick. Insert between petals and candies in a circle.
Cut a strip of green paper large enough to go 1 turn around the flower. Cut it crosswise into 1.5 cm wide pieces, without bringing the scissors to the end so as not to cut the strip. Cut out the petals and give them shape. Glue the strip to the base.
Related article: DIY master class on a cage made from newspaper tubes with video
Give the flower shape. Decorate as desired.