Types of painting on wood
Since time immemorial, wooden kitchen utensils have been painted with patterns. In this way, folk craftsmen decorated objects of their simple everyday life. Any wood painting technique is characterized by ease of execution, free choice of image and the availability of coloring pigments.
Mezen decor
In the Arkhangelsk region and the Komi Republic in the lower reaches of the Mezen River, an original technique for painting wooden objects arose at the beginning of the 19th century. Main features:
- predominance of red and black colors;
- ornament reminiscent of wood carving;
- image of repeating figures of deer, horses and birds.
Kitchen utensils and various household items were painted using Mezen technique. During the painting process, black soot and red ocher were used. They painted unprimed wood, and after applying the design it was covered with drying oil. Objects painted with red and black patterns acquired a golden hue.
Mezen painting was revived in the mid-20th century by the descendants of the first masters who worked in this original technique.
Khokhloma
Khokhloma wood painting got its name from the village of Khokhloma, which is located in the Nizhny Novgorod region in the Volga region. The technique is ancient, dating back to the 17th century. There is a legend that it was invented by Old Believers icon painters. They first began to paint kitchen utensils and furniture with golden patterns.
Khokhloma is a decorative pattern in red, green, yellow, made on a black background. The golden color of the painting is given by the use of tin or aluminum powder. Khokhloma is a floral repeating ornament or design in a primitive style. The objects depict birds, flowers, leaves, rowan berries, strawberries, wild strawberries. At the final stage, painted products are varnished and hardened in an oven. This procedure gives objects a golden shine.
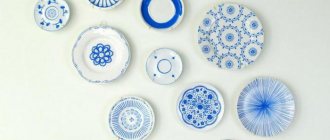
Severodvinsk painting
The Severodvinsk technique of painting wood and birch bark arose in the 18th century in the Arkhangelsk region, along the banks of the Northern Dvina River. The craftsmen painted red, mainly kitchen utensils. Each village in the Arkhangelsk region was famous for its special equipment (Permogorsk, Boretsk, Rakul).
All Severodvinsk paintings had common features: the application of a black border framing each image; drawings in red, green, yellow colors; floral ornament or pattern. Birds were often painted in the center of the composition. Severodvinsk painting resembles the technique of applying enamel in a black outline. Currently, the ornament is painted with gouache and varnished.
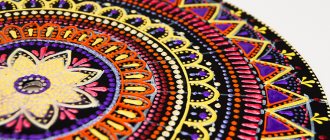
Gorodets patterns
Gorodets technology got its name from the city of Gorodets, which is located in the Nizhny Novgorod region. Painting appeared in the 19th century. Spinning wheels, household items, dishes, furniture, even shutters and doors were painted with drawings and ornaments in the style of Gorodets technology. The predominant colors are red, yellow, green, blue.
See also
Technical characteristics and composition of PF-115 enamel, purpose and consumption
Gorodets technology is distinguished by its original plot. Usually this is a cartoon image of peasants, merchants, and nobility in magnificent costumes. Artists painted scenes from life in a primitive folk style, decorating the sides of their paintings with floral patterns. The design was applied to raw or primed wood using random strokes. At the final stage, the image was coated with varnish.
Types of paints
To create a beautiful and high-quality product with rich colors, you need to choose the right paints. Since wood is a material that has different properties (dries out, cracks over time), it is important to choose a paint that is durable and of high quality.
Today, the choice of coloring agents is very wide, depending on the skill and the creative product itself, you can choose the best option.
To prevent painted household items and furniture, dishes, toys, souvenirs, boxes and boards from changing their color under the influence of the sun and water, master artists have used tempera paint since time immemorial. Tempera has many advantages .
- Easily soluble in water.
- Once dry, it cannot be washed away.
- It has a uniform texture and covers the pattern with an opaque layer.
- It does not crack, unlike analogues.
- Stored in a sealed container, does not thicken or become moldy.
The paint is made by hand, a rather labor-intensive process. The base consists of egg yolk, which is ground with dye.
Today there are several options for tempera:
- casein - the basis is protein from animal milk;
- egg - consists of eggs, vegetable oil, varnish;
- gum arabic - based on hardened resin of the acacia tree.
It is important to know that the ingredients in tempera paint do not react with metals.
Features of painting with acrylic and oil
To obtain a durable and rich color of the image, acrylic and oil paint are used. They are easy to use, quite thick in consistency, and can be mixed to achieve a greater effect. Acrylic dries faster than oil paint and has a more saturated color palette - these are their main differences. The main advantage of acrylic is the creation of a protective film on a wooden surface, so there is no need for additional opening with varnish (with the exception of dishes that will be used in the future).
Painting on wood with acrylic paints for beginners includes: sanding the workpiece; surface leveling; translation of the drawing; the painting itself; drying the finished product.
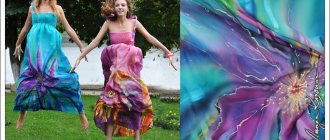
Watercolor painting on wood
The peculiarity of painting with watercolors on wood is its quick application.
Since wood can deteriorate from excess moisture, it is necessary to paint the wooden blank quickly. Using watercolors you can create airy images, shade, and make smooth transitions. For greater effect, it can be mixed with other types of paints. This paint most accurately conveys natural colors and shades and is ideal for painting portraits. For beginners, you can choose a wooden matryoshka blank for training. First you need to transfer the drawing to the product. To make the paint adhere better, brush over the desired area once with a wet brush. First, large elements of the design are painted, after which they are given color. After painting, the product is dried and varnished.
Stages of preparation for work
If desired, anyone can paint a wooden or birch bark object. You can come up with a drawing yourself, inspired by the beauty of flowers and plants, or copy it from an original made by a professional artist.
Before you start painting wooden objects, you need to prepare. You can paint any object: a cutting board, a wooden box, furniture doors, room doors, a table top, a shelf. Before painting, wooden objects must be cleaned of old paint (if any), leveled, and polished with fine-grained sandpaper.
List of preparatory work:
- cleaning objects (from dust, dirt, paint);
- polishing with sandpaper (if necessary);
- drying;
- primer.
Wooden objects can be primed with PVA glue diluted with water until it becomes milky. Ordinary stationery will do. After drying, you need to walk over the surface with fine-grained sandpaper and cover it with a second, thicker layer of PVA and water. You should get a perfectly smooth board.
It must be remembered that PVA glue does not emphasize, but hides the structure of the wood. In addition, it gives a whitish coating and pallor to the image. Linseed oil perfectly reveals the beauty of wood, although it takes a long time to dry. Drying oil can also be used as a primer, but it is not advisable.
Expert opinion
Zakharova Irina Yurievna
Cleaning professional with 15 years of experience. Our best expert.
Ask a Question
It is better to use primer varnishes for wood (such as PF and NC), with darker matte ones as a base, and light glossy ones for the finishing coat of the painting.
You can buy acrylic, alkyd or oil primer. The type of primer must match the type of finishing varnish and be suitable for the paint (not “corrode” it). Before you start painting wooden objects, you need to buy paints, brushes, sandpaper, primer varnish, coating varnish, pencil, and eraser.
Methods for transferring images onto wooden products
Experienced craftsmen, having primed the wooden surface, can safely apply the design with paints. For beginners, it is better to use stencils or make a sketch first.
Stencil
The stencil method of painting a wooden surface is considered the simplest. True, it is only suitable for flat objects. Before painting a tree, you need to prepare a stencil, that is, a template for the future drawing. It is made from paper or film.
You can find a pattern or ornament you like on the Internet, print it on paper using a printer and cut out the outlines of all the images.
The stencil must be pressed tightly to the surface, secured with tape and outlined around the recesses with a simple pencil. You can simply spray paint over the template or make strokes with a brush.
Pointed
Using dots, you can transfer an image to a surface, or even paint an object. A spot translation of a drawing requires the presence of a pattern on thin (tissue) paper and a sharp pencil. The paper image must be applied to the surface and holes must be made in it with graphite. The more dots you get on the tree, the easier it will be to reproduce the pattern. You can draw the entire ornament on a wooden object with multi-colored dots. True, for this you need to buy acrylic paints in tubes with a sharp tip.
See also
Description and technical characteristics of EP-773 enamel, application rules
According to sketches
Before painting a wooden object, you can make a sketch on paper. This is a test drawing that will help you correctly determine the proportions of all the details of the ornament. The image is often done in color in order to understand what the future work will look like. According to the sketch, you can make sketches with a simple pencil on a wooden surface.
Some craftsmen use carbon paper to copy the finished drawing onto wood.
stencils step by step on boards and wood
Today we are studying the Gorodets painting technique for beginners. This type of painting is one of the types of folk arts and crafts in Russia, which originated in a small town on the Volga called Gorodets. Drawings made using this technique are distinguished by bright, saturated colors, the presence of black horses in the paintings and birds with incredibly bushy tails. Also, flowers are always present in the works, mainly bud, rose, rose and chamomile.
Drawings using the Gorodets painting technique are very symbolic - the horse symbolizes wealth, birds symbolize happiness, and flowers symbolize health and prosperity. The main motifs of the drawings are riders on horses, young ladies in lush, colorful dresses, various special events - fairs, weddings, folk festivals or just city streets, i.e. all the elements of the painting conveyed the life and life of ordinary people. Moreover, animals were always depicted only in profile, and people in full face. In addition, Gorodets pictures are always saturated with flowers - in the form of bouquets, garlands, or they are simply scattered chaotically throughout the work.
Traditionally, drawing using the Gorodets painting technique was done on wood - patterns were used to decorate spinning wheels, boxes, chests, arcs, children's furniture, cutting boards and other household items. But at the initial stage, you can try your hand at paper, so that your hands get used to curved shapes, to transitions from the finest lines to broad strokes and other unusual elements of drawings.
Let's touch a little on folk art and try to draw the main types of flowers that are present in Gorodets drawings. To do this we need a sheet of paper, a pencil, a brush and cherry-colored gouache.
At the beginning of the work, we draw four circles on a sheet of paper - three identical, and the fourth is slightly smaller, and using a brush and paint we make round spots on each circle - these will be the noses of the flowers. On the first two mugs, the spouts will be located in the center, and on the rest - on the side.
Next, we begin to finish painting our flowers as shown in the photo, making the petals with paint of the same color. We draw an arc along the circumference of the first circle, starting with a barely noticeable touch of the brush on the paper, gradually increasing the pressure and finishing the work again with a barely noticeable touch - we get a bud. In the central part of the second circle we draw a similar arc, and along the edge of the circle, with smaller arcs made according to the same principle, we draw petals - we have a rose. We draw the same petals around the circumference of the third circle, thus obtaining a rose. From the fourth circle we will make a daisy, using a different technique - dipping to draw droplets around the nose of the flower.
These are the simple ways in which flowers are drawn in Gorodets painting. Now you can paint some household item and present it as a gift to a loved one. If you have to draw a large number of flowers, then you can use templates and stencils of circles using a compass and use them in your work.
Now let's take a step-by-step look at how flowers are made using the Gorodets painting technique.
Stages of making flowers
Stage 1
The underpainting is the same colored circle that serves as the basis for all the colors in Gorodets painting. For flowers in this painting technique, paint of red, cherry, pink, blue and blue is traditionally used. In this case, blue and cyan flowers may be completely absent from the picture or occupy no more than 1/4 of its part.
Stage 2
Guiding the petals - after the gouache with the underpainting has dried, we begin to draw the petals depending on the colors that you want to paint and use darker paint to outline them.
Stage 3
Revivals are the decoration of flowers using dots and strokes. The animations are made using white gouache and thin art brushes No. 2 or No. 3. Dots are placed in the center of the spouts of all colors, and the spouts of daisies and roses are also edged. The noses of buds and roses are decorated with a white arch. This stage is completed by the touches that are applied to the roses.
Thus, if you adhere to the traditional rules of drawing in this technique, then Gorodets painting for beginners will no longer seem like something super complex and unattainable. Even children can master it, they just need to put in some effort and, as they say, “get the hang of it.” In addition, there are now quite a few different art educational institutions where teaching this type of creativity is adapted for both children and adults.
Household items painted using the Gorodets technique are still popular today, because designs on cutting boards, boxes or kitchen spatulas can decorate the interior of any home, even the most modern one.
Video on the topic
In conclusion, we suggest that you familiarize yourself with video lessons on the Gorodets painting technique, which will allow you to plunge into the world of folk art, help you better master this technique and create unique patterns on quite ordinary household items that will delight you and your loved ones for a long time.
sdelala-sama.ru
How to choose brushes for painting
The choice of brushes for painting depends on the type of paint. Brushes are made from nylon, polyester, pony, squirrel, goat. There are brushes made from badger, sable, bristle, and kolinaya (from the mustelidae family). They come in natural and synthetic, thin and thick, round and flat (flattened).
List of paints and suitable brushes:
- for acrylic - synthetic, from column, bristles;
- for watercolors - soft squirrel, kolinsky, pony, goat;
- for oil - synthetic, bristle, column;
- for gouache - from squirrel, kolonka, pony;
- for aniline dyes - core dyes.
When buying round brushes, you need to pay attention to their thickness, that is, diameter. All brushes are marked from 0 to 20 and above. The thinnest ones are “zero”. Thin brushes are needed for drawing small details. Use medium-sized brushes to paint the main pattern.
Flat tassels are numbered only with even numbers. He considers “2” to be the smallest. This brush consists of a handle (wooden or plastic), a metal base (clip) and a hair tuft. May have a flat, oblique, semicircular top.
When choosing a brush, make sure that the metal frame does not wobble, the handle does not bend, and the hairs do not come out. Before purchasing, you need to stroke the tip of the brush. If the hairs remain in your hand, it is better not to buy the product. To paint on wood you need several brushes of different thicknesses.
How to apply a drawing
Make sure the board is dry before burning. Place connection points on the pencil-translated drawing and only then draw lines. To obtain a thin line, the electric burner should be moved quickly, and vice versa, if you want to get a thicker line, move the tool pen more slowly.
There is no need to press hard on the electric burner when applying a design. When the line is completed, the pen must be torn off sharply.
First, the outer contour is burned out, then gradually you can move on to the internal details, to the center. It is best to burn in parts, that is, you need to give the newly burned elements the opportunity to cool. So work a little on one area, then leave it and move on to another, and so on until the whole job is completed.
Related article: A train made from plastic bottles for the garden with photos and videos
After burning, the surface should cool slightly, then carefully, so as not to damage the strokes and lines, especially small ones, you need to sand the board with fine sandpaper. You can paint with watercolors or oil paints only when the work has cooled completely. After painting, the work must be waxed, that is, subjected to a wax finish. Thanks to waxing, the design acquires a soft shine and preserves the natural color of the wood and the richness of the colors.
What kind of varnish can I cover?
After painting wooden objects with paints, you need to wait at least a week, and only then varnish the product. The longer the painted item dries, the better. If you apply varnish to a damp surface, the design may warp. The paint must be completely dry before varnishing.
List of paints and suitable varnishes:
- for acrylic - acrylic, water-acrylic, alkyd;
- for oil - alkyd, oil-based;
- for gouache - glossy or matte varnish for gouache;
- for watercolors - fixative varnish, topcoat varnish for watercolors;
- for aniline paints - alkyd, acrylic.
As a finishing coat, you can use acrylic matte or glossy varnish. It can be used if the drawing was made in acrylic or oil. Works painted with oil paints can be coated with oil varnish. True, it takes a long time to dry. For acrylic and oil, alkyd or polyurethane varnish is suitable. This substance also takes a long time to dry, it has an unpleasant pungent odor, but it gives a perfectly smooth and shiny surface.