If your work or home hobby involves sewing, then you probably have whole skeins of thread lying around the room and getting in the way from time to time.
In order to solve this problem, we suggest making a homemade box in which you can collect everything you need from the embroidery kit. Depending on the number and size of skeins and tools, you can create a box of the appropriate size. For beauty, it is possible to further decorate it at your own request.
Getting the job done will be quite simple. In this article we will tell you how to build a convenient place to store threads and needles with your own hands.
Materials and tools
In order to decorate the box, you will need the following.
- Wooden, plastic or metal base.
ADVICE . You can use a ready-made metal box for tea or sweets.
- Glue "Moment".
- Paint and impregnation when using a wooden base.
- Knitted fabric in different colors.
- Satin ribbon.
- Bow.
- Button.
- Skewers or wooden Chinese chopsticks.
- Pencil, ruler.
ADVICE . If during the planning and work you have an additional idea for improving the design, you can supplement it with other parts of your choice.
The box should be comfortable, roomy and attractive in appearance.
What types of organizers for sewing accessories are there?
If you need to store beads or beads, you can use a regular small box. For larger products, it is advisable to purchase a plastic container with compartments. Professional needlewomen buy quite a lot of tools for their work. Therefore, they need large organizers with compartments. They can accommodate not only sewing tools, but also many other small items.
This will be more convenient than hiding items in a closet. You can place small clothes, headphones or stationery items in such containers.
Plastic box
A hanging container made of fabric is easy to use - this is the most common type. Such an organizer saves workplace space and will also be an original decorative element. You can buy a hanging organizer for sewing supplies or make it yourself. It is also advisable to beautifully decorate the finished product with beads, a brooch or other accessories.
Note! You can create a box for storing threads from a tin candy box. At the same time, it is advisable to paint it antique, which will look very original and impressive.
A full-fledged large wooden box, with compartments and varnished, will look beautiful.
Storage in regular banks
In general, all wood products look more aesthetically pleasing than, for example, plastic. Therefore, such an organizer is made not only for yourself, but also presented as a gift to some needlewoman. In addition to storing threads, you need to keep needles along with them. A do-it-yourself box for threads and needles is usually made of plastic and using foam rubber; it is convenient to stick needles into it.
An ordinary jar with a lid will look quite original. Threads will be stored inside, and a soft needle bed will be sewn onto the lid. If desired, the jar must first be primed and then painted with acrylic paints. Make some kind of ornament or drawings of animals.
You might be interested in: Making a pattern and sewing gloves yourself
Wall shelf for threads
Well, if you don’t want to bother at all, but you need to store the threads somewhere, then you can use a shoe box. It needs to be wrapped in gift wrap. Place foam rubber inside and insert wooden or metal pins into it, on which the coil will be strung.
A do-it-yourself floss organizer is made mainly in the form of a tablet. It is made, for example, from an SD disc. To do this, holes are drilled in it where the threads will be wound. The disc itself needs to be covered with felt or cotton.
Important! Any organizers should have a lid, because dust collects on the yarn very quickly, which is not acceptable.
It is advisable to store in such products not only threads, but also various sewing trifles, such as needles, buttons or ribbons. So as not to lose such small things over time.
Large shelf for the workshop
Fabric
To make the organizer truly effective, you need to use all your imagination and talent.
The fabric organizer can be made in the form of a house.
Such an organizer will not only be useful to use, but will also decorate the room with its appearance.
Materials for work:
- Pieces of different materials;
- Office paper or cardboard;
- Scissors, soap and ruler.
A fabric house does not need a lot of space. It all depends on personal preferences and desires. For example, from 15 to 40 cm on each of the walls of the house. It is advisable to do more.
First you need to make a roof.
Using a template, make a slanting roof out of cardboard. You need two identical parts.
It is also necessary to cut out the part for the bend. It's very easy to do.
Wicker Yarn Basket
Sew the top strips along the inside. Then turn it outside. Insert a solid strip inside and sew the ends together.
Now the walls are being made, the most important part. You need to cut out the walls from cardboard and glue pieces of fabric onto them. Making an allowance of approximately 2 cm. On the sides, make lines along which you need to cut with soap.
Decorate the walls as desired, make windows or sew buttons.
Now we need to start assembling the house. Connect the floor to the walls. Next you need to put the roof on top, sewing it along the edge. In the end, you get five parts that need to be sewn by hand. The organizer is quite simple to make, so you can create several houses at once.
You may be interested in: Patterns and sewing of beautiful women's Panama hats with your own hands
Plywood box
Plastic
Making such an organizer is not difficult. A plastic cookie box is used as a base. The main thing is that it must have a lid to protect objects from dust and children. If the box is small, you can take it with you anywhere.
To work, you need a plastic box for cookies, a small square of foam to put on the bottom of the container, and wooden sticks.
Step-by-step work process:
- You need to cut out a rectangle or square from polystyrene foam and place it on the bottom of the box;
- If there is no foam, then you need to put a piece of laminate;
- Cut the wooden sticks into pieces slightly smaller than the height of the organizer. If sawdust is sticking out, it is better to clean it off;
- There is already foam plastic at the bottom of the product, now you need to insert sticks into it. String spools of thread and ribbon on them.
From a tin can
Wooden
You can make your own thread box from wood. For work you need boards or slats measuring 10 cm. You need to use wooden fruit boxes. Use nails to make a frame. Place five crossbars for the coils in it. The gap between them should be about 5cm so that the coils fit completely there. Drive screws vertically into each crossbar at equal distances. You will need to string threads on them.
Hang the finished organizer for a seamstress on the wall or place it near the workplace.
Decorate with beads as desired or beautifully decorate the wood with acrylic paints, and then varnish. To keep it permanently closed, you can make a small transparent lid on hinges. Will look like a small safe for accessories.
Floss storage option
How to make a thread box
We recommend using the standard work procedure
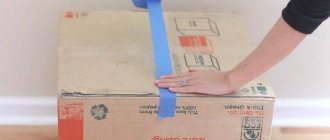
- Take the finished box and treat its surface with alcohol to degrease.
- After drying, you should glue the fabric, previously prepared in size.
- Using glue, cover the entire surface with it.
- Additionally, cover the fabric with a layer of paint.
- Now all that remains is to prepare the inside. To do this you will need sticks to hold the threads. Saw them into pieces of equal length.
- Glue each of the parts at the same distance from each other (about 2-3 cm according to the radius of one package of threads). Glue each stick carefully and strictly at a right angle.
- Place the threads evenly over the entire area of the box.
If a man is involved in making the box, he can use bolts instead of wooden sticks. In this case, it is better to use a metal box for the base. And in addition to the usual set of tools, you will need a drill to drill holes for the bolts in the bottom. They are inserted so that the cap is under the bottom, and secured inside the box with nuts.
The main work is done, and you can already use your product. But if you wish, you can complement the image with beautiful elements.
How to make a fabric organizer with your own hands
These types can be made entirely of fabric and be soft, or use cardboard or plywood to be more durable. Fabric organizers for sewing threads are considered the easiest to make and most reliable. They can be machine washed, wrung out and steamed. You can store not only threads, but also various needles, knitting needles or scissors. The execution is so simple that you can involve a child in the work, teaching him how to do needlework in a playful way.
You might be interested in what kind of leave-in and wash-out fabric markets there are.
What materials and tools will be needed
The main materials you will need for work are:
- Fabrics of various colors;
- Scissors, or better yet a roller knife;
- Pencil or chalk for fabric;
- Needles, threads, buttons;
- Cardboard, paper or plywood;
- Sintepon;
- Beads and rhinestones for decoration.
Reels on nails
Organizers can be made from absolutely any materials. The more imagination a person has, the more original the container for storing threads and more is. Below we describe how to sew a fabric organizer with your own hands.
Universal box
If you don’t have a lot of sewing supplies and want to keep them at hand, make a universal box that will fit everything: from scissors to small buttons. To do this, you will need a spacious container with a lid, cardboard, scraps of fabric, foam rubber, polystyrene foam and small plastic containers with lids.
- Divide the container into three wide horizontal sections, as in the previous method. Place the longest scissors on one of the strips. If they fit completely into the box, leave this part undivided; if there is still free space, fence it off with cardboard.
- Line the other strip with plastic containers: you can store small items in them so they don’t fall apart. Cover the remaining space with a piece of foam rubber: this will be a pincushion. It is important that the containers have lids, otherwise if the box falls, the little things will clog the entire box.
- The third part is useful for storing coils. Cut a block of foam the size of the required space, insert toothpicks into it and place threads on the resulting pins.
- It is rational to use the side parts of the box for storing small tools: an awl, a ripper, tweezers, screwdrivers for a typewriter, etc. To do this, take scraps of fabric and make a ribbon with small pockets out of them. Secure the fabric to the box with glue. You can use a glue gun.
A box for storing sewing accessories is a convenient way to organize your workspace and save space. Homemade boxes are better than store-bought ones because you can create an organizer that fits all your tools, parts, and threads exactly.