Is it difficult to make smeshariki?
This is an important question. But he has a simple answer: you need to apply a little patience and imagination, and then everything will work out! Those who have already made Smeshariki think that making such dolls is fun, amusing and, most importantly, useful!
You can make them for both children and adults. For example, some Smesharik will be a wonderful decoration for a car window.
Or you can decorate your home, your room, a children's corner, even your pediatrician's office with it! The doctor will definitely appreciate such a gift from a little patient and will be very grateful to him.
How to make smeshariki?
Crafts can be made from disks; you can make a Smeshariki craft from plasticine. Smeshariki made from threads are also interesting! In any case, Smeshariki’s children’s crafts will be of interest to parents, friends, and the child himself.
Templates for Smeshariki crafts are available on the Internet, they can be different.
Photos of the Smeshariki craft are needed in order to know what products should approximately be the result. You can use them as a guide when preparing Krosh, Nyusha or another character.
Photos of Smeshariki crafts
Read here - Crafting a snowman - 115 photos of the main methods of making and master classes for decorating figurines
Did you like the article?
0
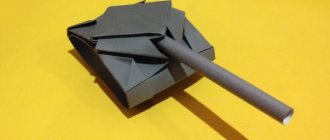
Smeshariki from disks
It's fun to make characters like this. Nowadays, parents often take their children to kindergarten or to visit by car. This smesharik is ideal for dad's or mom's car.
You can glue a ready-made smesharik onto the disk, which was previously drawn or printed on paper. Or you can glue a part of the character onto the disk so that your head can come up with his image further. This is intriguing. But this is more difficult, although interesting.
We recommend reading:
Crafts made from twine are original and interesting uses for twine. 125 photos and video descriptions of ideasCrafts from foamiran: master class, diagrams, examples and step-by-step guide from experts on how to make crafts from foamiran
Crafts made from colored paper - examples and step-by-step master class for children and adults (95 photos and videos)
First you need to take the disks. They must be without a picture. Then you need to degrease with alcohol. To do this, the surface of the disk on which the character will be glued must be lubricated with a cotton swab and alcohol.
Then you need to draw or print the character, color it, cut it out and then stick it on the disk with glue. You must not forget about the ears, eyes, needles, nose, mouth, paws.
Bows, hats and other “equipment” must be made separately. You can draw and cut out characters from colored paper, it will be even more colorful!
If you took colored paper, you need to draw a hero on the back of it. Then take sharp scissors and cut it along the edges. Then take the glue, apply it to the other surface of the paper and glue it onto the disk. The product will take some time to dry, so you will have to be patient a little.
We create funny characters
We will need:
- unnecessary disks;
- colored paper or cardboard;
- It will be more convenient and faster to connect parts with double-sided tape, but you can also use glue;
- scissors;
- screwdriver or nail;
- threads, you can use fishing line;
- multi-colored markers.
Now let's take a step-by-step look at the sequence of our work. Since our craft will not be stable, it is most convenient to make it hanging. To do this, first of all, you need to make a small hole in the disk and thread it. To make this easier, heat the edge of the clove over the fire and pierce it near the very edge of the disk.
Related article: Do-it-yourself hot stand made of fabric: master class with video
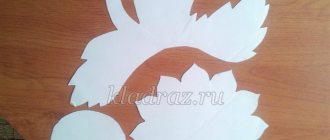
In the following photo you can see the provided templates of all the cartoon characters. You can simply print them out in the size you need and cut them out. Or draw by hand and decorate as you wish.
Smeshariki made of paper
You just need to first pay attention to whether you are allergic to paper dust. If it is not there, then you need to take paper and use several techniques.
You can simply cut out a Smesharik from cardboard. You can make it using “origami”, you can use a special “Superball” technology, it is made by folding paper squares and gluing them together.
We recommend reading:
Crafts from scrap materials - the most beautiful and interesting crafts from scrap materials (105 photos)Hedgehog craft: master class on how to make a hedgehog craft with your own hands (140 photos and videos)
- Crafts from seeds - step-by-step instructions on how to make cool crafts from seeds (125 photos)
The only thing is, first you need to make the squares themselves. You can slightly change the character’s figure and make it recognizable, but original, for example, by stretching it or making it square. This can be made from paper.
How to make smeshariki from paper?
Creating smeshariki from paper can be at least two options, which we will now consider.
Making origami-type Smeshariki crafts from paper
To make a smesharik using the origami technique, you need to use the “superball” technology. It is based on assembling a ball by folding paper squares and sewing or gluing them together.
The ears, eyes, nose, and paws of the character cut out from appropriate paper are glued onto the finished ball.
This technology makes it possible to make a very original and durable toy that will not fall apart when changing location or in sunlight.
The negative side of this technology is the rapid accumulation of dust in the folds of paper and the impossibility of removing it. Because of this, the toy can quickly fail or cause an allergic reaction in the child.
Modeling smeshariki from paper
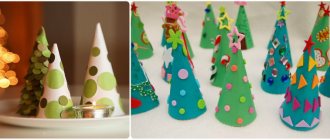
Another option for making any character from the cartoon “Smeshariki” is to cut out a stencil from paper, and the toy will not be round, but in the shape of a cube.
Smeshariki made of paper.
Draw out the shape of a cube on paper of the required size. After gluing it, individual details of each character from the animated series “Smeshariki” are glued onto one side. If there is no colored paper, we paint the elements of the craft by hand.
A homemade cube can also be hung on the ceiling in a car, in the kitchen, above a desk or in a child’s bedroom. This will create comfort in the room and will have a beneficial effect on the child, because he will know that his work is very important for his parents.
Smeshariki for home and kindergarten
You can make cartoon characters from large things - old wheels, a wide plywood board or some other material.
If you took a car tire, you need to attach plywood to it on both sides and attach ears and feet from some kind of auxiliary material. All this needs to be painted and details drawn.
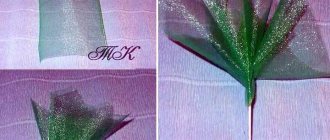
Smeshariki from threads
Knitting threads are a real miracle; they are suitable for a New Year's Smesharik for mom or dad, and maybe for a friend.
You need to take a balloon and inflate it. Then take a bottle and fill it halfway with PVA glue. You need to put a thread from a skein there. One end of the thread should pass through the hole in the bottle cap.
We recommend reading:
- Crafts from sweets: the best options and the most interesting crafts from sweets and candy products (90 photos)
Wood crafts - step-by-step instructions on how to make wooden crafts with your own hands (200 photos + video master class)
Mushroom craft - a review of interesting crafts and a master class on making a simple mushroom (100 photos and videos)
Then you need to wrap the ball with thread. Then you need to burst it and carefully pull it out of the toy itself. Then small parts are glued on - ears, eyes, paws, etc.
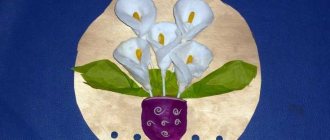
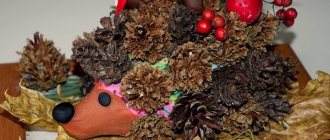
Smeshariki from fruits and vegetables
It’s quite possible to make a delicious smeshariki! This can be made from eggs, potatoes, tomatoes and other products.
For example, you can make a Teddy Bear. To complete it, you need to take a potato and attach ears and a hat from red plasticine to it. Then, from various elements that you can choose yourself, you need to make the whites of the eyes - from white, the pupils - from black. Don't forget to glue on the character's nose and mouth. The main thing is that Smesharik turns out to be smiling!
A moose can be made from a large onion and plasticine, a pig from a green apple. It’s easy to make rabbit from pears, Krosh from cabbage, and then eat it all!
Progress
You can make a car out of eggplant. One vegetable is used entirely. The other is cut into small rings. They will become the wheels of the car. You can attach the products using toothpicks. Then we fashion headlights from yellow plasticine. We attach them to the tip of the eggplant. We cut out a window from a plastic bottle. We insert it next to the headlights. The car is ready. You can come up with accessories, seats, and a radio for it. Smeshariki from natural material are created very simply. To make a teddy bear we use a small potato. We attach ears and a hat made of red plasticine to it. We make eyes from white circles, and pupils from black circles.
Then we sculpt the character’s smile, nose and mouth. The main thing is that he smiles. A moose can be made from an onion. Using plasticine we create a nose, mouth and tongue. We fashion the horns and attach them to the vegetable. We make the pig from a green apple. We sculpt the eyes, nose and mouth. We knit a small pink braid from lace or yarn. Using a toothpick, attach it to the crown. A rabbit can be made from a pear by first turning it over. We sculpt the eyes, nose and two snow-white teeth. Using toothpicks, we attach the main characters to the eggplant machine. Do-it-yourself mixed vegetables and fruits are ready!
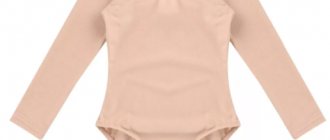
One of the options for a backpack toy is Nyusha
The Nyusha from Smeshariki craft is not that difficult to make.
You can make Nyusha from pink fleece, white fleece, belt tape, calico, adjusters for straps, polyethylene foam, holofiber, snake lock, thread and using scissors.
You need to print out the pattern of Nyusha’s parts on a printer and transfer them to fabric. Then cut out the parts. Then glue Nyusha’s face together. Then the parts of the backpack need to be sewn by machine or by hand, it all depends on the size and your patience. Then you should attach the straps and zippers.