Women love the house to be clean and tidy. They place all items in their places in the closet, chest of drawers and organizers. It is very inconvenient to store needles in boxes or boxes, so needlewomen came up with beautiful biscornia - pads of a funny curved shape. Cross-stitched needle cases look extraordinary and bright.
The article provides a large selection of patterns for cross stitch embroidery.
Types of biscornu
Before you start embroidering, you need to choose which pad will be created:
- standard
- fragmentary
- five-blade
The stitches connecting the elements of the product are specific, and a canvas is needed to create them. The images on several squares of the pad should match each other, creating the illusion of an unusual pattern. The seam on the biscorn is made strong, since other fragments are attached to the skin.
Standard needle beds are made from two square pieces. Each workpiece is sewn with a thick stem stitch, the thread is carefully pulled up without folds on the canvas. For a standard pillow, the same schematic pattern of squares is chosen. Embroidery is done symmetrically. Embroidered blanks are stitched together.
We invite you to familiarize yourself with the gallery of schematic images for the manufacture of standard products.
Having finished embroidering the elements, they need to be sewn together. To do this, it is important to apply the workpieces correctly:
- We place the elements face to face.
- We combine the corner of one square blank with the central part of the second.
- We sew the parts using the previously made stitches.
- We fill the product with padding polyester.
The squares take on a convex unusual shape. After stitching is completed, we tighten the product in the center using buttons on both sides. The pillow is ready.
Fragmented pincushions are more difficult to create due to the large number of parts. In such products they are sewn asymmetrically.
8 square pieces of canvas of the same size are embroidered and joined together. 4 blanks are immediately fastened together. The first element is sewn to the second, turned at a right angle, on one side. 3, the workpiece is turned in a circle and sewn to the bottom of the second element. Part 4 is rotated 270 degrees and the upper part is attached to the side of the first square, and the right part to the edge of square 3.
We sew the remaining squares together identically. We connect the parts of the product using a needle and thread, and fill it with padding polyester. The result is a pincushion of a fancy format.
At the request of the needlewoman, the product is pulled together in the center and decorated with beads. To create the pad described above, the following embroidery patterns are suitable:
The five-blade is a biscorn, which is not easy to perform. Sewing it is quite difficult and troublesome. With patience and perseverance, needlewomen will be able to please their friends with new crafts.
The pad consists of three rows of five wedges, on which the ornament varies.
We turn 5 square elements with an identical pattern with the corner towards the center and sew them on one side alternately. The last element is attached to the first. The lower part of the product is assembled identically. Having finished assembling the two parts, we attach the middle one. The side parts are sewn with edges to 2 adjacent square blanks, etc. Before finishing stitching, fill the pillow with airy material and finish sewing. We stretch a thread into the central part of the pillow and sew a button.
Check out the cross stitch patterns for biscornu with wedges.
Needlewomen themselves choose the desired shape of the pillow and a suitable ornament. A beautiful, extraordinary product will decorate the interior of your home and become useful in everyday life.
Using pillows as an example
These products are found quite rarely in everyday life, so few people even know what they are. This is one of the types of decorative and applied arts. Externally, the product resembles a small pillow decorated with cross stitch. This product can be an excellent pincushion, keychain, phone pendant or decorative item.
What is biscornu
Biscornu is a voluminous item that is sewn from two identical parts decorated with embroidery.
In addition to threads, beads, beads and rhinestones, sequins or ribbons are used to decorate the product. Pompoms or tassels can be sewn onto the corners of the needle bed. If the pillow is to be hung as a decoration or beacon, a loop is attached to one of its corners. In the classic version, the pad is sewn together from two equal squares , which were previously embroidered with a colored or monochrome pattern using the cross-stitch technique.
The main feature of this product is the technique of stitching parts, which allows you to obtain a special shape. Editorial voice
Matryona
Fan of embroidery and sewing
Ask a Question
When stitching, they do not touch the fabric; they pass only through the backstitch stitches, which are used to trim the edges of the fabric. This technique is called biscorn . With another method of stitching, the special shape of the item will not be obtained.
The main purpose of the pad is to store stuck needles in it . However, often, having made intricate embroidery, needlewomen begin to use the item as a Christmas tree decoration or an element of interior decor. You can also make an embroidered sachet if you fill the krivulka not with the usual filling, but with aromatic herbs.
If you sew a biscorn of a larger size , you can get an unusual decorative pillow for the sofa , which is practiced quite often.
Some craftswomen use the product in the design of handmade bags and voluminous knitted clothing . In this case, the pads are often decorated with beads, since they do not rub off or become dirty. Miniature items are sometimes used to create costume jewelry; in most cases, they are paired for earrings.
In addition to the classic krivulka, there is a whole range of similar embroidered pillows of various shapes. Each of them has its own charm and appeal. All of these products are easy to perform, requiring only care and precision.
Preparing for work
Like any type of needlework, it requires special preparation. You will need to prepare the following materials in advance:
- canvas in hoop
- threads
- needles
- scissors
- filler
Canvas in hoop
It is also necessary to add such little things as chains and curly buttons, bows and ribbons, beads and beads. Embroidering voluminous biscorn pillows is done on thick canvas using high-quality threads. Materials must be of good quality, since the finished product will be used frequently and low-quality materials can simply wear off and ruin the troublesome work. It looks very elegant on black canvas, embroidered with white threads and vice versa. Such an element will certainly decorate the interior of your home, giving it a touch of unusualness and originality.
If you have the opportunity and desire to embroider a pattern on canvas yourself, use a rectangular hoop. Then, you will not encounter unevenness and inconsistencies in your product.
Threads, needles, beads, scissors and filler
synthetic filler
The threads can be of different colors, the only point that must be adhered to is the symmetry of the squares and the same pattern on them.
Drawing
You need two squares measuring 10 by 10 cm or 15 by 15 cm.
If you mean a keychain, you can take a smaller size, but it will be difficult for beginners to make such a small thing, so it’s better to start with larger squares. Experienced needlewomen recommend that beginners do not immediately cut out squares from the canvas. Initially, squares are marked on a solid canvas and patterns are embroidered. Next, sew the squares along the contour with a back seam using a needle. It is important to retreat 3-4 squares from the edge of the pattern so that it does not stick out in the future.
Biscorn and zigugu as a gift. Three Master Classes
Maybe some of the newbies will find this article useful)))) And after watching MK, they will be inspired by this little crooked thing that I have...ALS! I just can’t get around to it)))))))) but I really want to))) At first reading the title... I wanted to swear... what kind of words? In short, let’s say hello)
Thanks for the tip
Author of the article: Ekaterina Vinnichek
What is this, biscornu
?
In fact, (from the French biscornu - curved) is ... “crooked”. A three-dimensional product made of two squares of canvas, rotated 90 degrees relative to each other, sewn along the perimeter and in the center, embroidered with a cross or embroidered with beads. Usually used as an accessory
(pincushion, beacon for scissors, pendant, pendant, Christmas tree toy). In general, this is a very cute and stylish thing that can be a wonderful gift for any occasion. I started my acquaintance with biscornu last year with such a monochrome crook; That’s when I realized how easy it is to make such cute and intricate-looking things. And today I invite everyone to make this wonderful thing for themselves using my simple but quite detailed master class.
HOW TO MAKE BISCORNA
1 . We select the biscorn embroidery pattern we like, because they can be of different sizes (small - 35x35, 40x40 crosses on the side and large - 70x70, 80x80 on the side), but always square. I selected two embroidery patterns for biscornu: You need to select 2 patterns of the same size - for the upper and lower parts of the biscornu (you can also make two identical halves). A wonderful selection of cross stitch patterns for biscornu
can be viewed here.
We select floss or beads for embroidery, which can be either monochrome or colored. 2. Select a canvas
of a suitable size (so that you can embroider both designs) and
make markings
with a washable or disappearing marker for convenience.
There should be some distance between the diagrams, at least 12 cells. Markings
can also be made with thread, but do not do it with a simple pencil or other permanent writing object!
If you marked with a thread
, be careful when embroidering so as not to sew the marking thread tightly (after all, for convenience, the marking is usually done with a contrasting thread so that it is more noticeable).
As embroidery progresses, excess marking thread can be removed. 3. Cut out the squares with seam allowances, cross-stitch (or embroider with beads) the canvas squares according to the patterns. If you are used to embroidering exclusively on a hoop, you need to leave large allowances so that the canvas can be stretched over them. We erase the embroidery (so that the markings disappear), iron from the inside out (so that the crosses become more even and convex). 4. We retreat 3-5 crosses from the edges of the embroidery (check that the same number of crosses can be retreated on both embroideries!) and sew a “ backstitch
” seam along the entire perimeter of the squares (in a foreign style, it is called
backstitch
).
From the inside out, the backstitch
looks like this: 5. And now the most important thing: let’s start
assembling the biscornu
.
Let's determine the middle of the upper part of the biscornu (I mark it with a needle). We fasten the thread (I always sew in 2 threads of floss) in the corner of the lower part, bring it to the front part. We hook the backstitch thread (just the thread, without touching the canvas!!!) exactly in the middle of the upper part and pull the thread out. I suggest sewing from right to left. We grab the second backstitch stitch from the corner on the bottom part and pick up the next backstitch stitch on the top part. And so on... The seam
turns out like this: 6. We reach
the corner
of the upper part (and for the lower part of the biscorn this will be the middle of the side of the square).
Carefully (the technique is still the same) we go around the corner and continue to sew further... From the inside out, the biscorn
now looks something like this:
A miracle
.
With your own hands, you will create a voluminous, intricate figure from two simple flat squares! 7. When you have 1 side left to sew, don’t forget to stop and stuff the biscorn
.
I prefer to use padding polyester or holofiber for this. Now we sew up the remaining edge and, hiding the tip of the thread, carefully trim it. 8. Biscornu
is almost ready, but one small characteristic detail is missing.
Let's make a drawstring
.
Let's take a stronger needle. We thread a strong thread in 2 folds so that a loop is formed at the end. We find the center of the lower part of the biscornu (it’s easier to do this according to the picture), pierce it through and take out the thread, but the end of the thread (loop) should remain at the bottom. We make 1 cross on the top of the biscornu and pierce it again in the opposite direction, passing the needle into the loop from below, pulling the thread. We make a few more stitches (back and forth), securing the thread. It really did look like crap
!
Well, now we attach the bead (button) in the place of the tightening and... the biscorn is ready! If desired, you can decorate
with beads, tassels at the corners, sew on a loop... Well, what to do with your
biscorn
- your imagination will tell you! stolen from herehttps://www.vsehobby.ru/biskornju.html
And one more MK.
..
Biscornu-five-blade (needle bed)
This top is intended for lovers of embroidery and sewing, but may be of interest to any needlewoman. The biscornu-five-blade looks very original. Such a thing will be convenient for your own use, and can also become an unusual gift.
The word "biscornu" comes from the French "biscornu", which literally means two-horned, uneven, with protrusions, funny. Biscornu is always a polygon - a small pad with several unequal angles, but nevertheless quite symmetrical. In this regard, biscorn is also called “crooked”. The purpose of the “krivuli” is quite different; most often it is used as a needle bed. If you sew a biscorn in a smaller size, you can use it as a keychain, a “beacon” for scissors, or even a pendant. By sewing on a small cord or flagellum, with appropriate design, the biscorn can be hung on a New Year tree or in a car as a pendant. The secret of biscornu’s unusualness is in the stitching technique. In this topic, I bring to your attention one of the types of biscornu - five-piece. So, it is better to take a medium-sized canvas for making biscornu-five-blades. I embroidered on K 16 “Gamma” canvas (1 cm = 6.5 squares). 1. Choose a motif for embroidery, keeping in mind that the size should be small. I embroidered an 8-petal flower, 15 x 15 squares in size. Leave a few squares on each side for indentation from the pattern and connecting seam. I left 3 squares on each side, so a separate square turned out to be 21 x 21 squares in size. You need to embroider 15 squares: 5 squares for the bottom side, 5 for the side and 5 for the top. You can mark the canvas and embroider all 15 squares on one canvas. I embroidered stripes of 5 squares (for each side), and then cut them into separate pieces. The side side was embroidered only with beads. First you need to sew the squares with a “backstitch” seam (this seam is also called “backstitch”), moving 2-3 cells away from the edge of the square. And then embroider the chosen motif.
2. Let's move on to stitching the elements together. All connections are made using a biscorn stitch. The squares are sewn together using backstitch threads, without piercing the canvas (!). First we sew the top (or bottom) side of the biscornu. We sew two squares on one side, sew the third square perpendicular to one of the squares, sew the fourth square to the third on one side only, and sew the fifth between the first and fourth squares. It turns out to be a “flower”, see photo on the right.
Sew the second (bottom) side in the same way. Sew side squares to one of the sides (top or bottom). You will get a blank like in the photo on the left. From the inside, the blanks look like this:
3. We begin to sew these blanks. Before reaching the end, fill the biscorn with filler. I used padding polyester. Because I didn’t use a new synthetic padding polyester, but one that had previously been in a pillow, then I washed it in soapy water and dried it.
You can also use synthetic fluff or holofiber as a filler. Filling density is optional. I like tight, well-stuffed biscorns =) 4. We tighten the biscorn in the middle with a button or bead. It is better to do this after filling with padding polyester, but without finishing it completely, in order to hide the ends of the threads from the sewn bead inside.
Sew to the end, carefully fasten the thread. Biscornu-five-blade is ready!
Side view:
and the third MK...
Zigugu - master class
Zigouigoui is another small variety of French crooked pincushions, assembled from squares of canvas, decorated with embroidery, beads, sequins, etc. Just like other brothers - berlingo, biscornu, etc., zigugu can be used as a souvenir, pincushion, keychain, decorative pendant for a mobile phone, Christmas tree toy, and serve as an original decoration where you see fit.
Let's do Ziguga!
Well, I once saw a new variety of biscorn and was inspired to make such a thing for myself!
And it’s called, as it turns out, zigugu. Then I came across this on the Internet – zigouigoui. But I couldn’t find a translation for this word. The first association was still the squiggle.
So, the first thing to start with is choosing a motive. It should be a design with an even number of crosses on the sides!
We make markings and embroider the motif.
And, as for biscornu, we sew it with backstitch around the perimeter of the square.
Don't forget to wash and iron the whole thing.
At this stage, you can sew a tassel (bead, chain, whatever your heart allows) into the very center of the design. We decorate (optional) with sequins, rhinestones, beads, buttons, etc.
Then we begin to put everything together into a single whole.
We determine the center on one of the sides. We fasten the thread from the wrong side. And starting from the center to the edge, we pry the backing threads, thereby sewing the edges together without visible seams. By the way, we collected biscorn! During assembly, you can string beads onto a thread, but then it is better to do it this way - a stitch for fastening, then beads with a second stitch.
On the opposite side we repeat the previous step.
It turns out we have such a pocket.
We fold it so that the seams meet in the center. And having secured the thread in the same way, we sew from the edge to the center.
In the very center we can sew a loop, a chain or something else...
At that moment, when we have reached the middle and have already sewn (if necessary) a loop, we remember about the filler! Fill with filler to the desired density and volume!
And we sew to the end!
All! Our zigugu is ready! And you can finally think about its purpose, in case you haven’t already!
There are a lot of different ideas and MK here https://mastera-rukodeliya.ru/vyshivka/uroki-stitch.html
Product execution technique
The first step is to decide on the pattern. As a rule, geometric shapes or ornaments from folk motifs are chosen. It can be done with complete cross stitch, or filling the squares can be partial. That is, in the center of the square there is a central figure and small elements emanate from it.
When it is ready, the squares must be sewn together. Use the same thread that you used for the backstitch with a needle. While embroidering, try to tuck the canvas inside so that the seam framing the squares becomes the edge of the product. Experienced needlewomen pull beads or seed beads onto the thread after each stitch. What comes out in the end is a line of beautiful stones. This will also help beginners hide small imperfections and crooked stitches. Having passed along the contour, a small hole is left through which the filler will be introduced. Suitable fillers include cotton wool, padding polyester, foam rubber and even old nylon tights cut into pieces. It is important to choose a filler that does not seep through the canvas and perfectly takes the shape of the product. Then the product is sewn up, grabbing the two framing seams back with a needle with one even seam and straightening it with your hands. You need to make sure that there are not many knots and hanging threads inside, they can eventually form knots.
Additional decorations
You can decorate it with a beautiful button to match the product or with small beads. If the product will hang on the wall, then you need to make a beautiful loop in the corner. Satin ribbons or crocheted strips of woolen threads work well. For example:
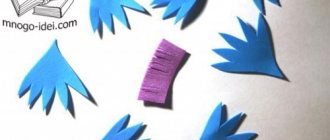
Supplement with cutas
Products complemented with embroidery thread trims will be unique in their own way. You need to take multi-colored threads or plain ones and wind them on a piece of cardboard. The length of the threads in the finished bamboo depends on how thick the cardboard is. Remember that the more thread you wind on a piece of cardboard, the more magnificent the cut . So, having wound threads around the cardboard, carefully pull out the cardboard. You will end up with a kind of loop of thread, it needs to be tied at the top point with thread. Next, threads of the same color grab the upper part of the loop and wrap it in a circle, forming a kind of cutas head. Using scissors, cut the lower thread connections and the bombon is ready. Attach it with the thread with which you first tied the loop removed from the cardboard. You can sew only one bombon in the lower corner and hang an original rhombus on the wall, or add cutlets in the corners and attach a square in the middle.
Kutasiki asterisk
Every year the technology becomes more and more popular, and accordingly, new product design options appear. They look very nice in the shape of a star, they can be used as Christmas tree decorations. Animals , for example, a turtle, look no less impressive You make an oval one, simply complement it with 4 legs made of soft material identical in color, stuffed with cotton wool. Such a toy will be especially close to the child, because it will contain the warmth of the mother.
Separately, I would like to note the product in the form of a cube . Yes, you read it correctly, the cube can also be made in this manner. A special feature of the product is that you need not two squares, but six. The cube is made according to the same principle, the only differences are in the amount of filler and in the pattern; it may differ in the side squares and the top ones.
Biscornu embroidery - creative features
Translated from French, the word “ biscornu ” means “two-horned, biconvex, polygonal.” It is not surprising that this name was given to this type of pincushion - the peculiarity of the products is that they are made in the shape of an octagon.
You can prepare biscorn in a variety of sizes. The main purpose of the craft is to be a pincushion, but resourceful craftswomen use miniature products as beads for decorations, larger pillows as Christmas tree decorations, and the largest ones serve as sofa or decorative pillows.
Many corners and edges are formed thanks to an interesting way of connecting biscornu parts - two square pieces of fabric of the same size. The corner of one piece is applied clearly to the middle of the side of the second piece, after which the elements are sewn together along the edge.
The middles of the lower and upper sides of the soft pillow are tied together with thread and decorated with beads, rhinestones, and sparkles.
Simultaneously with biscornu, needlewomen began to create related types of needle beds, which differ slightly in the sewing method.
Banurukotty
The appearance of this product is slightly reminiscent of its octagonal relative, but the technology of its sewing is significantly different. Firstly, a volumetric needle bed consists of two planes with five corners each, located exactly under each other. Whereas you need to sew the biscorn in such a way that the 4 corners of the upper side do not fall into the same plane as the edges of the lower side.
In addition, banurukotti is made from fifteen small squares: five for the top side, five for the bottom, and the last five for the sides. Whereas biscorn is made from only two, but larger figures.
Zigugu
The zigugu needle case is even smaller in size than the biscornu, due to the fact that it is sewn from just one square piece. First, the fabric is decorated with embroidery, after which the corners of the fabric are sewn together, forming the lower side of the product.
A characteristic decoration of the craft is a hanging loop and a tassel attached to the center of the embroidery.
Pendybull
A small soft craft is also sewn from one square. The sides of the figure are sewn together, resulting in an isosceles triangle with a solid wide side. Through the small hole left, filler is added to the top center corner, leaving the side edges empty.
The hollow corners are sewn together, forming something like a handbag handle - this part needs to be decorated with ribbons, bows and beads.
Product care
Requires special care during operation. If the product becomes dirty, you need to wipe it with a damp sponge and mild shampoo. It should not be washed in a machine or in hot water. Hot water will cause the threads to fray and the product will not look neat, and washing in a machine will cause the stuffing to bunch up in one place. It will not be possible to straighten a sewn product; you will have to stitch it and re-stuff it, or throw it away.
To familiarize yourself with embroidery in detail for you lovely needlewomen, a video is attached.
Patterns for cross biscornu: floral paintings
Floral motifs are used quite often in biscornu embroidery. Such products can be used both as individual accessories and as decorative interior elements to create a cozy atmosphere in a home or any other non-residential work space; in addition, many people use similar products with floral prints as pincushions in their creative life.
Floral motifs, and especially poppies, can be found quite often in biscorn embroidery
How accessories embroidered in biscornu floral style can be used:
- Like a pendant around your neck;
- In the form of decorations on the strings of children's hats;
- As a keychain for a woman's handbag or backpack.
One of the popular images of flowers recently has become the poppy. These red flowers blend harmoniously with the curved shape of the product.
Now you can find a large number of free embroidery patterns for biscornu, depicting poppies in various forms: blossoming, closed in the form of buds, and so on.
Necessary set for work
Before sewing a biscorn, it is necessary to determine the materials and tools that will be useful to us for this. For work, prepare:
- outline;
- a needle;
- threads;
- material with which you can fill the biscorn (use holofiber or padding polyester);
- patterns for cross stitch. Choose a wide variety of patterns that can decorate your original biscorn.
Also, if you wish, you can decorate your krivulka with any decorative elements you have, for example, beads, beads, satin ribbons, original buttons, etc.