How to make a mouse from felt
This felt mouse can be made in literally 10 minutes.
To create a craft we will take:
- gray and pink felt;
- small black beads;
- threads with a needle;
- pink bead;
- scissors;
- glue gun
The basis for our DIY mouse will be a triangle cut out of gray felt. It will be isosceles, its base in our case is 10 cm, and its height is 6 cm. If desired, the size of your craft can be different.
Next, we’ll use hot glue, apply it to one side of the triangle, and then fold the piece in half.
Now the glued triangle needs to be turned to the other side. To do this, you can use any pointed object. This is the basis for the gray mouse.
Let's use a thread and a needle. We begin to sew on black beads that will become the eyes of the mouse.
We will also sew on a pink bead, this will be the nose.
Let's finish the back of the craft. To do this, the protruding triangle needs to be tucked inside and glued.
The remaining details will be made from pink felt. These will be the ears and tail.
First we glue the ears.
Then we add a pink tail. We made this felt mouse.
What you need for work
Sewing supplies for work
Do-it-yourself felt mice are easy to make. To work you will need:
- Felt sheets. The thickness may vary: for small toys, a thin sheet of material 1-1.3 mm is used as a base. Stiffer felt is used for individual parts.
- Threads. It is recommended to take a medium thickness. Craftsmen use floss in 3 folds: such threads do not twist during the work process.
- Filler. The best options would be synthetic fluff, holofiber and camphor. For a limited budget: padding polyester.
- Decor elements. In any craft store you can find beads, buttons, ribbons, rhinestones, sparkles, and seed beads.
You might be interested in this. Master classes on crocheting various toys
A mouse made of thin felt at home cannot do without this:
- scissors;
- marker (chalk);
- needles;
- glue.
Before starting work, you need to prepare everything listed.
DIY mouse with felt cheese
Among all animals, the mouse becomes the most popular with the onset of the New Year. That’s why we propose to make it in our master class.
To make this mouse with cheese we will prepare:
- felt in gray, yellow and pink;
- scissors;
- decorative eyes;
- a small piece of black yarn;
- glue gun
The main detail for the future craft will be a triangle. We will make it isosceles with a base of 6 cm, and its height will be 12.5 cm.
We'll make a couple of cuts on the sides at the bottom. Our mouse's paws will be here.
Let's slightly round the tips of these legs.
Now you need to bend the upper corner down, while fixing it inside with hot glue. This is how we outlined the head of the future mouse.
Cut out a pair of ears from pink felt.
Glue them on the sides of the top of the craft.
Add decorative eyes to the face.
All that remains is to make the antennae and nose. We make the antennae from pieces of black yarn; we secure them with a glue gun at the very edge of the muzzle. And we cut out the nose in the shape of a small circle of pink felt, and glue it on top of the antennae.
Our mouse will have a piece of cheese. For it we cut out a triangle from yellow felt.
We make holes in it. To do this, it is more convenient to use nail scissors.
We give this piece of cheese to the paws of our felt mouse.
Our cute felt gray mouse is ready.
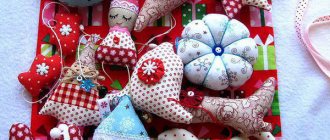
Mouse made of fabric in the form of a Christmas tree toy: video mk
All that remains is to tie a red satin ribbon around the little mouse’s neck and the toy is ready! New Year is perhaps one of the best holidays of the year! We start preparing for it no later than the beginning of December - we need to find a new salad recipe, come up with outfits, invite guests and prepare gifts. By the way, about gifts: the symbol of 2021 will be the White Metal Rat. It would seem that sewing a rat, and even giving it to dear people, is a so-so idea, but we will try to convince you and prove that these animals can be cute too! Making a fabric mouse pattern with your own hands, as well as detailed master classes, will help you make an original toy quickly, easily, and, most importantly, inexpensively!
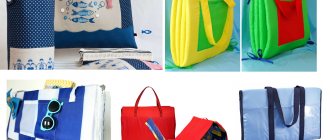
How to fold a towel as a New Year's gift in the shape of a rat
Remember when we made bunnies out of napkins? It turns out that you can twist a towel in the shape of different animals. The banal turns into a very original gift.
Apart from the diagram, I didn’t find anything else, and to be honest, I couldn’t twist the rat: I got stuck on the 5th step. Maybe you can do it? Then please share how and what needs to be done.
But there is another option for a mouse made from a towel that I came across, it’s simpler, watch the video.
My only question is: if you glue the eyes, will there be any traces of glue left on the towel?
Step-by-step master class
So, on the handicraft agenda is a New Year's toy made of felt. Begin!
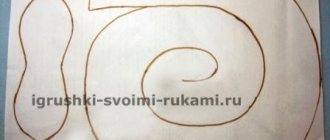
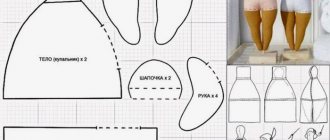
Step 1: Cut out the pieces
Print on cardstock and cut out all the templates. Transfer the outlines of the parts onto felt and cut out with small seam allowances.
Step 2: embroider the muzzle
Using black thread, embroider the eyes on the mouse’s face and sew on a nose.
Step 3: Sew the ears and body
Using a needle-forward stitch using gray thread, sew the inner parts of the ears onto the main parts. Using an over-the-edge seam, sew the body (in the second option, the boot) and the head, leaving a small piece unsewn at the top of each part.
Step 4: Sew on the Hat
Using a “forward needle” stitch, sew white cuffs onto the hat and boot (if you are making the second version of the toy) with white thread.
Step 5: Make the Details
- To make the mustache, tie knots at the end of four strands of floss, thread them through the felt and trim the excess, leaving the length you like.
- Attach the hat to the mouse's head with a decorative stitch.
- Sew leaves onto the cap and use French knots from red thread to form 4 berries.
- Attach the ears symmetrically.
- Fill the head, body and boot with synthetic padding or a special filler for toys.
Do not stuff the toy too much so that it does not become very hard.
Step 6: Sew the Head and Body
Sew the mouse's head and body together. Make a pompom out of thread (or cut a circle out of felt) and attach it to the hat. Sew the mouse's paws and heart directly onto the baby's sock.