Decoupage of glass products looks very original and unusual
Glass is a transparent material that has always been distinguished by its fragility and beauty. Most people at home have a wide variety of old glass jars, decanters and lampshades left over from Soviet times. Many people don’t even realize that these products can be given a second life by decorating them using the decoupage technique. Such hand-decorated products will be excellent gifts for friends and relatives, which, carrying a piece of your soul, will evoke a lot of positive emotions in the recipient. In addition to decorating old unnecessary objects, this technique can be used in tandem with stained glass paint for painting mirrors. Read on to learn about all the intricacies of working with glass using the napkin technique.
Direct decoupage technique on glass
Direct decoupage is used to decorate products made from absolutely any material. Its meaning is to paste an image onto the front of the product.
The direct decoupage process is performed in a certain order:
- Painting the product in the desired color;
- Pasting the pattern;
- Coating the craft with varnish.
The direct technique of decoupage on glass must be performed in a certain sequence
Due to this sequence of drawing, not all pictures are suitable for direct decoupage on glass, since the boundaries of the material on which the ornament is depicted can stand out under a thin layer of varnish.
In this way you can beautifully decorate a bottle of colored glass champagne with pictures.
To work with glass, the reverse type of decoupage is usually used.
Reverse decoupage technique on glass from napkins
The reverse technique is used to decorate transparent materials, most often glass kitchen utensils, which cannot be polished well. The sequence of stages of such decoupage occurs in the reverse order, which allows you to hide the boundaries of the design.
The first step of the reverse technique of decoupage on glass is gluing the pattern
Reverse decoupage stages:
- Pasting a picture;
- Applying a layer of paint;
- Opening the product with varnish.
Using this method, you can even decorate dishes intended for storing food components in such a way that the food in such products will not come into contact with inedible decorations.
Decoupage for beginners on glass: a little about choosing the material
Of course, you can purchase a ready-made decoupage kit; it includes everything you need, but it is quite expensive. It would be much wiser to go to an office supply store and purchase all the tools separately.
Tools and materials necessary for working with decoupage technique:
- Brushes of different sizes and hardness. To cover the product with paint, you will need a thick fluffy brush, to glue the picture - flat and hard, and to complete the missing elements, you need to purchase a thin soft brush.
- Special glue for decoupage or regular PVA.
- Acrylic and craquelure varnish. Craquelure varnish cracks when dry, thereby creating an antique effect.
- Scissors.
- Multi-colored stained glass and acrylic paints.
- A cloth or sponge for smoothing the glued pattern.
- The decorative item itself can be a glass plate, a New Year's ball, a jug, or even mirrored wardrobe doors.
- Additional decorative elements in the form of sparkles, beads, ribbons and lace ribbons.
In addition to the above tools and materials, you need to select pictures for decorating glass.
To work using the decoupage technique, you need to prepare the necessary materials and tools.
Angels, poppies, archideas can be printed on napkins - any drawings that reflect your interior.
For direct decoupage, images printed on multi-layer napkins, decoupage cards or rice paper are suitable, but denser materials for working with glass in this technique should not be used, as the borders of the decor may be noticeable on the finished product. For the reverse method of applying images, absolutely any material is suitable, if you do not plan to buy special cards and napkins, you can use beautiful photographs of people and places dear to you, or even print the pattern yourself on plain paper using a laser printer.
First, images printed on thick sheets must be soaked in a small amount of warm water, and then the excess layer of paper must be removed from the back of the image. Such simple steps will help make the motifs applied to any material more suitable for work.
After the treated decorative elements have dried, they can be used to decorate glass products using the reverse decoupage method.
Vintage box using decoupage technique
If the results of the previous two master classes can serve solely as decoration, then this wooden souvenir can be useful in everyday life. Do you have an old wooden box lying around? Decoupage will breathe new life into it. Now we will tell you how to make decoupage on wood.
Let's try to make an attractive, vintage box from old photographs; for it you will need:
- vintage images and old photographs;
- some water;
- ruler and stationery knife;
- glue and brushes;
- acrylic varnish, acrylic paint and primer.
1. Prepare in advance several photos that you will use. Cut them to the size of the box and soak them; the image should come off the paper very easily. Prime the box and then paint it with acrylic paint in pastel colors.
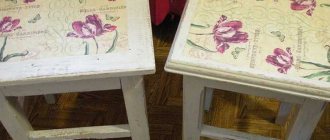
2. Apply a good layer of PVA to the lid and position the image. Smooth the paper base so that there are no air bubbles under it. Leave the box to dry, it is best to place it under a press. The picture can be smoothed with a regular rag. But this must be done as carefully as possible so as not to erase the image.
Related article: Stool decoupage - the correct technique
Apply glue and stick the picture
3. On the sides of the box, apply simpler images, these can be vintage images of flowers. Such pictures usually dominate on supermarket napkins. You can decorate the box with bows, sparkles or beads.
Glue the pictures on the sides and cover the box with varnish
Decorating the box
Another trendy decoration is the craquelure technique, which allows you to create the effect of wear and antiquity. As you can see, the decoupage technique is very simple, but it can give objects an unusual twist or completely change their appearance.
How to make decoupage boxes (2 videos)
Ideas for decoupage with photographs (35 photos)
The best posts
- Floor joists: the size of the timber and the distance between the joists, table and how to strengthen the floors, arrangement in the house
- Crochet appliques: patterns and descriptions for children's clothing with video
- Master class on DIY coffee topiary with coins
- How to make a fabric ceiling with your own hands quickly and stylishly
- Heating the cottage with gas
- Bronze chandeliers: features and advantages
- Passionate red and all its shades (40 photos)
- DIY shower cabin. How to install a shower cabin yourself? Photo
Glass decoupage master class: making a plate
If you want to please your mother or grandmother, you can make them a gift with your own hands, decorated using the reverse decoupage technique. Such dishes not only look beautiful and can become part of the interior of any room, but they also carry an additional functional load, because it is pleasant and safe to eat from plates on which the entire decor is located on the part not in contact with the food.
Master class “Step-by-step plate decoration”:
- Degrease the workpiece using liquid soap. You can look for an ordinary plexiglass plate at home or buy it in IKEA stores.
- Now you should prepare the images. Cut out the necessary elements and decide where they will be located. If you use napkins or decoupage cards, separate the top layer with the picture and soak them in water for a few seconds.
- Place a drop of glue on the desired area of the back of the plate and spread the design over it using a stiff brush. Wait for the pictures to dry.
- Complete the missing elements with acrylic paints.
- Once the design is dry, paint the entire back of the plate. Apply layers of paint until the product reaches its brightest color and the outlines of the images no longer show through. A total of up to 20 layers may be required.
- Cover the back of the craft with two layers of varnish and leave until completely dry.
You can easily and simply make a plate using the decoupage technique with your own hands.
If you used glue and paint for firing, then after they have completely dried, the products must be placed in an oven preheated to a temperature of 130 - 160 degrees for an hour and a half. Paints that require additional heat treatment, after firing, give an interesting mixture of shades that will make your gift more attractive and unusual.
History of decoupage
Almost all types of art in which paper is present came to us from China. Decoupage on glass was no exception. Beautifully executed and originally designed products brought from the East immediately won the hearts of all art lovers in Europe. The following items were decorated using the decoupage technique:
- vases of various shapes and sizes;
- plates, mugs, cups and other utensils;
- candlesticks;
- glass toys;
- bottles.
Despite the cheapness of the material for decoration, all of the listed items were made for a long time and with high quality, so their price was appropriate. For example, only the richest Europeans could afford a vase made using the decoupage technique.
The decorated surface of the product was covered with several layers of expensive, smelling varnish. It could dry for several weeks, which turned this art into a purely professional activity.
Nowadays, decoupage is no less popular. With the availability of modern materials, the whole process is significantly accelerated, and accordingly the price becomes lower. Now anyone can afford such a decorative element.
Decorating a jug: decoupage on glass for beginners step by step
Using direct decoupage, you can add personality to an ordinary glass jug. This addition to the holiday table will, without a doubt, pleasantly surprise your guests. In this original dish you can serve alcoholic and non-alcoholic drinks, or put flowers in it.
Master class for beginners “Decorating a jug with direct decoupage”:
- Degrease the dishes using dishwashing detergent or alcohol.
- Coat the jug with several coats of primer. For this purpose, you can use white acrylic paint.
- When the soil is dry, paint the jug with paint, which, as planned, should be visible through the cracks after applying the craquelure varnish.
- On top, while the bright layer is still not completely dry, add a thin layer of paint of a different color.
- Apply craquelure varnish to the entire surface of the jug. Blow dry it and you will see cracks begin to form.
- Separate the top layer with the pattern from the picture cut out from the napkin. Moisten it with water and stick it on the product, removing air bubbles from under it using a hard flat brush.
- Complete the missing elements and inscriptions with acrylic paint.
- After the drawings have dried, apply 3-4 layers of acrylic varnish to the decorated jug.
- The round lid of the jug also needs to be decorated. To decorate it, you can use completely different ideas that just come to your mind.
A jug made using the decoupage technique will pleasantly surprise all guests at the festive table
The use of tableware decorated using the decoupage technique for its intended purpose is safe only if food and drinks do not come into contact with decorative elements that are harmful to health. The design of a corrugated decanter occurs in exactly the same way. With the help of decoupage, you can make objects that previously did not fit into the interior of your home, suitable for any style.
Exclusive candy bowl
To begin work, select a transparent glass plate, clean it and degrease it with alcohol. Patterns are pulled out of the napkin with your hands, and the future composition is drawn up. Its dimensions should not exceed the dimensions of the convex part of the candy dish, since reverse decoupage on glass is performed on the outer part. With this decoration, the plate can be used for its intended purpose.
The entire composition is glued to the bottom and sides of the container. To do this, apply PVA glue to each fragment from the center to the edges with a brush. A large single drawing can be secured using a stationery file. To do this, you must follow the sequence of actions:
- The fragment is placed face up on the surface.
- Using a spray bottle, generously spray water onto the napkin.
- Carefully and thoroughly smooth out all wrinkles.
- Place the file on the back of the plate, napkin down.
- Before removing it, the overlay is adjusted and any stray air bubbles from the center are eliminated.
- When removing the file, make sure that the napkin does not move away from the plate. After this, PVA glue is applied to secure it. We should not forget that a wet napkin tears easily, and the brush should barely touch the surface.
After drying, the product is coated with acrylic varnish. Then, without going beyond the boundaries, the fragment is tinted with white paint. An opaque background adds brightness and contrast to the front side of the picture. After a pause, a one-step craquelure varnish is applied to the remaining areas of the surface of the candy dish in one even layer using a foam sponge. Drying time is left as specified in the instructions.
When dried, the applied decorative layer cracks beautifully. If it covers the surface of the glued napkin, it will simply tear it. The resulting cracks can be painted over with silver or patina, after which another layer of acrylic varnish must be applied.
Decoupage on the mirror
Every woman wants to see her reflection in the mirror several times a day. And it’s much nicer if the frame framing this glass, which is essential in every home, is beautiful and unusual.
Decoupage on the mirror looks very original
The mirror frame can also be decorated using such a popular technique as decoupage. The glass itself can be decorated with special stained glass paints.
You can decorate the mirror with flowers in the Provence style, gold ornate patterns, in tribute to the pompous 18th century, or animal prints, copying the African theme - in any case, a product made using the napkin technique will look stylish and unusual. To decorate the frame, they use the direct decoupage technique, combining it with voluminous flowers and rhinestones.
