Quilling. The flower is simple.
Let's start with the simplest flower.
1.
Prepare a square sheet of colored paper. Its dimensions should be approximately 10x10cm.
2.
Draw a spiral inside the square.
3.
Using scissors, cut a spiral along the drawn line.
4.
Using a special quilling tool (which can be replaced with an awl, needle or toothpick), twist the paper into a spiral.
You should end up with a rose like this. By making several of these flowers, you can come up with a beautiful composition.
Rose using quilling technique (video 1)
Rose using quilling technique (video 2)
Flowers using quilling technique for beginners: patterns with photos and videos
It’s best to start learning the art of quilling by making flowers. It's no secret that paper flowers have a variety of shapes and types and are the most common crafts using the quilling technique. How to make flowers using the quilling technique for beginners is the topic of our article.
Such flowers look spectacular not only in paintings, but also as decorations for gifts, caskets, boxes for small items, and are even used to create costume jewelry and clothing accessories.
Working with the technique is quite simple, but it requires perseverance, patience and accuracy from the master. That is why children are sometimes recommended to master this skill to cultivate diligence and develop fine motor skills.
Quilling flowers. Schemes of delicate flowers.
To make such delicate flowers, you need to create several blanks.
1.
To make the middle, cut the fringe. This example uses 11 large flowers and 4 buds.
2.
To make the centers of a large flower, prepare a paper strip of peach color (1cm wide and 30cm long) and green (1cm wide and 10cm long).
* To make buds, the width of the paper strips should be left and the length should be halved.
3.
Start curling the fringed centers of the flowers. Glue a green stripe to the first peach stripe.
4.
Prepare 3 orange elements and make a leaf shape out of them. These blanks need to be glued at the base - use just a drop of PVA glue.
* Do not glue the petals together; they need to be fixed only at the bottom.
5.
Prepare 4 peach-colored paper blanks and make a “drop” shape out of them. Next you need to glue 2 “droplets” into the gaps that you will find between the orange “petals”. The remaining 2 “drops” need to be glued on top - you will need to step back from the edge of the base by about 5mm.
6.
Now you need to cover the top of the petal with an orange border (all elements have the same width - 3mm). In total there will be 5 of them for one flower. The same number for buds but smaller in size.
7.
To collect flowers, use a heat gun.
8.
Making leaves. Prepare 4 strips approximately 3mm wide and 30cm long. These strips need to be twisted into a tight roll, and then the roll is rolled between the thumb and forefinger so that it takes the shape of a cone.
You need to prepare 4 cones and grease each one with glue to glue the petals of the buds and centers into it.
9.
We collect a leaf. Prepare 5 blanks and give them the shape of “eyes”. Next, you need to glue all these blanks together, applying glue only at the base.
10.
Insert 4 more blanks between the leaves. On top you need to add 3 more elongated blanks. Squeeze the paper at the sides.
You can use several shades of green.
The more greenery you use, the more beautiful the composition will look.
Simple flowers
The quilling technique produces very realistic flowers. The openwork elements from which they consist add grace and tenderness.
It’s better to start making paintings with flowers step by step with simple types. The easiest to make are daisies.
We make a loose roll from white strips of paper, glue the edge of the strip, and give it a teardrop shape. This is how a petal turns out. Glue several petals together in a circle.
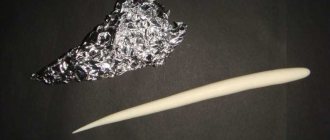
Related article: DIY hero’s helmet made of paper and foil with video
Cut a strip from yellow colored paper that is four times wider than the strips for the petals. Make cuts along the edge to create a fringe.
Roll into a tight roll, glue the edge of the strip and straighten the fringe, directing the cut edges from the center to the sides. Place the yellow center between the petals and glue them together.
To give the flower a natural shape, place it in your palm and press in the middle. The chamomile will become concave.
The stem is made of wire. It needs to be wrapped in green corrugated paper. Glue the edge of the green strip to the end of the stem and wrap the tape around it. Make a small funnel and glue a flower inside.
Sunflowers are another easy-to-make flower. These bright sunny flowers make very beautiful paintings and panels, which with their rich colors lift your spirits and fill you with energy.
Interesting and delicate panels are made from sakura branches. Sakura has simple flowers. They are made from dense rolls, pressing the center of each petal. Five petals are glued in a circle. Either stamens, which are sold in craft stores, are placed in the middle, or beads are strung on a fishing line. You can make the middle fluffy and glue a roll with fringe to the center. The twig is made from wire wrapped in brown corrugated paper. Or, a spiral is twisted from brown paper strips and pulled out, then glued to the base, giving the desired shape.
Fringed flowers using quilling technique (master class)
For these colors you will need strips 10mm and 5mm wide, and no more than 25cm long.
1.
Start cutting the fringe. Its size is 2/3 of the width of a 10mm strip. It is worth noting that the thinner the fringe, the fluffier your flower will be.
You can cut fringe into several strips at the same time.
2.
Glue one strip of paper 10mm wide and one 5mm wide and start winding the spiral, starting with a narrow strip.
Continue twisting even when you reach the fringe strip. At the end, simply secure the tail with glue.
3.
After the glue has dried, the fringe can be folded back.
This is what you get if you only twist the fringed strip. Yellow flowers can act as dandelions, pink ones as daisies, and green centers as flowers.
You can safely change the length and color of the fringed strips by gluing them together in advance.
What types of panels are made using the quilling technique?
- Wallpaper panel. If you decide not to stop there and transform an empty wall, then choose this method of decorating a room. With the help of the remaining strips of wallpaper you can decorate the free space on the wall and make it unusual and unique. A tandem of wallpaper that matches the color, texture or pattern with the rest of the wallpaper looks especially interesting. In addition, a panel on a wall made of wallpaper may not be combined with the rest of the walls at all, but can be an addition to brightly colored furniture or decorative elements in your room.
- Fabric panel. Pieces of fabric delight the eye with their diversity and volume. Use your imagination and you can create a spectacular decoration for your bedroom or living room from previously unnecessary scraps. Think over the design and shape, and secure them with an excellent result that will delight both your family members and guests at home.
- Panel of flowers. This method of wall decoration is suitable for romantic and sophisticated people. If flowers are your passion, then do not part with them for a minute. A beautiful floral wall panel made of any material will decorate the room and make it more joyful and radiant. Such wall decoration will lift your spirits at any time of the year, even if there is a blizzard and frost outside the window.
- A panel of buttons of various colors and sizes also looks good in any room. With the help of such simple and affordable things you can create a unique decoration for your home design.
As you can see, the quilling technique is not limited to paper. This type of decorative and applied art is different in that it allows you to transform everything that is at hand into beauty. Everything that previously lay idle, and even sometimes annoyed, can now form a bright and unusual composition that decorates any wall in your home. All you need is a little patience and imagination.
Volumetric flower using quilling technique
First you need to choose the color of your product. If you want a two-color flower, you can choose two similar shades.
For one petal, choose a strip 65cm long. You need to prepare 22 of these strips by gluing several small strips into one long one.
1.
Roll all the prepared strips into tight rolls.
2.
Unroll each roll to a diameter of 2cm.
3.
Next, alternately make a quilling element from the circle such as a rhombus. To make a diamond out of a circle, you need to flatten the element on 2 opposite sides and then stretch it out.
From the resulting elements you can create many beautiful, yet not very complicated flowers.
You can complicate the task by slightly improving each diamond using a knitting needle, awl, toothpick or a special quilling tool. Just twist the corner of each element a little.
4.
Cooking the middle. To do this, you need to tightly twist a strip 10.5 cm long. If you want to make the middle two-color, glue two strips of different colors together.
5.
Prepare a wider paper strip. You can also make it two-color by gluing two strips together.
6.
Make several small cuts on the new strip.
7.
Now you need to wrap a wide strip around the middle and glue it.
8.
Making the base of the flower.
The base will be in the shape of a cone. Go here to learn how to make a cone
.
Here are simple instructions for the base: cut out a circle with a diameter of approximately 3cm. Draw a radius with a pencil and cut along the radius line. You can now make a cone from the circle - use glue to attach it.
9.
Glue 2 rows of petals into the cone along with the center.
10.
You can make 10 leaves using the same instructions as the petals and glue them to the back of the cone.
Seasons
Wonderful bright paintings are made on an autumn theme. Autumn is characterized by bright, warm colors. Landscapes, bouquets of yellow, orange leaves and red berries of viburnum and rowan - all this looks incredibly colorful, as can be seen in the photo below.
In order to create such enchanting canvases, you need to learn how to make beautiful carved maple leaves.
Related article: DIY strapless top
Winter in quilling paintings looks no less attractive. Frosty patterns, snowflakes, snow-covered nature look simply fabulous. Paper ribbons seem to be created for making winter lace and decorating frames with monograms.
The New Year occupies a special place in the winter theme. A festive painting will be a wonderful gift and will complement the New Year's decor of the premises. Beautiful cards with beautiful openwork Christmas trees, Santa Claus, Christmas tree balls will delight you with beauty and create a festive mood.
It will not be difficult to complete these paintings, since most of the elements for creating them are the same as for making flowers. To make beautiful patterns, you can first draw them with a pencil or print out the finished pattern. Then carefully glue the side of the paper tapes to the outline of the drawn pattern.
Quilling paper flowers. Carnations.
1.
Make vertical cuts on a wide strip of red color.
2.
Wrap the toothpick in green paper and secure with glue.
3.
Glue the beginning of the strip to the stem and begin to wind it. At the end, secure it with glue.
4.
After you have completely wound the paper tape, begin to straighten the flower.
5.
Make petals from strips of green paper and glue them to the stems.
If you make not vertical, but diagonal cuts on the strip. You will get this version of the flower.
Basic elements of quilling
The main principle of quilling is to twist and bend strips of paper in different ways, using your imagination. Video lesson about the basics of classical shows tools and elements. The master demonstrates the beginning of work, the technique of twisting rolls from paper strips, and methods of gluing elements to the main fabric. The video shows many simple and complex elements based on tight and loose rolls: drops, petals, hearts, triangles, diamonds, ovals, bells, crescents, stars, onions, carrots, anchors, flowers.
DIY quilling flowers. Asters.
Prepare double-sided colored paper, scissors, rhinestones, quilling tools, and glue.
1.
Prepare a strip of paper 30 cm long and 2.5 - 4 cm wide and fold it in half lengthwise.
2.
Make several small cuts on the strip.
3.
Using a quilling tool (as already mentioned, it can be replaced with a toothpick, awl, needle, etc.) twist the strip.
4.
After you have rolled the roll, carefully begin to unscrew the fringe from the outside.
You should end up with a flower like this.
For different flower sizes, vary the strip sizes.
How to choose and where to buy
A panel using the quilling technique on the wall is a unique decoration of its kind, which not only occupies thoughts and hands, it allows the soul to express itself to its fullest. Just imagine how many unforgettable emotions creating your own decorative panel on the entire wall will give you.
You will be able to decorate your favorite home yourself without making a lot of financial resources or personal effort. The WESTWING shopping club catalog gives everyone a unique opportunity to enjoy beauty and put their own hands into it. Choose various quilling panels from our catalog and create your own masterpieces!
How to make flowers using the quilling technique. Dandelions.
Prepare strips of yellow thick paper in two shades (for flowers), green paper strips (for leaves), crumpled paper (for stems and buds), scissors, tweezers, glue.
The width of each strip should be 3.5 cm. Two strips as long as an A4 sheet are enough for one flower.
1.
Prepare 3 strips to cut into petals. Fold each strip in half lengthwise and fold it towards each other as shown in the picture. Next you need to cut the petals to about 0.5mm in size.
2.
Using a quilling tool, twist one yellow strip and secure the tip with glue. Next, wrap two orange strips on top of the yellow strip, having previously glued them into one long strip.
* You can fix the flower from below with glue.
* Gently straighten the petals.
3.
Making leaves.
Prepare a small green rectangle of paper. Fold it in half and cut out a leaf shape.
4.
Squeeze the leaf into an accordion to make it more realistic.
5.
Making a bud.
Prepare 1/3 of a paper strip and cut the petals. Roll the strip into a roll and secure with glue.
Cut a strip 1.5 - 2 cm wide from crumpled paper. Glue its edge, place a bud on it and wrap the paper. Just twist the rest of the stem.
6.
If you want to make a beautiful composition of flowers and buds, prepare a base of thick paper or cardboard.
Glue all the elements to the base. The first thing you need to glue is the flowers, and then the rest, smaller details.
Schemes for creating paintings using the quilling technique
Professionals can only use their imagination to create quilling paintings. For beginning creative people who are just mastering the technique, it is sometimes extremely difficult to create the perfect panel on their own, correctly calculating the size and number of elements, arranging all the details of the composition so that everything looks harmonious. It is not always possible to choose the right element and position it advantageously. Special stencils and diagrams for creating certain paintings can help in your endeavors; look at the photos for examples:
How to make flowers using the quilling technique. Roses.
As always, you will need quilling paper, a ruler, glue, as well as wax paper and pins.
1.
Make a “droplet” shape from a pre-prepared element. This will be your bud.
2.
Glue 5 petals together to make a flower.
3.
Now make another similar flower for the second layer of paper rose, but make the petals smaller. To achieve this, simply do not unwind the workpiece too much.
4.
Prepare a strip of yellow or green paper and fold it like an accordion as shown in the picture. You will get stems.
5.
Glue the stems to the paper.
6.
Fold a small strip of paper in half and, using a quilling tool, twist the right end to the right and the left end to the left.
7. All that remains is to fold everything on paper and glue it into one bouquet.
How to make beautiful flowers using the quilling technique: tips and reviews
- Quilling is a very painstaking form of creativity. Only after acquiring skills will the figures be obtained more or less quickly. Therefore, be patient
- Accuracy is the main factor for obtaining beautiful compositions. No matter how ingenious the idea is, if it is dirty or uneven, it will simply be impossible to look at it
- Paper parts are very small, so prepare the work area in advance
- Wait until the part is completely dry before attaching it to the base.
- Don't put a lot of PVA glue. Even a small amount of it glues paper well
- Don't skimp on your quilling tools. This will provide you with easier work and smooth parts.
- Take your time, stretch out the pleasure of creating your masterpiece
Flowers
Don't limit yourself to creating just one motif. Look for the ones that you like the most.
Flowers in quilling style. Bouquet on the wall.
Such a bouquet can become a decoration for both a postcard and a room. It can be glued to the wall, and it will decorate the interior, or glued to a postcard made by yourself. You can choose colors to suit your taste.
First you need to prepare 2 sheets of pink paper, 2 sheets of purple, a toothpick (quilling tool), scissors, PVA glue and beads (for decoration).
1.
Prepare paper strips 0.3 cm thick and roll it into rolls.
2.
Making the first flower.
- Glue one pink and two purple strips and roll them into a roll.
— Unravel the spiral so that its diameter is approximately 1.5 cm (in principle, you can choose the size yourself).
- Make an eye shape by squeezing the roll on both sides. This will be the petal of your flower.
— We need to make 5 more of these petals.
— For the center of the flower, twist a pink strip into a tight roll.
- Glue six finished petals to the middle. You can glue a bead on top of the middle.
*You can make a few more of these flowers for the composition.
3.
Making the second flower.
— Depending on the chosen color, glue two strips and roll them into a roll. You only need to make 6 of these rolls.
* You can prepare 4 rolls of one color and 2 of another for one flower (in this example, 4 purple and 2 pink).
* The diameter of the roll is slightly smaller than the diameter of the rolls used in the first flower.
- Give the roll a heart shape.
— For the middle, roll up a tight roll and glue the petals to it.
*Make several flowers of different sizes. To further use them in the composition.
*You can vary the number of petals. For example, one small flower may have 3 petals.
* You can decorate some centers with beads.
4.
Hanging leaves.
Making such leaves is very simple - prepare several rolls and make a teardrop shape out of them. Then just glue all the “droplets” to one strip.
5.
The entire composition can be glued to a plastic lid or to the cut bottom of a plastic glass. Then you can hang the composition on the wall, for example.
Improve your skill
After mastering simple flowers, you can try to make more complex lilies. In nature there are many species of this flower and their colors are different.
To create a lily, in addition to the standard quilling kit, you will also need a gel pen to apply dots, like a living flower.
You need to make three large petals. The photo shows its diagram, and the numbers indicate the diameter of the free rolls, which need to be bent as in the diagram.
Related article: Glove Turtle
Glue the elements together.
Wrap a common border around the elements several times.
You need to make three such petals.
Next, as shown in the diagram, smaller petals are made.
They are made according to the same principle as the previous petals. You also need to make three of them.
Next, the finished petals need to be painted with gel pens, imitating the color of a real lily.
Make a tight roll and shape it into a funnel. Glue the smaller petals to the center at the same distance from each other.
Glue larger petals in a checkerboard pattern higher in the tier. The middle should be empty so that the stamens can be glued to the center.
For the stamens, you need to form small moon-shaped elements from burgundy rolls. Then cut a strip of paper lengthwise into three strips, measure the length of the stamens, glue some edges together, and fold the other edges. Glue burgundy moons to these folded edges. The stamens are ready.
Glue the stamens into the center of the flower.
Now you need to make a pestle. Three small light green dense rolls are glued onto the strip.
Glue in the pestle. Lily is done.
So, gradually complicating the task, you can learn how to make incredible flowers.
Orchids on a branch look great. These very unusual flowers are distinguished by their unique shape and color. Their petals are made either like those of a lily, or from concave dense rolls. Orchids are suitable for both paintings and panels. A tabletop arrangement in a quilling flower pot will also look great.
Quilling. Pictures of flowers.
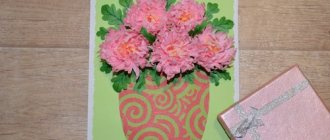
Application “Flowers in a vase”. Quilling master class
Application on the theme of Flowers using the quilling technique
Master class “Flowers”
Application using quilling technique
Author:
Budilova Galina Evgenievna, teacher of State Budgetary Educational Institution Secondary School 821 preschool department.
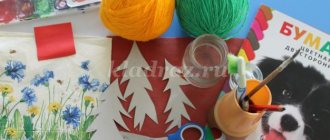
The master class is intended for children of senior preschool age and primary school age; kindergarten teachers; additional education teachers and parents. Purpose of the master class: making a gift, interior decoration, visual aid, craft for an exhibition. Goal: making a panel “Flowers” using the quilling technique. Objectives: improving skills in working with paper, scissors, glue. Development of fine motor skills of the hands. Cultivating attention, perseverance, artistic taste, and the ability to finish what you start. Materials: - colored paper, - quilling strips of different colors, - quilling tool, - scissors, - glue, - glue brush, - simple pencil.
Let's start making the vase. Take a sheet of colored paper, fold it in half, draw half of a vase and cut it out. This is the base of the vase.
We lay out the base of the vase with details made using the quilling technique. We take strips for quilling, using a quilling tool we twist the rolls, put them on the table so that they unwind a little, we get parts - spirals, glue the edges of the resulting spirals. We leave some of the spirals unchanged, and squeeze the other part of the spirals with our fingers on one side.
With these details we begin to lay out the base of the vase. We lay out the drawing as desired.
Then we cover the vase on all sides with quilling strips so that the edges look smooth and beautiful.
This is how you will get a smooth edge.
Our vase is ready.
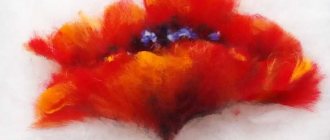
Let's start making flowers. We will make three types of flowers. For the first type of flowers, we take quilling strips of the same color, twist the rolls, let them unwind a little, we get spirals, squeeze the spirals on both sides with our fingers. We've got petals for a flower. You will need 16 such petals for one flower.
We make the base for the flower. Cut out a square of paper the same color as the petals. Square size 4cm x 4cm. We draw a circle on the square, cut it out, make a cut to the center of the circle, overlap the edges of the cut and glue it together. The base for the flower is ready. Now we take one petal, grease half of the petal with glue, glue the petal onto the base, the sharp end of the petal should lie in the center of the base. Glue the remaining petals tightly to each other, the sharp corner of all petals should touch the center of the base. We must place 8 petals in one row on the base. Next, we lay the second row of petals on the first row of petals, and begin to lay the petals between the petals of the bottom row. We make more flowers from quilling strips of other colors. These are the flowers we got. To make the flowers even more beautiful, we will give them multi-colored centers. To do this, take a quilling strip, twist it into a tight roll and glue it into the middle of the flower.
This is how our flowers have changed.
Now we will make other flowers. We take 5 dark-colored quilling strips and one light-colored strip. We twist the strips into spirals. We squeeze the dark-colored spirals on both sides with our fingers. We also compress the light-colored spiral from both sides, moving away from the middle closer to one of the sides. Glue the dark petals to the light part. These are the flowers of the second type we got. Let's start making flowers of the third type. We begin work by making stems. We take two green quilling strips, cut one strip into 4 parts, glue these strips onto another strip at equal intervals and bend them a little with your fingers.
Now we take a blue strip, twist the spiral, squeeze it with our fingers on both sides, and then again between them. You can first squeeze the spiral on one side with your fingers, then step back from this corner at equal distances and squeeze it on both sides with your fingers.
Glue the flowers onto the stem at the top.
These are the flowers we got.
Let's start making leaves. We take green quilling strips, twist the rolls, let them unwind a little, and squeeze them on both sides with our fingers. From these blanks we collect leaves of different sizes. A leaf can consist of one blank (leaves for flowers of the third type); from three blanks (leaves for flowers of the second type); from five, seven and nine blanks (leaves for flowers of the first type).
To decorate the painting we make several decorative elements. We twist spirals from quilling strips and unravel them in wavy lines. We take other strips: we twist some from both sides to the middle; others in opposite directions; The third ones are twisted only on one side. The number of decorative elements depends on your imagination.
We begin to assemble the panels: glue the vase, flowers, leaves and decorative elements. Our panel is ready.
We recommend watching:
Master Class. Peacock using quilling technique Applique. Bouquet of flowers using quilling technique. Master class with step-by-step photos Bouquet of flowers. Quilling Master class Bird cherry twig. Quilling. Master Class
Similar articles:
Quilling. Flower meadow. Master Class
Vase-candy bowl in quilling style
In order to bring the idea of such a vase to life, novice craftsmen will have to learn how to make other quilling elements. They must be very even and dense enough so that the final product turns out beautiful.
You will need:
- quilling strips;
- glue;
- toothpick;
- shapes for circles;
- sketch for the base of the vase.
Step-by-step description of the process of making a vase-candy bowl. For the base you will need the following basic figures: a thick roll, a petal. To ensure that all parts are the same size, use a template ruler. When composing the base pattern, try to make the outer circle as even as possible according to the sketch. The walls of the vase will consist of parts in the form of droplets. They are gradually glued to the base in the spaces between the round parts, slightly at an angle.
The next rows are glued according to the pyramid principle, the tips of the droplets are placed in the gaps between the droplets of the previous row. In the top rows you can combine different quilling details - drops with leaves and rounds of different sizes, rings. For example, you can take the diagram from this picture:
The last two rows need to be deviated even further from the vertical so that the vase is as open as possible. In the end, you should end up with a vase like this. If you used thick enough paper and strong glue to create it, you can put various small sweets or decorations in it.
A handmade gift in the quilling style will delight connoisseurs of handicrafts. Moreover, it is very easy to do even for a beginner. You can learn how to create other interesting gifts and crafts using this technique from various video and photo tutorials.