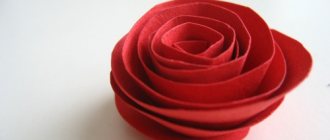
“Pink chrysanthemums” made of corrugated paper
Chrysanthemums have gained popularity due to the rich variety of varieties. These flowers differ in the size of the buds, the shape of the petals, the color scheme and the number of flowers on one stem. This means that anyone will find among this splendor flowers that will meet all their needs and desires. The buds of pink chrysanthemums used in bouquets, flower arrangements, garlands and wreaths look very tender and tender. You can also use the pink color of chrysanthemums as a basis to create a panel, composition or applique from corrugated paper. Let's look at this idea based on our master class.
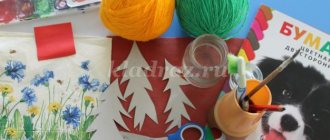
Materials and tools
When creating a panel applique with pink voluminous chrysanthemums you will need:
- double-sided colored and decorative paper;
- thick pink corrugated paper;
- White paper;
- yellow and dark green felt-tip pen;
- stationery and curly scissors;
- PVA glue (silicate glue).
How to make an applique with voluminous pink chrysanthemums from corrugated paper
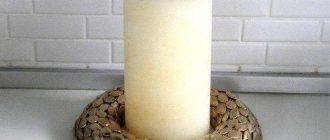
To create chrysanthemums, it is better to use high-density corrugated (creped) paper - this way the flowers will hold their shape better. For work, prepare the necessary tools and related materials.
Cut out long strips of corrugated paper with a width of about 5-6 cm (the larger the width, the longer the flower petals).
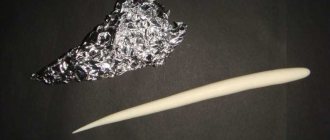
Fold the strips several times, as in the picture.
Using scissors, cut out the sharp petals, leaving 1-1.5 cm from the edge.
Make cuts evenly so that the width of the petals is approximately the same.
Straighten each of the strips. Apply a thin line of glue along the entire length of the strip.
Start rolling the strip into a tight roll. When the first strip is curled, start gluing the second strip around it.
Make several chrysanthemum flower preparations in a similar manner.
Gently spread outer chrysanthemum petals.
Spread the remaining petals to give the flower volume.
Using a scissor blade, curl the ends of the petals. Do this with all the petals so that the chrysanthemum becomes voluminous.
Lightly tint the center of the flower with a yellow felt-tip pen.
The number of flowers can be any, but it is desirable that the chrysanthemums differ slightly in size.
Cut out a vase of any shape from decorating paper. From dark green paper, cut out leaves that look like real chrysanthemum leaves. Use a green marker to highlight the veins on each leaf.
For the applique, make a base of office paper in two different colors. Cut the top rectangle with curly scissors to create a beautiful frame. Glue the shaped sheet onto the rectangle. Glue the vase onto the applique base.
Turn the flowers petals down. Make cuts at the base of the flowers and open the edges. Generously coat the edges of the flowers with glue.
Glue three flowers above the rim of the vase. Glue the remaining flowers to the second row.
Bend the edges of the leaves slightly using the blade of the scissors. Glue the leaves near the flowers and inside the bouquet. Glue a couple of sheets near the vase.
Give the painting a little time to rest so that all the parts are firmly glued to the base. The applique with delicate pink chrysanthemums is ready!
What a wonderful original composition we have with pink chrysanthemum flowers! A little patience, diligence and time, and such a wonderful result of the work done! This master class can serve as an example for creating similar applications with chrysanthemums of any other color or using flowers to decorate the interior.
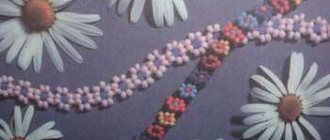
"Blooming daisies" made of corrugated paper
Spring brings warm sunny days and new hopes. Thanks to the change of seasons, everything awakens from a long winter sleep and the world reveals itself in colors! The harbingers of spring are bird trills and primroses, which inspire artists, poets, and connoisseurs of beauty. And therefore, we will devote our today’s master class to creating a panel with delicate blooming daisies from crepe paper.
Materials and tools
When creating a panel with delicate blooming daisies, we used:
- crepe (corrugated) paper in pink, yellow and green;
- yellow and green office paper;
- stationery and curly scissors;
- toothpick;
- PVA glue;
- green chalk;
- pink marker.
How to make a beautiful panel with blooming daisies from crepe paper
Prepare stripes to create three-dimensional flowers. Cut a strip of 4*20-25 cm from pink crepe paper. Cut a strip of 1.5*15 cm from yellow corrugated paper, and several strips of 1.5*10 cm from green paper.
Fold the strips several times and make notches on the yellow and green pieces, and on the pink ones - deep cuts, leaving 0.5 cm along the bottom.
Straighten the stripes. Divide the yellow blank into two parts. Connect the stripes, alternating yellow and green. Apply glue along the bottom of the long piece.
Place the toothpick on the edge of the workpiece and begin to twist the strip.
Try to twist the strip so that the length of the notches on the surface is the same. Twist the yellow-green center of the flower until the strip ends.
Using the blade of scissors, curl the edges of the petals on the pink blank, as in the picture.
Apply glue along the bottom of the blanks and begin to twist the strip with petals around the core of the flower so that the petals open outward.
Curl the pink strip completely and you will have a lush spring flower.
In order to make a daisy bud, you need to twist the strip with the petals inward.
Make a few flowers and a couple of unopened buds according to the sample.
Cut out several rectangles of different lengths from green crepe paper. Twist each rectangle into a tight stem, coat the edges with glue and secure around the stem.
Also cut out shaped leaves from green crepe paper, as in the picture. Using green wax chalk, highlight the edges and central vein on each leaf.
Give volume to the center of the sheets by straightening the paper.
Cut out a rectangle from green office paper, and a smaller shaped rectangle from yellow office paper. Use a bright marker to trace along the edge of the shaped sheet. Glue the shaped rectangle onto the green base.
Glue the flowers to the base of the panel. Choose a layout that is convenient for you to create a harmonious composition.
Glue the stems under each flower.
Glue leaves to the base of the stems.
A three-dimensional panel with blooming daisies is ready!
What delicate flowers were made from corrugated paper! As if by magic, spring daisies bloomed in the picture! Such an unusual panel will be a wonderful gift for a holiday or significant date, as well as an original solution for interior decoration.
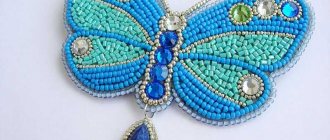
“Tender carnations” made from wet crepe paper
Bright red carnation flowers are often given to men on Victory Day, variegated ones will decorate any bouquet, and white and pink ones will emphasize the tenderness of feelings. Try making beautiful carnations out of paper and decorating them with an applique. Our detailed master class will explain and show how to do it yourself.
What you will need in the master class
To create an applique with delicate carnations you will need:
- pink crepe paper;
- colored paper (double-sided);
- thick paper for the base;
- curly scissors;
- stationery scissors;
- stapler;
- glue;
- spray bottle with water;
- colored markers.
How to make an applique with delicate carnations from wet crepe paper
This creative work requires different types of paper and tools, so you should prepare everything you need from the list in advance.
Cut 4 identical squares from corrugated paper.
Place the squares on top of each other, alternating the direction of the compressed “pattern”. Use a stapler to connect all the squares.
Using scissors, cut a circle from a stack of squares. Make cuts towards the center to divide the circle into petals.
Pick up the petals from the topmost circle.
Do the same with all the rows to get a lush flower.
Use a pink marker to make veins on all the petals.
Spray the voluminous flower with water.
Fold the flower in half and then into a quarter circle.
Let the flower dry in a warm place, or dry it with a hairdryer.
In this way, make several flowers and one unopened bud.
Take half a sheet of light yellow paper and paste a light green colored piece of paper on top.
Cut three 2.5 cm wide strips from dark green paper and glue them into tube stems. Cut out the sepals and narrow leaves as shown in the photo.
Glue the flowers to the base of the applique.
When all the flowers are glued, glue the stems to three large carnations.
Glue the sepals on top of the flowers.
Glue the leaves to the flower stems. Cut off the ends of the stems.
The applique with delicate pink carnations is ready!
What lovely pink carnations we got! The carnations are voluminous, with color transitions - this unusual technique allows you to achieve similarity between paper flowers and the original. The applique can be supplemented with a festive ribbon or multi-colored butterflies, or you can come up with other color combinations for decorating carnations.
"Peacock" from palms
Materials needed: colored paper or cardboard of different colors, pencil, glue, scissors.
Let's get started:
1. Place the child’s palm on colored cardboard or paper, trace and cut out the palms. 6 pieces will be enough. The more palms, the more magnificent and larger the peacock will turn out.
2. Draw and cut out the body of the peacock. It is shaped like a skittle.
3. Next you will need paws and a nose. To do this, cut out 2 semicircles and a triangle from colored paper.
4. All parts are ready. Let's start assembling the application. First we collect the tail. To do this, glue your palms to each other with a ladder, your fingers should point in the same direction.
5. We unfold the applique with our palms facing up and glue the torso. We revive the bird by adding the previously prepared legs and nose. The eyes can be completed with a felt-tip pen. Peacock is ready
Related article: DIY paper hearts on the wall using the origami technique
“Scarlet peonies” from paper accordions
The world of flowers is beautiful and diverse! You’re amazed at what bizarre shapes, combinations of colors and shades are found in the kingdom of flora. Among garden flowers, beautiful spherical peonies stand out for their lush forms, blooming profusely on bushes and flower beds. These flowers look wonderful in bouquets, compositions and festive decorative elements. You can also make beautiful voluminous peonies from corrugated paper and use them in the design of an applique or panel.
What you will need in the master class
To create an applique with scarlet peonies, we will need to take:
- light green and light yellow office paper;
- colored double-sided paper in yellow and dark green;
- bright red corrugated paper;
- corrugated cardboard orange or brown;
- green marker (felt-tip pen);
- scissors, glue.
How to make an applique with scarlet peonies from corrugated paper
Prepare the necessary tools, colored paper and cardboard to create a composition with voluminous flowers.
Take a piece of light yellow paper and glue a light green rectangle on top of it, leaving a border around the edges. Cut out a flower basket from orange corrugated cardboard. Glue the basket onto the base.
Prepare rectangles of red corrugated paper, as well as small yellow rectangles to decorate the center of the flowers. Divide each red rectangle into four parts and stack them on top of each other.
Fold the corrugated rectangles into an accordion so that the gathers are perpendicular to the fold lines. There should be a total of three vertices or five fold lines. Make an accordion out of yellow paper.
Make the edges of the red accordion rounded, and make notches on the yellow one. Place the yellow piece in the center, inside the red accordion.
Using scissors, make a small cutout on the back of the accordion and tie a thread around the center.
Straighten the accordion and make cuts towards the center to separate the petals.
Gently bend the petals towards the center to create voluminous buds, as in the photo.
Make the number of flowers needed for the composition in a similar way.
Glue a few buds over the edge of the basket.
Make a second row of flowers. Glue the remaining flowers. Cut leaves with angular edges from green paper. Use a green felt-tip pen to draw veins.
Glue the leaves inside the bouquet and along the edges.
Cut out a basket handle from corrugated cardboard and glue it on top of the basket, as in the picture. Cut out heart-shaped petals from red crepe paper and glue them near the basket.
The applique with scarlet peonies is ready!
How brightly the scarlet buds of peonies glow! If you like pink or burgundy flowers of this type, use crepe paper in the appropriate color. Such an original composition with voluminous flowers can be used as a basis for a panel, painting, or postcard.
Master classes were prepared by Anastasia Ushakova.
In order not to forget the page address and share with friends, add it to your social network:
More interesting:
Tags: March 8, DIY flowers
Master class on three-dimensional application “Flower Bed” with preschool children
Marina Rovodzyanova
Master class on three-dimensional application “Flower Bed” with preschool children
Goal: to create conditions for replenishing children's knowledge about garden flowers and for strengthening their skills in working with scissors and glue.
Software tasks:
- promote mastery of methods and techniques of volumetric appliqué;
- an exercise in folding and gluing round parts, creating the image of a flower;
- development of memory, vocabulary, fine motor skills;
- development of a sense of color and artistic taste.
Progress of the master class
-Guys, let's imagine that you are different flowers in a clearing!
Once, two or three times the flowers grew (we were squatting, we get up)
They stretched high towards the sun: (stretch on tiptoes)
They felt nice and warm! (look up)
The breeze flew by, the stems swayed (they swing their arms to the left - to the right above their head)
They swung to the left and bent low. (lean to the left)
They swung to the right - they bent low. (lean to the right)
Wind run away! (they shake a finger)
Don't break the flowers! (squats)
Let them grow, grow,
They will bring joy to children! (slowly raise their hands up, open their fingers)
-Look how many beautiful flowers have grown in our flower garden. Let's name them. (we show cards with pictures of different garden flowers, and the children must name them: asters, daisies, roses, tulips.)
Let's solve the riddle and find out what other flowers have grown here.
Many tender petals
At the pretty flowers,
The smell is fragrant -
Not pleasant for everyone.
Velvet petal,
In flowers - (marigolds).
— What kind of flowers grew in our flower garden? What time of year do these flowers bloom? So, what can you say about them? What kind of flowers are these?
(Marigolds are summer flowers.)
— In the summer, flower beds blaze in the gardens and flower beds. Along the garden paths, one of the most colorful and bright summer flowers - marigolds - burn like lights. They have no equal in brightness. They bloom for a very long time. The royal colors of these flowers can be seen from afar: yellow, orange, red, burgundy, purple - we can’t list them all!
Dynamic pause “Flowers grow in the meadow”
Flowers grow in the meadow (Arms in a vertical position,
Unprecedented beauty. palms open.)
Flowers are reaching towards the sun - (Stretch, arms up.)
Stretch with them too.
The wind blows sometimes, (Waving your arms, imitating the wind.)
But that's not a problem.
The flowers are bending, (Tilt your hands.)
The petals drop.
And then they get up again (Straighten your hands, fingers open.)
And they still bloom.
(Imitation of flower movements in accordance with the words of the physical exercise)
- Today we will try to create our favorite flower bed from different flowers, which will delight us and our parents.
To create flowers we needed colored paper, glue, and scissors.
Now let's get to work. Let's roll a tube out of green cardboard, like this.
Now cut one edge of the tube into equal strips. Glue each strip to the tube inside out.
Now we need flowers. They can be any color.
Glue the flowers onto the folds of the strips.
So our flowerbed is ready.
Physical education minute:
— I walk in the field, raising my legs (walking in place with a high knee lift)
— I’ll lean closer to the flowers
I will see all their beauty,
Delicate wonderful aroma
I'm glad to feel it too! (bend over, take a few breaths through your nose)
- I won’t pick flowers - (straighten up, turns head to the right - left)
- There will be a lot of beauty! (spread hands)