The birth of mosaic
As is known, glass is produced by melting quartz sand into a liquid transparent mass - charge. At this stage of production, the decorative tasks of the future product are also solved. To add color, dyes such as iron oxide, manganese, chromium, and many others are added to the transparent mass. If the technology involves the production of opaque, frosted glass, then feldspar is added to the charge. But that is not all. Let's take a look into the holy of holies of the factory - the chemical laboratory .
The strongest glass is smalt. To prepare this material, the finished mass of silicate glass is ground into powder, mixed with metal oxides and baked in ovens. The result is glass that is very resistant to various damages.
But the main feature of smalt is its peculiar translucency, internal glow, and barely noticeable color stains. Each tessera radiates its own unique deep pattern. Smalt mosaic is the best choice for public spaces, as it can withstand frequent cleaning, washing, and mechanical stress. One of the decor options is imitation mother-of-pearl coating. Quite an expensive process. Iridium, used in production, is very rare in nature and is valued on a par with gold and platinum. When added to the glass mass, it creates a pearlescent pattern. Mother-of-pearl in nature is limited in its palette, while iridium plays with all the colors of the rainbow. By the way, this metal is named after the goddess of the rainbow - Iris. Aventurine mosaic looks like a precious stone. Inside the glass base, streaks of sparkling dots are visible. The production of such glass mosaics is quite labor-intensive. To prepare aventurine, a special mixture is melted in ovens for 5 days, then copper oxide is added and boiled for 12 hours. You need to wait another 10 days for the mixture to cool. The resulting mass is ground into powder and added to liquid glass. Exact adherence to the recipe does not guarantee the expected result. Up to 30 percent defective in each batch. Hence the high price for mosaics with aventurine.
Third lesson
For work you will need the following tools and materials:
- Colored glass;
- Primer;
- Glue;
- Putty;
- Foam sponge.
Pieces of multi-colored glass can be used to decorate both a bathroom and an ordinary wall in an apartment. Today we’ll look at how to make a beautiful fish for the bathroom.
- The required surface must be sanded, thereby leveling it. Afterwards we apply a primer.
- Now we will transfer the drawing from the template to the wall. In our case it is a fish.
- After we have finished drawing, we begin to lay out the glass, gluing each piece. It is better to do this in several steps, allowing each row to dry.
- Leave the finished painting to dry completely.
- After the painting has completely dried, we dilute the putty and begin to coat the finished painting.
- Leave until this mixture dries completely. After half an hour, you can safely wipe the panel with a sponge.
- That's all, the painting for the bathroom is completely ready.
Article on the topic: Knitting clothes for dolls. Magazine with diagrams
In the same way you can make a picture for the kitchen. Having selected a beautiful template and mosaic, you can begin to create masterpieces with your own hands.
We invite you to watch video tutorials that will help you understand in more detail the process of making such paintings, as described above.
Production and varieties of mosaics
To create mosaic fragments, the mass is poured into special molds. The form varies. The most common are squares of 10×10, 20×20 and 50×50 mm with a thickness of 4 to 12 mm. In addition, the texture of the glass mass allows the use of round, rectangular, oval, diamond-shaped, “sea pebbles” and other shapes. The latest innovation from one of the Italian companies is the use of plant motifs to create mosaic forms.
There are several more techniques for decorating glass mosaics, which are obtained by pouring glass mass into molds.
One of them is a real gold mosaic. No, no, not a trick of the Venetian glassmakers.
Laying glass mosaic
Laying glass mosaics is impossible without knowledge of the nuances that accompany this complex work. I will try to tell and show you about them in detail.
Glass mosaics are assembled into mixes on film, paper or mesh. The average chip size is 20 x 20 mm.
Features of mixed doubles
1. Mixed paper on paper is only suitable for a swimming pool bowl, since it is difficult to achieve decent quality with it.
After drying, the paper is washed off with water, and only then the flaws become visible.
2. Mixed film on film is already better, since these flaws are visible, and you can cut through the film in the right place and fix problem chips, but in cases where glue is squeezed into the seam, it is difficult to clean it out.
The film on the chips sits tightly and is removed only when everything is dry. During this action, the quality of mosaic gluing is checked. If it sticks poorly, it will fly off along with the film.
3. Mixed on the grid. It’s not difficult to correct the chips, remove excess glue from the seams, and you can immediately see how the finished product looks, since nothing covers the outer plane. But it is more expensive than the first two.
Choosing a surface for mosaics
Where is glass mosaic used? More often these are round bowls of pools, with rounded sides.
Glass mosaic chips with beveled edges fit without problems on a rounded surface, and water hides flaws in the geometry of mixes and individual chips.
At the same time, glass mosaic is used both on walls and on the floor, depending on the design solution for a given room. More often these are artistic or abstract panels and inserts
We will look at how installation is done on a wall, but all recommendations are also valid for installation in a pool bowl, only with less, so to speak, careful execution.
If you are your own designer, then before choosing a place for the mosaic, consider the lighting of this area, since the direction of lighting affects the appearance of the finished product.
The main thing is to avoid horizontal lighting. Lighting directed along a mixed wall will reveal flaws in both geometry and installation, creating shadowed areas on protruding chips.
Moreover, if the corner of the chip protrudes by a tenth of a millimeter, then its shadow will be already a millimeter in size, and the appearance of the panel will become, to put it mildly, unpleasant.
Even a light bulb placed on the ceiling, but close to a mosaic wall, creates this effect.
Therefore, the installation of glass mosaics and lighting are planned taking into account the shadow.
Preparing the base
Preparing the base for glass mosaic involves leveling the surface.
In the pool bowl, hammam, and other rooms with high humidity, it is strictly not recommended to use gypsum plaster. Only a cement-based mixture, which, after drying, is primed with a moisture-proof primer.
Plastering a surface with a tolerance of ± 1 mm can only be done by a skilled craftsman, and in the absence of one, the plastered surface is trimmed and smoothed with tile adhesive, category Unis-2000 (200 - 300 rubles per 25 kg bag). Here you need to level it carefully, perhaps in 2-3 steps, priming each applied layer with a strengthening primer. Align at least to the light, at least to the passage of the blade. I smooth the finished surface with my hand to feel the irregularities.
The geometry of the chips, as I already said, is far from ideal, both in terms of edges and thickness, and if an uneven chip hits an uneven surface, then the protrusion, or dip, becomes unacceptable.
Keep in mind that you won’t be able to level anything with a mosaic, or it will require a lot of time and patience, with cutting, picking out, cleaning individual chips and installation sites, followed by meticulous leveling and cleaning up the exposed glue.
This applies to a lesser extent to the pool bowl, although it is better to make it as even as possible.
After leveling, waterproofing is done in the pool or hammam. It is better to use a dry two-component mixture of the Mapei brand. It has the smallest fraction and a relatively long period of vitality. The quality of the coating is without any complaints.
This waterproofing is applied over a fiberglass mesh with a mesh size of 2 x 2 mm. A mesh is applied to the surface of the base, and the mixture is applied over it with a 40 cm spatula, with pressure. You need to iron it carefully so as not to spoil the smooth surface that we made with such difficulty.
In other wet rooms (bathrooms and the like), you can get by with a water stopper on the floor and a moisture-proof primer on the walls. The water stop is also applied over the mesh.
Finally, I would recommend using mosaic glue. The fact is that it has enviable strength after drying, and it is not scratched with a notched trowel during further work.
It’s much more pleasant to work with a durable surface, and the glue consumption for such processing is so small that it’s worth the effort.
At the same time, missed irregularities will be revealed and smoothed out.
Marking
If you have a panel, then the matter is not complicated, it is first assembled on the table and then transferred to the wall.
For inserts, space is left in the tile in which they are subsequently assembled
Much more interesting is laying on corners or slopes. Let me remind you once again that this mosaic is supposed to be on rounded surfaces, but the flight of design ideas is inscrutable, so you have to make corners as well.
If the corner is internal, then all right. It is possible to cut the mixed cut along the inner corner, and close the cut with an overlay. But it’s difficult to trim an outer corner, even on a professional machine.
Therefore, we calculate in advance how the mix will fit the corner and decide what to do so that the mosaic in this corner does not get cut.
And you can do the following: stretch the mixes as you approach the corners, or vice versa - compress them.
The mixes, on the way to the corner, are cut into strips of 1, 2 or 3 chips, and these strips are glued either with some micron expansion of the seam, or vice versa with a narrowing.
Against the general background, such manipulations with seams will go unnoticed.
Choice of grout
Another point that is thought through before laying glass mosaics is the color of the grout. Color, with the exception of white, and even shade, changes the appearance of the finished product in a way that is difficult to even imagine.
Therefore, if you suddenly want to make a mosaic with colored seams, first experiment on samples, and do not regret one or even a couple of mixes for this.
It’s better to sacrifice a few plates than to ruin the product.
Preparing mosaic glue
Now let's move on directly to the technology and nuances of laying mosaics.
Let's start by preparing the glue, which is mixed by hand for glass mosaics.
This is done because: firstly, it has a small consumption, and secondly, I noticed one nuance: after kneading with a mixer, despite holding and stirring, after a short time, it fills with tiny bubbles and becomes not so plastic. When kneading by hand, nothing like this happens. Why dont know.
Preparation procedure: knead thicker, wait for a technological pause, and mix thoroughly until a mass is formed that does not flow off the trowel (read “Laying tiles - preparing adhesive”).
A notched trowel is needed No. 4, with a tooth height and width of 4 mm, and it is better with a square rather than a triangular tooth shape.
Applying glue
There are a lot of nuances in applying glue when laying mosaics.
The first nuance is that even though the color of the glue is white, the shade of white will never match the shade of the grout, even if it is also white. And if it is squeezed out into the seams, then it will not be possible to remove it immediately from mixed tapes on film and paper, since it is covered with film, and removing it after drying and removing the film is a tedious task.
If you do not remove it, then the seams will definitely turn out to be of different colors, which is very noticeable, spoiling the appearance of the product.
First the glue is applied like this:
And then it aligns like this:
The excess is removed from the edges of the spatula each time so that wings do not form, and the glue remains in the middle of the spatula. You can't do it with a clean spatula.
You need to apply light pressure so that only the rollers remain.
Before wiring, pay attention to the opposite plane of the spatula. There shouldn't be any hangings. If there is, then we remove it. The growths left by such hangings on the wall will definitely be squeezed out into the seam.
You cannot leave uncoated areas on the base along the edges and corners of the area.
When working with mosaics, you need to constantly monitor and adjust the glue on the spatula. Otherwise, there will be small spots left behind, uncoated areas will form, and nothing will really work out.
Mosaic laying
Apply the mixture, pressing from the middle to the edges. You can press it either with your fingers or with a grater - the evenness can be determined by the evenness of the base.
After installation, you must immediately remove any remaining adhesive from the wall.
This must be done carefully so that no elevations form under the adjacent plate. It will not be possible to continue applying glue for the next plate without removing the one already applied. The “old” one will begin to collapse.
Although it has great durability, it takes a lot of time to adjust the mixed plate, because you have to cut out and adjust individual chips glued crookedly.
When you achieve mastery, the process will become easier, since at one time you will learn to cover an area of 4 - 6 plates.
I wish you success in laying glass mosaics.
Section Construction >>>Subsection Laying tiles, mosaics>>>
Come on, what else is interesting?
Laying tiles on walls Secrets of laying tiles on the floor, all the nuances How to lay tiles on a wooden floor Laying tiles with your own hands How to cut tiles without a tile cutter
Glass mosaic
This mosaic actually uses 960 gold. The idea of creation belongs to the masters of Byzantium. Gold cantarels are smalt made of gold plate soldered inside. The technology is similar to making a hot sandwich. A thin plate of gold leaf is placed on a solid base of smalt sheet, and everything is covered with a protective layer of transparent glass. After the oven, the gold is firmly soldered to the other layers and a shining, unusual smalt comes out. For a variety of shades, colorless transparent glass can be replaced with colored glass, and silver foil can be used instead of gold.
The history of mosaic
Mosaic as a form of creativity dates back more than 6,000 years.
This fact is confirmed by fragments of the floor and walls discovered during excavations of Sumerian temples.
In Ancient Greece, mosaics were laid using river pebbles . Despite the meager range of colors, craftsmen created beautiful patterns on the floors of homes even from gray stones.
Ancient Rome had a special love for mosaic tiles. It was in this country that people began to willingly create bright paintings from broken glass, which were durable, matte and colorful. The name of this mineral is smalt .
Assembling mosaic chips. Advantages and disadvantages
To simplify the use of mosaics in construction and design work, mosaic chips are assembled into canvases. For this, two technologies are used: direct dialing and reverse dialing. In direct dialing, the chips are placed on a grid with the front side facing the consumer. Fastening to the plane to be decorated is made with the mesh side. The mesh is flexible enough to allow mosaics to be used on curved planes. Another significant advantage of the mesh is the ability to hide minor defects in the surface of the base. When setting in reverse, mosaic fragments are placed in a matrix and fixed on cardboard or film on the front side. Installation on the base is carried out by the glass part of the tile, and the cardboard is removed after some time. This set makes small spaces accessible for laying tiles and saves money due to waste-free installation. The standard shape for the matrix is a 30x30 cm square consisting of 225 modules, each 20x20 mm in size.
The technological process of forming glass matrices allows you to vary the size of the square and the chips for it. In addition to single-color sets, the workshop makes a variety of mixes. Both mixtures of shades of the same color and combinations of mosaic squares of contrasting colors are popular. Another type of mixing services is the ability to individually select and order a mixture for your exclusive interior design. A separate group of mixtures consists of the so-called mosaic stretch marks.
On 8 sheets, mixtures are formed with a smooth transition from a light shade of chips to a dark one, or vice versa, from dark to light. Installation of the stretcher has some peculiarities. The sheets are laid on the area to be decorated according to the numbers in vertical rows. Questions for the consultant manager 1. Practicality of glass mosaic Glass chips undergo special thermal hardening, after which they can withstand various loads. By the way, this hardening allows you to use this product for external cladding of stoves and fireplaces. Since glass mosaic is made up of small squares, it is simply impossible to break it. The sharp corners of mosaic tesserae are rubbed down with a special solution during installation. 2. Physical characteristics The only type of mosaic with zero water absorption, excellent for water structures - fountains, pools, showers. Glass mosaic can withstand not only heat up to 145 degrees, but also frosts down to -30 degrees. Such temperature characteristics allow it to be used for decorating outdoor ponds and facades. And the last argument is that the glass mass production technology makes the color resistant to sunlight and ultraviolet radiation. 3. Environmental friendliness of the product Glass mosaic does not emit harmful substances, is easy to wash and is easily cleaned of dirt, which prevents the development of unhealthy microflora and various bacteria. 4. Affordable price ranges A large assortment of mosaics creates the same wide price ranges, which makes the product affordable regardless of the size of the wallet. Buying glass mosaics can delight you with a variety of looks, excellent quality and monetary savings.
Let's start with the easy one
To work you will need the following tools and materials:
- Glass mosaic;
- Glue;
- Brushes;
- Grout.
An ordinary mosaic can be not only a beautiful decorative element, but also very useful in the life of any family. For example, use mosaic in places of switches and sockets. Sometimes it often happens that these particular places take on a gray and dirty appearance over time. So the mosaic came to the rescue, which can be easily wiped if necessary.
- We take the mosaic out of the bucket and select the colors we need for our work. The capacity of this bucket is 1000 grams.
- We grind the required surface and begin laying it according to the principle of laying tiles.
- We glue in layers, after each it is necessary to wait time for complete drying so that the drawing does not lose its appearance.
- This is how we make each layer of the sketch.
- That's all, the original place for the switch is completely ready. This work took no more than 2 hours.
Related article: Crochet a small napkin for beginners: master class with video
You can make a frame for stained glass windows in the same way.
Mosaic binder
Ancient mosaic panels were laid out on a very strong binder. Many masters use it to this day, fortunately the original recipe has survived to the present day:
1 part lime paste + 1/3 part fatty clay + 3 parts quarry or pure mountain (white) sand, washed and calcined + 6 pieces (per bucket of solution) broken eggs with shells.
Sand is sown through a sieve, and after adding eggs, the solution is kneaded until smooth (fragments of the shell should not be visible at all - it is this that serves as an indicator of the homogeneity of the composition).
Eggs in such a mixture did not rot in ancient times, and they do not rot now. They, interacting with clay silicates, only form a strong waterproof impregnation, and putrefactive bacteria are not allowed to develop by lime.
A lime-clay solution mixed with egg gains full strength several years after its use in mosaics. And its reliability has been tested for centuries. However, in order not to transfer the eggs, you can use cement-based tile adhesive. Of course, it has not yet been tested for centuries, but mosaics assembled on it in the open air last for decades.
Glass mosaics must be laid using glue that does not contain cement. If the panel is assembled inside a building, PVA is perfect for glass and stone. For exterior work, ethylene vinyl acetate adhesive (EVA) is successfully used. And when you need to lay a mosaic in conditions of high humidity (kitchen, bathroom, toilet, etc.), there is nothing better than construction silicone glue (aquarium glue is also suitable, but it is very expensive).
Mosaic panels made of beads or small plastic fragments are laid out on PVA or nitro-adhesive - “Moment”, assembly, 88th.
Mosaic laying technology - “reverse set”
There are several ways to create mosaic paintings. One of them is called reverse dialing. In this case, the mosaic glass is glued face down onto sheets of paper. In this case, choose a glue with a weak fixation, for example, PVA. If paintings of significant size are created, then there may be several such fragments on paper. The technique for creating a mosaic in this case has the following sequence:
- prepare the wall;
- fragments, pre-numbered, are glued to the wall using silicone or liquid nails;
- after all the sheets with modules have been glued, wait a day to dry;
- then moisten the sheets with water, wait and remove;
- prepare the grout mixture and fill the seams between the mosaic fragments;
- after 24 hours, clean the surface of the grout and give the painting a completed look.
What is remarkable about this technology is that fragments of the future image can be created in advance and in another place. And the sheets with mosaic glass will be delivered to the installation site on the eve of their fixation.
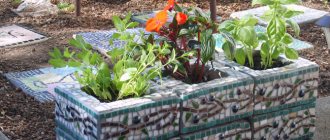
What can be made from broken glass?
Experienced mosaic artists can use more than just colored glass as a material. They use fragments of tiles, colored pebbles, shells, eggshells, beads, broken glass, etc. A do-it-yourself glass mosaic, laid out around the perimeter of the photo frame, will attract the views of all loved ones.
You can make a glass mosaic on the wall with your own hands, using wet plaster coated with glue. Mosaic fragments, pre-glued onto sheets of paper, are simply pressed into the wall. After the solution has set, the paper is removed with a damp sponge. To seal the joints, gypsum or tile grout is used. To make the painting more expressive, you can add the desired color to the grouting mixture.
If there is no desire or opportunity to purchase ready-made glass fragments for mosaics, it
is recommended to make them yourself .
To do this, you should, armed with a glass cutter, prepare pieces of the required size and shape (triangular, square, rectangular, diamond-shaped). The glass should be approximately 3 mm thick. It is best to paint white glass modules with spray paint. For convenience, it is recommended to glue transparent pieces of glass to the film and spray paint on top. This method will allow you to obtain a high-quality painted front surface. When the paint has dried, the modules can be separated from the film and arranged according to color scheme. Oil- and alcohol-based paints are suitable for painting glass.
By the way, as an idea for a drawing, you can use simple embroidery patterns for needlewomen.
Something special
Many people would like to create something special with their own hands. And mosaic too. In principle, anything can be used as unusual materials for panels, including:
- various push pins;
- pieces of soft wood and pine plywood;
- small pyramids with multi-colored edges;
- matches with ends and other materials.
( 80 votes, average: 4.80 out of 5)
Artificial stone: independent production and installation
Calculation of the number of wallpapers
Related Posts
Making your own mosaics
The process of making a mosaic begins with the selection of elements for it. Most often, they take squares from 1 x 1 cm to 5 x 5 cm. They prepare the pieces for future use, in sets, arranging them by color or fragment of a design, pattern, so that later they will not be distracted while working on the image.
“Pixels” for the future mosaic are pricked (like smalt), and not “bited” with side cutters, pliers, etc. Or you can even buy broken multi-colored tiles at a construction company or store - they will sell it there very cheaply, or even just like that. And on the fence you can quickly and easily make the necessary parts from these pieces.
It’s easier for those who chose porcelain stoneware as the source material. This one shoots just great! Therefore, it is better for beginning craftsmen to choose it for their work. For those who work with a prisoner, we can give some practical advice:
- First you need to break off a particle with a straight edge from the irregular piece. Next, you need to set the movable stop to the selected size in order to pin strips of equal width. And then “crush” these strips into pieces.
- You should never hit against the edge of the wedge. Only with a shift towards the stop (about half the thickness of the material).
- If a glass mosaic is divided on a backsplash, the refraction in this material should be taken into account. Otherwise, the glass will crack and crumble, but will not break.
- The tip of the wedge should be really sharp, without any dents. Otherwise you won't get any pieces.
- To make a wedge, you can use a file or fragments of a guillotine shears blade with a pobedit tip.
Mosaic technology
- First, you need to decide on the complexity of the image.
If your goal is to cover a wall with multi-colored, chaotically arranged mosaic pieces, you can start working almost immediately. If the goal is even a very simple drawing, the wall will have to be prepared in advance. - The decoration area must be thoroughly cleaned of any remaining wallpaper, glue, and leveled.
Please note: the temperature when laying out the mosaic should be between +5 and + 30! - Dilute the solution.
You can buy it at a hardware store. It is better to take white or transparent color. - Apply the solution to a small section of the wall. Process the piece.
Broken dishes are applied to it. And so on…
Important!
You should start from the center. First lay out the main figures, then the secondary details, and the background last.
- If the broken dishes come in large pieces, break them into small pieces. A hammer is suitable for this purpose. In this case, the dishes should be wrapped in cloth, which will protect you from possible injury.
- The grout is applied after a day. Before applying it, remove excess adhesive from the wall surface. The grout is applied in parts. Treat the piece, wait 20 minutes, remove excess substance with a damp sponge.
Description of mosaic glass
When the term “mosaic” is mentioned, many people imagine beautiful stained glass windows of foreign cathedrals. But we hasten to immediately dissuade readers that the technique of creating stained glass and colored glass mosaics are significantly different.
Colored glass for mosaics can be of two types:
- glass modules;
- smalt.
The appearance of smalt is disc-shaped.
Immediately before the creative process, the disc is split into pieces. Smalt is used mostly by professionals to create high-end mosaics. It does not have a transparent, but rather a matte structure. Broken glass tiles have quite a decorative and colorful look to fit into a modern bathroom interior. For those who are just getting involved in this creativity, it is worth turning their attention to the modules. These are colored fragments glued to a paper base or packaged in plastic containers. Glass fragments can be of various geometric shapes and sizes. It is more convenient and safer to work with such modules. You can cut the paper base using regular scissors or a stationery knife.
Those who want to make mosaic paintings with their own hands will need the following materials:
- glass cutters;
- liquid nails, PVA glue or transparent silicone;
- tile grout for seams;
- smalt or glass modules;
- marker, construction pencil.
A product made from broken glass should not cause injury, so you should use safety glasses and gloves throughout the entire creative process.
Features of the material and main varieties
Smalt mosaics have been known in history since the times of ancient Rome.
Now images made from colored glass pieces can be seen both in palaces, museums and temples, and in modern buildings and apartments.
Smalt has become so widespread due to its properties:
- High strength - due to mineral additives, the material has high density and hardness, does not break or crack from impacts. To split smalt, special tools are required. The material is also not subject to abrasion and scratches do not appear on the surface.
- Color fastness - shades do not lose their saturation for decades and do not fade in the sun. Such a mosaic will not require special care or restoration work - this distinguishes it from wall paintings and frescoes.
- Resistance to negative environmental factors - the material tolerates large temperature changes well and is frost-resistant. Smalt does not absorb moisture and does not expand when heated. These properties make it possible to use it in outdoor work - for example, when decorating building facades.
- Wide possibilities for creativity - the material can be given almost any shade. No less effective is another means of expressiveness - heterogeneity of fragments. They can be of different sizes and shapes, with uneven edges, which often allows you to find interesting artistic solutions.
- Environmentally friendly - the material is safe for human health, does not emit toxins or substances that cause allergies. Using glass waste helps protect the environment.
The choice of the type of smalt depends on the artistic task at hand.
Based on the shape and size of fragments in modern production, the following types are distinguished:
- Opus - identical square-shaped pieces of small size.
- Fusion - freedom in a variety of shapes, options with uneven edges.
- Ravenna - square fragments of various sizes.
- Wall - oblong-shaped pieces that resemble brickwork (can be in both horizontal and vertical directions).
the composition of the material is a criterion - for example, smalt containing precious metals is classified into a separate group.
Smalt containing precious metals has a significantly higher cost. A kilogram of material with a gold layer will cost about 60-80 thousand rubles .
The price per kilogram of regular smalt is 500-1000 rubles .