how to make a gun out of paper
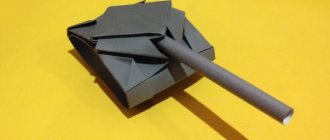
Do you enjoy doing crafts with your kids? Teach your boys how to make a paper gun with their own hands , this is a great alternative to plastic toy guns. And anyway, someone needs to stop the constant clutter of plastic toys filling children's drawers.
Kids will love this idea because making a paper gun is super easy and quick, and who doesn't like quick results? And if it’s also a paper gun that shoots , then the enthusiasm will increase significantly. The article presents several models of paper pistols and even a paper gun , which are ideal for children's crafts. Make a home shooting range and announce a competition for the best shooter. Just explain to your children that you can’t even shoot cats and dogs with paper bullets.
Penguin Art -
The Japanese ninja weapon “shuriken” is made using the classic origami technique, that is, the basis for creating the figure is a paper square. And when making crafts, no scissors or glue are used. If you follow the step-by-step instructions exactly, then even beginners will certainly be able to please themselves and their loved ones with the original origami shuriken. For those who have long been interested in origami, there are advanced master classes. This article describes in detail how to make origami weapons: shuriken and other bladed weapons, independently according to the diagram, video and photo master classes.
Flying paper ninja stars
You can learn to fold origami weapons not only for beauty or out of interest. Having folded the paper Japanese ninja weapon, it is worth using it in practice, in a game with children. The child himself will be interested in assembling simple origami weapons and feeling like a Japanese warrior. The shooter can throw shuriken as many times as he likes, but nothing will happen to this flying star if it is done step by step, according to the instructions described in the article.
Shooting shurikens while playing ninja is completely safe because they are made of paper. And not a single toy gun will cause as much childish delight as playing with hand-made shuriken. As a result, the child receives a double benefit: he develops by composing origami and gets the opportunity to have fun playing with a new toy. Japanese shuriken paper weapons are also suitable for group games, because they can be prepared in the required number of pieces.
Origami ninja star assembly diagram
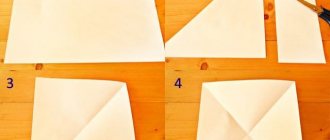
- Taking a square of paper, you need to bend it in half, unfold it again and use a ruler to divide it into equal parts, as in Fig. 2, paragraph 1.
- Connect the vertical sides of each part together, carefully press it in the center with a ruler (Fig. 2, item 2). Fold the resulting two identical blanks as follows (Fig. 2, item 3): mirror (relative to the vertical center) twice, alternately, bend in opposite directions - the short side of the part to the length.
- As a result, two blanks are obtained (Fig. 2, item 4).
- Then they are placed one on top of the other and connected so that the corners of one part are placed in the pockets of the second.
Rice. 2:
Video: Origami shuriken
This version of the assembly diagram for Japanese origami weapons is ideal for active and frequent throws, since it is especially durable and reliable in use:
Transformable throwing disc
For those who master the technique of constructing shuriken for beginners, new opportunities will open up for the implementation of bold creative ideas. The ability to combine templates allows you to make double and eight-pointed Japanese ninja stars. In the photo fig. 1 – 2 show examples of complex compositions built from the required number of throwing and combat paper discs.
Rice. 1:
Rice. 2:
Scheme of constructing a Japanese transformable paper throwing disc
The step-by-step construction of a shuriken-transformer is a rather difficult task, but if you carefully follow all the points of the diagram, you will certainly be able to cope with it.
- To get started, you will need two identical large squares of paper, each of which must be divided into four smaller ones. Thus, blanks for eight identical modules will be at hand.
- Each square should be folded and unfolded again along two diagonals, as well as connecting the opposite sides. This way the center of each square will be clearly marked.
- Then, taking one of the prepared squares, you should connect two corners of one of the sides in the center, along one of the planes of the square.
- Connect the corners of the remaining side of the square by bending the center line inward. The result should be a diamond-shaped rectangle. This is done with the rest of the blanks - squares.
- Each of the eight diamond-shaped rectangles is connected to the previous one, in stages, by bending small corners inside the next one. For clarity, you can watch a video with a detailed master class according to the diagram given below.
- As a result of alternately connecting the parts, a shuriken is obtained - a transformer. For greater effect, it can be done in contrasting colors (photo in Fig. 3).
Rice. 3: Another diagram for assembling the transformer shuriken assembly:
Video master class on creating a transforming shuriken
Paper firearms
You can use paper to make not only shuriken, but also various firearms. Let's look at the assembly diagrams for the main ones: a pistol, a revolver and a shotgun.
You can use the diagram and make a shooting pistol. For “cartridges” we recommend using paper balls.
Video: Origami firearms
https://youtu.be/vqAR1WGrGIQhttps://youtu.be/UAP6XvKSUts
https://youtu.be/oISZkHtYdD4https://youtu.be/2YJtPTcVDKU
_
_
Origami diagrams for assembling bladed weapons and firearms
More details can be found here vnitkah.ru
penguin-art.ru
Making an origami sword of different models
The content of the article:
Origami is a magical art, because paper rolling not only allows you to create beautiful crafts, but also provides a unique chance to make your most cherished dreams come true! For example, if you know the secrets of the origami technique, you can easily make an unusual paper sword.
Video: Making a dragon sword
Learning to fold a sword from paper using MK photo
No connoisseur of edged weapons will be able to pass by a masterfully made sword, even if it is made of ordinary paper. Although such blades do not pose a deadly threat, they are still worthy exhibits in private collections.
To make your own origami sword you will need:
- Square sheet of paper
- Patience
Step-by-step instruction:
- Place a double-sided square sheet of paper in front of you.
- First make a horizontal fold line.
- And then vertical.
- Next, form diagonal folds.
- Then turn the workpiece over and bend it, just like in the photo.
- Turn the workpiece over and tuck its sides to the middle.
- Take out the previously folded triangles.
- Bend these triangles, just like in the photo.
- Next, using the assembly diagram, construct the handle of the sword.
Beginners are unlikely to be able to immediately fold such an unusual sword without errors, so before picking up high-quality thick paper, we recommend practicing on ordinary sheets. This approach will allow you to hone your skills and save expensive materials.
Elegant sword-blade in origami style
This short master class will tell you how to make a beautiful paper sword-blade using the origami technique. Unlike the previous sword, this blade looks much more elegant and “lighter”.
Detailed job description:
- Place a square sheet in front of you and bend it horizontally, vertically and 2 times diagonally. As a result, you should have a workpiece with marked fold lines.
- This origami blank must be assembled to form a so-called “double square”.
- Then you need to pull both sides of the top layer towards the middle.
- Using your finger to gently hold the bottom of the top layer, open it up to form a diamond shape. Thanks to the previously “drawn” fold lines, you will cope with the task without any problems.
- At the next stage of MK we will fold the newly formed rhombus.
- Then turn the workpiece over and fold the corners.
- And then we straighten the fold lines and tuck the corners inside the part.
- He turns over the origami blank and begins to form the blade.
- First, we lay the side corners of the top layer along the lines so that they coincide with the vertical.
- After this, we turn the workpiece over again and bend the wedges, as shown in the photo.
- Let's make a revolution again. We straighten the folds located in the middle.
- Pull the bottom corner to the right and align the edge of the resulting triangle with the middle of the future sword.
- Using the previously outlined lines, form a “bunny ear” on one side.
- Point the tip of the ear down and, using the same pattern, make folds on the second half of the workpiece.
- Since we are making not just a figurine, but a “deadly” blade, we will need a special barrier that protects our hands from cuts. To make it, the lower corners of the top layer must be moved to the right side and bent diagonally.
- The final stage of the step-by-step training master class will be devoted to the step-by-step creation of a handle. To make it, the corners located at the bottom must be pulled towards the middle. After which it is necessary to pull up the protective rays and bend their tips.
The origami sword is ready! A “deadly” blade made with your own hands can be a wonderful gift for a friend who is interested in computer games and bladed weapons. Such an unusual souvenir will surely bring him good luck and help him win many online battles!
Video instructions for folding a paper sword
Modular sword for Minecraft fans
Every Minecraft fan dreams of having the same sword in real life as in the game. But not every gamer knows how to get the desired blade. It's actually simple. You need to make it yourself!
Bringing this idea to life will require:
- Scissors
- PVA glue"
- Square origami blanks twisted in the same pattern
- Free time and, of course, patience
To learn how to create such a unique sword, simply watch a short video with detailed instructions.
This video tutorial describes in detail the process of twisting the cubes that make up the sword. It also demonstrates how these squares are fastened together.
Beginning craftsmen should take into account one nuance when creating such a sword: a structure assembled without glue will be quite fragile, so it can only be used as an element for interior decoration.
Video instructions for folding a modular sword
If you want your sword to be able to be picked up and swung, you need to use glue when assembling the model!
Sword folding patterns
vishivashka.ru
We collect various models of firearms
The content of the article:
Unfortunately, modern statistics are very sad - parents spend very little time with their children! Although it’s not difficult at all, on the contrary, it’s fun. Moreover, most often children prefer not the expensive toys with which parents “pay off” their sons and daughters, but homemade ones.
Teach your child to make paper pistols - and he will be happy! It’s a real miracle for children to assemble a gun or an airplane out of paper, which they can then play with. Origami gun for beginners - in our article. There will be accessible master classes and more challenging options for inquisitive minds, so to speak.
Making a shooting pistol
Simple assembly diagrams
Pistol
Not only a beginner can figure out this assembly - even a junior school student can understand it from the pictures. If you need more details, then read on for step-by-step instructions:
- Cut the A4 sheet in half lengthwise. Using a long ruler, mark the folds at equal distances, and on one sheet they should be wider than on the other. We bend along the lines.
- We bend the resulting strips in the middle.
- The wider strip has its long ends folded along an oblique line.
- The ends of the second, narrower strip enter the resulting holes.
- If desired, you can glue the gun for extra strength and paint it to make it look cooler.
And another example that does not require additional instructions and is easy to make yourself:
Gun
Revolver
It will be more difficult
Gift for dad on February 23rd
Actually, what could be better than a homemade gift, especially when this gift is made by the hands of your own beloved children? Moms - everything is clear - flowers and other flora and fauna. And for some reason, on February 23, dads are usually given painted airplanes, St. George ribbons and other military paraphernalia. In principle, pistols are not far from this, but at least you can play with a paper figurine. Help your son with this craft by February 23: origami is a very interesting technique that will captivate both children and adults, and by the time dad arrives you will already have a mountain of toy guns!
There is an option - from the photo. You print and cut out the parts, then glue them together. But keep in mind that it will be difficult and long, perhaps not even in a day. Another way is modular “origami”. Photos alone are not enough here.
Video of MK modular origami gun
Detailed photo of a pistol assembly master class
Description of all steps step by step in a detailed master class:
- Fold a sheet of paper (preferably thick, for example, a magazine sheet) several times and secure it with tape or glue.
- From the resulting material we make a blank for the pistol frame, forming sides:
- For the handle, we make a tube in the same way as in step 1, only thicker and shorter. Secure with tape, and cut the area that will be adjacent to the trunk obliquely. Connecting parts using glue, for example, a glue gun.
- To make the pistol shape the same as the real one, you need one more additional action:
- We hide all the imperfections under a paper square and attach a safety bracket:
- Now we need two dense tubes, each of which will have a rectangular hole, and so that it is not visible, we hide it under a small rectangle:
- We connect the elements in any convenient way:
- The shutter is made almost the same as in step 1:
- See how everything is held together with additional parts:
- In principle, you can stop there, but if you wish, also make a “magazine” for toy cartridges.
Assembling a shooting pistol
A gun can even shoot from paper if you cut it out according to this template: The assembly diagram is as follows: You need to fold it according to the pattern, then cut it and insert an elastic band. Take a closer look at how the muzzle is made: Homemade bullets will fly into the groove of the muzzle. The circle in the next picture is a bullet, rolled from newspaper or any other, the main thing is that it fits in size.
Making an origami shooting gun in the MK video
In fact, there are many more ideas for creating pistols out of paper. There are entire masterpieces that are quite difficult to repeat on your own. But the delight from the finished result will be truly enormous! And if you use black gouache, it will look quite real.
Start with simple ones, gradually moving on to complex models; if you like it, then it won’t take long to come up with something of your own! And the time spent with children and such pistols will definitely be unforgettable.
vishivashka.ru
