Operating procedure
The most important thing is the idea that will have to be implemented. You can get ideas from master classes on discharge bows. They usually involve a step-by-step process with photographs or a video.
The bow can be made multi-colored by using contrasting ribbons; you can also include:
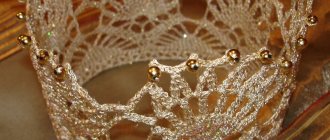
- lace;
- beads;
- artificial flowers;
- rhinestones;
- other decorations, if they look harmonious in the overall composition.
The popular kanzashi style with bows for discharge also looks very beautiful. For beginners, folding kanzashi petals can cause some difficulties; you can make simpler options that can be combined and supplemented with your own ideas.
Preparation of materials and tools
In addition to ribbons of the required color and quantity, decorations and other materials that will make up our bow, you need to prepare:
- a lighter or candle for scorching the edges of the tape;
- thread and needle;
- tweezers;
- hot glue gun;
- Experienced craftswomen use a special apparatus to cut the ribbon and simultaneously singe the edges, which is also convenient for burning kanzashi petals, so they do not need a lighter.
Needlewomen advise thinking through everything you need as much as possible and laying it out on the table so that everything is at hand, then you won’t have to be distracted by looking for what you need and waste time.
central part
The main decoration is supposed to be the brightest and most attention-grabbing. Therefore, special attention should be paid to creating the central part of the bow.
Kanzashi aster for decoration
This is another original and beautiful option to receive a bow for kanzashi discharge. To do this, you should prepare the following materials :
- Colored satin ribbon can be taken from one palette for a smooth color transition. The dimensions of the tape depend on the desired diameter of the flower.
- Felt lining for the base of the flower.
- Thermal gun.
- Scissors.
- Candle, lighter or matches.
- Beads, semi-precious stones, rhinestones, sequins.
The simplest option
If you don’t have enough skills, but you really want to create a decoration for your baby, then you can try to make a very simple, but at the same time lush and beautiful bow.
It will require a ribbon 2.5 - 5 cm wide. You need to form loops from it in your hands. We determine the size of the loops by eye.
To ensure that they are the same, you can first mark the places of kinks from the inside out.
The following steps are performed:
- Having collected the required number of curls, tie a strong knot in the middle with a thread;
- wrap this part several more times and tie it in a knot again;
- carefully straighten the loops and cut off the remaining tape;
- do not forget to process the edges;
- With the ends of the ribbons you can tie the main ribbon on which our lush bow will be attached, and tie a knot on it, or the bow can be sewn to it.
Two-color bow for newborn
To create it you will need the following materials:
- Satin ribbons of two colors, for example, red and white. The width of the red ribbon is 3.5 cm, and the white one is 2.5 cm.
- Glue or heat gun.
- A set of threads, needles and scissors.
- Candle, matches or lighter.
The step-by-step technology is not particularly difficult. But it is important to do everything exactly :
The first flower consists of 7 pieces of red ribbon, 8 cm long. To form the petal correctly, you need to bend the right edge of the ribbon in the middle at a right angle.- Then fold the left edge of the tape and align the two ends together.
- Fold the remaining six ribbons in the same way and tie them with thread.
- Tighten the thread to form a flower of the correct shape and secure the thread.
- The next white flower is made of 8 ribbons. To do this, cut out squares from the ribbons and fold them in half diagonally, forming triangles.
- Next, connect their corners at the upper main corner. The petal will be made if you bend the structure exactly in the middle.
- Then secure the ends of the petal with matches or a candle. For a flatter shape, cut off the excess corner.
- Wrap 7 more ribbons in the same way.
- Using the same pattern, roll 16 red petals.
- Arrange the second flower as follows: place two red ones inside each white petal and glue or sew them together.
- Cut a circle from a small piece of felt and glue it to the back of the flower.
- Connect both halves of the flower together. You can decorate the center of the flower with a gemstone, a flat bead or a sew-on rhinestone.
To hide the place where the petals are attached and make the flower more neat, you can use sequins or sew-on bicones. Such a flower can be tied or glued to the baby’s envelope, it will look very impressive.
Bow with elastic band
An alternative to a bow on a ribbon is a bow with an elastic band, which is simply put on the envelope, wrapping around its circumference and keeping it in the desired position. Such decoration can be sewn from a material that matches or contrasts with the fabric of the envelope.
You will need a strip 20 cm wide and about 80 cm long. We sew its edges along the length from the wrong side and turn it inside out. Now measure from the middle 2 cm up and down to sew 2 seams along the length. We thread an elastic band between them, joining the ends with the ends of our improvised ribbon. We gather the resulting “belt” evenly and sew its ends.
Now from the same fabric, adding another contrasting stripe, we sew a bow. The bottom strip for it will be 10x25 cm, the top - 6x15 cm. We sew them from the inside out and turn them right side out. We fold it in the center and stitch it, tie it with a thin strip of fabric (about 4-6 cm wide and 5-6 cm long), also stitched from the inside out and turned inside out. We sew this strip onto the bow and attach it to the “belt”.
Decoration for girls
The birth of a girl is, by definition, frills, rhinestones and bows. There is no mother who did not call her girl princess. In this master class we will tell you how to make a beautiful or magnificent graduation bow for a girl from ribbons.
Required materials and tools:
- pink satin ribbon 5 cm wide and 400 cm long;
- white satin ribbon 2.5 m wide and 1 m long;
- pink satin ribbon 2.5 wide and 450 cm long;
- pink nylon tape 2 cm wide and 1 m long;
- thin metallized silver ribbon 105 cm long;
- a piece of white or pink felt;
- blank-clip for attaching a bow;
- scissors;
- ruler or measuring tape;
- needle and thread to match;
- bead or half-bead for decorating the middle;
- thermal gun or Moment glue;
- candle or lighter.
Let's start step by step.
From a pink ribbon 5 cm wide, cut 6 ribbons of 17 cm each. We singe the ends.
We connect the ends into loops. We string them one by one on a thread, tighten them and form a bow.
We cut the white tape into 6 pieces of 16 cm each.
We process the edges using fire, having previously formed loops. We string the parts onto a thread and tighten.
Related article: DIY Halloween spider web made from wire and thread
We cut the nylon tape into pieces of 15 cm in the amount of 6 pieces.
We fold the chiffon parts into loops, singe them with fire and form a bow, as in the previous paragraphs.
We cut a thin silver ribbon into 6 pieces of 16 cm each and glue them into loops, pre-processing the ends.
Now you can start assembling the bow. We glue or stitch the layers one by one in a checkerboard pattern: the bottom layer is made of a wide pink satin ribbon, then a white blank, with silver petals glued onto it. The final layer at this stage is made of nylon flower. This is how it turns out.
From a pink ribbon 2.5 cm wide, cut 27 strips of 6.5 cm each. We form kanzashi.
We string the blanks onto a thread and roll them into a roll, forming a flower. We sew the middle. Experienced needlewomen can glue the roll together during the assembly process. Glue in the middle. We glue the entire flower into the blank.
Turn the workpiece over. Using a heat gun, glue a felt circle on the wrong side. We attach a clasp to it.
You can make a bow with an elastic band; it can be a great decoration for celebrating the first year.
A piece of about 3 meters should have remained from the 5-centimeter tape. This will serve as the binding for the baby envelope. We cut the edges of the tape, as shown in the photo, and singe them.
Attach a bow to it using a clasp. The bow is ready. For decoration, you can make bows or flowers on the edges.
Video of beautiful DIY ribbon bows
Nowadays it has become very fashionable to use beautiful bows as decoration for hairstyles, accessories and clothing. The stores have a huge selection of materials, colors and decorative elements for decoration. You can make beautiful bows from satin ribbon with your own hands if you spend a little time on it. You will receive not only a wonderful decorative element, but also pleasure from the process itself. Watch a video master class on how to make a beautiful bow from satin ribbons.
Materials, tools
To make a beautiful accessory, you will need:
- sewing needle;
- sharp scissors;
- tape measure;
- textile;
- pins.
Tools for making
Attention! Sewing a decorative element can be done by hand or by machine. Tapes made from various materials are suitable for work:
- satin - looks great, easy to sew;
- nylon is a durable and tough material;
Satin fabric
- tulle and organza are light translucent fabrics. Disadvantage: the ends of the products crumble and require melting with a lighter;
- rep is a pliable material with a long service life;
- lace – holds its shape perfectly, looks elegant and expensive on the finished product. Disadvantage: rapid wear, difficulty in maintenance;
Lace
- cotton - the products are durable, the edges do not fray. The material gets dirty quickly, but washing the product is not difficult.
Cotton
You can sew a bow from fabric using the Japanese kanzashi technique. Kanzashi makes it possible to obtain beautiful, multi-layered products of bizarre shapes.
Kanzashi
It is important to know! To properly sew a complex bow from fabric, you will need a bow pattern. You can create your favorite bow pattern yourself by downloading it from the Internet.
You might be interested in this: Construction of a pattern and the order of sewing a four-piece skirt
Bow for a boy
Bows are only appropriate for little boys. Any parent or relative will be pleased to take out a beautiful “gift” from the maternity hospital. Let's look at the example of a master class on making a discharge bow for a boy.
Materials:
- blue satin ribbon 2.5 cm wide 95 cm;
- blue satin ribbon 2.5 cm wide 3.5 meters;
- thin blue braid with contrasting edging 2 meters;
- a piece of white or blue felt;
- blank-clip for attaching a bow;
- scissors;
- ruler or measuring tape;
- needle and thread to match;
- thermal gun or Moment glue.
Related article: How to make holes in jeans at home beautifully with video and photos
A master class on making a bow for a boy is provided below.
We cut the blue ribbon and braid into 6 pieces of 15-16 cm each. We place the braid in the middle of the tape and singe it, attaching the tapes to each other.
We fasten the parts into loops using glue.
Cut out a circle with a diameter of 4 cm from felt. Glue the loops evenly onto the felt base.
We will cut the white ribbon into 6 pieces of 14 cm each. We will cut the same ribbons from the braid. We put them together, singe them and fasten them. Glue into loops.
Let's continue to form the first tier of the bow. Glue the white parts between the blue ones.
We cut the blue ribbon into 8 pieces of 25 cm each. We singe it.
We connect the tape into circles, gluing the ends of the part.
From each piece we form eights, gluing them in the middle.
We form two crosses by gluing the parts in pairs.
We place the blanks on top of each other in a checkerboard pattern and fasten them together.
Glue the bow into the blank.
Let's start forming the middle. Take the blue ribbon and use the bends to twist the rose. We fasten each turn of the tape with glue. More details can be seen in the videos provided.
Glue the rose into the middle of the bow blank.
Now we form the mount. A circle of felt is glued to the wrong side, and a blank clamp is attached to it. If it is not there, you can do as shown in the photo.
We measure 2-3 meters from the blue ribbon. We trim and process the edges.
Decorate the ends of the ribbon with small bows. To do this, we form 2 bows from blue ribbon, as described in steps 6, 7, 8, only in the last step we squeeze the ribbon horizontally. You can simply stitch them and tighten the thread.
Glue or sew bows 10-15 cm from the edge of the binding tape and decorate with the centers.
The bow for the boy's envelope is ready.
A bow is sewn from non-woven fabric
Process step by step:
- At the initial stage, decide on the size of the bow. If the dimensions are determined, cut out several pieces of fabric and the same amount of interlining. The details must be the same. A piece of material is required - a holder. There should be a piece of non-woven fabric of a similar size.
- Non-woven fabric is applied to the fabric cuts from the reverse side. It is carefully ironed, folded facing each other, and a stitch is made on the machine so that there is a little space left on one side. This is required so that the finished element can be turned out.
- The corners of the workpiece are sewn at an angle of 45 degrees. The excess is trimmed off.
- Turn the workpiece out.
- Sew up the hole left for turning the workpiece inside out.
- Proceed to the holder. Fold a piece of fabric in half. Make a stitch on the machine, sew from the inside out.
- Turn the holder right side out, sew up the hole and iron it so that the seam is in the middle on the wrong side. When the bow is sewn on, the seam should not be visible.
- The main piece of fabric is folded in the middle so that a beautiful decorative element is formed on the dress.
- The resulting product is fixed with threads.
- The resulting product is wrapped with a holder from the inside out.
- The holder and the product are sewn up with threads from the inside out.
You might be interested in this. Detailed characteristics of 1022m class sewing machines
Non-woven option
Beautiful bows for discharge from the maternity hospital with your own hands
The birth of a child is a wonderful, exciting moment for every person, be it mother, father, grandmother or grandfather. The whole family usually prepares for this moment: relatives coordinate the composition of those greeting them, prepare gifts for the medical staff. They also prepare the first clothes for the new little person - diapers, an envelope, bows and much more.
If we recall very recent times, an ordinary satin ribbon was considered a luxury. And even now, not in every outback of our country you can easily buy all the necessary attributes.
But when a child is born, you want to give him the best, and the very minimum - a bow for decorating an envelope creates a special atmosphere: an ordinary one-color envelope decorated with a beautiful bow will look chic.
Look what beautiful bows you can make with your own hands.
How to make bows from satin ribbon: sewing instructions
Required:
- Cut 20 × 50 cm.
- Scissors.
- Thread with a needle to match the cut.
- Measuring tape or ruler.
- Chalk (soap).
- Sewing machine.
You need to cut out rectangles on the fabric:
- 18 × 22cm;
- 15 × 18cm;
- 5 × 8 cm.
Bow for an envelope for discharge
Next, the sewing technology looks like this:
- Cut out the details. The large piece is folded right side inward, with an allowance of 1 cm at the top, and sewn on a machine. It turns inside out. The middle part is folded into a trapezoid and stitched.
- The details are ironed.
- The sections of the first part are folded inward, 1 cm each, and stitched.
- The middle of the part is folded into a boat.
- Sewn with double thread to match the color of the fabric. The thread is not cut.
- The second part folds halfway.
- The third part is the holder. Fixed with a needle.
- All excess is trimmed and sewn.
- The product is ready. You can decorate clothes, an envelope for discharge to the maternity hospital.
Attention! If several parts are made, where the second one is 4 cm smaller, the element will look original. The decorative element is suitable for decorating a dress for a girl; an elastic band or a hair clip for a child will look great. To make such a product, you need to take hard material.
The best fakes for discharge
Ways to surprise and delight
Creating beautiful crafts for newborns is a great way to congratulate a young mother and baby on their discharge from the hospital:
- Making cakes from diapers for newborns is an opportunity to make a useful and beautiful gift that will please the eye and be useful in the future. Such cakes are created in the Country of Craftsmen from rolled up diapers and decorated with little things necessary for the baby: booties, toys.
- To make discharge from the maternity hospital creative and fun, relatives prepare funny posters and inscriptions with which they welcome mother and baby.
- If mother and baby are picked up in their own car, the car is decorated. There are special stickers that decorate the hood of a car, as well as ribbons and bows, and balloons.
- A children's photo album, especially one created with your own hands, also makes a good gift for a young family. It can start with photographs that were taken in the maternity hospital and during discharge from the maternity ward.
- At the time of discharge, the newborn will be wrapped in a beautiful festive envelope, decorated with ribbons and bows. If a stroller is prepared for the baby, it is also decorated with flowers made from ribbons and balloons.