Of all the materials for creative work, plain paper occupies a special place: it is used for many crafts. Adults and children love to work with this material. Easy origami crafts made from paper are available for children from 3-4 years old. Any creative activities contribute to the intellectual development of children.
Origami (folding paper figures) has long been a real art: its history goes back several centuries. If previously it was available only to monks and members of the nobility, then with the spread and availability of paper sheets, this type of creativity has gained popularity in many countries around the world.
ORIGAMI FOR BEGINNERS
This skill is reminiscent of a magic trick - a beautiful figure is born from a simple leaf in a few minutes. The activity does not require large material costs and is absolutely safe even for small children. Origami allows you to create a whole world without special abilities. This hobby develops spatial imagination, fine motor skills, motor and spatial memory, concentration, communication and gaming abilities, horizons, and creative skills in beginners. The paper diagrams below will help you make original, unusual toys, gifts, and figurines.
WHAT MATERIALS WILL BE NEEDED?
Before you start doing origami, you should stock up on the necessary set of tools. First, you should choose paper, preferably office paper, since it is not too smooth and is thick enough for folding according to patterns. To attach small parts and gluing, you will need a glue stick or PVA glue, and aerosol glue is necessary if you need to glue two different-colored sheets of paper. The last technique allows you to create interesting crafts using a combination of textures and colors.
You can use a more convenient adhesive mass, with which any part can be easily attached inside or outside the craft, and then removed if necessary, without leaving any traces. If the craft is made from white paper, then it is then covered with spray paint. Sometimes several pairs of sharp scissors with blades of different shapes and lengths are required. In some cases it is possible to replace them with a cutter. This tool is necessary for trimming and cutting straight lines. The blade must be sharpened to obtain a smooth, neat cut.
To mark according to the diagram when folding figures, cutting out the base, maintaining a certain angle of assembly, and symmetrically placing a composition based on a panel, triangles, rulers, and protractors are needed. You will need a mechanical pencil with a replaceable thin lead. Additionally, needlewomen use ready-made eyes for toys, leftover yarn, ribbons, fabric, beads, seed beads, sequins for decoration, and thread and needle for connecting individual parts.
PAPER SELECTION
The result of the work depends on the correct choice of paper, since the entire process of creating origami according to patterns consists of folding and bending. The list below will help you decide which material is better and which is worse suitable for this type of needlework:
- Office white paper is thick, not too smooth, so the modules hold well when connected. It’s better to start practicing origami with such material, since it’s a shame to throw away a damaged model. Its disadvantage is that hairiness appears at the bend.
- Colored office paper - does not turn white when folded, is dense, and is used in modular origami.
- Stickers, note paper - can be painted in different colors, used to create kusudama, in modular origami.
- School colored paper is thin, friable, easily torn, and not suitable for this hobby. It wears off on the folds and white stripes appear.
- Foil paper is durable, does not tear, is used when creating complex patterns, twisted models, and modules. When straightened, the folds remain in tight stripes.
- The pages of glossy magazines are dense, bend well, and hold their shape.
- Banknotes are durable, do not wear out on folds, and are suitable for small modules and making gifts.
- Special paper for origami - sold in sets, with a variety of patterns, can be double-sided, monotonous.
- Rice, papyrus, craft, parchment, tissue, mulberry, silk and other expensive types of paper - each type has its own advantages and disadvantages, allowing you to create interesting crafts according to patterns.
- Drawing graph paper, tracing paper - suitable for first attempts at creating complex works.
How to choose paper
To make origami, you need paper that holds its shape well, that is, of sufficient density. This could be copier paper, white or colored, or ready-made sets of colored paper for children. You can use matte wrapping paper; corrugated and different types of embossed paper look good. Sets of special paper for origami – “kami” – are also available for sale.
To make a craft, you may need thin paper, but it does not hold wrinkles well.
In this case, you can make a so-called sandwich, that is, place thin foil between the sheets - the product will hold perfectly.
If a child is interested in this type of creativity and already has certain skills, it is recommended to purchase special Japanese washi or washi paper - this is a soft handmade material that is sold in specialized stores and will ensure high quality products.
TYPES OF ORIGAMI IN PICTURES
Origami is a great opportunity to keep yourself busy with something interesting, useful, and have fun while developing new skills and abilities. In addition to the classical direction, there are many other alternative techniques:
- Simple origami is interesting for beginners and craftswomen. When assembling according to the pattern, mountain folds are used, when the figure needs to be folded away from itself, as well as valley folds towards itself. The most famous example is the crane fly.
- Modular origami - the product is made from several identical parts, called modules, each of which is folded according to the rules of classic origami from one sheet. The elements are connected to each other by folding into each other, and the resulting frictional force prevents the structure from falling apart.
- Kusudama is three-dimensional origami, where the parts of the figure are not inserted into one another, but are glued or sewn. In most cases, the craft has the shape of a ball.
- Wet folding - moistened paper gives the products expressiveness, rigidity, and smooth lines. This method is used to create non-geometric objects (animals, flowers). For wet origami, paper is suitable; during production, water-soluble glue is added to it to hold the fibers together.
- Aerogami is a simple technique for creating an airplane.
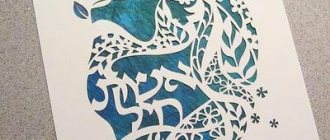
- Kirigami - this technique allows the use of scissors to make figures. Used to create postcards.
The first models for children from 3 years old
Currently, in addition to classic origami, there are other types of it, but for beginning craftsmen and young children, it is best to start getting acquainted with the world of origami with the simplest classical patterns. Classic origami is the folding of models from square sheets of paper, without using any glue or scissors when creating figures.
The simplest crafts for beginners include: an airplane, a boat, a tulip, a dog or a cat. Let's look at how to make these figures step by step.
Tulip
A simple model of this flower can be assembled by a very small child with the help of his mother. The older the child, the more complex patterns for creating a tulip are available to him: they turn out already voluminous, with open buds. A simple diagram for a child over 2 years old will allow him to make a beautiful craft and give his mother a reason to be proud.
Stage one
Take a red square piece of paper. Help your baby fold it diagonally. Unfold the sheet and fold it in half along the second diagonal.
Stage two
Bend the corners of the resulting triangle from the center line. Bend the lower sharp tip of the bud. You have a tulip bud.
Stage three
Take a square green piece of paper. Bend the corners, directing them towards the diagonal of the square.
Stage four
Fold the resulting figure in half. You will get a green triangle. Bend the bottom corner of the figure - you have a tulip stem.
Stage five
Connect the flower and stem on a thick paper base. The result is a tulip applique using the origami technique. The craft looks very beautiful. The baby can give this card to his mother or grandmother.
This is a simple pattern with no complicated folds. The baby can master this craft under the guidance of his mother.
Familiarity with the technique of creating a dog will help you create an animal.
Dog
Stage one
Fold the paper square diagonally. There should be a triangle in front of you, in which the right angle is directed downwards.
Stage two
Fold the top two corners down to form ears.
Stage three
Bend the bottom corner of the craft upwards to create the face of a dog.
Stage four
Let the child draw the doggie's eyes and nose. He will color his craft the way he likes.
Panda
White paper required. Prepare a black pencil, felt-tip pen or paints. For pandas, white and black colors are relevant.
Stage one
It is necessary to outline the fold lines. To do this, fold the square sheet diagonally twice, and bend the corners on the left and right sides forward.
Stage two
Bend the resulting upper corner in the opposite direction.
Stage three
Make the resulting panda face smaller at the edges.
Stage four
Bend the bottom corner forward. For the spout, fold the corner of the top edge down.
Stage five
Let's draw a face.
Light figures include cars and tanks. More complex models are images of birds and insects. Children 8-9 years old can already make human origami on their own. Creating such a figurine requires an understanding of the classic folds and developed motor skills of the child’s fingers.
To create a New Year's mood, there are many light models of Christmas trees and voluminous snowflakes made using the classic origami technique. Paper rings are very popular among girls. However, such models are quite complex for novice craftsmen. To learn the technique of creating a paper ring, you can take a look at special master classes.
HOW TO LEARN TO MAKE ANIMALS - DIAGRAMS FOR CHILDREN
Children's pranks and inability to sit in one place are often due to the fact that the baby has nothing to do, and energy needs to be directed in a certain direction. Invite boys and girls to do origami, which will calm them down, captivate them, and make them feel like little wizards working miracles. This is a useful hobby that develops attention, patience, artistic taste, and thinking. Learning how to make origami animals is simple: take a piece of paper, fold it according to the diagram below and get a funny little animal.
The influence of origami on the thinking of a child/adult.
Origami helps children develop fine motor skills, which is important not only for children, but also for adults in the era of widespread digitalization. It was not without reason that at the beginning of the nineteenth century, Friedrich Froebel (German teacher, theorist of preschool education) proposed introducing such classes in kindergartens in Europe. In addition, this art helps develop creativity in both children and adults. Folding paper toys helps you become more focused, diligent and develop spatial thinking.
| Subscribe to updates from the “Design in Life” blog by email
and we will definitely publish even more useful lessons and materials for you! |
(Visited 290 times, 3 visits today)
- Share on Facebook
- Share on Twitter
- Share on Pinterest
- Share on LinkedIn
- Share on Vkontakte
- Share on Instagram
WHAT ELSE CAN BE MADE FROM PAPER: ASSEMBLY DIAGRAMS
All kinds of origami techniques make it possible to make many interesting crafts. This is an ideal pastime for a child in the form of play. Such decorative and applied art does not stand still: it gradually gained experience and was transformed, as a result of which many schemes for assembling various figures of snowflakes, cars, airplanes, furniture, animals, etc. arose.
FIGHTER PLANES
Many in childhood folded airplanes from pieces of paper torn from a school notebook and launched them during recess, watching the flight. In the origami technique there are a lot of options and forms of this craft, from the simplest to the most complex models. The diagrams below clearly demonstrate the assembly of fighters, which will require a little patience and paper.
CARS
The next popular paper craft is a typewriter. Every boy loved to play with them in childhood. If you don’t know how to make one, the following easy diagrams of racing and regular cars, trucks, and police cars will help you. If you follow the instructions, assembling the model will not take much time, and the result will be excellent.
MINECRAFT
Minecraft is a sandbox construction computer game. It allows players to create, destroy various blocks, and use objects in the surrounding 3D environment. If you are familiar with the game Minecraft, you will be interested in creating its blocks and heroes using the origami diagrams below. You can use white paper and draw the desired image on it, or print out templates.
FURNITURE
It's very fun to make origami furniture using paper patterns. You can create a window, a sofa, a table, a bed, a desk, an armchair. Such crafts are suitable for future children’s games, creating a dollhouse, and appliqués. You can choose any paper of different shades. By creating several figures, you will get a whole set of miniature furniture. All patterns are easy, so even a child can do crafts.
SNOWFLAKE
Origami and kirigami paper snowflakes are a great way to decorate your home for the New Year holidays. You can hang such crafts near windows, on a Christmas tree, on a chandelier, make a garland out of them and hang them along the walls, or a children’s mobile. Each pattern allows you to create a unique, inimitable snowflake. You can paint the finished products with silver, blue and glitter colors using spray paint, or apply glue with glitter along the edges to make the decoration even more interesting.
Deer from modules
The sika deer is the second most important animal for the Japanese, after the raccoon dog. They are considered messengers of several gods at once and even acquired their own city. In the ancient capital of Japan, the city of Nara, deer roam the streets as freely as local residents or numerous tourists. They are hand-fed, groomed and cherished, and the killing of these harmless, trusting animals is considered a state crime.
Realizing that people treat them in a special way, the deer have completely ceased to be afraid and every now and then they pester passers-by, demanding a treat. At every city intersection there are special vending machines with the favorite delicacy of four-legged divine messengers - saltine crackers. And if an overly thrifty tourist or city dweller passes by such a “deer canteen”, disgruntled animals stand in his way and persistently push him towards the coin acceptor.
Today, the city of Nara is home to over 1,200 deer. According to legend, once one of the supreme gods of the Japanese pantheon, Takemikazuchi no, rode into Nara on this very animal. The Kasuga Shrine was built for the celestial, and a park was laid out around for his deer. To commemorate your visit to this amazing city, talismans with images of the four-legged “owners of Nara” are sold. The Japanese believe that deer brings happiness, longevity and prosperity. However, you don’t have to go to Nara to get a good talisman.
You can make a deer yourself using the modular origami technique. The Japanese sacred beast will make an excellent interior decoration or an impressive gift and will definitely bring joy to those around you.