You definitely need to learn how to make an origami box with a lid . It can serve not only as a container for storing small items, but also as a beautiful gift wrapping. It doesn't matter what size the item you want to put in the box is. You can make a product of any size by taking square sheets of suitable size.
For a paper box with a lid you will need:
- 2 sheets of colored paper 15x15 cm;
- 4 sheets 12X12 cm for the lid;
- the desire to make a beautiful craft;
- 1 hour of free time to understand the assembly technique and get a good result.
For the lid, you can take squares of the same or different colors.
DIY origami box
Among the boundless ocean of ideas on how to make a gift for a loved one with your own hands, an origami box is one of the most successful. The fact is that, along with simple craft options that are available to beginners, you can also make an original paper box: with a lid or a surprise. With which? You'll find out very soon.
The simplest option, how to make an origami box, is available even to children, who will happily get to work if the paper is colored, patterned or glossy.
Step-by-step instruction
- To make a box out of paper, you will need a square sheet, which must first be folded in half.
- Then you need to bend the edges up 2/3, as shown in the figure.
- Now we make two corners.
- The same thing - on the other side: this is the base of the bottom of the figure
- Each side needs to be folded back, carefully ironing the edges of the paper.
- We unfold the figure by pulling the made sides.
- The result is a rectangular origami box.
Video master class on a simple origami box
Such an origami box can be convenient for storing pleasant little things: beads, coins, pins and other useful home accessories.
Making a box with a lid
This tutorial provides detailed instructions, from which it is easy to understand how to make a paper box with a lid. It is convenient not only to store small items, but also to hide something valuable so that you can later give an unexpected gift to a dear person.
The scheme of actions is also simple, and if desired, a novice master of the origami technique will be able to assemble this paper craft.
Step-by-step instruction
- Take a square sheet of paper and fold it in half in both directions, as shown in the template.
- Bend all corners towards the center.
- Bend both edges in half.
- Now we unbend it, as shown in the diagram.
- Fold the sides towards the middle
- Once again we make the side folds.
- We assemble the long sides.
- We bend the remaining edge - the figurine is ready.
As you may have guessed, you need to fold the lid according to exactly the same pattern. Such a box made of origami paper is well suited not only for pleasant little things, but also for precious gifts - imagine how original and unexpected the surprise will be if the earrings or pendant are placed not in a classic jewelry box, but in a craft that you can make yourself.
ADVICE
It is better to make the model itself and the lid for it from contrasting colors - then the aesthetic effect will be maximum (see photo).
Video support for creating a box
A visual description of our actions is in this video.
Making a surprise box
A box with a lid is a convenient option for storing items and an original gift, however, to create an even greater effect, you can master an additional craft option: this is a box with a surprise.
It is a cube in which a face is placed, expressing different emotions. Children will be delighted with the figures, because with their help you can put on a real home performance! Yes, and giving such a frame to the main gift for an adult as a funny addition will be incredibly fun!
You can clearly see how to make an origami box for a gift here.
The diagram with faces will help you. You can print the image or simply draw it in the desired size.
Advice! Make figures of different sizes and colors, give them human or cartoon features using beads, feathers, straws, sticks, in a word, everything you can find in the household. And open a home theater!
Schemes for creating boxes
More details can be found here vnitkah.ru
Source: https://penguin-art.ru/blog/korobochka-origami
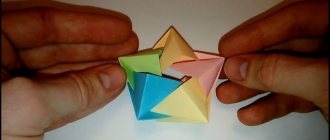
Pyramids
Agree, it’s always nice to receive unexpected gifts. And when they are beautifully packaged - doubly so. The pyramid will be an excellent solution for packaging a small gift. Such pyramids can be either triangular or quadrangular.
Related article: Fabric hydrangea flowers. Master Class
To create a 3-gonal pyramid you will need the following blanks:
- 3 square sheets measuring 12.7 x 12.7 cm;
- 6 square sheets measuring 6.3 x 6.3 cm.
For a 4-corner box you will need:
- 5 squares measuring 12.7 x 12.7 cm;
- 8 squares measuring 6.3 x 6.3 cm.
Assembling such a craft does not require a lot of time and effort. To create it, you don’t even need a diagram, because the whole process shown in the video lesson is so simple that even a child can figure it out. Despite this, such a pyramid with a surprise inside will cause a lot of delight and joy.
Schemes and photos of MK origami boxes of various little things
An origami paper box is a good storage container. There are a lot of ideas for creating different boxes. These can be simple boxes for storing small items or beautifully decorated gift packaging. The density and color of the future box should be selected in accordance with its functions.
Even a beginner can make a box out of paper. Many people probably collected Zunako, Sanbo or other models in childhood.
The master class will be useful both for beginners getting acquainted with origami and for lovers of this type of creativity.
Simple boxes
The simplest origami boxes are folded according to ready-made templates. To do this, just cut out the workpiece and fold it along the marked lines. In some models, it is necessary to use glue to connect the sides, but you can select blanks in which the sides are fastened together by means of slots:
Without blanks, an origami box is made from one sheet of paper. There are several simple models without lids. Assembling these boxes is good for beginners. Below are master classes that describe step by step how to assemble a simple square box and the classic models of Zunako and Sanbo.
With two drawers
If you need to organize a place to store small items on your desktop, this video shows how to make a beautiful box with 2 drawers. You can put pins, paper clips, beads, and jewelry in them. No glue needed. To fold the box you need 1 sheet of A4 paper. Boxes that allow you to conveniently remove small items are made from 2 square sheets. The side length of each square is 13.5 centimeters. When the work is finished, you can decorate the box with stickers and label the boxes.
How to make a box with your own hands: 40+ original ideas for gift boxes with patterns
On the eve of the New Year holidays, store windows are full of gift boxes, decorative bags, and wrapping paper for every taste.
Smiling sellers helpfully offer to provide wrapping services for New Year's gifts. And all this seems great, because you must admit, it’s much nicer to receive a New Year’s trinket in a beautiful package.
But on the other hand, the whole meaning of the gift is lost, the very gift that should be intended specifically for you.
The recipient of the gift will be doubly pleased if, in addition to choosing the gift, you spend a little more time on wrapping it. In this article we will teach you how to make gift boxes from paper or cardboard with your own hands.
This is not at all difficult to do, because all the crafts presented with us are accompanied by ready-made diagrams, templates and step-by-step master classes. All you have to do is choose the appropriate box option, print out the diagram and glue the paper box together according to the instructions.
By the way, some of the boxes we present are made using the origami technique, which means that you don’t even need glue!
So, before we get started, let's check if everything is ready. To make a paper gift box with your own hands, you will need: beautiful wrapping paper (you can get by with plain white paper and then decorate it), scissors, pencil, ruler, glue or double-sided tape, and a stationery knife. Everything is? Well then, let's create!
#1 Box “Herringbone”
A great way to pack a small trinket for friends or family is this New Year's themed box. By the way, it’s very easy to do. You'll need green paper and hole punchers (although you can do without). Well, any rhinestones, beads, sequins are suitable for decoration, in general, to your taste!
#2 Gift box “Mint Candy”
And here is another original version of a gift box, which you can very easily make with your own hands, especially with our step-by-step master class. You will need red construction paper (for the box itself), as well as white paper for decoration.
You can make the upper part of the box with applique or simply color the white sheet with pencils or felt-tip pens. By the way, there doesn’t have to be a lollipop on top.
You can get creative with a New Year's theme and decorate the box on top, for example, with a snowflake, a Christmas ball or red M&M's.
#3 Box with lid (diagram)
Well, if you don’t have the time or desire to tinker with the box for a long time, you can use a simple ready-made template. You need to download it, print it, cut it and glue it. Voila, the box is ready! Please note that we have prepared 2 diagrams for you: square (size 5x5) and rectangular (size 7x6x4). Download diagram 5x5 Download diagram 7x6x4
#4 Cup with a gift
But here is a gift packaging option for those who want to surprise with originality - a gift box-cup. It's quite simple to do, but looks impressive! To create, you will need thick paper, scissors and glue. And of course our step-by-step instructions!
#5 New Year's box “Cake”
If the New Year's party is planned in a large company, for example with a large family, it makes sense to pack gifts for everyone in one large multi-pack box. The cake packaging box consists of 8-10 pieces, each of which is a separate paper gift box. Download the diagram
#6 Gift box with lid for muffins and other small items
During the New Year holidays, edible gifts are quite common: various sweets and baked goods. An original gift will be a muffin prepared with your own hands in a designer gift box. Download the diagram
#7 New Year's box “Diamond”
You can pack a New Year's gift in a diamond-shaped gift box. With our scheme, making such intricate packaging will not be difficult. All you have to do is print out the box template, cut it out and glue it according to the instructions. It's simple! Download the diagram
#8 New Year's packaging "Santa"
A very cute New Year's package will be made from a regular paper bag, decorated with a paper Santa. Download the Santa pattern, cut it out and glue it onto the bag. DIY Christmas packaging is ready! Download the diagram
#9 Boxes “Harry Potter”
Fans of stories about Harry Potter will be indescribably delighted when they receive a piece of their favorite hero as a gift. By the way, such a box with magic sweet beans can be a wonderful addition to a set of books about the adventures of a young wizard. Download the diagram
Origami paper gift box: diagram and master class
We present to your attention a simple but interesting master class that describes in detail how to make an origami gift box. This cute paper thing is very easy to create with your own hands.
Tools and materials Time: 30 minutes • Difficulty: 3/10
- scrapbooking paper;
- stationery glue or PVA;
- scissors;
- pencil;
- ruler;
- cutting mat.
This interesting origami gift box is perfect for those times when you urgently need beautiful packaging, but don’t have the strength or desire to run to the store!
On the eve of the New Year holidays, we made a whole bunch of these boxes so that we would have enough to congratulate all our loved ones, colleagues and friends! However, these boxes can be used all year round and keep whatever you want in them!
Step-by-step instructions with photos
Let’s start creating a beautiful origami gift box for loved ones with our own hands.
Step 1: Cut out the paper
Carefully measure and cut your paper to the desired size.
To make an origami box, you will need 2 square pieces of paper, one of which should be 1.2 cm smaller than the second. Therefore, if you use standard sheets of scrap paper measuring 30 x 30 cm, you need to reduce the second sheet to dimensions 28.8 x 28.8 cm. The larger piece of paper forms the lid, and the smaller piece forms the bottom.
Step 2: Form the pleats
Place the sheet in front of you with the design facing down and fold it in half. Next, open it, rotate it 90 degrees and fold it in half again. Your folds should form a cross.
Next, fold the paper from one corner to the opposite and form a triangle. Open it, rotate it 90 degrees and repeat.
Step 3: Fold the Corners
Now fold each corner into the center of the paper square.
Your folded sheet should look like the picture in the top left corner of the photo below.
Step 4: Fold the Edges
- Take your square and fold its bottom edge towards the center.
- Repeat for the other side. Your folded paper should now look like a rectangle.
- Open it, rotate it 90 degrees and repeat. It should now look like the image below on the right.
Step 5: Form the Lid
Lift 2 opposite triangles and turn them flat.
Take the top flap and begin folding it inside the lid along the formed folds. This is the part where you may need to use a little glue. If the shields of your triangle do not fit very tightly, apply a thin layer of glue to each of them, press and leave until dry.
Rotate the craft 180 degrees and repeat on the other side. As you can see, our origami gift box has already begun to take shape. Left just a little bit!
Step 6: Make the Bottom
Repeat steps 2-5 for the smaller scrap paper square.
Once complete, the larger box should easily fit on top of the smaller bottom.
A charming origami gift box has been created with your own hands! To make the medium sized box we used 25 x 25 cm and 23.8 x 23.8 cm sheets, and for the small box we used 20 x 20 cm and 18.8 x 18.8 cm paper.
We hope you enjoyed our master class. And if you have any questions, write to us in the x below. Happy holidays to you!
Bonus video on making origami paper gift boxes:
Source: https://masterclasso.ru/origami-korobochka-dlya-podarka
DIY Magic Box
A surprise box (Magic Box) is a unique gift that is suitable for all holidays. Birthday, New Year, Valentine's Day, March 8, February 23, wedding, teacher's day and other celebrations... The main gift is a surprise - it can be candy, a flash drive, money, a photo and anything else that you want to put in a box. However, the design of the box itself evokes joyful emotions and emphasizes the theme of the celebration. In this article we will look at how to make a surprise box with your own hands.
Small box
You will need: thick white paper, pink scrap paper, pencil, scissors, ruler, non-writing pen, moment glue, distress ink, decorative elements - lace, shabby ribbon, stickers, flowers, berries and a surprise gift of your choice .
Master Class
- Box size 7 cm: make a cross of 5 squares, the sides of which are 7 cm.
- Draw the folds with a non-writing pen and lift the squares up, forming a box.
- Cut 4 6.8cm squares from scrap paper.
- Tint the edges of the squares with ink and glue lace onto each square.
- Cover the front side of the box with squares.
- Prepare 4 6.8 cm squares from other scrap paper.
- Tint the edges of the squares, decorate with stickers and cover the inner walls of the box.
- Make the lid in this way: prepare a square with a side of 10.1 cm.
Draw out the sides of the lid 7.1 cm and the height of the lid - 1.5 cm, then cut it out as shown in the image. - Draw the folds with a non-writing pen, fold and glue the lid.
- Cut out the parts for the lid from scrap paper of the following sizes: ends of the lid - 6.9x1.3 cm; three squares - 6.9 cm.
- Shade the parts and set them aside.
- Prepare a square and 2 pieces of shabby ribbon, glue the ribbons to the back of the square, then glue it to the bottom of the box and tie a bow.
- Cover the lid of the box with scrap paper parts.
- Decorate the lid to your liking and place the surprise inside the box.
The small box is ready!
Box with a secret
You will need: thick white A4 paper, scrapbooking paper, glue, ruler, scissors, 4 paper clips, crochet hook or non-writing pen, decorative elements - twine, pendant, figurines...
Master Class
- Prepare a square of thick white paper measuring 18x18 cm. The size of the box will be 6 cm.
- Draw the workpiece into 9 squares of the same size using a hook and a ruler.
- Cut the corner squares to create a cross.
- Lift the squares up to form a box.
- Prepare 10 squares of scrap paper measuring 5.8 cm.
- Cover the outside and inside of the box with squares.
- Make the lid this way: cut out a square of thick paper measuring 8.2 cm and 2 squares of scrap paper of the same size.
- Step back 1 cm from the edges of the square and make a crease (draw lines with a crochet hook).
- Make diagonal cuts at the corners, then cut the cut pieces in half as shown in the image.
- Fold and glue the corners, then secure with paper clips and wait until dry.
- Make a small bundle of paper, tie it with twine and attach it to the bottom of the box, also don’t forget to put or write a secret.
- Decorate the box to your taste by attaching various decorative elements.
The box with the secret is ready! I recommend watching this video!
New Year's surprise box
You will need: a scoring board, fantasy knives, scissors, a ruler, moment glue “Crystal”, PVA glue, scrapbooking paper, watercolor paper, acrylic plastic, Raffaello sweets, decorative elements - a snowman, a pom-pom and other decorations...
Master Class
- Prepare a sheet of white scrap paper measuring 21x26 cm. The size of the finished box is 5x10x4 cm.
- Make a scoring (draw lines with a non-writing object) along a side equal to 21 cm at a distance of 4;4;5;4;4; and on the side 26 cm – 4;4;10;4;4;
- Cut off the excess and assemble the box.
- Make the lid of the box in this way: take watercolor paper, make a crease by adding 1 mm to each side - 5.1; 4.1; 5.1; 4.1; + 2 cm for gluing (see photo).
- Cover the outside with scrap paper, glue it and try it on the box.
- Glue a strip of acrylic plastic to the back of the snowman and wait until it dries.
- Glue the snowman by the strip to the inside of the box and wait until it dries.
- Decorate the box to your liking, glue on a pompom and place the candies inside the box.
The New Year's surprise box is ready!
Men's box
You will need: black cardboard, gray leatherette, scrap paper, hat elastic and black eyelets, ruler, creasing tool (not a writing pen, crochet hook), chipboard (cardboard cutouts for decoration), sewing machine, black threads, glue, decorative an inscription, a gift set - a bottle of alcohol, a screwdriver, a pack of cigarettes, a morning-after pill or other...
Master Class
- Cut a rectangle from black cardboard for a box measuring 37x27 cm. Box height - 8 cm, bottom length - 23 cm, width - 13 cm.
- Cut a rectangle from cardboard for the lid measuring 27.2x17.2 cm. Height of the lid is 3 cm, length is 23.2 cm, width is 13.2 cm.
- Cut out the corners (8x8 cm squares) from a large rectangle.
- Punch and bend along the marked lines.
- Punch the lid of the box as shown in the image.
- Cut triangles near the corners of the lid and fold along the marked lines.
- Measure each side of the box and lid, then prepare pieces of leatherette according to the resulting dimensions.
Prepare parts from scrap paper in the same way, just make them slightly smaller than the leatherette parts. - Sew the leatherette and scrap paper parts together.
- Sew one of the rectangles to the front side of the lid.
- Glue one rectangle to the bottom of the box.
- Install the eyelets and attach the elastic as shown in the image.
- Cover the inside of the box with rectangles of scrap paper.
- Install holders from grommets and elastic bands for other gift elements.
- Glue the lid of the box and cover the outside of the box and lid with stitched rectangles.
- Fill and decorate the box with lettering and a chipboard.
The men's box is ready! I recommend watching this video!
Box with photos
You will need: a cutting mat, a stationery knife, scissors, glue, a ruler, a pencil, a crochet hook for creasing, scrapbooking paper, distress ink for tinting the edges, 8x9 photographs, decorative elements - ribbons, pom-poms, figurines...
Master Class
- The size of the finished box is 10x10x10cm.
- Prepare 3 squares of thick paper measuring 30x30cm, 29x29cm and 28x28cm.
- Make a crease by dividing each sheet into 9 squares. For the first sheet, step back 10cm from the edge; for the second 9.6 cm; and for the third 9.3 cm.
- Trim the corner squares of each sheet to create crosses.
- Cover the blanks with scrap paper, round and tint the edges.
- Glue three pieces together in the center.
- Make the lid this way: take a square of scrap paper measuring 20.3cm; retreat 2.5 cm 2 times on each side, make a crease as shown in the image, then make cuts along the dotted lines and assemble the lid.
- Glue the photos and assemble the box.
- Decorate the box to your liking and tie with ribbon.
The box with photos is ready!
Box with a surprise
You will need: 3 A3 sheets, black pastel paper measuring 50x65 cm, scrapbooking paper of 2 types (red and with flowers), Moment Crystal glue, pencil, ruler, red satin ribbon, mug, 4 candy bars.
Master Class
- Take an A3 sheet of paper and draw out the diagram of the box.
- Take another A3 sheet and redraw the side edges of the box.
- Take the third A3 sheet and redraw the diagram of the box lid.
- Cut out the parts from 3 sheets.
- Glue the side edges of the box.
- Fold the edge of the lid 2 times inside.
- Secure with glue.
- Cover the sides of the box with black pastel paper.
- Cut out a blank from black paper according to the lid pattern.
- Cover the lid with black pastel paper.
- Cut out 4 rectangles measuring 15x16 cm from black pastel paper.
- Cut 4 rectangles measuring 13 x 14 cm from red scrapbooking paper.
- Cover the inside of the box with black rectangles.
- Place a piece of red ribbon in each direction.
- Glue the red rectangles to the inside of the box on top of the ribbons.
- Cut out a 15x16cm rectangle from floral scrapbooking paper.
- Glue it onto the center base of the box.
- Cut a 13 x 164 cm rectangle from floral scrapbooking paper and glue to the lid.
- Place 4 bars on the sides and tie with ribbons.
- Place the mug in the center, lift the edges and close the lid.
- Decorate the lid with ribbon and tie a bow.
The surprise box is ready! I recommend watching the video master class!
Magic Box Ideas
Loading…
Source: https://svoimirukamy.com/magic-box-svoimi-rukami.html
Heart shaped box
A heart-shaped box is useful for packing a gift for Valentine's Day or a special occasion. The manufacturing method is demonstrated in detail in the master class on the AmyFamilyDIY channel. The following materials and tools are needed: 1 sheet of plain paper to obtain a template, 2 sheets of cardboard or thick paper, pencil, scissors, ruler, glue gun. The product can become an original decoration for a child’s room where a girl lives.