A large selection of master classes with a detailed description of knitting hats for boys of all ages.
Table of correspondence between the age, volume of the child’s head, height and diameter of the bottom of the hat
| Age | Head circumference, cm | Cap height, cm | Bottom/crown diameter, cm |
| 0-3 months | 35-40 | 13 | 9 |
| 3-6 months | 42-44 | 14 | 10 |
| 6-12 months | 44-46 | 15,5 | 12 |
| 1-2 years | 46-48 | 18 | 13,5 |
| 2-3 years | 48-50 | ||
| 3-4 years | 50-52 | 19 | 14,5 |
| 4-5 years | 52-54 | ||
| 5-8 years | 54-56 | 19,5 | 15,5 |
| 8-10 years | 56-58 | 21,5 | 16,5 |
| 10+ | 58-60 | ||
| 16+ (small adult) | 22 | 17 | |
| average adult | 23 | 18 |
Important: The table shows average values. More precisely, the diameter of the bottom/crown of the hat can be determined by the formula: OG /3.14, where OG is the head circumference in cm. The depth of the product depends on the model and individual preferences.
A simple light knitted hat for a boy and a scarf: diagram with description
In this part of the article, we bring to your attention two simple hats, knitted using two different techniques: from the top (from the crown) and from the bottom (from the elastic band). By learning how to knit these basic patterns, you can bring the most complex ideas to life.
A simple light hat for a boy with knitting needles (knitting from the crown)
A simple light hat for a boy knitted
Hat size/head circumference , cm: 48
Important: if you are knitting a larger item, increase the diameter of the bottom/crown to the required size (see the table at the beginning of the article).
For work you will need : • Yarn, color blue. Composition: 100% wool. Weight - 100 g, meter - 140 m. To work you will need a thread in two folds • Circular knitting needles #4.5
Abbreviations used in the description: KP - edge loop IP - purl loop ISP - purl crossed loop (see photo below) LP - front loop LSP - front crossed loop (see photo below) N - yarn over KR - circular row PR - turning row
How to knit a yarn over with a purl crossed loop
How to knit a yarn over with a crossed stitch
Main pattern: • garter stitch. All turning rows are knitted in LP. Circular rows are knitted according to the pattern (see picture below)
Garter stitch pattern for knitting on circular needles
Finishing: stockinette stitch or elastic 2x2 (1x1)
Description of work: 1. Knit the bottom/crown of the hat: • Cast on 7 loops. • 1st PR: KP, N, LP, N, LP, N, LP, N, LP, N, LP, N, KP. At the end of the increase there are 13 loops on the needle. • 2nd PR: KP, ISP, IP, ISP, IP, ISP, IP, ISP, IP, ISP, IP, ISP, KP. • 3rd PR: KP, *2 RL, N (knit alternately from * to the end of PR), KP. At the end of the increase there are 19 loops on the needle. • 4th PR: CP, *LSP, 2 RL (knit alternately from * to the end of PR), CP. • 5th PR: KP, *3 RL, N (knit alternately from * to the end of PR), KP. At the end of the increase there are 25 loops on the needle. • For the 6th PR and all subsequent even PRs, knit RS, yarn overs with LSP. • 7th PR: KP, *4 RL, N* (knit alternately from * to the end of PR), KP. At the end of the increase there are 31 loops on the needle. • 9th PR: KP, *5 LR, N* (knit alternately from * to the end of PR), KP. At the end of the increase there are 37 loops on the needle. • 11th PR: KP, *6 LR, N* (knit alternately from * to the end of PR), KP. At the end of the increase there are 43 loops on the needle. • 13th PR: KP, *7 PR, N* (knit alternately from * to the end of PR), KP. At the end of the increase there are 49 stitches on the needle. • 15th PR: KP, *8 RL, N* (knit alternately from * to the end of PR), KP. At the end of the increase there are 55 stitches on the needle. • 17th PR: KP, *9 LR, N* (knit alternately from * to the end of PR), KP. At the end of the increase there are 61 loops on the needle. • 19th PR: KP, *10 RL, N* (knit alternately from * to the end of PR), KP. At the end of the increase there are 67 loops on the needle. • 21st PR: KP, *11 PR, N* (knit alternately from * to the end of PR), KP. At the end of the increase there are 73 loops on the needle. • 23rd PR: KP, *12 RL, N* (knit alternately from * to the end of PR), KP. At the end of the increase there are 79 stitches on the needle. • 25th PR: KP, *13 PR, N* (knit alternately from * to the end of PR), KP. At the end of the increase there are 85 stitches on the needle. • 27th PR: KP, *14 LR, N* (knit alternately from * to the end of PR), KP. At the end of the increase there are 92 loops on the needle. • 29th PR: KP, *15 RL, N* (knit alternately from * to the end of PR), KP. At the end of the increase there are 103 loops on the needle. The diameter of the resulting circle is 13.5 cm (see photo below).
The bottom/crown of the hat.
Advice. If you need a larger hat, continue knitting with yarn overs, gradually forming a larger circle.
2. Close the knitting in the KR and begin to form the crown (main part) of the hat.
Closing a circular row.
3. Continue knitting the crown of the KR in garter stitch without increasing.
How to measure the depth/height of a header.
4. Once the required height of the product has been achieved, you can • knit the cap flap. To do this, knit another 4 cm with an elastic band 2x2 or 1x1 and bind off the loops; • tie the ears with ties.
How to knit ears with ties: 1. Determine the width of the frontal part using the formula ¼ of the total number of loops, i.e. 103/4≈28 (always use an even number of stitches) 2. Continue working in stockinette stitch. Knit a row in the following sequence: 38 LP, bind off the middle 28 loops, 37 LP. 3. Knit stitch 6 PR. On each turn row, knit 2 stitches together at the end of the row. Be careful: you should remove 3 loops on each side!
Working on the back of the hat
3. Determine the width of the back part using the formula ¼ of the total number of loops, i.e. 75/4≈19 4. Knit a row in the following sequence: 28 LP, close the middle 19 loops, 28 LP. 5. Continue knitting the ears, working in parallel with two separate skeins of yarn. On each row, knit 2 stitches together at the end of the row. When the number of loops reaches 4, continue knitting without decreasing, knitting cords of the required length.
How to tie a hollow cord
6. Sew the crown of the hat. Decorate the product at your own discretion.
Finished hat.
A simple light hat for a boy, knitted (knitted from below)
A simple light hat for a boy, knitted (knitted from below)
Hat size/head circumference, cm: 46-48.
For work you will need: • Yarn, blue color. Composition: 100% wool. Weight - 50 g, meter - 80 m. • Circular knitting needles #4
Abbreviations used in the description: IP - purl loop LP - front loop KR - circular row
Description of work: 1. Cast on 74 loops on the knitting needles. Distribute the loops to form a circle. The cast-on edge should be located in the center of the resulting circle, and the loops should not twist. 2. Knit a cast-on row of LP. At the end of the row, secure the working thread and the end of the thread from the set of loops with a knot. This way you will get a closed CR. 3. Knit according to pattern #1 to the required height. To determine the height of the crown, use the formula: height of the cap (cm) – ½ the diameter of the bottom/crown, i.e. • height of the cap - 18 cm (see the table at the beginning of the article) • diameter of the bottom/crown - 13.5; hence ½ of the bottom diameter is 6.5 cm • crown height, cm: 18-6.5=11.5
Scheme #1
4. To knit the bottom/crown of the hat, continue working in stockinette stitch: Divide the total number of stitches by 6: 74/6=12 (+2 stitches in the rest). For ease of work, knit in rotating rows. 1st PR: 10 LP, 2 LP together, 11 LP, 2 LP together, 10 LP, 2 LP together, 10 LP, 2 LP together, 11 LP, 2 LP together, 10 LP, 2 LP together. After decreasing there are 68 stitches on the needle. 2nd and all subsequent even PR: IP. 3rd PR: 21 LP, 2 LP together, 32 LP, 2 LP together, 11 LP. After decreasing there are 66 stitches on the needle. 5th PR: alternately 9 LPs, 2 LPs together until the end of PR. After decreasing there are 60 stitches on the needle. 7th PR: alternately 8 LPs, 2 LPs together until the end of PR. After decreasing there are 54 loops on the needle. 9th PR: alternately 7 LPs, 2 LPs together until the end of PR. After decreasing there are 48 stitches on the needle. Knit, gradually removing stitches at the end of each wedge, until there are 18 loops left on the knitting needle. Pull the remaining loops together with the cut working thread and secure. Sew the product.
Simple scarf for a boy
You can knit a simple and very practical scarf from leftover yarn. Main pattern: garter stitch The width and length of the product are calculated individually.
Children's scarf in garter stitch
Sports cap with toe
Sports cap with a corner for a boy 4-5 years old
Knitted sports cap with a toe (corner). The model is made in garter stitch with cross knitting using medium thickness yarn. Size: head circumference - 51-52 cm. Required: 70 g light green wool or wool blend yarn of medium thickness; 20 g of yarn in black, red and white for finishing; knitting needles No. 2.5. Abbreviations: p. = loop; persons = knit (loop); purl = purl (loop); chrome = edge (loop). Garter stitch: all rows are knit stitches. ATTENTION! In purl rows, remove the first edge stitches, and purl the last edge stitches. Distribution of yarn colors: from the 1st to the 81st row - light green; from the 82nd to the 85th row - black; from the 86th to the 89th row - red; from the 90th to the 93rd row - white; from the 94th to the 108th row - black. And then symmetrically: from the 109th to the 123rd row - black; from the 124th to the 127th row - white; from the 128th to the 131st row - red; from the 132nd to the 135th row - black; from the 136th to the 216th row - light green. Knitting density: garter stitch 32 stitches and 36 rows = 16 cm x 8 cm.
Knitting a hat
Measure the head circumference (= 52 cm), subtract 4 cm for the stretch of the cap (= 48 cm) and divide into 6 equal parts (= 8 cm). When knitting crosswise, 8 cm (= 36 rows) is the length of one part of the cap. Multiplying 8 cm by 2, we get the height of the cap - 16 cm (= 32 loops).
Part 1: cast on 32 stitches and knit purl rows from 1st to 35th as follows: 1 chrome, 1 yarn over, 28 knits, 2 knits. together, 1 chrome. Front rows from 2nd to 36th - knit. loops.
Part 2: knit purl rows from 37 to 71 as follows: 1 chrome, 2 knits. together, 28 persons, 1 yarn over, 1 chrome. Front rows from 38th to 72nd - faces. loops.
Part 3: knit from the 73rd to the 108th row a little differently. Decrease loops should also be performed at the end of each purl row, and yarn overs at the beginning of every 2nd purl row, i.e. in 73, 77, 81, 85, 89, 93, 97, 101, 105th rows. Facial rows - faces. loops.
Part 4: knit from the 109th to the 144th row, as in the 3rd part, only in a mirror image, i.e. decreasing loops at the beginning of each purl row, and making yarn overs at the end of every 2nd purl row. Part 5: knit rows from 145 to 180 as in part 1. Part 6: knit rows from 181 to 215 as in part 2. In the 216th row, close the loops.
Assembly
Moisten the product, straighten it and let it dry. Then make 4 seams as indicated in the diagram. Tip ☞ It is advisable to join the knitted parts of the product using a knitted seam.
I have an idea!
A hat can be knitted without seams if at the end of each purl row of the 2nd (4th, 6th) part you pick up the penultimate walls of the edge loops of the 1st (3rd, 5th) part, and at the beginning of each front row row knit 2 persons. together (as when knitting heels in socks).
ஓજஓજஓ
All rights reserved. Copying material for publication on other sites is prohibited! It is allowed to use an announcement with a picture if there is an active link to the source ladies.by
ஓજஓજஓ
Maybe you will be interested in other sections: Knitting for boys Knitting for girls Knitting for kids under 2 years old Knitted toys The art of amigurumi Knitted patterns for men Knitted patterns for women Knitting for the home Knitting for dogs Collection of knitting patterns Collection of crochet patterns Knitting lessons Crocheting lessons Knitting ‒ portable hobby
If you found the page interesting and useful or have something to share, please leave your comment. We will be very grateful to you. ☸ڿڰۣ–
Knitted winter hat for a boy: diagram
Winter hat for boy
Hat size/head circumference, cm: 48-50 (50-52) 52-56.
Please note: there are different calculations for each size in the description!
For work you will need: • Yarn, green and brown. Composition: 60% wool, 40% polyacrylic. Weight - 100 g, meter - 170 m. • Circular knitting needles #4 and #4.5
Description and diagram
Knitted winter hat for a boy: diagram
Double knitted winter hat. Detailed description.
Incredibly warm, soft and beautiful double hat for your boy. If you carefully follow the instructions given in this master class, your baby will be warm, stylish and exclusively dressed in the coming winter.
We need:
- pr-zha (100% wool). In our case, these are gray (100 gr.), white (50 gr.), red, quite a bit;
- cr. sp. No. 3.5.
Size: master class for a hat with a volume of 46 cm.
Description
The product will consist of an outer and an inner part, we work in 2 threads. We are working on the ears: 7 sts. 1 x 1, + in each person. R. 2 stitches on each side until there are 19 stitches. By analogy with the previous option, set aside and do not close the stitch. On other sp. - the same. On the sp. with 1 stitch + 12 stitches, connect knitting – + 2 stitches. Next, elastic band 1 x 1 p. x 6 r. Then + 28 p., close, 5 cm with an elastic band. Then - the front stitch, alternating gray and red stripes, doing this 8 cm and moving on to decreases at the back of the head: 1st row: every 10 and 11 stitches together. 2nd row: 9 and 10 sts. 3rd row: 8 and 9 sts. 4th row: 7 and 8 sts.
Continue until 15 stitches remain, tighten and attach the pompom.
Let's start with the inner part: satin stitch with one thread of white color. Combine the finished parts of the cap by placing one inside the other and baiting them from the bottom. From inside Art. through both layers we cast on stitches along the edge, not forgetting to cast on loops more often when turning the ears so that the product does not wrinkle; 4 rub. l. g., 1 p. R., 4 R. l. g. + 2 r. contrast thread.
We should also steam the edging and bend it over the faces. side along the row with purl. n. and bait. Next we make a seam, for this we need to remove the counter. thread (last 2 rows) and sew each loop back and forth. seam We connect the closest parts of 2 p. The winter hat for the boy is ready!
Knitted hat and helmet for a boy with a detailed description
The simplest hat-helmet for a boy
Even very inexperienced craftswomen can knit such a model.
Hat size/head circumference, cm: 52-54
For work you will need: • Yarn, gray color. Composition: 100% wool. Weight - 100 g, meter - 300 m • Circular knitting needles #3
Abbreviations used in the description: IP - purl loop LP - front loop KR - circular row PR - turning row
Main pattern: 2x2 elastic (see diagram below)
2x2 elastic pattern for circular loops
Description of work: 1. Cast on 152 loops on the knitting needles. Distribute the loops to form a circle. The cast-on edge should be located in the center of the resulting circle, and the loops should not twist. 2. Knit a cast-on row of LP. At the end of the row, secure the working thread and the end of the thread from the set of loops with a knot. This way you will get a closed CR. 3. Using the “Rib 2x2” technique, knit a “pipe” 14 cm high. 4. Upon reaching the specified height, cast off 54 loops and continue knitting the PR, focusing on the pattern. 5. Having knitted 12 cm in height from the closed edge, cast on 54 loops (see figure below) and continue working the KR.
A set of loops for expanding the canvas
6. Having knitted 8 cm in height from the cast-on edge, proceed to knitting the crown of the helmet: • Knit an LP for each pair of loops. After decreasing there are 78 stitches on the needle. • Continue knitting RS: 6 RS, 2 loops together RS, 6 RS, 2 loops together RS, 7 RS, 6 RS, 2 loops together RS, 6 RS, 2 loops together RS, 6 RS, 2 loops together RS, 7 RS , 6 LP, 2 loops together LP, 6 LP, 2 loops together LP, 6 LP, 2 loops together LP. The decrease area on the knitting needle is 70 stitches. • KR without decreases: LP to the end of the row. • KR with decreases: alternately 5 LP, 2 loops together LP until the end of the KR. After decreasing there are 60 stitches on the needle. • KR without decreases: LP to the end of the row. • KR with decreases: alternately 4 LP, 2 loops together LP until the end of the KR. After decreasing there are 50 stitches on the needle. • KR without decreases: LP to the end of the row. • KR with decreases: alternately 3 LP, 2 loops together LP until the end of the KR. After decreasing there are 40 stitches on the needle. • KR without decreases: LP to the end of the row. • KR with decreases: alternately 2 LP, 2 loops together LP until the end of the KR. After decreasing there are 30 stitches on the needle. • KR without decreases: LP to the end of the row. • KR with decreases: alternately 1 LP, 2 loops together LP until the end of the KR. After decreasing there are 20 stitches on the needle. • KR without decreases: LP to the end of the row. • KR with decreases: 2 loops together RL to the end of the KR. After decreasing there are 10 stitches on the needle. Tighten the remaining loops with the cut working thread and secure. 7. Trim the hole.
Tying with the “Rachy step” technique
A cap.
Cast on 58 +1 stitches on needle No. 6 for a beautiful closure in the circle. Hang a marker for the beginning of the row.
Knit in the round with an elastic band *knit 1, purl 1* 12-15 cm.
Now we change the needles to number 8 and knit, repeating 4 rows: 2 rows * 1 knit, 1 purl *, the next 2 rows * 1 purl, 1 knit *. When we have knitted the required length of the hat, it is approximately 30 cm, we form the crown.
The crown will consist of three rows.
1 row. *Knit 2 together.*
2nd row. All stitches are knit stitches.
3rd row. *Knit 2 together.*
Pull the remaining loops, cut the thread, and fasten.
Snood is knitted on needles No. 8.
You need to cast on 66 loops +1 to close into a circle.
Snood length 29 cm.
Knitted hats. Detailed description and diagrams.
How to knit a hat with knitting needles. For beginners.
You can see all our hats by typing the desired word or part of it in the “Search” line. All articles that mention the word you typed will pop up.
Knitted children's hat with ears for a boy: diagram
At the beginning of the article, we looked in detail at how to knit a hat with ears from the top of the head. This part of the review presents a tutorial on knitting a model with braids (knitting direction from bottom to top).
Children's hat with ears for a boy
Hat size/head circumference, cm: 51-55
For work you will need: • Yarn, blue color. Composition: 100% wool. Weight - 100 g, meter - 210 m • Circular knitting needles #3, #3.5
Abbreviations used in the description: IP - purl loop ISP - purl loop crossed from broach (see diagram below) LP - front loop LSP - front loop crossed from broach (see diagram below) KP - edge loop NP - straight yarn over NO - yarn over reverse KR - circular row PR - rotary row
Knitting pattern for crossed stitches from broach
Main pattern:
Scheme of the main pattern for a hat with braids
Additional pattern: 2x2 elastic
Description of work: 1. Knitting begins with making cord ties (see infographic below). Cast-on edge: 4 loops. The cords are knitted in stockinette stitch.
How to knit a hollow cord with knitting needles
Advice. By working in parallel with two separate skeins of yarn, you will knit completely identical pieces.
2. Once the cord has reached the required length, proceed to knitting two ear parts. For one “ear”: • 1st PR: CP, NP, 2 LP, NO, CP. • 2nd and all subsequent even PRs: according to the pattern, knit yarn overs with crossed loops (LP or IP - without forming holes). • 3rd PR: KP, NP, 1 IP, 2 LP, 1 IP, NO, KP. • 5th CR: KP, NP, 2 IP, 2 LP, 2 IP, NO, KP. • 7th PR: KP, NP, 1 LP, 2 PI, 2 LP, 2 PI, 1 LP, NO, CP. • 9th CR: CP, NP, 2 LP, 2 PI, 2 LP, 2 PI, 2 LP, BO, CP. • 11th CR: KP, NP, 1 IP, 2 LP, 2 IP, 2 LP, 2 IP, 2 LP, 1 IP, NO, KP. • 13th CR: KP, NP, 2 IP, 2 LP, 2 IP, 2 LP, 2 IP, 2 LP, 2 IP, NO, KP. • 15th CR: CP, NP, 1 LP, 2 PI, 2 LP, 2 PI, 2 LP, 2 PI, 2 LP, 2 PI, 1 LP, BO, CP. • 17th CR: CP, NP, 2 LP, 2 PI, 2 LP, 2 PI, 2 LP, 2 PI, 2 LP, 2 PI, 2 LP, BO, CP. • 19th CR: KP, NP, 1 IP, 2 LP, 2 IP, 2 LP, 2 IP, 2 LP, 2 IP, 2 LP, 2 IP, 2 LP, 1 IP, BUT, CP. • 19th CR: CP, NP, 2 PI, 2 LP, 2 PI, 2 LP, 2 PI, 2 LP, 2 PI, 2 LP, 2 PI, 2 LP, 2 PI, NO, CP. • 21st PR: KP, NP, 1 LP, 2 PI, 2 LP, 2 PI, 2 LP, 2 PI, 2 LP, 2 PI, 2 LP, 2 PI, 2 LP, 2 PI, 1 LP, BUT , KP. • 23rd PR: KP, NP, 2 LP, 2 PI, 2 LP, 2 PI, 2 LP, 2 PI, 2 LP, 2 PI, 2 LP, 2 PI, 2 LP, 2 PI, 2 LP, BUT , KP. • 25th PR: KP, NP, 1 IP, 2 LP, 2 IP, 2 LP, 2 IP, 2 LP, 2 IP, 2 LP, 2 IP, 2 LP, 2 IP, 2 LP, 2 IP, 2 LP, 1 IP, NO, KP. • 27th PR: KP, NP, 2 IP, 2 LP, 2 IP, 2 LP, 2 IP, 2 LP, 2 IP, 2 LP, 2 IP, 2 LP, 2 IP, 2 LP, 2 IP, 2 LP, 2 IP, NO, CP. Number of loops on the knitting needle: 34. 3. Form the back part. To do this, cast on 20 loops between the ears. After combining the parts on the knitting needle - 88 loops (34 eyelet loops - 20 cast-on loops - 34 eyelet loops). Continue knitting the PR with a 2x2 rib. Recommended height of the back of the head is 2 cm (9 rows). 4. To form the frontal part of the hat, cast on 40 loops between the ears and close the KR. There are 128 loops on the knitting needle. Continue knitting the KR with a 2x2 rib. As soon as the height of the part reaches 5 cm (19 rows) from the cast-on edge, start knitting the crown of the hat. 5. For the convenience of working with the main pattern, move the beginning of the CD to the left by knitting five loops with a 2x2 elastic band (according to the pattern). The beginning of the rapport corresponds to the 6th cast-on loop at the back of the head. It is this loop that will later become 1 loop of the KR. 6. To avoid reducing the volume of the cap, make increases according to the following scheme: *1 LP, 1 LSP, 1 LP, 1 LSP, 2 LP, 1 LSP, 1 LP, 1 LSP, 1 LP, 1 IP, 1 ISP, 1 IP, 2 LP, 2 IP, 2 LP, 1 IP, 1 ISP, 1 IP; continue from * (repeat 8 times). At the end of the KR there are 176 loops on the knitting needle. 7. Knit the crown of the hat according to the “Main Pattern” pattern; the pattern repeat will be repeated 8 times. Knit even KRs, focusing on the pattern of the fabric. The height of the fabric with braids is 26 rows. 8. Having knitted the specified number of rows, begin knitting the crown of the hat.
Tip: If knitting the crown while maintaining the pattern is too difficult for you, switch to stockinette stitch and knit the crown using one of the methods described above.
• 1st CR: remove 5 LPs onto an auxiliary needle while working, 2 LPs together, 3 LPs, 2 LPs together (from the auxiliary needle), 3 LPs, 3 IPs, braid 1x2, 2 IPs, braids 1x2, 3 IPs. Repeat until the end of the CD. After decreasing there are 160 stitches on the needle. • 3rd CR: 8 LP, 3 IP, braid 1x2, 2 IP, braid 1x2, IP no. • 5th CR: 8 LP, 2 IP together, 1 IP, braid 1x2, 2 IP, braid 1x2, 1 IP, 2 IP together. Repeat until the end of the CD. After decreasing there are 144 stitches on the needle. • 7th CR: 8 LP, 2 IP together, braid 1x2, 2 IP, braid 1x2, 2 IP together. Repeat until the end of the CD. After decreasing there are 128 stitches on the needle. • 9th KR: 8 LP, 1 PI, braid 1x2, 2 PI together, braid 1x2, 1 PI. Repeat until the end of the CD. After decreasing there are 120 stitches on the needle. • 11th K: remove 4 LPs onto an auxiliary needle while working, 2 LPs together, 2 LPs, 2 LPs together (from the auxiliary needle), 2 LPs, 1 IP, braid 1x2, 1 IP. Repeat until the end of the CD. After decreasing there are 104 loops on the needle. • 13th CR: 6 LP, 1 PI, scythe 1x2, 1 PI, scythe 1x2, 1 PI. Repeat until the end of the KR • 15th KR: 6 LP, 1 IP, 2 together LP, 1 IP, 2 together LP, 1 IP. Repeat until the end of the CD. After decreasing there are 88 stitches on the needle. • 17th CR: 6 LP, 1 IP, 3 combined LP, 1 IP. Repeat until the end of the CD. After decreasing there are 72 loops on the needle. • 19th KR: remove 3 LPs onto the auxiliary needle while working, 2 LPs together, 1 LP, 2 LPs together (from the auxiliary needle), 1 LP, 1 IP, 1 LP, 1 IP. Repeat until the end of the CD. After decreasing there are 56 stitches on the needle. • 21st CR: 2 LP together, 2 LP together, 1 IP, 1 LP, 1 IP. Repeat until the end of the CD. After decreasing there are 40 stitches on the needle. • 23-1 CR: 2 combined LP, 1 IP, 1 LP, 1 IP. Repeat until the end of the CD. After decreasing there are 32 loops on the needle. • 25th KR: 2 LP together, 2 LP together. Repeat until the end of the CD. After decreasing there are 16 stitches on the needle. 9. Pull the remaining loops with the cut working thread, fasten, trim the ends.
Knitting technique for a hat
We position the pattern in such a way that the toe is on the left, and determine the starting area for knitting, which is performed across the fabric.
With this arrangement of the pattern, it will be convenient to add different shades of yarn, because all the ends of the threads and transitions will be on the wrong side of the fabric, in the back of the head. We start working with a set of air loops (P) for the first zone of the pattern. Then we knit facial loops (LP) into each P. After this, move to the second row (P). We remove the first edge P, after which we knit 2 Ps together behind the front segment. This means that we are decreasing 1 P. Next, we perform the entire row of LP, and before the last edge we add 1 P using a yarn over. We knit the last edge P like a purl loop (IP). In this area of the canvas on the right we decrease P, and on the left we make additions.
In the next R, the yarn over is tied behind the front bow so that a hole does not form.
We use the same technique to complete all the rows until the first part of the sports cap with the toe is ready.
Starting to knit the next part, we make increases on the right, and we will decrease P on the left. The technique of additions and decreases should be similar to the first part.
Read
Step-by-step description of knitting a zigzag pattern with knitting needles
Next, we will continue to work on the pattern until all 6 strips are completed. At the same time, other shades of yarn must be woven in the front rows.
Knitted children's minion hat for a boy: diagram with description
Children's minion hat.
The minion hat is one of the most favorite models of boys from 2 to 102 years old.
Abbreviations used: LP - facial loop LPS - crossed facial loop
Description of work: 1. Knit a hat, based on the MK presented above. Basic knitting: knit or garter stitch. 2. By and large, the main difficulty arises in the process of decorating the hat. This is where we will stop. The minion's eye consists of several separately connected parts: a white circle, a gray frame, and a pupil. 3. The white circle is knitted from the center using stocking needles: • cast on row: cast on 9 loops, while knitting, distribute onto 3 needles (3 loops each). • Alternately: 1 LP, 1 LP from the broach. After adding 18 loops on the knitting needles. • Alternately: 2 LP, 1 LP from the broach. After adding 27 loops on the knitting needles. • Alternately: 3 LPs, 1 LPs from the broach. After adding 36 loops on the knitting needles. • Alternately: 4 LPs, 1 LPs from the broach. After adding 45 stitches on the knitting needles. Depending on the size of the hat, you can stop at this stage or continue further, increasing the diameter of the circle. Close the loops. Sew the piece to the hat. If your minion has two eyes, you need to knit 2 white parts. 4. The gray frame of glasses is also knitted with stocking needles in stockinette stitch. • Cast on row: number of loops = number of closed loops of the white piece + 5 loops. If you finished with 45 stitches, then cast on 50 stitches (45+5) • Knit 6 rows. Close the loops. Roll the finished part with a roller and sew along the circumference of the white circle. • For the pupil, use a button or felt circle. 5. Attach several black threads to the top of the head to imitate minion hair.
Children's hat with earflaps, knitted for a boy: diagram with description
Ushanka hat for a boy
Ushanka hats are a classic, warm and cozy. The video master class tells in detail about all the stages of knitting a hat with earflaps for a boy (size: 54-55), starting with a set of loops and ending with assembling the product. If you need a smaller hat for a 1.5-2 year old child, study the diagram below.
Children's hat with earflaps, knitted for a boy: diagram with description
Explanations for the diagram
Stages of knitting a children's hat with earflaps
Necessary materials and development of a hat pattern
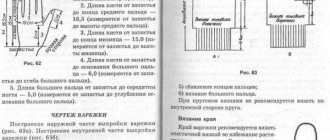
Let's look at the needlework technique using the example of knitting a simple children's sports cap with a toe. We will need the remains of wool blend threads in bright colors, knitting needles No. 2.5, a needle and thread, cardboard for the pattern, as well as scissors and a pencil. This model of hat must be knitted in garter stitch, according to a pre-designed and drawn pattern. The first step is to take two measurements, head circumference and hat height. In the master class, the circumference was 44 cm, but this size must be reduced by 2 cm, taking into account the stretching of the fabric of the product. As a result, for calculation we will take a circumference of 42 cm. To measure the height of the product, you need to measure the length between the bottom of the back of the head and the location of the edge of the toe on the forehead. In our case, this distance is 28 cm. We divide this figure by 2 and get 14 cm.
Read
We knit stylish men's jackets with knitting needles
The procedure for developing a pattern is as follows:
- On cardboard or paper, draw a horizontal line 42 cm long.
- We mark this line, dividing it into 6 parts.
- From each point we draw a vertical line, dividing the drawing into 6 vertical stripes 7 cm wide (a).
- Guided by vertical lines, fold a sheet of cardboard into an accordion (b).
- Next, cut off a piece to get the desired shape of the toe (c).
- Set aside 14 cm on both sides of the cut and connect the resulting points. Then we cut the cardboard along the resulting line (d).
- Lightly cut off the toe, making it less sharp (e).
- We straighten the folded sheet and get a finished pattern.
Knitted tanker helmet hat for a boy: diagram with description
Crocheted tanker helmet hat.
If you carefully studied the MKs presented above, knitting the “Tanker Helmet” hat will not be difficult.
1. Knit a standard hat with ears, using the tutorial for knitting a hat from the top of the head. Main knitting: knit.
Please note: the tanker's helmet has a flap in the back of the headdress! You can knit it separately and then sew it onto the hat, securing it with buttons. When unscrewed, the valve will protect the child's neck.
Rear view of the “Tanker Helmet” hat
2. Separately knit the overlays: 2 round overlays for the ears, 1 overlay for the forehead, 4 longitudinal overlays. To add additional volume, the linings should be filled with padding polyester or holofiber. 3. Round overlays • cast on row: cast on 9 loops, while knitting, distribute onto 3 knitting needles (3 loops each). • Alternately: 1 LP, 1 LP from the broach. After adding 18 loops on the knitting needles. • Alternately: 2 LP, 1 LP from the broach. After adding 27 loops on the knitting needles. • Alternately: 3 LPs, 1 LPs from the broach. After adding 36 loops on the knitting needles. • Alternately: 4 LPs, 1 LPs from the broach. After adding 45 stitches on the knitting needles. Depending on the size of the hat, you can stop at this stage or continue further, increasing the diameter of the circle. If the diameter of the circle suits you, knit 1 KR without any additions. Close the loops. Sew the piece to the hat, not forgetting to fill it with filler. 4. The forehead pad is a rectangle. You should knit the piece based on the size of your product. The overlay should also be filled with filler (during the sewing process). 5. Tie the longitudinal overlays: 2 - slightly longer (for the middle part of the head) and 2 - slightly shorter (located in the temporal part of the headdress). Longitudinal linings are long strips, 3 to 5 cm wide (depending on the size of the hat). Sew on the overlays. 6. A special Velcro fastener can be used to secure the “ears”.
Knitted hat for a boy for spring and autumn: diagram, description
The fashionable and comfortable “Owl” model is suitable for boys under 10 years old. The video at the beginning of the article will help you calculate the number of loops.
Owl hat for a boy
Description and diagram of the “Owl” hat.
Knitted stocking hat for a boy: diagram with description. Knitted beanie hat for a boy: knitting pattern
The simplest description possible.
The hat is knitted on stocking or circular knitting needles. Yarn is selected based on personal preference. The number of knitting needles (circular or double-knitting needles) must correspond to the number specified in the manufacturer's recommendations. The video at the beginning of the article will tell you how to correctly calculate the required number of loops.
Main stages of work: 1. Cast on the required number of loops, knit the first row of the cast-on edge, close the circular row. 2. Continue knitting the hat using the “Elastic band 1x1” or “Elastic band 2x2” pattern 3. An adult size requires a product length of at least 30 cm. For a children’s hat, the length must be determined independently, based on personal preferences. 4. Once the length of the product has reached the required length, close the loops. 5. Form the crown by gathering the edge of the hat into folds (number of folds: 4 or 6) 6. Secure each fold with a seam. Tuck the seams inside. 7. Fasten all the threads, cut off the knots.
How to knit a stocking hat (beanie hat) with knitting needles.