What does a beginner need?
When performing simple work, a novice needlewoman will need:
- photo of volumetric decoupage in finished form (taken as an example);
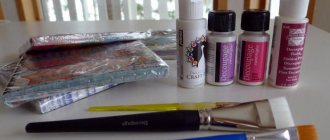
- acrylic paints of the desired colors and brushes for them;
- decoupage glue and special varnish;
- colored paper, cardboard and other materials (depending on what exactly will be created);
- scissors and stationery knife;
- tweezers for fine work;
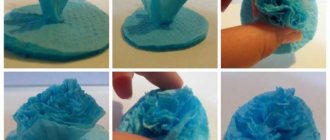
Work should begin by preparing all the details of the composition. Elements that need to be given volume are cut out in several copies of decreasing size.
When all the parts are prepared, the main elements are glued to the surface to be decorated. This could be a vase in which voluminous flowers will stand, or the body of a hedgehog with future voluminous needles.
Then, volumetric parts are glued, starting with the largest size and descending. The main thing is to maintain consistency. We coat the finished work with varnish where necessary.
Read here - Decoupage of Easter eggs - master class on decorating and using decoupage for Easter eggs (110 photos)
In fact, the initial stage of getting to know this type of decoupage is practically no different from the usual one. The operating principle, tools and materials are similar.
The most interesting work begins next. For example, volumetric decoupage using improvised materials.
Volumetric decor with eggshells
One of the most unexpected elements with which you can make volumetric decoupage is an eggshell. Based on it, crackles are made, that is, peculiar cracks. In addition, some needlewomen are able to create decoupage on eggshells.
Read
Rules for decoupage hair and a gentle method of washing
So, in order to repeat this master class, prepare:
- product for decoupage. The presented master class uses a kitchen cutting board for this;
- eggshells;
- a napkin with a suitable theme;
- fan-shaped brush;
- a piece of foam sponge;
- acrylic based paints;
- acrylic-based varnish with a matte or glossy effect.
At the first stage, the so-called egg crackle will be created. To do this, apply glue to the surface of the workpiece and apply eggshells. Now, with your hands you need to press on it. This will cause the shell to crack into small pieces. Take a toothpick and use it to spread the shell fragments on different sides. Based on this diagram, you need to fill the entire board with similar details. Having finished with this stage. Leave the product to dry.
Next, the crackle board needs to be primed. To do this, take paint of a suitable shade. This master class used paint to match the chosen subject on a napkin.
To apply paint, take a sponge and, using jerky movements, apply it over the entire plane of the board, not forgetting the areas among the cracks. As a result, the photo shows what kind of surface you should get. Let the board dry.
It is the resulting egg crackle that underlies this technique of volumetric decoupage.
Now it’s time to create decoupage. The top layer with the image is separated from the napkin, which is fixed on the surface of the product with acrylic-based varnish. Using gentle movements, slowly, using a fan brush, move from the middle of the picture to its borders.
Next, using a brush, fold the edge of the napkin and carefully tear it off. In view of that. If the napkin has already acquired a wet texture, it will not be difficult for you to carefully tear it off. This method allows you to simultaneously fix and varnish the picture. Once dry, you will need to apply another coat of varnish.
In this simple way, you can create three-dimensional decoupage on different products with your own hands using ordinary egg shells.
Read
Rules for creating decoupage on fabric surfaces
“I made him out of what was...”
Lines of a wonderful song as the basic principle of volumetric decoupage. And, indeed, you can use anything for your work, be it eggshells, cereals, fabric, shells, clay, cones, etc.
Often, though already more experienced craftsmen, “dabble” in volumetric decoupage with putty. This technique is also called “Art French”.
Here, an image is created by overlaying several layers with different images - a base layer, an intermediate layer and a surface layer. Due to this, the picture turns out to be three-dimensional.
Using structural paste in decoupage
Decorating objects with decoupage using structural paste is another way to create three-dimensional details. The final master class will introduce you to making touching hearts for your favorite holiday using such material.
In your work you will use:
- MDF hearts;
- satin ribbons;
- organza ribbons;
- decorative metal parts;
- magnets;
- acrylic-based aerosol primer;
- acrylic based paints;
- PVA glue;
- decoupage cards;
- acrylic-based varnish with a transparent effect;
- bitumen patina;
- structural paste;
- crystal paste;
- tassels;
- putty knife;
- scissors;
- sandpaper;
- pencil.
Take the heart and prime it along the front side. Paint the reverse part with paint of a suitable shade to match the main motif.
Take a decoupage card and trace the heart, thus making the design template you need.
Next, the picture is applied to the heart and fixed with PVA glue, previously diluted with water in equal proportions. Leave the item to dry, then use sandpaper to go around the edges of the heart. If necessary, during the process you can paint the background in areas not covered by the picture. To do this, simply mix the paints until you get the desired background tone. To apply it, use a finger on which a medical glove is put on and lightly touch the surface of the product.
The varnish is applied to the dried surface of the heart in three layers, with each one pre-drying. Apply bitumen patina to the ends of the object.
It's time to use the structural paste. The use of such a paste will give clear volumetric snow outlines, provided for by the selected thematic pattern. Apply it using a metal spatula with careful jerky movements. After the work using the structural paste is completed and the surface is dry, the same areas are coated with a special paste that gives a crystal effect.
On the back of the product you can attach magnets, add interesting accessories, and tie bows. Give free rein to your imagination to get an original item.
Thus, we have become acquainted with the options using which you can create volumetric decoupage. Choose the method that suits you and begin the exciting creative process.
Read
Decoupage of Christmas tree decorations and Christmas balls
