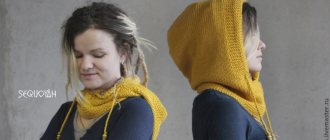
Scarf hood with wide braid
The scarf comes in one size.
We need:
- yarn, alpaca 100% (40m by 50g) – 500g;
- knitting needles No. 15;
- aux. knitting needle for braids
Patterns:
- braid No1 (K1): 1r., 3r., 7r., 9r. (front side): 1kr., 5l., 2p. with a cross to the right = 2 PP (1 p. we remove at work, 1 l., we knit the removed loop 1 l.), 1 i., 8 l., 1 i., 2 pp, 5 l., 1 kr.; 2 rub. and all purl: 1k., 5l., 2i., 1l., 8i., 1l., 2i., 5l., 1k.; 5p.: 1cr., 5l., 2pp, 1i., 8p. with a cross to the right = 8 PP (4 p. we remove at work, 4 k., we knit the removed loops 4 k.), 1 i., 2 p., 5 k., 1 cr.;
- braid No2 (K2): 1r., 3r., 7r., 9r. (front side): 1kr., 2l., 2PP, 1i., 8l., 1i., 2pp., 4l., 1kr.; 2 rub. and all purl: 1k., 4l., 2i., 1l., 8i., 1l., 2i., 2l., 1k.; 5 rubles: 1 cr., 2 l., 2 pp., 1 i., 8 pp., 1 i., 2 pp., 4 l., 1 cr.
Density: on the “Braid” pattern 8p. for 10r. equal to 10 cm by 10 cm.
Description
The parts will be knitted separately and then sewn together.
Item No1 – scarf
We dial 26p. and perform pattern K1. Having knitted 200cm, closed. P.
Part No2 – hood
We dial 22p. and perform pattern K2. Knitted 48cm, closed. P.
Assembly
Fold the hood in half and stitch the back seam. We join the bottom of the hood and the side edge of the scarf, aligning the seam of the hood with the center line of the scarf. We make a seam.
Seamless snood
What you will need for work:
- yarn 200 g;
- circular knitting needles No. 5;
- scissors.
Article on the topic: Spring crocuses from foamiran. Master Class
Cast on 80 stitches (or multiples of 4). Start knitting according to the pattern:
Join in a circle, then continue knitting with a Polish elastic band for 80 rows:
Close the loops. The scarf is ready.
Scarf hood cherry color
We will need:
- h/w yarn (250m per 100g) – 200g;
- knitting needles No. 4.
Patterns:
- shawl pattern: all sts in all r. – facial;
- main pattern - see diagrams.
Density: pattern сх.1 24p. for 26 rub. equal to 10 cm by 10 cm.
Description
We dial 44p. and do 2p. shawl pattern. Let’s move on to diagram 1 (it shows only knit stitches, purl stitches – knit stitches according to the pattern). We repeat the pattern from 1p. 53 rub. once. Next we repeat from 55r. for 61r. Having knitted up to 105cm in height from the beginning, we knit from 53r. 1 rub.
Next - 2 rubles. garter stitch. Closed P.
On both sides of the middle of the scarf we measure 21cm. In this section, we raise the stitch and begin to knit the pattern 2. At 21 cm, we divide the fabric in half and knit each part separately. On the right half of the hood for a bevel we reduce along the left edge in every 2nd r. 5 times 1p. Closed n. We knit the left half of the hood in a mirror image.
Assembly
We sew the scarf and hood according to the ABCDE marks. For fringe, cut strands of 20 cm. We fasten them along the edges of the scarf at intervals of 1 cm.
Crochet hat and snood for a boy: diagram, pattern, dimensions description
Crochet hat and snood for a boy: diagram, pattern, sizes description
The cap and snood set will be an excellent decoration for a child’s image. The baby's head and neck will be protected from the cold. Choose soft threads for knitting such a set so that your baby is comfortable.
This set is knitted simply: regular single crochet stitches, skipping one stitch between stitches. The snood dimensions are 50 cm in full length. It does not need to be knitted long so that it can be put on without turning, otherwise it will be uncomfortable for the baby.
Single crochet pattern:
Crochet hat and snood for a boy: diagram
Crocheted hat and snood for a boy - description:
Snood
- Cast on a chain of air loops and knit so that its length is 50 cm.
- Now work in a single crochet stitch until the end of the row.
- In the next row, insert the hook under both threads of the tops of the columns of the previous row.
- Knit this way to the desired length of the product.
cap
- First, tie the circle with columns with an increase of 7 cm in diameter - this will be the top of the hat.
- Then continue knitting, adding twice as many stitches in the next row. Knit in the round, completing the ring.
- When you have knitted another 15 cm of the hat, finish knitting.
Make a small pompom with a diameter of 5-7 cm and sew it to the finished product.
Remember: If you know how to knit complex patterns, then create a more interesting set for your baby. But for a boy, choose soft threads, and the pattern should not be openwork.
For example, you can knit this light green set:
Crocheted hat and snood for a boy - gray and light green color
Scarf hood knitted in one piece
Scarf dimensions: 0.3m x 2.1m.
Hood dimensions: 0.72mx0.84m.
To connect this model we need:
- yarn containing 75% wool, 25% silk (110m per 10g) – 100g;
- knitting needles No. 7;
- hook No.7;
- markers (M);
- pin or stitch holder;
- hook for securing fringe.
Patterns:
- shawl pattern: all stitches in all rows. facial;
- persons stitch: knit stitches in knits. rows, purl - purl;
- braids - knit according to patterns No1 and No2. They show only faces. R. On the wrong side. – we knit according to the pattern. Vertical rapport -10 rub.
Density: face. iron with two threads 13p. for 20r. equal to 10cm by 10cm; on braids 16p. equal to 7.6 cm.
Description
Right side of the scarf
We collect 52p in two threads. and perform: 1 cr., 4 p. – shawl knot, 16p. – braid cx.No1, 10p. – persons Ch., 16p. – braid cx. No2, 4p. - board. knot
Having completed 140r. (=70cm), closed by persons side 46p. On the remaining 6p. knit a scarf stitch - this will be a placket. Having knitted 76 rubles (= 36 cm), we transfer the stitch to the pin.
Left side of the scarf
We knit a mirror image of the right side: on the left under the closed bar. 46p. on the wrong side side and on the remaining 6p. we knit a scarf risk. Having knitted 76 rubles (= 36 cm), we transfer the stitch to the pin.
Hood
Like the previous parts, the hood needs to be knitted in two threads.
Dial 106p., continuation:
1p.: 1cr., 4p. – shawl pattern, 16p. – сх. No1, 64p. – persons Ch., 16p. – сх. No2, 4p. - handkerchief risk.
We do 112 rubles (=56 cm). We designate two central points with two M and proceed to forming the hood: 1p.: 1cr., 4p. - handkerchief fig-k, 16p. – сх. No1, 1l., 1 decrease with a tilt to the left (UL): 1p. we remove knits., 1l., stretch it through the removed one., 28p. – persons ch., 1p. for the bottom slice from the broach, 2l. (central ones are marked M), 1 l. from the broach behind the bottom slice, 28p. persons ch., 2p. in 1l., 1l., 16p. – sch.No2, 4p. shawl pattern, 1 color;
2p.: according to the visible pattern.
We repeat row No. 1 to form the hood 7 more times in knits. rows. Next we continue with an even canvas of 36 rubles (= 18 cm).
Track. stage of work - knitting the back of the hood. To knit it, we will work in short rows: in knits. R. knit up to 1 p. in front of M, turn the canvas with 1n. and knit it purlwise. complete row.
Next r. we knit up to 2 sts before M, again turn the fabric from 1n.
We continue like this, shortening each face. R. on 2p. 1 more time, on 3p. 2 times, on 4p. 2 times. With each turn we perform 1n. Transfer the item to the holder.
We knit the loops of the right side in a mirror image of the left: from M we shorten the r. by 1p. 1 time, for 2 p. 2 times, on 3p. 2 times, on 4p. 2 times. We transfer the item on the right side to the holder.
Assembly
Block parts. We connect the loops of the strap - 6p. with a special seam.
Using the same seam we sew the seam of the hood, counting 1n. and the next loops for 1 p.
Sew the first r. hood and long side of the placket - see pattern. We sew the sides.
We make fringe - 17 strands per side. Each is made of 9 threads of 40 cm. Fold the strands in half and secure them with a crochet hook to the scarf.
How to crochet a snood with a description for beginners?
How to crochet a snood with a description for beginners?
A voluminous scarf, knitted in the round, can be worn over a coat, or thrown over your head instead of a hood. How to crochet a snood?
A description for beginners will be located below. Knitting work begins with preparation:
- Select yarn and hook. You will need 400 grams of thread (15% wool, 75% acrylic) and a 7 mm hook.
- The length of the snood is calculated as follows: measure the length of your face from the chin to the crown, and multiply the resulting figure by the number of turns that you plan to make around your neck with the scarf. The result will be a number that will be equal to the full length of your future snood. 400 grams of thread is enough for a scarf 166 cm long.
Now you can start knitting. Schematic illustration of crocheting:
How to crochet a snood - diagram
Follow these steps:
- Knit chain stitches . The result should be a chain 166 cm long.
- Close the chain of air loops into a ring. Only after this can you start knitting the pattern.
- Knit 4 stitches and insert the hook into the second loop.
- Knit 4 more stitches . Hook up the working thread and pull it through the last two loops of the two resulting stitches.
- Knit one stitch up . Pass the hook through the next loop and repeat the process of creating the pattern (tie two columns of 4 loops and connect them).
- Knit to the end of the row , close it, and repeat the entire pattern from the beginning.
- Knit like this until you run out of yarn.
If you don't know how to crochet chain stitches, watch the video:
Scarf hood with a combined pattern
Dimensions: 33cm by 131cm.
We will need:
- mixed yarn: 79% acrylic, 20% wool, 1% polyester, (100g per 115m) – 700g;
- circular knitting needles No. 7, line length 80 cm;
- aux. spoke;
- marker (M).
Patterns:
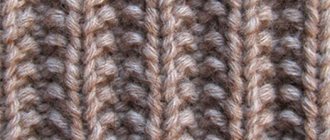
- "Rice" pattern:
1p.: *1l., 1i.* – from * to * repeat on all sts;
2p.: shift the pattern by 1p.
Repeat 1 time. and 2p.;
- combined pattern: knit according to the pattern.
Density: on a relief pattern 12p. for 18r. equal to 10 cm by 10 cm.
Description
At the first stage, we knit two parts of the scarf separately. It is more convenient to do this at the same time, casting on loops for two parts on circular knitting needles, and knitting from different balls.
For each we dial 38p. and install M between the parts. We knit stitches according to pattern No.1. Having received 96 cm, on the wrong side. side, on the right part we cast on an additional 37 stitches. between details.
Next we knit the loops of the second part. Now we will knit on all stitches at once, i.e. with a single piece of fabric.
On the side parts we knit the previous pattern, and the central part from the cast-on 37 stitches. knit with the “Rice” pattern - cx. No2.
At a hood height of 35cm, we finish knitting, fold it in half with the wrong side inward, and sew the top edge with a knitted seam.
Assembly
For fringe, cut the yarn into 50cm pieces. For each strand - 5 segments. Fold it in half and fasten it to the ends of the scarf - 6 pieces per side.
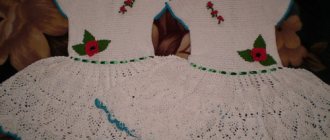
Openwork crochet snood for girls: diagram with description
Crocheted openwork snood for a girl: diagram with description
The crocheted openwork pattern looks great. Therefore, it is used for knitting hats, scarves, shawls and snoods. Your girl will look tender and beautiful in such a scarf-collar.
Openwork crochet snood for girls
Crochet openwork snood for girls - a simple diagram with a description:
Openwork crochet snood for girls: diagram
- Knit 85 chain stitches. Now according to the pattern: knit a stitch of 4 loops, one loop and again a stitch of 4 loops. Lower the last stitch into the fifth loop and knit to make a small circle.
- Now knit 3 single crochets , 2 chain stitches and again 3 single crochets. Next, 3 air loops, attach one column to the 4th loop and again 2 air loops. After this, knit 1 double crochet into the 4th loop. Do this all the way through the chain to the end.
- In the next row, pick up 3 loops and tie two double crochets - you will get a “slingshot”, as in the diagram. Now 3 loops and 4 single crochets, again 3 loops. Two double crochets, with a double crochet between them from the first row. Again 3 loops, 4 single crochets, and so on until the end of the row.
- In the third row, make 3 air loops, 4 stitches should be tied to the posts of the previous row. 3 chain stitches and 2 single crochets. After this, knit 3 air loops and 8 stitches. Continue like this until the end of the row.
- In the fourth row , pick up 3 stitches, make 8 stitches in 4 stitches of the previous row, then 1 chain loop and 16 stitches in 8 stitches of the previous row. So until the end of the row.
- The fifth row is knitted in the same way as the first, but at the beginning you need to knit 1 stitch for lifting and 3 single crochets. In a “slingshot” knit 3 chain stitches, a double crochet, 2 chain stitches and a double crochet again. The last stitches should be knitted between the 8 stitches of the previous row.
- Repeat this entire pattern until the end - until the desired length of the clamp. Connect the edges using a regular needle and thread.
Below are other openwork knitting patterns for a collar. One of these patterns will definitely inspire you and you will create a new masterpiece for your little princess.
Crochet openwork snood: diagram
Openwork crochet snood for girls: interesting pattern
Openwork crochet snood for girls: original pattern
Openwork crochet snood for girls: beautiful pattern
Openwork crochet snood for girls: two patterns
If something is not clear in the description, you can carefully watch the video and knit a snood, as an experienced craftswoman shows - beautifully and stylishly.
Hat scarf bashlyk
We will need:
- yarn containing 65% wool, 35% acrylic – 500g;
- knitting needles No. 6;
- additional sleep
Patterns:
- We carry out according to the scheme.
Explanations:
- cross of 6 points to the left: 3 points. we shoot on additional sp. in front of the canvas, 3l., 3l. with additional knitting needles;
- cross from 6 points to the right: 3 points. we shoot on additional sp. behind the canvas, 3l., 3l. with additional knitting needles;
- bump: from 1p. we knit 5p.=1l.+1n.+1l.+1n.+1l., unfold the knitting, knit the received stitches with knit stitches, unfold the fabric again, knit these stitches with purl stitches, again turn - 5p., another turn - 5p. knit in 1i.
Description
We dial 46p. and perform the pattern according to the diagram.
Until reaching 94cm, we work according to the scheme, repeating vertical rapport. Then we start increasing on the right side - after a section of 4 stitches of garter stitch. Add 12 times 1 p. in every 2nd r. We knit the added sts with cones - from 18 sts. at 29p. scheme. This is 58p. In this algorithm we knit 60cm.
Then we decrease stitches on the right side after the section of the scarf pattern - 1 stitch at a time. in every 2nd r. 12 times.
We continue knitting according to the pattern for another 94cm. Closed P.
Fold the scarf in half and sew 30cm from the center. Make a tassel 15cm long and sew it onto the hood.
At the ends of the scarf we make a fringe 20 cm long.
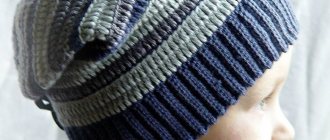
Winter crocheted snood for boys: diagram, pattern, sizes, description
Crochet winter snood for a boy: diagram, pattern, sizes, description
For a winter snood for a boy, choose thicker and softer yarn. The pattern, just like for a demi-season scarf, should not be complicated - everything is simple and easy. Also prepare a hook No. 4.5 or No. 5.
Description of winter crochet snood for boys:
- Knit a chain of chain stitches. It must be at least 120 cm long. Use a connecting post to connect the beginning and end of the chain.
- Now knit the lifting loops - there should be four of them.
- Continue knitting with single crochets, but not with regular knitting, but with skipping and pulling through the base loop: insert the hook into the second loop from the beginning of the lifting loops. The first loop is passed, the thread is grabbed and pulled through the base loop.
- There will be 2 loops on the hook; there is no need to knit them. Take the working thread with your hook and knit only one loop from the hook. There are again 2 loops on the hook.
- Grab the working thread again and knit again only the first loop from the hook. Now knit both stitches together.
- Continue doing this throughout the circular chain.
- The result was a pattern: “pigtail” and a separate thread. Therefore, when knitting the next row, insert the hook so that a separate thread from the previous row remains behind the hook. Thanks to this technique, you will get a smooth transition from row to row.
- Continue knitting, leaving a thread behind the hook, near each column.
- Knit the third and remaining rows in the same way.
You will get this pattern:
Winter crochet snood for boys: pattern
A snood with such a pattern looks beautiful on both little boys and teenagers. The size of the scarf-collar can be reduced so that the boy wraps his neck not three, but twice. This will make the image more solid and stylish.
Hoods for the family
A stylish men's cardigan or sweater with a hood looks complete and extraordinary. A separate MC for knitting the element is not needed; it is performed using previous technologies. For a man, you shouldn’t settle for a strict look, because for the holiday you can knit a hooded hat in an unusual version.
READ ALSO: Ushanka hat 22 models with descriptions and knitting patterns, Knitting for children
It won’t be difficult to choose a bonnet model for a girl. Knitting - from columns to openwork flowers. The girl will be delighted with a bonnet in a romantic style or in the shape of an animal. Examples of photos for selecting models: