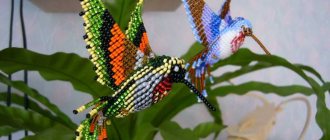
Beading is a fascinating activity that does not take much time, but requires perseverance and accuracy. It has won the hearts of needlewomen all over the world. Having the necessary materials at hand, you can create any decoration: both simple and complex.
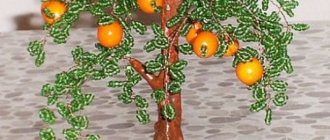
Sakura, bonsai, brooches, baubles, toys, and beaded keychains can be excellent gifts for relatives and friends. Using products made from small beads, you can decorate clothes, fill your home with objects dear to your heart, and create a special atmosphere in the interior. To make it you will need: thin wire, nylon threads or fishing line and bags of beads.
Weaving technique "brick stitch"
There is a wide variety of bead weaving techniques. One of the simplest and most common methods is the “brick stitch”. It can be used to create flat and shaped models, including keychains, bracelets, hairpins and much more. In the first version, the beads are laid horizontally, like bricks, and twisted tightly.
The second method of “brick stitch”, which is also called mosaic weaving, is most often used to create flowers. The beads are woven vertically into the pattern and are not twisted very tightly. Brick weaving will be more aesthetically pleasing if you use threads or fishing line of the same shade as the beads.
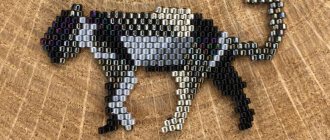
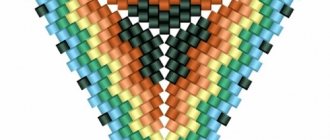
Bead machine: weaving according to the pattern
To weave such a craft, you can use various combinations of beads. These can be red or transparent beads. Beads of a bright green and also transparent color will look beautiful. Or you can use a rich blue shade for weaving.
If you are guided solely by the proposed scheme, then you will be able to accurately weave a miniature machine, which can then be used as a keychain or pendant for the car interior. So, prepare the following materials:
- beads of the main color you choose;
- beads for weaving car windows;
- black glass for wheels and gold for headlights;
- fishing line or monofilament.
This description will use the monastic weaving technique. It is also called cross weaving. The first step is to weave the bottom of the machine. Take a monofilament thread and string three red beads onto it, placing them in the center of the main material. Then add another glass of a similar shade and secure the row by passing the free end of the thread through all the elements, moving to the second edge of the monofilament. The loop that has formed should be tightened tightly. Again, string one red element onto the two ends. Pass the end through the second bead on the opposite side, adding another element.
Complete two more similar elements, and to complete the fourth element, collect additional glass. Pass additional fishing line through the third thing. Then you need to weave the fifth link in the same way as you did before. After completing these steps, turn the product around. It may be that the machine may not work out the first time. Then try again and again until the result is achieved.
Read
A fascinating master class on weaving blue forget-me-nots from beads
Weaving options
You can create flat or three-dimensional products from beads. Each model uses its own scheme and technique.
Flat figures
To create flat, elastic and beautiful models using the “brick stitch” method, very smooth, calibrated beads are used, which are not cheap. In this method, the beads are tightly adjacent to each other like brickwork. Name keychains, car badges and many other products are woven using this method.
Volumetric figures
Three-dimensional models are obtained using the mosaic or parallel weaving method, in which the beads are stacked vertically. Wire is used as a frame for such products.
You can weave beads in other ways. For example, there is hand weaving, cross weaving or monastery weaving. Some techniques will require a special miniature machine, which you can easily make with your own hands from an empty box.
Geometric figures
To weave a cube of beads, you first need to weave a rectangular fabric using monastery weaving or, in other words, a cross. Take a thin wire to work with to shape your product.
Weave a cube from a square rope, but use more even and high-quality beads for it. At the end of the work, add beads of the same or contrasting color to align the walls.
You can place a bead inside such a cube without finishing the product beforehand and of such a size that it does not fall out.
Beaded balls are also made in several ways. The first is braiding a wooden bead using the mosaic method, which involves the use of more expensive beads.
Products using not only beads, but also other beads, larger sizes or bicones, turn out beautifully. These keychains will look quite glamorous. The balls are woven in a circle using the monastery cross method. Add tassels on chains.
Related article: Weaving baskets from packing tape for beginners with photos and videos
To create beaded keychains, it is better to use good Japanese beads. The product will look smooth and will only please the eye, even though the beads are expensive, but a large amount will not be required for the product. Quality work done can be given as a gift.
Beaded Keychain Ideas
Almost every person decorates a bunch of house or car keys with a keychain. This is a beautiful option and at the same time functional - it makes it harder to lose your keys. Today, youth backpacks, handbags, leather briefcases, wallets, and smartphones are also decorated with keychains. For many, they represent things dear to the heart.
An experienced needlewoman and even a beginner can make a keychain from beads with their own hands. This product will be distinguished by its exclusivity, because it cannot be found in the store.
There are a lot of ideas for creating beaded keychains:
- orange, lemon, lime or watermelon slice;
- owl;
- letters of the name;
- car icon;
- number of the car;
- wheel;
- machine;
- animals - snake, baby dragon, unicorn, frog, hippo, giraffe, turtle, dog, kitten, crocodile, monkey, raccoon, wolf, sheep;
- Zodiac signs;
- dollar;
- ball;
- cube;
- guitar;
- smiley;
- heart;
- Starfish;
- mug;
- ball;
- butterfly;
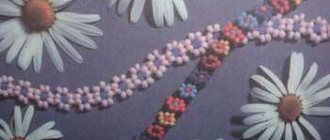
- flowers - tulip, rose;
- fish;
- bee;
- berry;
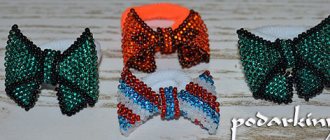
- bow;
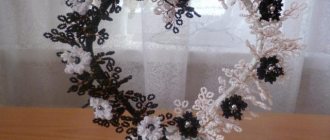
- new Year decoration.
What you need for weaving
For weaving you will need beads of different colors (depending on what kind of craft will be made). Japanese and Czech beads are valued the most: they are smooth and have a uniform color. For some products, you will additionally need beads of different sizes and shapes, as well as faceted bicone crystals.
As additional materials and tools, synthetic (nylon) threads, monofilaments, thin brass or copper wire or fishing line, elastic band, bead needle, scissors, tweezers, ruler, small pliers, saucer, cotton pads, cellophane or padding polyester for filling figures are used, as well as a piece of fabric on which the beads will not slip.
Monofilament resembles fishing line, but is similar in thickness to regular sewing thread, only much stronger. Beading needles are thinner than sewing needles; they fit freely into the holes of the beads.
In addition, you will need carabiners, chains, buttons, fasteners, rings, ribbon, laces for hanging, and tassels. For beginning craftswomen, weaving patterns with step-by-step descriptions are needed.
Flat figures made of beads. Ambulance.
Tweet
We continue the theme of beaded transport. Today I will show you a diagram of a beaded ambulance.
To work you will need white beads - 3-5 grams, 14 red beads, beads for windows and 1 bead for headlights. Choose the color yourself. Also a wire with a diameter of 0.3 mm and a length of 40 cm.
Bead machine. Start of weaving.
1. The weaving pattern is almost the same as that of a bus.
— We put 5 beads in the middle of the wire according to the pattern and forget about them.
— We put on 6 white beads and thread the other end “toward.”
-Tighten and align the ends of the wire, squeezing the rows towards each other.
2. Make 1 more row of 6 beads.
3. We put 5 white beads on the upper end, release them and forget them.
4. We put 6 white - 3 blue - 2 white beads on the lower end of the wire and thread the other end through them.
ATTENTION! When weaving a figure, so as not to confuse where and how many beads to put on, always put them on the lower end, counting according to the diagram from below.
Bead machine. Wheel weaving.
5. When we have made a row with the first red bead of the cross, we weave a wheel:
-We put 6-7 black beads on the bottom wire, hook them to the broach between the 3rd and 4th rows, and tighten the wire a little.
- we pass the same end in the opposite direction through all the beads of the wheel,
- we first pull up to the end that part of the drag that went through first - the wheel should pull up to the machine.
- only after this we tighten the main end.
Bead machine. Lantern weaving.
6. Having made a complete row with the cross, we weave a flashing light.
— We put 9 beads on the upper end.
- We begin to return with the same end, threading 3 beads “into the ring”: at the beginning we thread through 4,5, 6 (make sure that the wire is completely tightened and is not visible.
-then we go through 3 beads again, but already through 1,2 and 3. You should get a dense square of 3 by 3 beads.
— We apply the flashlight to the figure (forward), and find the place where the edge of the flashlight touches the body of the machine.
- At this point we hook up to the broach and return back (along the broaches) to the place where we finished weaving.
7. We continue to weave according to the pattern until the end of the figure, not forgetting to make the back wheel.
ATTENTION! If you can’t make the front wheel, then weave the figure to the end. After the last row, we put on 6-7 beads and thread them through the broach between the last row with the bead from the cross and the next one, we go along the broaches of 3 rows and again put on 6-7 wheel beads. Then we again pass between the broaches of rows 2 and 3, tighten the wire and fasten it along the remaining broaches forward.
Our beaded ambulance is ready.
If you liked the article, hit the social buttons.
If you want to know site news, subscribe to updates.
Tweet
You can read:
Beaded figures. Pencil
Bead toys
Beaded figures. Father Frost.
Beaded figures. Ship.
Bead toys
Bead toys