Keychains can be made without much difficulty. Let's look at the example of a cat.
Here you can find other options for keychains, for example “Hearts”
For production you need:
- foil;
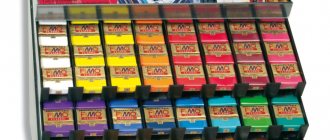
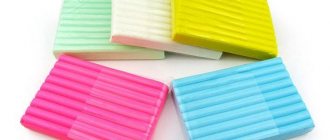
- polymer clay;
- stacks;
- toothpicks;
- pin with loop;
- pasta machine or roller for rolling out clay;
- stationery knife.
Keychain in 25 steps
1. First, take a small piece of foil and crumple it to form a cone.
2. Now take a piece of polymer clay, knead it well and roll it into a layer.
3. Apply the cone and cut off the excess.
4. Wrap the cone.
5. Roll out a little to level the surface.
6. Roll into a small ball, flatten and close the bottom of the cone.
7. Now let’s roll the piece into a ball - this will be the cat’s head.
8. Using a stack with a ball, we create indentations in place of the eyes on the head.
9. Next we need to take a pin with a loop and a toothpick. Since it is difficult to pierce a cone with foil with a pin, I pierce it with a toothpick, and then with a pin through the head with a loop on top. We press the head to the body.
10. Create the ears. From two small pieces we make two triangles and press them to the head.
11. Now, using small parts, we form the cat’s face (small parts consist of flattened balls and strands, which we give a certain shape and bends). We'll use a stack to clean out the grooves in the ears.
12. This is how the muzzle turned out.
13. Let's start finalizing the body. Let's make a dress for our cat. Roll out a piece, cut off the excess edges with a stationery knife and wrap the body.
14. Next we proceed to the handbag. We make a handbag from a rope and a flattened ball, which we give to the appropriate shape, and press it to the body.
15. We create legs from two identical strands and also press them to the body. Using a stationery knife, we make the toes on the paws.
16. Next we proceed to the sleeves of the dress. To do this, roll the ball, flatten it and press it to your shoulders. I decided to roll up the bottom of the sleeves a little. Use a toothpick to gently press the edges and seams.
17. We make a collar from flattened balls and a rope.
18. Again, we make buttons from the flattened balls. We cut off the pin protruding from the bottom a little and bend it 90 degrees so that it does not fly out during operation.
19. Next, roll out the tourniquet and wrap it around the bottom of the dress.
20. Making a ponytail.
21. Using two triangles and a ball, we “represent” a bow on the tail.
22. Decorate the dress with small peas, in which we make indentations using a toothpick.
23. I decided to use a toothpick to give some relief to the bottom of the dress.
24. From very small balls we create a bracelet for the paw.
25. Next, you need to bake the figurine in the oven, taking into account the baking time and temperature indicated on the packaging of your polymer clay. After baking, attach the necessary accessories for the keychain. They are very easy to make.
On this site you can find other options for keychains, for example “hearts”.
Knitted miracle
In this master class we will make amigurumi keychains, which we will knit using a crochet hook.
What we need:
- hook;
- thin threads, it is better to use iris;
- padding polyester;
- several black beads and two white beads for the eyes;
- black thread and needle;
- rings for a keychain.
Let's start knitting.
- Row 1: make two chain stitches, and then make six single crochets into the primary row;
- 2nd row: in each previous column, make two more single crochets;
- 3rd row: add 6 more single crochets, in the end we should get 18;
- 4th row: 2 single crochets and add 6 more, we get 24 loops in this row;
- 5th row: 3 single crochets and add 6 again, in total we get 30 loops;
- 6th row: four single crochets and plus six more, for a total of 36 buttonholes;
- Rows 7 and 8: knit 36 buttonholes without double crochets and increases. Next we should make a half-column, pull out the thread and cut it.
We take a black thread and knit it in the same way as the first half, but only up to the 6th row. Next you need to connect the two parts together. To make the rows even, you need to start from the beginning of knitting the first part and the second. Please note that our parts have a reverse side. We knit the two parts together, without any increases, leaving 36 buttonholes around the perimeter. We also need to stuff the body of the keychain with padding polyester; for this we do not knit it all the way. When the ladybug is full, then we can connect it to the end.
Related article: Stencils for clothing
We collect air ones from black thread of the required length to go around the back of our ladybug. We sew the resulting chain to the back carefully so that it is not noticeable. There is no need to cut the thread; it will still be useful for the head.
Let's make the head.
- 1st row: four air, now in the second from the tool we make an increase, a single crochet, and in the final one we make four single crochets, then we turn it so that we get an oval-shaped piece, a single crochet, an increase and we get 10 single crochets.
- Row 2: make two increases, a single crochet, four increases, a single crochet and two increases, resulting in 18 single crochets.
- 3rd and 4th row: 18 single crochet columns, knit a half-column, cut the thread and pull it on the wrong side.
You need to sew on the head with neat stitches, but first you need to stuff the head, as well as the body, with padding polyester. We sew white beads to the sides of the head to create eyes, and randomly sew black beads on the back.
We attach a ring to the back of our ladybug or you can stretch a cord. If you make a string or ribbon, such a keychain can be hung in the car, which will also be an interesting approach to interior design. And if you use a ring that we pierce behind the insect, you can use the product both for keys and other items. You can attach a chain or carabiner to the ring. Our keychain is ready!
This is the keychain I got
You might also be interested in:
- Dog made of polymer clay
- Making a cockerel from polymer clay
- Decorating mugs with polymer clay, making beautiful cats
- Goldfish made of polymer clay
- Polymer clay earrings
- Mug with flowers made of polymer clay
- Hairpin made of polymer clay
- Dry felting of a calico cat
- about the author
- New master classes
Catherine
Join my VKontakte group - Hobby-up
Tools and materials Time: 1 hour • Difficulty: 6/10
- polymer clay in yellow, red, orange, light green and dark green shades;
- key rings;
- small chains;
- connecting rings;
- nail polish (you can use clear nail polish);
- needle nose pliers;
- toothpicks.
Add some color to your everyday life with these charming and fun keychains in the shape of colorful fruits! Also, such keychains are an excellent gift for close friends and colleagues on the occasion of small holidays!