Preparing the shells
The first step is to process the shells. First, check to see if there are shellfish remains in them. If there is a foreign smell, the collected shells should be boiled for about five minutes and then the remains of the shellfish should be removed with long tweezers.
If the shell is empty, dip it in bleach mixed with water in equal proportions for half an hour. In some cases it may take a little longer. Then the dark layer should be removed.
You can use a stiff toothbrush for this work. Thoroughly clean the surface of the shell from plaque.
At the end of this stage, the shell will become dull and lose its shine. For some seashell crafts, the matte effect adds a touch of sophistication. If you need a classic gloss, the shell should be further processed.
Processing shells before starting creativity
We bring back from our vacation a reminder of the sea in the form of a whole scattering of various shells. Shells can have different shapes, colors and even patterns - this depends on the glands that the mollusks have. The surface of the shells can also be different - rough, smooth, twisted, with stripes, fan-shaped, etc.
How to clean shells from foreign odors and shellfish residues
Processed shells can be bought at the market or in a store.
If you brought them from the seashore or ocean, or found them in a lake or river, then the shells must be processed.
If there are no shellfish remains in the shell , simply soak it in a chlorine-containing solution (water and “Whiteness” in a 1:1 ratio) for half an hour. If the shell is not clean, you can keep it in the solution longer. Next, scrub the sink with a small brush to remove the dark layer.
If the shell contains mollusk tissue and there is a foreign odor, then it is necessary to thermally treat it: boil the shell for 5 minutes or heat it in the microwave for 30-60 seconds. After these procedures, you should remove everything unnecessary from the sink with scissors or tweezers. Next, you can proceed to the above-described procedure for processing the sink.
There is another way to clean the shell from the remains of the mollusk. Place the shells in a bag in the freezer for several days. After the freezing procedure, it is necessary to remove the mollusk tissue from the shell.
Post-processing of shells
After cleaning and drying, the shells have a dull matte surface. You can give them an artificial shine (this will be discussed below), or leave them as is.
Use them as decoration for baskets, boxes, etc.
Photo from homedecordesigns.info
And also as independent interior items, such as stands, vases and flower pots:
Spectacular vases made of shells
Flowerpots
Decor with glass
Stands for small items
Using the universal Moment glue, it’s quite easy to create various interior compositions with shells and starfish...
...decorate mirrors:
Shells look especially organic in tandem with natural materials, such as wood and twine:
And children can take part in creating simple crafts from shells. In this work you will need glue and thick cardboard for applications:
Author: BeachDaisyJewelry
Varnishing shells
Seashells that have dried out from water look a little dull and lose their attractiveness. Glossy varnish gives them shine and a certain gloss, so they look brighter and more impressive.
With the help of mother-of-pearl coating, shells are transformed and shine as if they had just come out of the water.
Pearlescent gloss
Very impressive presentation
To cover the shells, you can use acrylic varnish (transparent or with mother-of-pearl), which is applied to the shell with a regular art brush. Acrylic adheres well and dries quickly, making it great for decorating shells.
When covering the shells with acrylic varnish, you can simultaneously cover them with loose sparkles (glitter), they will stick to the varnish and will stick well, giving the shell additional texture and volume:
Spray varnish is also suitable for covering shells. Aerosol varnishes are colorless, as well as with golden and silver glitter.
It is better to work with aerosol varnishes in specially designated, well-ventilated areas or outdoors.
Photo from seathingsventura.com
Photo from dekorella.hu
An alternative to the above varnishes can be nail polish . Even the one that doesn’t fit well will do.
In order not to stain your hands and the surface of the table, and also to avoid sticking the shells to the kaolin surface, it is best to paint and dry by placing the shells on pencils or knitting needles standing in a pencil holder.
Galina Pchelka demonstrates in her video tutorial how you can transform the most ordinary shells using nail polish:
In your crafts, you can combine both matte and varnished shells.
Initial letter
Photo frame
Turtle
How to make a through hole in shells
When making crafts, it becomes necessary to make small holes in the shells. This work is almost like jewelry, since the shell is a fragile material and can crack or delaminate during the drilling process.
One rule must be observed: the thinner the wall of the shell, the smaller the hole and the accessories used (thread, fishing line, wire, etc.) should be.
A hole in a shell can be made using automated and manual methods.
When using a drill or screwdriver, you must select a drill with a diameter of 0.8 - 2 mm. The shell should be placed on a wooden or plastic board and secured with masking tape. The hole must be drilled directly along the tape. This will help the shell not break.
The hole can also be made using a nail and a hammer . To do this, secure the shell with masking tape and apply a mark on its inside. Next, place the nail against the mark and gently tap it with a hammer to create a starting hole. Next, move the nail back and forth until you get a hole of the desired diameter.
If you don’t have a nail and a hammer at hand, you can replace them with a needle , knitting needle or other improvised means.
It is necessary to follow safety rules and protect your eyes, as shell fragments can fly in your direction and cause injury!
Having learned how to make holes, you can create very beautiful jewelry from shells, for example, pendants, earrings, bracelets:
Author: KaliaKaiDesigns
Massive earrings in a marine style
Original pendant
Accessories for jewelry can be bought at a handicraft store.
Posted by Prim Rose Hill
Author: HappyEverythingElse
Chips on the shell can be cleaned with sandpaper or a sanding block and an original decoration can be made from such elements.
Author: Wildestier
To make a sea “breeze” or a dream catcher, all you need is the shells themselves, fishing line or rope, as well as a base made of driftwood or other material. In this case, you can combine shells of different colors and shapes, complement them with other elements:
Mini curtain for home
Island Dreamcatchers
To liven up your interior decor, “build” beautiful sailboats from shells:
Author: Irina Smolkova
How to make a cross section of seashells
Both whole shells and their cross-section are used in decoration. Of course, without having certain skills, it is difficult to make such a cut yourself. To do this, use a stone cutting machine.
Photo from seathingsventura.com
Oleg Yaremchenko shows in his master class how you can make a cross section of a shell using a machine:
The cross section of the shell resembles the outline of a snowflake, which is why they are used to create Christmas tree decorations.
And also in the manufacture of jewelry: earrings, pendants, pendants and even wedding accessories.
Author: SimpleHearted
How to make a hole
For some crafts, small holes should be made in the shells. You can do it in two ways:
- Screwdriver,
- Manually. To do this you will need a hammer and the thinnest nail you can find.
The work should be done carefully. Too much force and the shell will crack.
We recommend reading:
- Crafts from plasticine: the best master class for children at school or kindergarten. 90 photos of the best ideas for creating plasticine figures
Felt crafts - the best patterns and templates. Step-by-step instructions and master class for beginners (130 photo ideas)
DIY crafts from egg trays - the best step-by-step master class, with description. TOP 100 photos of original ideas for crafts
Glossy effect
Water-dried shells look less vibrant than the items on store shelves. To achieve a beautiful glossy shine, the parts are treated with acrylic varnish with a transparent or pearlescent tint.
After processing, mother-of-pearl models acquire a lasting shine. It seems that the shell was just taken out of the water.
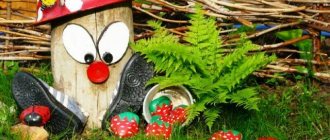
Craft options
Shells can become a decorative element or represent a single composition. For example, photo frames designed to look like crafts made from seashells, or watches with a dial decorated with seashells, are still popular.
You can create various souvenirs from shells, including:
- Pictures in frames.
- Candlesticks.
- Animal figurines and ship models.
- Jewelry, including bracelets and beads.
- Postcards.
- Interior decorations and much more.
Handmade crafts made from shells will make an excellent gift.
How to make paintings from natural materials
Using shells, you can create unusual paintings or decorations. Doing this is not as difficult as you might think at first glance. You just need to approach the work from a creative side, using your imagination. The main material is shells, which can be bought or collected on the coast. Then they need to be sorted depending on type and size. To create a masterpiece, you will also need the following materials at hand:
- base, you can use plywood, board or thick cardboard;
- frame;
- glue;
- paints;
- beads, twigs, blades of grass, sand, beads and other decorative elements.
The process of creating a picture from shells consists of the following steps:
- Sketch design. If you are not very skilled with a pencil, find a picture on the Internet, scan it and make an image along the outline.
- Preparing the base. Thick plywood or a cutting board, such as a cutting board, is best. It is recommended to sand the base and then repaint it. The background can be made with a stain of a suitable color or potassium permanganate.
- Drawing. If you are working with a sketch, it is better to use a carbon copy to transfer the picture onto the base, or simply create the future picture directly on the board, like a mosaic. You need to paint the material before you start gluing it. It is advisable to use bright acrylic paints. If you are making a flower, it is better to take white or multi-colored paints, but for a panel with a seascape, green and blue shades are suitable, which convey the color of the waves well.
- Gluing the material. Shells and other decorative elements are well fixed with PVA glue.
- Framing the painting. Homemade baguettes can transform paintings, but making them will require a lot of patience and skill.
Seashell panel with seascape
This type of needlework will awaken everyone’s creative abilities. A panel with a seascape will look great in the bathroom. It’s not too difficult to make it using a master class:
- Paint the frame with stain or potassium permanganate and set it aside to dry completely. For a panel with a seascape, use white, blue and green paints.
- Insert the prepared base into the frame.
- The background can be made of mesh, sand, fabric or burlap. Cut the material according to the size of the baguette, attach with glue or a special glue gun.
- Proceed to the next stage - creating the picture itself from shells. Remember that you need to carefully attach each part with glue.
- Cover the finished panel with acrylic varnish. This will give it a complete look, and the sea will shimmer, as if you were really standing on the shore.
Portrait applique made of seashells
A painting made by yourself will be an excellent gift or decoration in the home. To create a shell applique, you need to have a lot of base material in different sizes and colors. If you are good with a pencil, then making a portrait from shells will not be difficult. The process itself is as follows:
- Prepare the foundation on which the creation will be located.
- Draw a sketch using a photo of a person as a reference.
- Apply glue to the image and immediately lay the shells, not allowing the glue to dry. Elements must be suitable in color and size.
- If the portrait applique is ready, do not forget to spray it with varnish. This will give it shine and completeness.
Making a flower arrangement from shells
Using natural materials, you can create original interior items. The decor of the room will be decorated with a hand-made flower arrangement made from shells. For production you will need:
- main material – shells (any size);
- frame;
- varnish and paints in cans;
- universal glue;
- piece of film.
A step-by-step picture of flowers is made like this:
- Use paint to create a background for your future work. Using a spray can for this purpose, you will do everything neatly and without streaks.
- Start making flowers: wipe off the shells, place them in a row (this makes it easier to take).
- Place a little glue in the center of the film.
- Glue the shells one by one in the shape of a bud.
- Make the core of the flower: glue a small shell of a different color into the middle of the half-opened bud.
- Make the rest of the flowers in the same way, the quantity depends on your desire. It is worth noting that the flower arrangement will be more interesting if shells of different shades alternate in one flower.
- Think about where each flower will be located on the base; you can make marks.
- Glue the flowers and spray with varnish.
Abstract seashell mosaic
Such paintings will make any interior exclusive. Making a mosaic from sea shells takes a long time, but you will have fun doing it. When creating a masterpiece, an important step is preparing the base. The “weeping” shell is often used. Get started:
- Draw an even circle on the sink and cut it out with scissors.
- Glue the shells in a certain order onto a prepared base (photo frame, flowerpot or any other object). Start from the top outline, moving down, from the right side to the left. It is better to attach it with a hot glue gun, applying the composition to the base and to the sink. Please note that the glue strips should be no more than 2-3 cm.
- When most of the mosaic picture is ready, apply glue only to the shells and carefully insert each one into place, pressing it firmly into the base.
- Decorate the background with backfill - plastic or glass chips. Apply glue to the required area with a brush, then cover the material in a dense layer and press with your fingers to compact it. Afterwards, turn the picture of shells over so that the excess falls off.
- Skin rashes due to helminthiasis
- Blood from the anus
- A composting toilet for a summer residence without odor and pumping - how it works. Where to buy and how to choose a dry closet for your dacha with prices
Photo frame
Every year, designers come up with new ideas for making crafts from shells that will complement the interior. One of them is photo frames.
We recommend reading:
DIY crafts from Kinder surprise eggs - 125 photos of exclusive options with step-by-step instructions, master class and videoCrafts made from twine - an overview of original design solutions. More than 100 photos of new products + step-by-step instructions for creating crafts with your own hands
- DIY crafts from candy wrappers: 150 photos of the best ideas from craftswomen. Simple instructions, master class, diagrams and video tutorials on creating crafts from candy wrappers
Materials needed:
- Seashells.
- Glue.
- Acrylic paints.
- Varnish.
- Wooden frame.
Wind chimes made from sea shells
There should be a ring at the base, but this is not necessary. Forms may vary.
Materials required:
- shells, starfish, beads, corals, pieces of glass;
- jute twine or any other thread;
- wire for beads;
- willow branches;
- crochet hook;
- knitting threads;
- scissors;
- varnish;
- glue gun (you can use a drill with a small drill bit, nail scissors or a needle).
Manufacturing instructions:
- Willow branches must be boiled for 2 hours, then cooled and the bark removed.
- Form a ring from the branches, braiding some branches with others (the branches should be wet), level it and leave it to dry overnight.
- Prepare flowers using clear nail polish and wire.
- Tie the shells (let them be openwork).
- Prepare several beads by stringing each one onto a wire and securing it.
- Cut 8 ropes of 120 cm each.
- Attach the parts to a string: some you simply tie, some you glue, and tie it to the base ring, leaving the end hanging down. Do the same with the rest of the ropes.
- Collect the loose ends into a bun and tie it with a separate thread. If the ropes are unevenly loaded with parts, it is difficult to achieve balance. And this is necessary before making the craft correctly. So, when distributing beads, fragments, stars and shells along the rope, you will have to monitor your balance.
- From the resulting start, tie a braid up to 10 cm long and form a loop from it. Wrap one of the threads around the base and cut off the rest.
Willow branches can be replaced with hoops and wrapped with twine.
How to do
First of all, we cover the blank frame with acrylic paint of any shade. Then we prepare the shells: remove the mollusks, polish them, and, if necessary, varnish them.
Small shells of various colors are best suited for photo frames. We glue the prepared shells to the base using a heat gun and wait until they dry completely.
After this, you can insert the photo into the frame and hang it on the wall.
Basic instructions
Before you start working with shells, you need to prepare and clean them. The first case is when the shells may turn out to be dead, that is, there are no living mollusks left in them. Soak them in a solution of water or in any chlorine-containing product (for example, “Toilet duck”, “Domestos” or chlorine in a weak solution) in a one-to-one ratio for 20-30 minutes. There is no need to soak the shells any longer unless you want to remove the top dark layer and remove heavy dirt and sand. After the procedure, carefully clean the shells with a brush and rinse in clean water.
The second case is when the shells are “living”, that is, they have animal remains, even if they are very old. They tend to smell unpleasant, so they need to be thoroughly cleaned. This requires boiling in hot water. Place the shells for 5-10 minutes, and then remove the remains of the mollusks using tongs. You can also put them in the microwave for no more than one minute, otherwise they will crack. When cool, soak for 5-10 minutes in a chlorine-containing product.
Related article: Knitting an umbrella for an amigurumi doll
Paintings and panels
It is known that children love to make crafts from a variety of materials. One of them is shells.
We recommend reading:
Crafts flowers - 125 photos of the best ideas from craftswomen. Instructions on how to make it yourself from A to Z. Simple and complex options for crafts + video tutorial- DIY crafts: TOP-200 photos of the best ideas. Schemes, master classes, modern design, new products, instructions with descriptions
- Crafts from plaster - 120 photos of the best ideas for creating original crafts with your own hands. Master class for beginners with examples and video lessons
One of the most common shell crafts for children are wall panels. They can be decorated not only with shells, but also with sea pebbles.
To make a painting in a marine style you will need attention and perseverance, as well as the following materials:
- White dense paintings,
- Paints,
- Pencils,
- Shells and pebbles.
How to use seashells for the interior
A unique apartment interior is an expensive pleasure if you hire a designer. You will have to spend a decent amount of money for a couple of original figurines or crafts if you buy them in a specialized store. Use sleight of hand and imagination to save the family budget by creating a cozy atmosphere at home.
Decorating with seashells is part of the eco-style. Eco-style is popular in the West, but it will never reach us. Be an example for your family and friends. Show how to extend the life of household items: mirrors, photo frames, paintings, empty bottles, jars, boxes, flower pots and other trinkets. Dilute the everyday comfort with bright and colorful elements - updating the appearance of your home will be beneficial. Create a nautical style for your bathroom – classic will never go out of style.
You always need to change something in life. Start with the interior of the apartment.
Large and small shells, pebbles, sand, and pearls are suitable for work. Natural materials do not deteriorate over the years - eternal beauty. This is the perfect gift for a loved one who reminds you of you every day. Please note that the process will not take much time. You don’t have to buy expensive equipment or spend a lot of effort and nerves on work. Everything ingenious is simple.
Related article: What types of knives are there for cutting linoleum
How to do
The first step is to cut out the base of a certain shape. Then, the cardboard is pasted over with colored paper or painted with paints. And after the background has completely dried, all decorative elements are glued.
Such panels are considered one of the most common children's crafts made from shells. The author's imagination is not limited by anything. Children can glue shells in absolutely any order.
Craft ideas
If, after trips to the sea, quite a lot of shells of various colors and sizes have accumulated, you can use them to create unusual compositions.
Framed story
For such a composition, it is better to choose an image of a letter or some small plot. Now you need to draw a sketch on paper and cut it out to get a stencil. Using a stencil, transfer the drawing onto the base of the painting. Next, select the necessary shells to fill the entire volume of the design; for “trying on” it is better to immediately steal them onto the base. After the entire composition is laid out, you can begin gluing the shells to the base.
Article on the topic: Do-it-yourself amulet bracelet made from threads for a child with photos and videos
"Set of Shells"
It is possible to make a simple version of the panel even from a small number of shells. Prepare small square or rectangular pieces from different materials. Not only pieces of paper are perfect, but also fabric, cardboard, and mesh. Glue them to the base and place the shells on top. If the sinks are large, it is better to choose an adhesive with greater strength. On each such piece you can create a small plot with several shells, from shells and stones, ropes, straw. If desired, the top of the composition can be coated with transparent varnish.
Simple option
And this is the easiest way to create a picture. We paint all the shells the same color and glue them to the base in a certain order. Fast, simple and easy. The picture is done!
Elegant option
A picture can be created with just a few large shells, a starfish and additional sea-related elements. The most important thing when creating such a composition is to successfully choose the combination of the frame, the main background, shells and their relative position.
How to do
Sanded sinks should be checked for edge sharpness. The excess is processed with a file or emery sheet.
The cinders should be melted in a water bath and poured inside the shell. Until the candle hardens, you need to place a wick with a bolt or nut attached to it. It is necessary to hold the wick until the paraffin completely hardens.
To make the candle not only pleasing to the eye, but also give a pleasant aroma, you can drop aromatic oil into the melted paraffin. The finished product can be painted or varnished.
Candlestick
Another craft option that will be useful in every home. A beautiful, unique candlestick will decorate any celebration. It's quite simple to make. You will need wide mollusk shells of different diameters, varnish and glue.
We lay out the shells in the shape of an open lotus and carefully glue all the parts together. We coat the finished composition with acrylic varnish. Place a candle in the center.
This is how you can easily create unique interior items or figurines. A little imagination and patience will help you make a real masterpiece out of a bunch of shells.
Love for the sea
We suggest creating a heart-shaped picture made of shells - as a gift to a loved one or as a symbol of love for the sea.
To complete this master class, sinks of different sizes and different shapes are suitable. It wouldn’t hurt to add pebbles, beads, beads, small pieces of wood from the sea and anything else that might remind you of the sea. You can use paper, cardboard, burlap, fabric, glass as a base. Additionally, you need to prepare a heat gun and clear varnish. On the selected base we draw a heart and carefully cut it out. We coat the blank with hot glue and fill it with prepared marine parts. After completing the creative part of the work, all parts of the valentine must be coated with two layers of varnish and wait until everything is completely dry.
The sea heart is ready.
Photos of crafts made from shells
Did you like the article?
4+