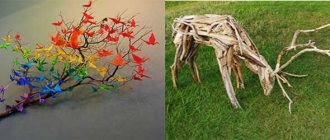
Caring for a summer cottage is not limited to weeding the beds and planting new plants. The aesthetic side of the issue is also worth paying attention to if you want to give your cottage and garden the proper appearance. Let's look at how you can make original crafts for your dacha and garden with your own hands: all the new items and some traditional options.
What materials can be used to make crafts?
The arrangement of a summer cottage is preceded by a well-thought-out idea of decoration. The design can be very diverse. From creating the interior of your favorite fairy tale to making a spaceship. It all depends on the abilities of the summer residents, financial capabilities, and the availability of time for arrangement. Decoration is carried out both for the interior decoration of the premises and for the territory of the site.
Materials used for decoration:
- metal;
- concrete or cement;
- rubble, brick, brick chips, gravel;
- gypsum;
- wood, plywood, chipboard;
- cardboard;
- elements of old furniture;
- elements of automotive structures, etc.;
- plastic and waste products made from it.
When using these materials, the dependence on the external environment is taken into account. Ability to withstand temperature changes, resistance to humid environments, and mechanical stress. This will help determine the areas of application of materials for manufactured items.
Garden vases: ideas
Vases and flowerpots made from cement and other components turn out to be very beautiful. You can make a small vase or a large flowerpot yourself, planting magnificent climbing plants there.
To make a large vase, you will have to take:
- Plastic mold with a diameter of 54 cm and a height of 24 cm
- Cement
- Perlite
- High peat
Execution process:
- Mix 2 parts cement, 1 part perlite, 2 parts peat. Dilute the ingredients with water to obtain a mass resembling thick sour cream.
- Since the vase will be quite heavy, make it in a place where it will stand permanently.
- Next, take a plastic pot and line its inner surface with cling film. Straighten it so that wrinkles do not appear on the surface of the cellophane itself.
- Initially spread the solution over the bottom surface approximately 5 cm thick.
- To make the product more durable, install a metal wire frame in it. Also add some fiberglass (optional).
- Since the vase will be large, you will have to mix 4 or 5 batches.
- Don't forget that there should be a drainage hole at the bottom of the vase. Do it this way: place a cork at the bottom of the vase, wrapping it in film.
- Next, spread the cement completely over the entire surface of the dish, cover it with film, and leave for about 10 days.
- If you notice that the cement is drying out very quickly, moisten it.
- After 10 days, free the vase from auxiliary materials, treat the surface with a wire brush, removing any unevenness.
- When you have processed the vase, rinse it with water and dry it a little. Wrap the craft again in film to further harden it.
- After about 7 days, the material will become lighter, so remove the film and install the product in the desired place.
What can be made from unnecessary pipes?
Different pipes suit different options. In general, you can make a lot out of them: summer outdoor furniture (especially for children), devices for watering the garden or fastening greenhouses, shelves, floor lamps, hangers, vases and more.
There are various fasteners and adapters on sale, which allows you to make even complex crafts that might not immediately seem possible to create from such material yourself.
Mirror frame
Crafts made from cardboard tubes do not always reveal the material from which they are made by their appearance. They can be cut into rings and used as a decorative element. For example, this could be an original mirror frame, where such rings are glued to each other, creating a fancy pattern.
You can decorate anything in the same way. Also, pipe rings can be painted in different colors and put on vases, and then the green corner will be colorful and bright.
Furniture frame
Propylene pipes make good crafts that can withstand heavy weight. This makes them ideal frames for furniture. It will be enough to cover such a frame with fabric, and you will get a chair, table or couch. This often works out cheaper than purchased furniture, even if the pipes were purchased specifically for this purpose and were not left behind after renovation.
We recommend: Crafts from cork - 105 photos of the best ideas and features of creating crafts from cork material
Watering the garden
Partially extra pipes can also play a similar role: if you dig them into the ground near the beds, then with their help you can carry out deep watering in hot weather, when any moisture evaporates from the surface quite quickly, without having time to reach the roots of the plants.
This function can be combined with the greenhouse frame if you make holes in the pipes in appropriate places to allow water to be poured through them. There are a huge number of photos of various crafts made from pipes, which demonstrates the popularity of this phenomenon.
You can see such unexpected options that at first glance it is difficult to guess what it is made of and how.
However, for those who like to create something original with their own hands, this is great entertainment, which is also useful. Firstly, this allows you not to throw away building materials in vain, and secondly, many crafts turn out to be really useful in the household. Moreover, you can do both simple things and complex ones that require certain skills and abilities.
Hedgehog made from plastic bottles
You will need:
- plastic bottles,
- soldering iron or glue gun,
- wire,
- acrylic or spray paint in black and gray colors,
- cocktail straws,
- lighter.
Master Class
- Cut off the middle of a plastic bottle and roll it into a cone.
- Place the cone on the second plastic bottle.
- Cut hedgehog ears from the third plastic bottle.
- Make small cuts for the ears on the cone.
- Insert the ears into the cuts and secure with a glue gun or soldering iron.
- Cut the fourth and fifth plastic bottle into strips.
- Make needles on the stripes.
- Burn the needles with a lighter.
- Attach the needles between the ears, making a bang for the hedgehog.
- Attach strips with needles to the muzzle (cone) in the direction away from you (if the hedgehog is looking at you).
- Attach the strips with needles to the back and tummy of the hedgehog, towards you (if the hedgehog is looking at you).
- Color the hedgehog.
- Cut out eyes from a plastic bottle, paint and glue them.
- Twist the wire into legs.
- Place cocktail tubes on the paws and attach them.
Crafts from plastic bottles: photos
Original ideas for a summer house - using old barrels and ladders.
Old wooden barrels can also find new life in your dacha. You can make many useful things out of them: in particular, a small wine cellar, an original flower bed, make them the basis of furniture - there are a lot of ideas. And we will be happy to share it with the readers of Best-Stroy.ru.
Wooden barrels with water go very well: they will be an excellent decor for a country pond or water pump. A unique atmosphere of antiquity is immediately created, as if you are mentally transported to an era when water had to be carried in buckets on rockers, and each yard had its own well.
You shouldn’t deprive iron barrels of a chance for a second life. They can be properly treated to remove rust, painted and used not only for storing water, but also as a barbecue. Agree, you definitely won’t find such a grill in every yard.
By the way, we have a whole article on how to make a barbecue for your dacha with your own hands. We recommend reading!
And for decorating a personal plot, iron barrels will come in handy. You can decorate them at your own discretion and enliven even the most remote and shaded area of the garden or vegetable garden. And elegant decorations like umbrellas or bows will only add color to the figures.
Before painting, the iron barrel is thoroughly washed and dried, sanded from rust with a hard iron brush, and then with sandpaper. Just wash and dry the plastic barrel. Often, the green or blue background of the plastic barrel is left and a design is simply applied to it. Iron barrels are primed before painting, then painted with metal paint in 2-3 layers, allowed to dry, and then a design is applied.
And here is a modest but spacious flower bed for flowering plants.
Let's not ignore the old garden stairs. By thoroughly drying, sanding and painting the ladder, you can turn it into a convenient and original hanger for the hallway. At least it’s very convenient to hang clothes on hangers.
You can also make original flower beds from old stairs. The composition will acquire a special flavor if you complement it with all kinds of antiques - pots, carts, even old shoes can be used.
However, an ordinary wall composition will look great if you select suitable climbing and flowering plants. The background can be either bright or monochromatic - in each case the flower garden will look different.
Polyurethane foam frog
You will need:
- old saucepan,
- can,
- wire,
- Super glue,
- a can of polyurethane foam,
- oil paints,
- furniture varnish,
- button eyes,
- scissors.
Master Class
- Cover the pan with polyurethane foam, then the jar and wait an hour for the foam to set. The base for the frog's body is a saucepan, and the base for the head is a jar.
- Glue the jar to the pan.
- Apply a good layer of foam and shape it into a frog shape with your hands.
- Twist several pieces of wire together and attach them in place of the handles, then cover with foam.
- Make the lower legs and attach the eyes.
- Wait until the foam has completely hardened, then paint the frog.
- Coat the frog with furniture varnish.
- Place the frog in the area or near the pool.
