Preparing for work
We collect the eggshells and place them in a deep container. Meanwhile, prepare a 5% baking soda solution. Pour it into the shell and wait 5 minutes. Then drain the liquid and rinse the shells under running water.
It is best to use raw egg shells because they lose their hardness when cooked. For example, any shell is suitable for children's crafts.
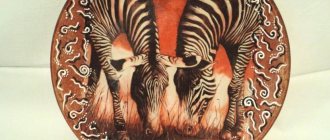
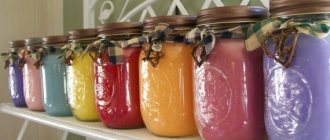
To make a painting using the eggshell technique, you first need to remove the film from it. Leave it on the tray for a while to dry. Then you need to color it with food coloring. Then we put it away in plastic containers, first sorting it by color. Due to the fact that the shell is not always painted evenly, it can be used to depict not only pictures, but also, for example, to make beautiful decoupage on a bottle of any drink. You wouldn’t be ashamed to give such a gift to your friends on any holiday.
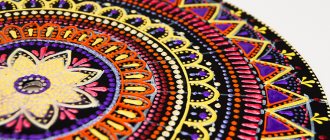
We create original decor with craquelure for experienced craftsmen
You can try to decorate plates with craquelure if you have experience in other, less complex works. Although this process itself is not very complicated. To make a beautiful one-step craquelure decoupage, you need to follow the above master class, and then varnish the product. First, the ornament is applied, and after drying, the product is coated with craquelure varnish. If everything is done correctly, it will have an antique look, with cracks and three-dimensional details, which the craquelure varnish will provide us with. Craquelure plates are very beautiful works that you wouldn’t be ashamed to give as a gift to someone. A DIY watch made in decoupage style will also look very advantageous - a stylish highlight in any interior!
Egg painting
For work you will need the following tools and materials:
- Egg shells;
- PVA glue;
- Brush;
- Cardboard (or any other surface, everything will depend on what exactly you want to do);
- Tweezers;
- Wooden stick;
- Varnish;
- Acrylic paints;
- Napkin for decoupage.
Step-by-step instructions for doing the job:
- First you need to make a template according to which the eggshells will be laid out. Draw it on a simple sheet of paper, or for those who don’t know how to do this, just take any drawing and print it out.
- You need to glue a sheet with a pattern onto a sheet of cardboard.
- Let's move on to applying the shell. We do it as follows: grease a small area of the picture with glue and place the shell on it. If the size of the shell is very large, then take a stick and press it on it. Because of this, it will crack and crumble into several small fragments. The distance between the shells should be the same.
- With this action we fill the entire drawing completely.
- We put it out of the reach of children and wait for it to dry completely.
- After the drawing is completely dry, decorate it with paints.
- At the end of the work it is necessary to coat it with varnish.
Related article: Vest for girls for school with diagrams and videos
This concludes the master class.
Glass miracle
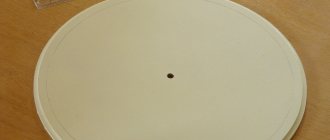
Direct and reverse decoupage of plates with napkins are also distinguished by a fairly simple technique. If you have to stock up on anything here, it will be patience. It is clear that the second version of the work involves using the back of the dish for creativity.
The master class on reverse decoupage on a glass plate clearly explains all the subtleties:
Take a regular or special craft napkin with a pattern.- Mark and cut it around the circumference of the bottom of the saucer, leaving a margin of approximately 0.5 cm as an allowance.
- Grease the working surface of the dish with glue.
- Dip the tenderloin in water until it is wet, squeeze it out and place it face down on the glass.
- Next, proceed as when gluing wallpaper - smooth the paper from the center, expelling the air. It is better to do this with your hand rather than a brush at first.
- Carefully cut off the allowance.
- Coat the entire work surface with glue.
- After drying, cover the drawing with a layer of transparent sealant.
The trick of this style is determined by the use of glassware (otherwise the design simply will not be visible from the front side).
This material also allows for better centering of the image when sticking. It turns out to be a real glass miracle!
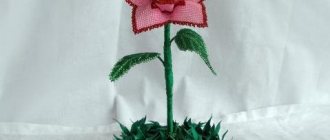
Simple flowers
For work you will need the following tools and materials:
- Simple sheet;
- Simple black pencil;
- Set of felt-tip pens;
- PVA glue;
- Finished egg shells;
- Watercolor paints;
- Set of brushes;
- Sippy cup;
- Wooden skewer.
The technology of work is as follows.
On a regular sheet we draw a sketch, in our case these are violet flowers.
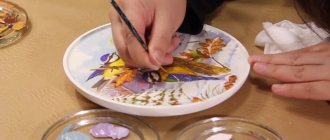
After the drawing is completely ready, we move on to the technique itself. Lubricate the flower petal with glue, as shown in the photo.
Place eggshells on it. For this action it is better to use a whole shell. We lay it so that it covers the entire surface that was coated with glue.
With a little pressure, the shell cracks, thereby filling the pattern. Just be sure to make sure that the shell pieces break into more uniform pieces.
For a more even laying, you can use a wooden skewer.
We outline the finished petals with a bright felt-tip pen; we chose black. This is necessary so that the borders of the petals do not merge.
We do the same with other petals.
After the flower is completely ready, we outline it.
We do the whole drawing in exactly the same way.
Here, the picture is almost ready.
In a small small bowl, grind the eggshells into a fine powder.
We coat all the details of the drawing with glue, and sprinkle shell powder on top. In this way, we fill the empty spaces that formed during work.
Let the painting dry completely. Then we move on to painting. For this you will need brushes, paints and a sippy cup.
We color according to the sketch, which was originally transferred to a simple sheet of paper. Here it was like this: one of the colors was yellow, the second was blue (purple). Then let the painting dry completely. And we apply different shades to the petals themselves.
At the end, all that remains is to decorate the leaves of the almost finished composition. Remove until completely dry.
Article on the topic: Knitted hat with a lapel for women: master class with video
With this, MK came to an end. This work is perfect for children.
We also suggest that you watch video tutorials for a more detailed study of this technique.
Eggshell furniture decor
Decorating furniture with shells is usually done partially. A “solid” relief background on large surfaces may slightly lose its color. However, this material perfectly imitates snake skin. Natural finishing of furniture items costs incredible amounts of money, so shells are an option for creating original decorations that will be indistinguishable from the original at first glance. The registration process may be delayed due to the specific processing of the base material. Each piece of shell will have to be processed separately. To do this, you will need tweezers, which are used to manually bite off the extra millimeters from the edges to give them the round shape characteristic of reptile skin. Gluing the shells will also take a long time, since in this case the degree of similarity to the original depends on their location. Dye tones are selected in accordance with the natural skin tone of the reptile. First, apply a light shade to the entire surface and allow it to dry completely. Then a darker color is dripped onto each “scale”. Eggshells are used to decorate any surface: from traditional wood to plastic. Shelves, cabinet fronts, coffee tables and lamp stands designed in this way look original.
Master class using napkins
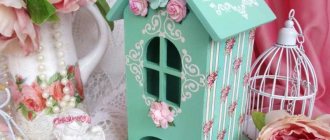
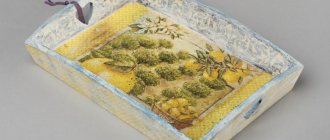
Do you want to decorate a tray in Provence style? Nothing could be easier! Provence is characterized by light shades of green, blue and yellow. The pictures most often depict flowers, stripes, beautiful patterns with a variety of monograms. Handicraft stores sell napkins with suitable motifs, and they will come in handy for work.
Decoration using napkins
Before you start decorating the tray, check that you have all the materials and tools available:
- three-layer napkins;
- nail scissors;
- acrylic paint;
- varnish;
- sponge;
- PVA;
In order for the drawing to look as bright as possible, you need to create the necessary background. Cover the tray with acrylic paint and leave to dry. If the wood is dark enough, at least 2 layers will be required. When the acrylic paint is completely dry, you can decorate the base using napkins. Cut out the design you like and separate the bottom of the paper from the top.
To work, you will need exactly the front layer of the napkin, the brightest and most saturated one. Place the pattern on the tray, apply PVA glue to the paper. After complete drying, seal the tray with varnish. The Provence style composition is ready!