Brief description of the technique
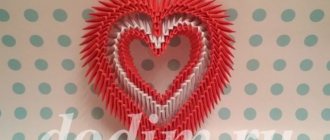
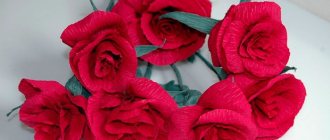
Each sculpture consists of dozens of triangular shapes, but when completed, the model will appear as one wavy structure.
The duration of the manufacturing process will depend on the size and number of parts being introduced. There are several ways to fasten the structure:
- Use regular transparent glue, such as a pencil. You should not fasten the parts with PVA; over time, yellow spots will appear, which will affect the aesthetics.
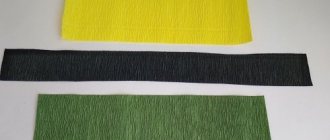
- Use thick and matte paper. Cardboard and glossy sheets are not suitable. The design will hold up perfectly if all the parts are made from simple album canvas or whatman paper.
Paper that is too thin, such as that used for printing, will cause the shape to change. A few days after assembly, the structure will begin to fall apart, since the thin ribs of the parts will not be able to cope with the load.
Even though this art form dates back to around 1734 (as mentioned in the book Ranma Zushiki by Hayato Ohoko), it still generates interest today.
The principle of creation has not changed over several centuries; the classic structure consists of a large number of triangles. Photos of modular origami can surprise even an adult.
Volumetric paper toys, New Year's
Ten more ideas for bright New Year's paper crafts that are easy to make shortly before the holiday with your children.
3D star
How to fold:
From colored paper (you can use either regular paper or paper with openwork patterns, ornaments, or foil paper), we cut out star blanks. You will need two squares for one decoration. Size - 10 x 10 cm.
Fold the pieces in half twice, then twice diagonally. Let's straighten the paper. Make short cuts in the center of each side of the squares. Fold the corners neatly and secure the folds properly (as in the photo).
Glue the corners in the center, leaving the main part of the fold free. This is necessary so that the star holds its shape well and is voluminous. Let's repeat these steps with all the squares. Let's smooth it out and then beautifully straighten the folds of the rays of the stars.
Glue the pieces together in pairs. Between the layers of paper we insert a strong ribbon or twine to hang the decoration.
volumetric snowflakes
wicker Christmas ball
How to do:
- Cut out the elements of a three-dimensional New Year's ball according to the template:
Make a loop from the ribbon and attach it to the ball.
paper circle garland
christmas house
How to do:
To make a house you will need to print the following template:
fawn, video
Christmas tree dyeing kusudama, video
surprise box, video
New Year's mandala, video
How to make a triangular module
As mentioned earlier, for production you need medium-weight paper. A4 landscape sheets are suitable. Each will be divided into 16 or 32 equal parts in the form of rectangles.
It is worth remembering that each module must be dense and even; stiffening ribs are of great importance, due to which the structure will be more stable. Modular origami assembly diagram:
- The rectangular part is first folded horizontally. Next, an even bend appears in the middle.
- The sheet is straightened and folded into two identical squares.
- Next, the sheet is straightened again, two triangles are assembled along the resulting lines, their ends should be proportional to each other.
- Smaller triangles are made from the remaining part, after which the structure is connected by placing the corners in the formed pockets.
The number of elements will depend on the figure that the master plans to make. Beginners are recommended to use ready-made diagrams, where the number of elements is indicated in detail. Everything is quite simple, first the modules are created, after which they are simply connected into a figure.
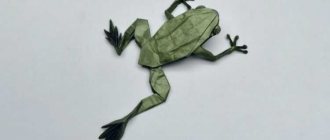
Origami paper figures
origami Santa Claus: step by step
To assemble a three-dimensional figurine of the main character of the upcoming holiday using the modular origami technique, you will need triangular blanks, in quite an impressive quantity. Making them according to the following scheme will not take much time.
In total you need to prepare: bright red triangle modules - 433 pcs.; white - 390 pcs.; light beige - 27 pcs. The Santa Claus model turns out to be stable and durable, so there is no need to fasten the elements with glue. It is enough just to glue a couple of rows at the base. This will make it easier to start assembling.
The order of connecting the body elements:
In the final, 26th row of the body there are only a dozen bright red modules. Try to bring their ends as close as possible so that there is no hole left at the top of Santa Claus's hat.
All that remains is to make the hands, eyes, and staff:
- We will make hands from seven red and two white triangles. To do this, simply insert the elements into each other sequentially.
- Cut out mittens from red paper. We fix them in the holes of the final modules on the hands and secure them with glue. Let's glue our mittened hands to the body of Santa Claus.
- Cut out two circles from white paper - eyes. We will draw the pupils with a marker or make them out of black paper. Let's stick the figures on the face.
- From a small beige rectangle we will make one triangular module - the nose. We will also attach it to the face. This module should be much smaller in size than those we made for the torso.
We recommend making the staff from gift paper with a bright ornament. Roll it into a tube and glue the edge. Let's attach it securely to Santa Claus's hand.
Snow Maiden, video
We also recommend making a figurine of Santa Claus’ faithful assistant, the Snow Maiden, using the modular origami technique. To visualize the assembly sequence, we suggest watching a detailed video tutorial.
Video: “Modular origami Snow Maiden for beginners”
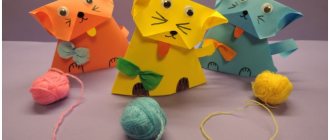
hare
How to do:
Let's prepare the paper. Better - multi-colored, bright, rich shades. How many origami New Year's bunnies you want to fold, the number of sheets you will need.
Fold each sheet in half. Let's fold the squares. Let's cut it. The result should be two square blanks for each figure. From one we will make the bodies of bunnies, from the second we will make heads with ears.
Let's put our heads together according to the following pattern:
Let's make the torso:
Use a stapler to fasten the elements from the back.
Eyes, nose, mouth and mustache can be depicted using applique or simply drawn.
Cut out stable “stumps” from a cardboard parchment tube. You can cover them with colored paper if you wish, or you can leave them as they are. Let's make two slits in each. Let's fix the hare figures in them.
Video: “New Year’s craft bull: origami bull symbol 2021”
DIY origami Christmas tree
It doesn’t always matter what is given, it is important that it is done from the heart, and if the gift is made with one’s own hands, then it is valued even more, because the person who gave it spent his time.
A Christmas tree is a New Year's attribute, and New Year's origami - a small paper tree looks original and very attractive. In general, you can come up with different New Year’s origami, the main thing is not to be afraid to create and remember, everything will work out.
To know how to make a Christmas tree origami, you need the following:
- Take a cut out square of green paper. Size 20x20 or larger;
- Bend the square diagonally, unfold it and create a second diagonal, so that you get two fold lines;
- Fold the sheet in half, turn it ninety degrees, open it, turn it and fold it in half again;
- After all these operations, you should get a square with folds marked crosswise;
- Next, it’s just a matter of assembling the tree;
- The square again needs to be bent in half, its side corners need to be bent inward. The result is a triangle;
- After this operation, a trunk with four lower corners is formed;
- The corners need to be raised up in order, while working on the table;
- By raising the corners, a rhombus is formed;
- The rhombus needs to be folded in half;
- The remaining corners need to be folded, similarly forming three more rhombuses;
- The corners of the rhombus are further bent inward.
- The output is a voluminous spruce.
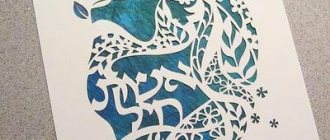
There is another technique for creating New Year's crafts, which is called kirigimi. This technique is used to make snowflakes and other New Year's paraphernalia cut out of paper. Jewelry made from this technique looks original and is fundamentally different from the origami technique, although they are very similar in appearance.
The main difference is that when making jewelry using the kirigimi technique, you need to use scissors and glue. When cutting kirigimi, the tool must be sharp and of different sizes. This is necessary so that a product of any size looks original and of high quality. Practicing this technique is very useful, as it develops thinking, imagination and creativity in general. Both adults and children find this activity fascinating. Kirigimi is a great alternative to computer entertainment.