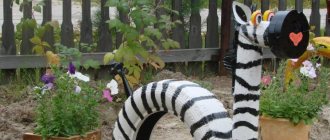
There is not much time left until the New Year 2021!
The symbol of 2015, the charming sheep/goat will be replaced by a funny fiery monkey. On New Year's Day, it is customary to give each other gifts and, of course, symbols of the coming year, which will protect and bring good luck. And if the symbol of the coming year is made with your own hands, then it will definitely have magical powers.
In this article, the News portal “Vtemu.by” has collected for you several easy-to-follow master classes on making a monkey, a symbol of the coming 2016.
In the article you will find monkeys made by yourself from a variety of materials: paper, polymer clay, fabric, etc.
So let's get creative!
DIY sock monkey
An amazingly bright, funny and soft toy, a symbol of the coming 2021, you can get a monkey from a pair of ordinary socks and a small amount of cotton wool. By the way, you can fill a finished soft toy not only with cotton wool or scraps of fabric; foam balls, sawdust, cereals and even aromatic herbs can be an excellent filling option.
This symbol of the upcoming New Year 2021 will be an excellent gift for family and friends, friends and of course children.
DIY monkey toy: master classes with patterns
Before dumping on you a bunch of ideas from other masters, to whom by chance I gained access, I will tell you about that wonderful representative of the animal world that was born to me just the other day.
Her name is Mimi, a blueberry monkey hiding in an ice cream cup. She has a terrible sweet tooth, so she doesn’t come out of her hiding place.
Prepare for it:
- felt (thick for the cup and soft in two contrasting colors for the head and muzzle)
- threads in the color of thick and soft felt + black for the nose
- lace 6-10 cm wide
- beads, sequins
- two half beads for eyes
- padding polyester for stuffing
- patterns, pencil, scissors
First of all, prepare your patterns. They are quite easy to make:
- head - a circle with a diameter of 20 cm,
- a cup of ice cream - a quarter of a circle with a radius of 14.5 cm with a right angle cut off (slightly, so as not to interfere with stitching) and lines drawn at equal distances as in the photo.
And here are the patterns for the ears and muzzle (for the muzzle you will need 4 larger pieces and 2 small ones):
Cut out all the pieces. It is best to make the muzzle and the inside of the ears light, and the head and the outside of the ears dark.
Pencil lines indicate the places where you will need to lay lines of backstitch stitches. If you don't want to make this decorative element, you can simply cut a quarter circle out of thick felt.
The side on which the pencil lines were drawn is the wrong side. Here we leave all the knots and irregularities, bringing the thread to the opposite, clean side.
The result should be something similar:
In the end you will get an imitation of the grid like on the cones of waffle cones
Sew the horn blank at the back using a hidden seam.
Since my felt was very thick, I additionally glued the joints with transparent glue.
I decided to cover the seam with a piece of lace and several sequins with beads. To make the tip of the cone sharp like a real ice cream cone, I sewed a bead and beads onto it.
Fill the cone with padding polyester. To get the stuffing through to the sharpest point, take a ball-shaped knitting needle or hairpin and push the fibers inside.
Take a circle of soft felt and sweep it along the edge using a needle-forward stitch, pull it together, and stuff it. Stuff it tightly so that the future head is almost like a tennis ball. The main thing is not to overdo it - the thread will break.
After stuffing, pull the hole all the way and secure.
Take two parts of the outer and inner ear. Sew the inner ears using a needle-forward stitch to the larger parts.
Sew the ears with the same seam.
Sew the muzzle to the head, placing it in the place with the least amount of folds. Naturally, the place where the sewn hole is located should be at the bottom.
The ears can be sewn to the head with a hidden seam or carefully glued with transparent glue. Pre-mark the locations of the ears so that they do not move somewhere.
I placed the ears not exactly in the middle of the head, but a little closer to the muzzle, so that there was a difference between the muzzle and the back of the head.
The main parts are ready, it's a matter of finishing. Take the lace, cut a piece from it twice as long as the maximum conical circumference. Sweep it along the center line, pulling it together so that the resulting element is slightly less than the circumference of the horn.
Sew the ends together. Place the resulting circle of lace on the monkey’s head and glue or sew it. Then make sure that the sewn hole is in the center of the circle.
Now the most important thing:
- glue or sew the head to the horn body;
- embroider the nose
- glue the eyes.
That's all. To emphasize Mimi's "ice creaminess", you can sew a circle with beads on her head, imitating jam and some decorative element like a cherry or a crown.
Believe me, this will be one of the most original New Year's (and not only) monkeys. If you want to make an inexpensive gift, then this is one of the best options.
Update from 01.2016 - final photo:
DIY monkey pillow
This time, the symbol of the upcoming New Year 2021 is made in the form of a cozy and very cute pillow.
Everyone has a small piece of brightly colored fabric or old clothing in their home that is perfect for this craft. The pillow can be supplemented with secret pockets where you can put your most cherished desires written on a piece of paper. They say that wishes definitely come true.
Salt dough monkey
Everyone knows that children love to sculpt various figures from plasticine. An alternative to this activity for adults can be modeling a monkey from salt dough. Such crafts retain their appearance for a long period of time and do not deteriorate, unlike plasticine figures, which quickly begin to leak as soon as they are left in the sun, next to heaters or radiators.
In order to prepare plastic dough, you only need: flour, salt and water. You should mix 100g. flour, the same amount of regular table salt and add approximately 50g. water. In this case, only the finest salt will do. The result should be a homogeneous plastic mass. If the consistency of the dough does not seem plastic enough, you can add a little glycerin or vegetable oil. In this case, the dough will not stick to your palms and will provide additional care for the skin of your hands.
The next stage of work is the modeling itself. There are several tips that will help you make a high-quality and attractive craft:
• To prevent the prepared dough from becoming dry and crusty, it should be wrapped in cling film and small pieces should be torn off from the main mass to make a specific element of the craft. • Since finished dough figures need to be baked, you can sculpt them directly on parchment paper or baking foil. • It will be easier to sculpt a figurine if, as an example, you put a printed picture of a monkey you like in plain sight. • It is better to place the remaining plastic mass in the refrigerator, where it can be stored for several days and used for making other crafts from salt dough.
Article on the topic: Thank you mom for being there, cross stitch: free country and kids, symbols for a child, needlework
Figures made from dough should be baked in the oven for about an hour at a temperature of at least 100°, then painted and varnished.
DIY paper monkey
This symbol of the upcoming New Year 2021 can be safely called a money monkey.
A homemade paper monkey makes magical coin claps that sound the sound of approaching wealth. Make this miracle with your own hands and give it to your friends, acquaintances and work colleagues. Let their pockets and wallets always be full!
Cups - monkeys
An excellent decoration for a children's holiday table for 2021 will be handmade monkey cups. For this you will need:
- brown cardboard or thick paper;
- cups;
- pink paper;
- toy eyes;
- buttons or buttons with a black tip for the nose;
- glue;
- scissors;
- black marker.
Making cups for babies:
- We cut out strips of cardboard that are as wide as the height of the cup.
- We roll them into a tube and glue the edges.
- We put the blanks on the cups.
- Cut out paws and faces from brown paper.
- We glue the paws at the bottom and sides, and the muzzles at the top of the cups.
- Cut out a figure eight shape from pink paper and stick it on the face.
- Glue on the eyes, nose, and draw a mouth with a marker.
- All that remains is to sign the names of the monkeys.
DIY polymer clay monkey
If you know how to work with polymer clay, then you have the most incredible opportunities for creativity. You can make a monkey figurine, keychain, earrings, pendant or pencil decoration. Ready-made crafts can be a great New Year's gift!
How to sew a monkey from felt
This material has a number of advantages over other materials. There are a lot of bright shades of felt, its edges do not fray, there is no difference between the front and back sides, felt is available in various thicknesses, it is easy to sew and glue.
You will need:
- felt in two shades: brown and beige;
- filler;
- scissors;
- chalk;
- needle;
- threads to match the fabric;
- ready-made eyes or beads.
The principle of making a pattern is the same as using fabric. For the monkey you will need 2 brown parts for the head, body, tail and ears, 4 for the paws, 1 beige part for the face.
We sew the toy, starting from the paws and tail, using a loop stitch. After stuffing, sew up the remaining holes. Then we begin to sew the body, at the same time sewing in the finished paws and tail, leaving a hole on the neck for stuffing.
We fold the ears out of the circles and begin to sew the head, sewing the ears into it. Having reached the neck, we sew the head to the body. Leave the hole for stuffing at the top of the head. The muzzle blank can be attached in any convenient way. We make eyes; if desired, you can embroider a mouth and nose.
Wool souvenir
You can make a monkey with your own hands from wool using the dry felting technique. This is done using special needles, which can now be bought at any craft store. For work, prepare:
- Wool for felting – 2 shades of brown, as well as a little white and blue for the eyes.
- Special needles - take several sizes for large parts and for small parts.
- A foam sponge is needed as a stand so as not to stain the table.
- Framing wire – try to find copper wire, it is very flexible and can withstand a few twists.
- Dry pastel for tinting the finished work to highlight the cheeks and nose.
- Transparent superglue.