From twine
We will need:
- leg-split;
- cardboard;
- pencil;
- cocktail straws;
- a container for the future pot (from yogurt, for example);
- glue “Titan” or “Moment”;
- coffee beans;
- scissors.
We cut out the bases for the wheels from cardboard using a compass or other round objects. It is necessary to make 6 such blanks, two for each wheel.
Having glued the pieces together in pairs, we wrap them with twine.
We make spokes for wheels from tubes. To do this, measure two centimeters from the fold in both directions. There are four of these parts for each wheel. We wrap them with twine and glue them together with Moment or Titan glue.
Now we place the spokes in the wheels and fasten them with glue.
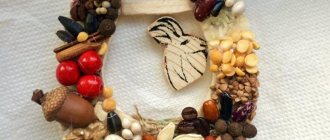
We decorate the rear wheels with coffee beans, as shown in the photo below.
We take the next tube and cut off 2 centimeters from the fold in one direction and 3 cm in the other. We make another such part. We connect them to each other with the long sides. This will be our steering wheel. We also wrap it with twine.
Cut off a part of the tube without a bend, 11 centimeters long. Wrap it in twine. This blank will connect the rear wheels of the bicycle.
Now we cover the ends of it and the steering wheel with coffee beans, which we set on glue.
We take a new tube, fold it and stretch it. We make a cut on the side of the short part, put a drop of glue and insert it into the segment that remains from previous work.
We need two such blanks. We also wrap them with twine.
Related article: Asymmetrical cardigan with knitting needles: step-by-step master class with patterns
We insert these long blanks into the front wheel, as shown below, and decorate the wheel with coffee beans on both sides.
Between the ends that will be at the top, we lay a piece of tube 2 centimeters long, and close this place with twine.
We connect the rear wheels with a jumper.
Now we take the container that we have chosen for the future flowerpot and cover it with twine. We decorate the top edge with coffee beans.
Glue the steering wheel to the top bar and place the planter between the rear wheels.
You can leave the flower pots for all sorts of little things, but with flowers the bike will still look more harmonious.
Instead of a flowerpot, you can make a bicycle with a cradle and place flowers there.
From wire
We will need:
- wire with a diameter of 2-3 mm;
- white tape;
- buttons of the same shade - 4 pieces;
- glue, you can use Moment-Crystal or a heat gun.
We roll three identical circles from the wire, fold them together and wrap them with tape. It turns out to be a wheel. We need to make three wheels, one of which is large, and the other two are the same size.
Using the same principle, we make three curls in each wheel.
We make the frame and steering wheel in the same way.
Our bicycle will come with a basket, so we’ll assemble that too.
We attach the basket between the rear wheels. And now our bike is ready. If we place a composition with candy flowers in it, it will be a wonderful gift. You can see how to make such flowers in the video below.
Caring for a flower garden-bicycle
It’s not enough to make a flowerbed out of an old bicycle; you still need to properly care for it. The main enemy of the structure is moisture. Snow, rain, frequent watering are the main causes of metal corrosion. Therefore, it is imperative to prepare the frame for painting, then spray the composition from a can and apply a layer of protective varnish.
Important! The most convenient way is to remove flower beds indoors for the winter. If this is impossible or inconvenient, protective treatment should be maximum.
Cracks with rusty spots on a bicycle under a flower bed are treated with a product like NEOMID 570. It is necessary to clean out the stains as much as possible and remove any remaining compound. Primer is first applied to dry surfaces, then metal paint for external use. This way the uniform will be protected as reliably as possible until spring. After the snow melts, the work is repeated.
From a three-core cable
Prepare the following materials and tools:
- three-core cable, always soft - 1.5 meters;
- wooden skewers;
- small blocks of wood;
- cotton wool;
- brown and white paint;
- coffee beans;
- threads;
- newspapers or office paper;
- cardboard;
- drill;
- silicone hot glue;
- screws;
- small flowerpot made of plastic or ceramic;
- satin ribbons and decor as desired.
Related article: Master class flowers from beads: video about wild flowers and trees in pots
We cut three sections from a three-core cable: one larger for the front wheel, two smaller for the rear. Pull out the blue wire from the middle. And using a piece from it and glue, we connect each piece of cable into a ring.
Using a drill, make a hole in a wooden block and wheel. Connect using a skewer.
Such holes must be made according to the number of spokes. The result is a design like this.
We connect two wheels. We bend the wooden block in the middle with another piece of cable and secure it with a screw.
We decorate the flowerpot and attach it to the frame of the front wheel with a screw.
We make a steering wheel from the blue middle wire.
All parts must be painted white, and the cable joints must be covered with satin ribbon.
We glue a piece of cable to both rear wheels.
We tie a bow made of ribbon 0.5 cm wide onto the steering wheel.
For the basket, cut out a circle from cardboard and place it between two wheels.
We cut out two more similar circles and attach newspaper tubes to one, these will be our stands. How to make them, see the video below.
Cover with the second circle and lift the racks up. Let's start weaving our basket. When it is ready, we attach it to the prepared platform. You can use glue or screw it on.
Now let's start making our topiary. We attach a ball of crumpled newspaper to the blue wire, folded in half. We cover the newspaper with cotton wool, then tie it with thread and paint it with brown paint.
Cover the ball with coffee beans. We install polystyrene foam or pour plaster into the basket and install our coffee tree. The trunk can be previously covered with tape or thread.
So that the inside of the basket is not visible, we fill it with artificial plants and twigs for decoration.
We also decorate the pot on the steering wheel as desired.
Related article: DIY New Year's compositions: photos of beadwork with video
These beautiful compositions can become a decoration for your home or part of a gift. Such bicycles can be decorated in any way you like, for example, in Provence, steampunk style, decorated with beads, rhinestones, ribbons, etc.
Garden decoration - photo ideas
Such a small decorative item will truly decorate any interior, or an original gift. Manufacturing will not take much time or effort, you just need to follow a few instructions and prepare the materials.
The bicycle planter looks amazing. If you have previously highlighted such products in stores, for example, you have noticed what a unique style and uniqueness they create. Jewelry made independently is in no way inferior to a purchased product.

