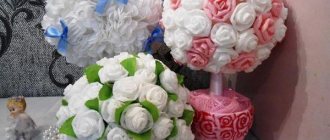
Despite the fact that December has just begun, I already want a New Year's holiday. And what will create a New Year's mood better than a Christmas tree? Although, recently New Year's topiaries have also become extremely popular. Such a small tree can be placed on a holiday table or used to decorate an office. In addition, the New Year's topiary will be a great souvenir!
We have already talked about what topiary is and what are the basic principles of its manufacture. Today we’ll talk about what features New Year’s topiary has.
Before you start making your own topiary, decide on its shape. The shape can be either round (traditional) or figured (for example, herringbone).
New Year's topiary ball
New Year's topiary-Christmas tree
Next, we move on to the materials used. Let's look at the most commonly used ones (although, of course, it all depends on your imagination; in addition, materials can be mixed and combined in different ways).
Topiary made of Christmas balls
To create such a topiary you will need:
- small Christmas balls of matching colors;
- ball base (for example, made of foam)
- stick for securing topiary in a pot
- the pot itself
- floristic oasis
- materials for decoration (pine cones, other Christmas decorations, decorative berries and apples)
- glue gun or Moment Gel glue
If the pot doesn’t really fit the New Year’s theme, then the easiest way out of the situation is to decorate it with fabric or paper (we fix it on the pot with double-sided tape).
Then we put polystyrene foam or a floral oasis inside the pot:
And we fix the trunk of the future topiary in the middle of the pot. An ordinary thick branch or cardboard base on which cling film is wound is suitable as a trunk. To make the tree look elegant, you can wrap the trunk with a wide satin ribbon and decorate the top of the pot with tinsel.
Next, we attach a foam ball or the same floral oasis to the topiary trunk, which must first be given a more rounded shape.
We glue the Christmas balls onto toothpicks and insert them into the base ball.
We fill the gaps between the large balls, which form the basis of the composition, with smaller balls, and also decorate them with tinsel, various beads and other Christmas tree decorations.
To prevent the consumption of toys from being too large, use a foam ball or oasis of small diameter as a basis. To make the toys stick better, glue them together at the end of the work.
Original master class
New Year's topiary master class
First of all, fix the branch in the pot. To do this, the pot can be filled with earth, pebbles, coins, alabaster, plaster, filled with plasticine or other materials. The main thing is that the structure is held firmly. It all depends on the weight of the structure and the shape of the base. If the upper part is light enough, then the container is filled with ordinary cotton wool.
If the substance in the container does not look very attractive, it is decorated with the same stones, ordinary New Year's tinsel or other materials.
Ordinary tree branches or parts of swamp driftwood are often taken as the trunk of a tree. Please note that such products look much better if they are not perfectly smooth, but curved, with irregular and complex shapes and appendages.
To hold all the parts of the topiary together you will need glue. To do this, use regular PVA glue or a heat gun with melting glue sticks.
Next, the base of the crown is created. As mentioned above, it can be created from thick cardboard. The cardboard is rolled into a cone, after which certain products are glued to it. To make the cardboard more durable and not lose its shape due to the abundance of glue, glue is first applied to it, and then wrapped with twine, after which decorations are glued onto the twine. This way the cone will be more durable and will withstand a large variety of elements.
A cone or other cardboard figure is perhaps the simplest and most affordable material for creating the base of a topiary. However, many people make the base from polystyrene foam or foam rubber if large and thick pieces are available. If there are thin pieces of foam, it can be broken into small pieces and glued into the required shape using glue. This material is easily placed on the base and holds tightly. In this case, the foam ball can be covered with paper or wrapped with twine for better strength and adhesion.
A characteristic feature of topiary is its originality and bright appearance. Therefore, when choosing jewelry for such a product, you should not limit your imagination. If you want to install many different products on your topiary, and if they are not incompatible, then feel free to do so.
Topiary made from natural materials
The principle of creating such a topiary is similar to the previous one, you just can use pine cones instead of Christmas tree decorations.
First, we glue cones to the ball-shaped base, and then fill the gaps between the cones with various decorative elements (beads, bows, small Christmas balls). The main thing is not to overdo it with decoration.
The author of the topiary is Natalia (Nataly.by)
The author of the topiary is phytodesigner Olga Snegova
If you take a cone and spruce or pine branches as a basis, it will also turn out quite nice:
Video master class on creating a New Year's topiary from pine cones and Christmas balls:
Idea No. 2: herringbone topiary
An excellent gift option for this holiday is a DIY topiary Christmas tree. The procedure for creating the tree itself is practically no different from the standard one: the same axis and base in the form of a durable container. But the top of the tree is made differently: the cone-shaped shape can be made not only from polystyrene foam, but also using papier-mâché, fabric or durable cardboard filled inside.
Attention! You can also choose a wooden cone for the Christmas tree, but it will be heavy and will not always be able to securely hold the decorative elements.
Do you want this Christmas tree to look interesting? Here is one of the master classes: New Year trees and topiaries made of colored yarn. Take thicker threads and begin to tightly wrap the cone-shaped base.
To be safe, you can lubricate the surface with glue: then the yarn will not change its location.
Another way to secure the yarn is to glue it only at the base. In some places, the direction of the thread can be adjusted using sewing needles or pins. At the top of the cone, the thread is secured in a similar way.
For a bright effect, you can also use multi-colored ribbons: wrap the cone over the entire area - and you get a stylish Christmas tree, to which you can easily glue or sew on some decorations.
Sometimes a Christmas tree with a textile surface is made more magnificent: cut out a large number of small elements in the form of drops or triangles in advance and glue them onto the cone. The same decor can be achieved by using green paper or cardboard.
Read in detail about decorating the New Year's table with your own hands: all the secrets and subtleties, photos with ideas for decorating the festive table for the New Year.
You can see a selection of photos with ideas for decorating a children's party with your own hands here.
Ideas for decorating a bedroom for two are in the article at: https://prostilno.ru/idei/prazdnik-dekor/spalnya-dlya-molodozhenov.html
You can choose berries, dried fruits, jewelry and other accessories as decorative elements. It is important that they are not overly heavy, otherwise the tree itself will fall. You can make the top of the Christmas tree curved: such decorations will be an excellent addition to the New Year's interior around the entire perimeter of the room.
And don’t forget about the tip: attach a small star or bow to the top.
By the way, for convenience, it is better to decorate the crown of the Christmas tree before attaching it to the base. Unlike a tree, a Christmas tree does not have to be installed in a pot: the base can be made using a cross-shaped structure made of pencils or in the form of a cylinder with dimensions sufficient to stabilize the tree.
Topiary made from edible materials (nuts, sweets, tangerines)
"Tangerine" tree
It's no secret that tangerines are a favorite New Year's treat. Therefore, we will consider the process of creating a “tangerine” topiary in more detail.
Prepare the following materials:
- tangerines
- a skein of linen rope (can be bought at any gardening and flower shop)
- a flower pot from which our tree will actually grow
- a beautiful branch or driftwood, strong enough to withstand the weight of tangerines
- scissors and paper knife
- a piece of foam or floral oasis
- spruce branches and mistletoe leaves for decoration
- pieces of wire for strengthening tangerines on the tree (a set of small hairpins will do)
- artificial snow (it can be crushed polystyrene foam or anything else, as long as it looks like snow)
We take our tangerines and wrap them with rope crosswise. We strengthen the wire as shown in the photo:
Lightly coat the twig (so that the needles do not stick together) with PVA glue and dip it in the snow.
We cut out a cone from polystyrene foam or oasis, which is shaped to easily fit into our pot.
Let's move on to the most difficult and important part. We strengthen the branch in the oasis so that it does not dangle. We begin tying the tangerines one to the other, starting from the bottom. There will be fewer tangerines at the bottom, a little more in the middle, and the same number at the top as at the bottom. Then we decorate all this beauty with leaves and twigs.
DIY New Year's topiary is ready! You can safely decorate your holiday table with it.
Remember that tangerines are a perishable product, so it is better to make such a tree on the eve of the New Year. As a worthy alternative, you can use decorative tangerines - plastic or made from polymer clay.
Candy topiary
What do you think of the idea of a New Year’s topiary made from candy canes?
The materials are the most standard: a foam ball, a stick for the trunk, a pot, a satin ribbon for decoration, a foam cube, adhesive tape and 200-300 grams of candy.
Pay attention to how you can secure the trunk in a foam cube, as well as decorate it:
And also see how you can cover a foam ball with colored adhesive tape so that you don’t need to further decorate the gaps between the candies:
The principle of creating a topiary is similar to those described above, but these 2 tips can be very useful to you.
DIY New Year's topiary
Needlework
07/07/2018 Anastasia Prozheva
Topiaries will help you decorate your room for the New Year. These amazing New Year-themed trees are best made in the shape of a Christmas tree, the height and size of which you can adjust yourself. You can use a variety of materials for making wood, depending on the interior of your apartment or house, as well as your personal preferences. We offer you four clear and step-by-step master classes on how to make a New Year's topiary with your own hands. The trees will be different, and each of you can choose the one that he personally likes.
Master class No. 1: New Year's topiary from Christmas balls
New Year's balls make very bright, festive crafts. Topiary in this case is no exception. To create a tree, it is better to take multi-colored, small-sized balls. Even better if they are made of glass rather than plastic. The fact is that plastic products have a characteristic convex line, which can ruin the festive look of the topiary.
Materials
To make a New Year's topiary from Christmas balls, prepare:
- large candlestick;
- foam cone;
- identical in size, but small Christmas balls;
- wide tape;
- hot glue.
Step 1
. Apply hot glue to the top of the candle holder. Press the foam cone with its base onto the glue-coated surface. Hold it until the glue sets, then leave the workpiece until the glue dries completely.
Step 2
. In the meantime, you can prepare the Christmas balls for further work. Carefully remove the metal fasteners from their top. They won't be needed.
Step 3
. After the cone is glued to the candlestick, you can start decorating it. To do this, grease the top of the ball with hot glue and gently press it into the cone so that it grips better. For convenience, you can squeeze hot glue into an unnecessary frying pan. Then you don’t have to take a gun and carefully coat the edges of the balls with glue each time, you can simply dip the ball a little into the adhesive mass and then work with it. This will make your work go much faster.
Related article: Do-it-yourself topiary for Easter: photo of a mug made from eggs
Step 4
. Fill the entire surface of the cone with balls, let the glue dry thoroughly and you can decorate the base of the candlestick with a wide ribbon, tying it in the form of a bow.
Be careful while working. If you apply too much pressure, the glass ball may break and injure you. For protection, you can wear thick rubber gloves on your hands.
Master class No. 2: snow-white New Year's topiary made of stones and rhinestones
A miniature tree made from irregularly shaped beads can be a very gentle and at the same time effective addition to the New Year’s interior. You can find these in any jewelry store. By adding transparent crystal details, you will make the topiary fabulously delicate and winter beautiful.
Materials
To make a snow-white New Year's topiary from stones and rhinestones you will need:
- foam base;
- hot glue sticks;
- heat gun;
- necklaces made of white beads of irregular shape;
- transparent glass cube;
- rhinestones.
Step 1
. Disassemble the beads by pulling the thread out of them and pour all the beads onto paper or a plate to make it easier to work with them.
Step 2
. Using hot glue, begin gluing the beads to the foam base, carefully filling the entire surface with them. Start gluing the beads from the bottom. Try not to leave empty spaces.
Step 3
. Let the prepared topiary base dry and you can start decorating. Carefully apply glue to the rhinestones and insert them into the spaces between the beads. Don't use too much rhinestones.
Step 4
. You can leave the topiary as is. It will look great, but a transparent glass cube will help make it even more impressive. To do this, simply place the topiary itself on it and glue the two parts together with hot glue.
Your snow-white topiary is ready!
Master class No. 3: DIY New Year's topiary made from yarn
You can make a very cozy and beautiful topiary from leftover yarn. Making one is a couple of trifles. Even children can do this, since there is no need to use hot glue and, in general, the process of making a New Year's topiary from yarn with your own hands is very simple.
Related article: Crochet hexagon boots: master class with diagrams and videos
Materials
To make this craft, prepare:
- foam cone,
- a skein of green yarn, preferably embossed and uneven in color;
- sewing needles;
- small New Year's balls;
- floral wire;
- decorative berries in the form of hairpins;
- round nose pliers;
- scissors.
Step 1
. The first step is to decorate the surface of the panoplast base of the topiary. To do this, take a skein of yarn. Secure its end with sewing needles to the base of the foam cone.
Step 2
. Start wrapping the yarn around the cone, making the wraps tight enough that there is no empty space between them. As you work, you can fasten the threads in place using the same sewing needles.
Step 3
. When you reach the top of the cone, cut the thread and secure the end with sewing pins.
Step 4
. Start decorating your New Year's topiary. As such, you can use small Christmas tree balls or decorative berries on a pin. The balls need to be attached with hooks to the turns of yarn, and the decorative berries simply need to be inserted with sharp pins into the foam base.
Step 5
. The final chord of decorating the New Year's topiary will be the Christmas star. You can make it from textured floral wire. Starting at the end of the wire, use pliers to bend it to form a star.
Trim this part. At its base, carefully secure a small piece of wire in the form of a pin. Stick the resulting star into the top of the topiary.
A simple DIY yarn topiary is now ready for further use as decoration.
Master class No. 4: DIY New Year's topiary made from twine
Twine topiaries are surprisingly light, airy and, at the same time, textured. Making this tree is not at all difficult and you will need very little time to make such a craft.
Materials
Before you make a New Year's topiary from twine with your own hands, prepare:
Related article: Summer in a jar. Preparations for the winter. Recipes
- a ball of twine;
- parchment paper;
- green floral thread;
- glue;
- empty plastic container;
- stapler;
- scissors;
- berries for decoration;
- artificial decorative flowers;
- spray paint.
Step 1
. Make a cone from a sheet of parchment paper, cut it from the bottom so that it stands stable on the table. To keep the cone in shape, fasten its sides with a stapler.
Step 2
. Pour the glue into a bowl. Dip the twine in it and start wrapping it around the workpiece. Do not fill its surface completely; there should be empty space between the turns. Make the base of the cone a little denser so that it then stands firmly on the surface.
Step 3
. Leave the workpiece until the glue dries completely, then remove the paper base. Take the green floral thread. Also soak it in glue and wrap it around the base of the tree using twine in a random order. This will help give your New Year's craft an interesting texture. You can take the thread in any color or spray paint it. This way you will get topiary of a different shade and a slightly different texture. After your tree is completely dry, decorate it with berries, planting them on glue or artificial flowers.
Using this technique, you can make a topiary of a slightly different shape. For example, you can get this kind of New Year's tree by wrapping a cone with twine in tight, even turns.
The best posts
- Do-it-yourself acrylic bathtub crack repair
- What is the best way to cover paper wallpaper so that it does not get dirty?
- Technology for installing plasterboard on the ceiling (step-by-step instructions): technical characteristics of plasterboard ceilings (video)
- Which mechanism to choose for sliding doors
- Do-it-yourself tile leveling system (SVP)
- Newspaper planter, wire bicycle and coffee topiary
- Do-it-yourself crochet soles for slippers: diagrams with video
- Knitted vest for a newborn: diagrams with description and video
Coffee topiary
Coffee topiary can decorate any holiday. To give this tree a New Year's look, use appropriate decorations, for example, a Santa hat:
Or make a coffee topiary in the shape of a Christmas tree:
Topiary made of sisal, fabric or felt
There are a lot of materials for creating a Christmas tree. For examples and patterns, you can refer to the article “DIY Christmas tree: 25 master classes on creating a New Year’s beauty!” Make a Christmas tree using any of the methods and secure it in a pot. The topiary is ready.
Christmas trees made of burlap and jute look very interesting:

