Where to begin
After looking at photos of homemade hair clips on the Internet, even a beginner can cope with this task.
Many sources recommend starting with the simplest compositions with elastic bands. Next, gradually getting used to new skills, you can begin more serious work with iron hair clips.
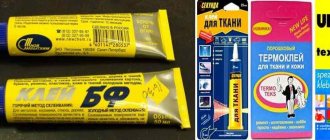
Hot glue is usually used to attach various decorations, namely rhinestones, beads, stones, flowers from ribbons. Popularly it is called the “Glue Gun”.
Secrets of easy work
To make your work enjoyable, you need to stock up on basic auxiliary equipment, namely:
- A table lamp or another light source besides the main one.
- Tweezers. It will be needed for small details of decoration and structuring of folds (when working with ribbon).
- Candle or lighter. It’s worth noting here that work with candles is safer, since its flame is more loyal and even.
- Accessories (for decoration). It can be beads, stones, beads, berries, stamens. Everything is at the discretion of the master.
- Ribbon, braid.
- Scissors. It is desirable that they have flat, even cutters.
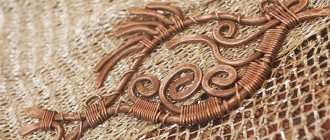
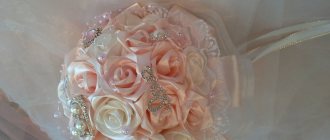
DIY hair decoration made of wire and beads
In this master class we will show you how to make a beautiful hair decoration with your own hands. It will decorate your hair and is suitable for any event, be it a corporate New Year or your beloved granny's birthday.
For work we will need:
Hairpin
Beads
Beads
Gamma wire diameter 4 mm
Decorative elements
Caps for beads
Tools:
wire cutters, pliers
Assembly:
In my work I will use a large number of materials to show the most diverse selection of fittings that can be used in assembling this decoration. It is not necessary to use them all at once, as I will do. There are very beautiful jewelry where two, three, or even one type of beads is enough, and they will look no worse if you used all the elements that I will use in my master class. The tools we need are wire cutters. If this tool is not available, it can be replaced with scissors.
The first thing we need is to unwind the wire. For the base of the hair decoration, we will need a piece of wire 20-25 cm long. In order not to constantly twist the ends of the wires together, I recommend doing all the work on one piece of wire. Therefore, to our base, which is 20-25 cm long, we add another 1 meter of wire and cut off this section from the common coil.
For the top of the hair decoration I will use 1 twin bead and 1 single bead. First, we pass the edge of the wire through one hole of the twin bead, and then through a single bead. And we move them along the segment so that on one side of the stringed beads the length of the wire piece is 20-25 cm, and on the other side of the beads the wire piece is 1 meter.
Next, take the short edge of the wire, remind you that its length is 20-25 centimeters, and pass it through the second hole of the twin bead. We tighten it. After this, the beads must be twisted on the wire. 10 revolutions are enough. The beginning of our branch is ready.
Let's move on to the next branch, which will consist of 5 small glass beads. We string them through the long edge of the wire. We move them to the first branch. Holding the beads with one hand, we begin to bend the wire, forming a circle of beads that resembles a flower. Then we twist the wire together until we reach the previous element with the top.
The second element of the branch is ready. To begin the next step of making a hair ornament, you need to twist the wires along the main trunk of the twig. Having gone down a little by twisting the wire along the main trunk, we can begin to add further branches. At the same time, when we twist along the main trunk of the branch, we bring out the long edge of the wire to the right. And it is on the right that each time we will collect a new branch, leaving the previous branch on the left.
Our next branch will consist of one bead of freshwater pearls. We string it again onto a long piece of wire and move it towards the remaining elements. We measure the desired length of the leg and begin twisting to the main trunk. After this, we make several twists around the main trunk of the branch.
We add the next three branches in the same way as we added the branch with a bead of freshwater pearls. To do this, we first use a bicone glass bead, then a transparent bead and a matte one.
I would like to draw your attention to the fact that with each branch it is necessary to make its leg a little longer than that of the previous branch. If we make them all the same length, then the branch will turn out to be quite small and not voluminous.
Next, I propose to make an element in the form of a leaf. We collect 7 beads on the long edge of the wire. We find the penultimate bead that was collected on the wire and through it we thread the wire again in the opposite direction and tighten it. This turns out to be our last bead and will fix the edge of the leaf. After we have secured the bead, we collect five more beads onto the free edge of the wire. We get a leaf-shaped pattern. We hold the beads with one hand so that they do not run away, and with the other hand we begin to carefully twist them.
This leaf has a fairly long stem. Therefore, you can make a branch from it and add another element. To do this, I will take a tween bead, pass it along the wire through only one hole and make a small branch out of it. This branch is connected to a branch of a petal made of beads. Next, we twist them to the base of the common branch, and then we twist the common base itself several times.
Now we will make another branch, which will consist of three small branches, at the end of which we will use beads in the form of bicones. First we string one bicone. Next, measuring the desired length of the leg, we do several twists. About half of our leg. We string the second bicone onto the wire. We measure the desired length of the leg and also twist it. Then we make several turns of general twisting with two bicones. Now you can string the third bicone. We tried on the leg and twist it along this branch, and then to the main column of the branch.
Now we will show you how to make elements with large beads for our decoration. We add a few more branches on the right and left sides of the general column of the branch, using different numbers of beads and branches for this. We will also collect one twig using a decorative element in the form of a leaf. And we will add the next branch with a bead and decorate it with caps for beads. We have a long branch ready.
Now let's move on to the short branch that will be on our side. To do this, take the long end of the wire. We roughly measure the length of our future branch and string the fittings elements one by one in the desired order, assemble the branch and twist it.
Next we need to secure the branch to a hairpin. We take the short end of the wire and make several turns around the hairpin through the nearest branches. We pull our wire tightly so that our product in the future does not dangle on the pin and sits tightly. When secured, you can add a few more decorative elements or branches. To do this, use the long end of the wire. The winding around the hairpin can be hidden using any large bead, securing it with wire at the very base of the hairpin. We twist the remaining ends of the wire around the hairpin and remove the excess using wire cutters. We press the edges of the wires with pliers so that they do not prick or hide the ends of the wires in the nearest beads.
The hair decoration is ready! You can make such jewelry for your hair with your own hands from a wide variety of accessories, as well as various shapes, colors and sizes of beads.
You will find all the necessary materials that I used in this master class in our online store for accessories for jewelry, All Beads. For a more detailed explanation of the assembly of this decoration, you can watch our video master class:
Types of bases for hairpins
Today there are a huge number of different types of retainers. It is better to make a hairpin yourself from these options:
- The automatic hair clip is suitable for thick hair and holds the braid perfectly. A large, voluminous decoration made of ribbons and beads looks great on such a hairpin.
- Bachs, or click-clack, are designed to support small strands and bangs.
- Indispensable hairpins - you can't do without them if you have long hair.
- Wreaths, hoops. They help complement the image and hold on even to the scantiest hair.
How to make an elastic band for beginners
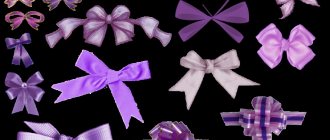
Bow
In specialized stores you can purchase special tapes, ready for crafts. They do not need to be processed around the edges . Just fold the bow and secure the middle. In the future, use your creativity by decorating the crossbar and edges with beads or rhinestones. Glue or thread will help secure the resulting bow to the elastic band.
Flower
- Take a transparent tape 5 cm wide, 50 cm long.
- Burn the edges of the tape with a lighter so that they do not fray.
- Make small stitches from one edge along the entire length of the ribbon and at the end pull the entire ribbon into a bun. You will get a rose.
- Sew or glue a large bead into the middle.
- Make blanks from satin ribbon of a contrasting color 20 cm long. Place stitches along the entire length of the blank and gather them.
- Place the previously obtained fluffy bun on a satin blank and secure with thread. For better fastening, you can add fabric glue. The flower is attached to the elastic band with glue.
Having made your first hairpin, you will definitely get a taste for it and will probably use only homemade accessories.
Subscribe to our Social networks
How to find a ring at home if you lost it?
Is it possible to keep artificial flowers in the house?
Making flowers with your own hands
To create a color composition that will decorate the hairpin, you will need to be patient and persevering. Flowers are assembled from several small parts, petals, and blanks.
You can buy blanks in an online store or use a technique called “Kanzashi”.
We recommend reading:
DIY brooch - the best step-by-step instructions with description. Photos of finished products, as well as a master class for beginnersHow to weave rubber band bracelets with your own hands - a review of the best weaving patterns. TOP 100 photos of different methods and beautiful weaving patterns
DIY headband with flowers: 120 photos of the best ideas. Simple instructions with real examples and full descriptions. Master class and secrets from craftswomen
Origin story of Kanzashi
About half a century ago, oriental beauties changed their image: they decided to replace boring, traditional hairstyles with playful, high towers.
For a more stable hairstyle, they used hairpins, sticks, and combs. Thus, a simple comb turned into an extraordinary accessory that was loved by half of the world's population.
Japanese combs and hairpins became an expression of female character, social status and marital status.
Before the modern era, decorative combs and pins, known collectively as Kanzashi, were an important part of Japanese fashion and social culture.
Step-by-step instruction
- The ribbon is cut into 5cm cubes. 7 such pieces are enough for one flower;
- The cubes need to be burned on all sides with a candle. This is done to prevent the edges from unraveling.
- We bend the square in half to form a rhombus. Next you need to bend it again and get a small triangle.
- We will fasten the corners into one, then remove the excess and fix it with fire.
- Repeat this way with all parts until you get 7 petals
- The lower edges of the blanks are pulled together with a thread and a needle
- Mugs of the required size are cut from felt fabric
- The final part of the craft is to glue the flower to the felt. The entire composition is securely glued to an elastic band or hairpin.
This instruction on how to properly make a hair clip with your own hands helps beginners step by step understand all the steps of assembling incredibly beautiful hair.
We recommend reading:
- DIY satin ribbon bows: TOP-200 photos of the best options. Step-by-step instructions + master class with description (video lessons + diagrams)
How to make a box - an overview of the best ideas for creating a box from different materials. 150 photos of new designs, instructions, diagrams, execution techniques, video
DIY pendant - step-by-step master class with instructions. Photos of finished works with an unusual design. Schemes, new items, recommendations from craftswomen
A little later, when your hands get used to such jewelry work, you can try to make someone else a little happier.
Bow hair clip for a schoolgirl
Every mother wants her schoolgirl to look beautiful. A large selection of ready-made hairpins in the store does not guarantee that it will look original and unique. And the advantage of a self-made accessory is that it is made with love and only in a single copy.
To make bows you do not need to have any special skills or abilities. The whole job will take no more than 10-15 minutes.
More details in the master class “Ribbon hairpins for school for girls”
Hairpins made from grosgrain ribbons
Hairpins made from several types of ribbons can be an excellent addition to the outfit of little fashionistas. Ribbons made of rep and satin go well together.
Rep tape is made from polyester thread. It is a narrow strip with characteristic transverse scars. It is easy to work with, it is highly rigid and retains its shape well.
Satin ribbons are a widely used material for needlework. They are made from viscose or acetate silk.
You can decorate a ribbon hairpin with various decorative elements that will serve as the center of the flower.
If it is not possible to purchase a ribbon, you can make a similar hairpin from small leftover fabric.
The process of creating jewelry is quite exciting and does not require much skill. Making the accessory is easy, just follow the instructions.
Learn more about how to make hairpins with mushrooms in the master class “Hairpins from satin and grosgrain ribbons”
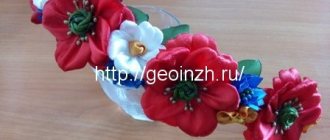
Elastic band "Ladybug"
Ladybugs are considered the most beloved insects among children. Therefore, hair accessories that contain the image of the “sun” look funny, cause affection, and most importantly, children like them.
These decorations are quite easy to make yourself. And you can involve your child in the manufacturing process, then the accessory will be even more beloved and valuable to him.
Hairpin with different petals
You will need 2 ribbons of different colors and braid. We cut the first ribbon into 5 cm pieces, 20 pieces, the second into 4 cm pieces. The braid needs to be made into 6 identical pieces.
To get a large, neat petal, bend the two-color blank so that a triangle emerges. If you take the edges and bend them to the top, you will get a rhombus. Next, you need to fold it in half and pinch the ends with tweezers. Trim with scissors and secure the candles. Repeat all the above steps with all 6 pieces.
To form a small oval petal, take 2 squares, bend them diagonally, and connect them into one petal. Then everything is done as in the previous paragraph.
For a sharp type of petal, we also connect it to form a triangle, but you don’t have to bend it to the top. It is enough to fold the parts in half twice and secure the candles.
We recommend reading:
Paper orchid: the best step-by-step instructions with real examples. Master class + video lessons for beginners (100 photo ideas)DIY beaded jewelry - an overview of the most beautiful options (120 photos). Instructions and techniques for making original beaded jewelry
- Hair jewelry - 120 photos of original ideas. Instructions on how to make a beautiful decoration with your own hands (master class + video lesson)
The petals should be collected in such a way that the lower parts of the flower are oval, and the upper parts are sharper.
Using a glue gun, connect all the parts and attach the desired center.
Attach the flower to the felt and then to the hairpin.
List of lessons on making ribbon hairpins
There are a large number of options for making jewelry yourself.
In the form of flowers
One of the simplest, but at the same time beautiful, products is a product made from satin ribbon. To make this you will only need to take:
- The material is made of satin in the main color, the width of which is five centimeters;
- A satin ribbon of some other color, two and a half centimeters wide (the color can be the same, but with some kind of pattern);
- Needle and thread;
- Small light bead;
- Fastening in the form of an automatic hairpin;
- Scissors;
- Glue.
If you have all this, you can start making the product right away.
Step-by-step instruction:
- First, take the material of the main color and cut it into pieces seven centimeters long;
- After this, fold each of the resulting strips at an angle of ninety degrees so that the distance from edge to corner does not differ;
- Thread the finished petal onto a thread with a needle;
- Do the same with the next four petals. The result of such manipulations will be a flower;
- Similar actions need to be done with the material of the main color , only the flower should come out larger;
- Attach the flower to the prepared base. It's easy - just cover a cardboard circle with material of the same color;
- Then make petals of a different type. To do this, take a ribbon with a pattern and cut it into strips five centimeters long. The result will be five parts. Using a soldering iron and a ruler, solder the corner; if you don’t have a tool, just sew it. Next, the excess fabric is trimmed, the main thing is to prevent the rest of the fabric from becoming tight;
- The workpiece is folded along the inside out. The cut corner should be sharp; the greater its sharpness, the smoother the bends of the final petal will be;
- The petal needs to be straightened and the corners bent towards the middle. The edge is fused using a lighter or soldering iron;
- Six petals should come out , which are sewn into bundles of three;
- As soon as each of the details is ready, begin to design the product. Glue the largest size flower in the center, and the smaller one on it. You need to fasten it so that the petals from the top part are located between the petals of the element located below. A bead is glued in the middle of the smaller flower. The finishing touch is the attachment of pointed petals to the side. That's all, now you can decorate your hair with this product!
Step-by-step instructions for making a hairpin from ribbons with your own hands
In the form of a bow
An interesting option are rapeseed bows.
Rapeseed tape has an original structure, which gives the final product a certain effectiveness. Flowers, bows and much more are made from this material. Its main advantage is its density; such decoration will definitely not crumble before your eyes. The hairpin, made of rapeseed, perfectly retains its original shape.
Option #1. Required materials:
- Rapeseed material (length 10 and 22 millimeters), their color should vary;
- Scissors;
- Lighter;
- Transparent thin fishing line;
- Needle;
- Fastening;
- Glue;
- Container for garbage.
Step-by-step instruction:
- Select material according to color scheme. To do this, make a template bow by placing the blanks next to each other. The length of the workpiece is influenced solely by the type of bow - it is short or long;
- When the first step is finished, cut the wide ribbon , not forgetting about a margin of about two millimeters, as well as burning the edges;
- Next, the ends of the workpiece are connected using fishing line and a needle;
- A thread is attached in the center and wrapped several times to form a bow that will become the base;
- Next, you need to take a second tape, ten millimeters wide, and wrap it over the base. After establishing the required length, taking into account a margin of two millimeters, the rest is removed.
- A ribbon is sewn to the bow , tied in the center;
- All that remains is elementary - to hide all kinds of seams and threads with a piece of plain material of the required length, attached with threads. If you want, you can fasten a button or stick a rhinestone in the middle;
- Prepare the base clip directly. Trim it with satin, glue on a bow, and the decoration is ready!
Option #2. Materials:
- Rapeseed material in red, white and blue colors;
- Barrette;
- Beads;
- Lighter;
- Glue gun;
- Needle;
- A thread;
- Scissors.
Step-by-step instruction:
- Cut a strip four centimeters long from the white ribbon , three from the red, and two from the blue; burn the edges with a lighter;
- Bend the blue part and then the red one , inserting a smaller piece into it, then bend the white one, inserting the two previous elements into it;
- Where all the pieces are connected to each other, using a needle and thread, grab the edges of each element. In the same way, make eight more petals, then connect them together in the right places, and glue a circle made of tape to the middle;
- On the back side of the flower, glue the hairpin itself , and decorate the flower and its center with beads.
Rapeseed tape has an original structure, which gives the final product a certain effectiveness
Kanzashi technique
Kanzashi is a very popular Chinese and Japanese hair accessory. Today, this product is very much loved by brides, as well as people whose work features relate to the use of kimonos. In our country, ladies use such jewelry in everyday life, and stores have a truly wide range of such hairpins. But you don’t have to buy them at all!
To make such a thing, you will need:
- Ribbon;
- Tweezers;
- Pins;
- Scissors;
- Candle;
- Needle;
- A thread;
- Glue;
- Mounting base;
- Beads as a design element.
Step-by-step instruction:
- Cut the required number of squares from the material , bend each one in half, and then in half twice more;
- Cut off the corners and singe ; this is not necessary, but in this case the corner will be too high;
- In the same way, make as many petals as required, then connect them with thread or glue;
- Decorate the flower in the middle with rhinestones, beads or buttons , connect it to the base and a stylish and original decoration for your hairstyle is ready!
Kanzashi is a very popular Chinese and Japanese hair accessory.
Reviews from experienced craftsmen
Having delved into the basic principle of how to make a hairpin with your own hands, housewives begin to embody their ideas using polymer clay and satin fabric. This product gains weight and looks quite skillful.
Some people decorate any hairpin with decor. For example, a circle strewn with rhinestones on top. It also looks very nice if the hairpin is decorated with an interesting design, a winter pattern, lines, or dots.
Textures that are used to create hairpins
The variety of textures used is very large, but the main ones can be identified:
- fabric and woven ribbons (lace, satin, guipure, velvet, organza, etc.);
- beads, beads, rhinestones, stones;
- feathers, fur;
- sewing accessories (buttons, hooks, zippers, threads, etc.);
- wooden objects;
- coins and other metal objects;
- polymer clay.
The use of hairpins has no age restrictions. This accessory can be used by both an accomplished middle-aged woman and a preschool-aged child, as evidenced by a significant number of photos of hand-made hairpins for women of different ages and for different occasions - from elegant to business options.
Read here: Polymer jewelry: master class on creating stylish and beautiful jewelry with your own hands (100 photos and videos)
All mothers love to dress up their little beauties. To make your baby look bright and unusual, you can make a beautiful hair clip with your own hands using beads.
A little about materials
It is recommended to choose materials for making hairpins from high-quality raw materials. They can be made of either plastic or metal bases.
To purchase all the components for amateur work, just browse the Internet a little.
Fortunately, in our time there are no restrictions on appearance, so representatives of the fair sex can not limit themselves to skimpy bobby pins or stilettos, but look exactly the way their soul desires.
Master class on making beautiful hairpins from satin ribbons with your own hands
Homemade accessories are a guarantee of originality and exclusivity, because even with the same instructions, different needlewomen produce dissimilar products.
In this master class we will tell and show how to make hairpins from satin ribbons with your own hands with kanzashi flowers. The main thing that is required for manufacturing is accuracy and patience. If you are new to this technique, take a lot of materials to practice and choose the most successful elements.
- Materials for making hairpins with flowers
- Step-by-step assembly instructions
Materials for making hairpins with flowers
To make flowers, prepare a satin ribbon:
- 24 thin cuts of red or brown color, 0.5 cm wide and 6 cm long;
- 24 thin orange cuts 0.5 by 5.5 cm;
- 24 thin lemon-colored cuts 0.5 by 5 cm;
- 24 thin cuts of ivory color 0.5 cm by 4.5 cm;
- 11 squares of lemon shade with a side length of 2.5 cm;
- 8 lemon slices, 2.5 cm wide and 10 cm long.
Also needed:
- 5 strips of golden brocade 1 cm wide and 5 cm long;
- round base made of yellow or white felt 4 cm in diameter;
- wide hug-water lily with golden texture;
- half-bead-ruby of bright color 0.6 cm in diameter;
- hot knife (soldering iron or wood burner).
For those who have never practiced kanzashi, we recommend studying the technology of the subtleties of craftsmanship in this article.
Step-by-step assembly instructions
Prepare 0.5 cm pieces of satin ribbon of different colors and sizes, focusing on the list of accessories. Working with delicate satin involves processing the cut edge; to do this, use a lit candle or lighter. Singe the fabric as quickly and carefully as possible so as not to spoil it with wax or melt it too much.
The selected shades together look harmonious and give the finished flower a beautiful smooth transition from dark to light.
Close each strip into a teardrop shape. Leave the front side outside and the back side inside, singe the combined ends with a lighter and squeeze with your fingers. Since sections of different lengths are initially used, the size of the droplets will gradually decrease.
Start nesting each smaller piece into the larger one. Collect a multi-layer droplet. Heat the satin with a flame again and squeeze to hold all the components together. The resulting drop of satin ribbons will become a petal for a flower - the main decoration of the hairpin.
Make 24 drops for one flower. Accordingly, for a pair of hairpins you need to prepare 48 pieces.
Cut out a round felt base. Use yellow felt that matches the color of the ribbon or white. Glue the first row of drops, consisting of 8 pieces, around the circumference.
Next, apply the second layer. To make the flower look lush, move the petals closer to the center, and also move them relative to the details of the first layer.
Turn the workpiece with the back side facing you and stick the remaining drops, moving them into the spaces between the petals of the top layer.
The bottom of the flower will consist of three layers, modeled from 24 four-layer droplets.
To create the top layer, use lemon squares with a side of 2.5 cm. Scorch all the cuts in the same way. Using the prepared parts, model sharp kanzashi petals. To do this, at the first stage, bend the squares diagonally.
Then bend again. When working with tape, it is convenient to use tweezers. Clamping the resulting triangular blanks in a forced position, close their ends. Sear again to seal the ends.
The resulting petals have an oblong shape, resembling a boat. Cut off the excess tape from the bottom so that the boats become flat.
Make identical petals from 11 prepared squares. Glue them into a flower. Glue a wide hug-lily in the center and insert a ruby into it.
Unravel 1cm wide pieces of gold brocade almost completely to create a fluffy fringe. Leave a few threads at the base intact, and for safety, also burn the unraveled edge so that the fringe does not fall apart.
Distribute five golden pieces evenly around the circumference, dripping glue into the center.
Glue an elegant flower modeled from sharp lemon petals on top.
To make an imitation of leaves, prepare lemon-colored strips 2.5 cm wide and 10 cm long. Bend across the center, clearly aligning the singed opposite ends of the satin ribbon. Next, place the workpiece on the towel, heat the knife blade or soldering iron and move it diagonally. The result will be two parts, one of which will be made in the form of a small bag. It is this part that you will use for further work. Press on top with your fingers.
Glue the leaves to the bottom of the flower so that only the sharp tips peek out. Join the ends of the diamond-shaped blanks in the center.
To make a pair of beautiful hair clips from satin ribbons in the kanzashi style, make two identical flowers with your own hands. The size of the finished product is 10 cm. On the reverse side you can stick a steel alligator clip or a yellow elastic band to make an accessory for creating fashionable hairstyles.
If you need a headband, take a look at these instructions, and here you will find flower hair clips with a different design.
A master class for readers of the online magazine “Women’s Hobbies” was prepared by Svetlana Sorokina. Photo by the author. All MKs on kanzashi are in this section.
Photo of DIY hairpins
Did you like the article?
0