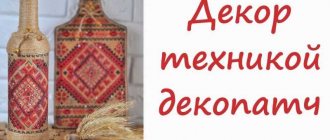
Many people consider champagne to be the best and integral part of the New Year. If you want to truly surprise your guests and add zest to your holiday table setting, then decoupage a bottle of champagne will be a pleasant and enthusiastic surprise for everyone.
The decorative technique of decoupage provides interesting ideas and incredibly effective possibilities.
Seven options for decorating champagne bottles with step-by-step craftsmanship lessons will help you prepare for the New Year without any extra effort.
Mastery Lessons:
- Basic techniques for working with decoupage technique
- Decoupage bottle “Forest Bunnies”
- Master class on decoupage with napkins (New Year's motives)
- Volumetric decoupage of bottles (Happy New Year!)
- Napkin technique decoupage (Snowmen)
- Bottle decor in New Year's style (New Year's chime)
- DIY bottle decoupage for Christmas (Christmas star)
- Decorating a bottle of champagne for the New Year (Santa Claus)
- Decorating a bottle of champagne for the New Year - video
- How to decorate New Year's champagne with your own hands - video
Basic techniques for working with decoupage technique
Background coloring
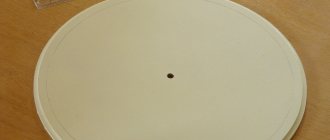
1. Place acrylic paint of the desired color on a plastic plate. Take a foam brush or a piece of regular dish sponge and dip the foam into the paint.
2. Apply paint to a clean, dry, label-free bottle, lightly pressing the foam onto the surface. Let the paint dry for 2 - 3 hours. The paint can be dried with a hair dryer. After use, rinse the brush in running water.
3. You can apply the second and third layers of paint in the same way - on the entire surface of the bottle or on individual parts. Be sure to dry each layer, otherwise you will ruin the whole job.
Gluing motifs (napkins with designs)
1. Cut out the motif you like from a three-layer paper napkin and separate the top layer of the napkin. You can first separate the top layer of the napkin and tear off the excess paper around the design you like.
2. Apply the motif to the painted surface of the bottle. Place glue on a flat synthetic brush, preferably a special glue-varnish for decoupage, but you can also use regular PVA glue, diluting it with water in a ratio of 1:1.
3. Using brush movements from the center to the edges of the motif, glue it to the surface, straightening out the small folds that form on the paper with the brush.
A few words about decoupage
Decoupage is an application of pictures made using technology using paints, glue and varnish
Decoupage is an application of pictures made using a certain technology, using paints, glue and varnish. It has taken its rightful place in the collection of ideas for decorating interior items.
This activity delights adults and children and can become a hobby for life. With the help of simple execution techniques it is possible to create exquisite things and unique gifts for loved ones.
A little imagination, a little patience, plus hard work and a New Year's masterpiece in your hands
In our case, the subject of the design will be a New Year's bottle. Holding this work of art in your hands (I’m not afraid of this word), it’s hard to believe that recently it was a nondescript piece of glass. A little imagination, a little patience, plus hard work and a New Year's masterpiece in your hands.
Decoupage bottle “Forest Bunnies”
You will need:
- Champagne bottle
- White acrylic paint
- Three-layer paper napkin with a bunny pattern
- Glue varnish for decoupage with glitters (sparkles)
- Acrylic contours in gold and pearl colors
- Scissors, foam brush, flat synthetic brush No. 8
- Silk or satin ribbon, matching the color of the picture with bunnies
Lesson – 1 (Decoupage bottles – Bunnies)
1. Free the surface of the bottle from labels and dirt. Dry. Using a foam brush, paint the surface with white acrylic paint. Dry.
2. The paper motif that you will stick on the bottle should be the size of a large label. From the napkin with the desired motif, separate the top layer of paint, from which carefully tear out the picture with your hands, retreating 5 - 7 mm from the contour.
3. Place the picture in the wide part of the bottle in place of the label, then use a flat brush to apply decoupage glue to it, gluing the motif to the surface of the bottle. Dry.
4. Paint individual parts of the design and background with acrylic paint with gold glitter: sparkles give the product a festive look. Dry.
5. Trace the contours of the Christmas tree branches, baskets, bunnies’ clothes and leaves with a gold-colored acrylic outline.
6. On a white background not occupied by the picture, place dots here and there using gold and pearlescent outlines. Dry.
If you wish, instead of dots, you can draw snowflakes or stars with outlines.
7. Complete the decoupage of the champagne bottle and tie a silk ribbon bow at the base of the neck.
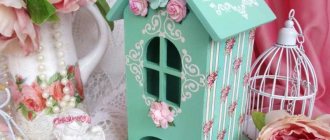
Champagne dressed up as a Christmas tree
Make a New Year's outfit for a bottle using green bias tape. Apply Moment glue to a clean surface and wrap it with ribbons up to the shoulders in the manner of a V-shaped collar.
Wrap the tape around the thick base of the bottle in a circle all the way to the bottom. Decorate an impromptu Christmas tree with beads, bows and snowflakes. You can glue a large star to the neck.
Let your imagination run wild!
Perhaps decoupage in a similar style will help you decorate several bottles for the New Year: in the form of Santa Claus with a cap on his “head”, Snow Maiden!
Decoupage bottles with napkins - master class
You will need:
- Champagne bottle
- White acrylic paint
- Three-layer paper napkin with a pattern of balls, ribbons and fir branches
- Glue varnish for decoupage with glitters (sparkles)
- Acrylic paint with gold glitters (sparkles)
- Scissors, foam brush, flat synthetic brush No. 8
Lesson - 2 (Decoupage bottles - New Year's motifs)
1. Wash the surface of the bottle well and dry it. Use a foam brush to paint the bottle with white acrylic paint and dry it again.
2. Apply a napkin to the bottle and determine the size of the ornament, as in the photo.
3. Cut out the design from the napkin, leaving a white background between its elements. On a surface painted with white paint, the white paper will not be visible, so cutting out even the most complex ornament will not be difficult.
If it is difficult to cut out the entire ornament, cut out individual motifs that will later create a single composition.
Separate the top paint layer from the cut out pictures.
4. Glue the motifs to the surface using decoupage glue and a flat synthetic brush. Then dry.
5. Apply acrylic paint with gold glitter to individual parts of the ornament using a flat synthetic brush.
6. With the same paint, using the tip of a flat synthetic brush, place dots around the ornament - snowflakes and dry.
How else can you decorate a bottle?
Decorating a bottle only with napkins will give a flat, volumeless decor. If you want something more, then barely dry acrylic can be sprinkled with coarse salt or sugar, imitating beautiful fluffy snow. Just first get rid of any black inclusions, if any. Such unwanted contrasting elements will greatly stand out from the design and spoil the image.
Decorate the neck of the champagne with satin ribbons, and if you decide to add paper ribbons, you can curl the free ends with scissors.
The stores also have various accessories for decoration: artificial flowers, plastic fruits and vegetables, lace. They perfectly complement decoupage and make the bottles truly festive and original.
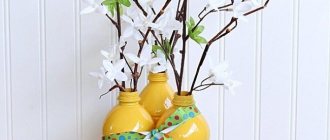
If you have no ideas at all, then you can take a look at what bottles other users are making. Or go to the nearest store and look at napkins, thematic covers of notebooks and books, product and box labels. Such visual training will help you catch inspiration and make beautiful work that will delight your family and guests not only on the holiday table, but also after the holiday, when an empty bottle can be used as a vase.
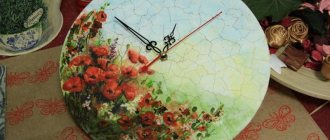
Volumetric decoupage of bottles - step by step
You will need:
- Champagne bottle
- Acrylic paints in white and blue colors
- Acrylic structural paste
- Decoupage card with a pattern of a clock dial, crackers, candies and balls
- Glue varnish for decoupage with glitters
- Acrylic paint with gold glitters
- Sheet of white paper, scissors, foam brush, flat synthetic brush No. 8, palette knife or regular knife, toothpick, pencil
Lesson – 3 (Bottle Decoupage – Happy New Year)
1. Using a foam brush, paint a clean, dry bottle blue and dry.
2. On a piece of paper, draw an oval the size of a large label. Cut out an oval along the contour.
3. Place the paper oval on the surface of the bottle.
4. Apply structural paste along the edges of the template and on the part of the surface around it.
Volumetric decoupage allows you to simulate images and lift elements above the surface.
5. After 5 - 7 minutes, remove the template by carefully prying it off with a toothpick. Dry the composition for 3 - 4 hours.
6. From a decoupage card, cut out the motifs of a watch dial, 1 - 2 crackers, three balls, 2 - 3 candies.
7. Place the cut out motifs inside the blue oval on the bottle to create a composition. Then, after moistening the motifs in water, glue them one by one to the desired places, applying glue to the wrong side of the picture and smoothing it on top with a dry synthetic brush. Dry.
8. Paint the entire surface of the bottle, except for the blue oval with pasted pictures, white with a foam brush and dry.
9. Apply a thin layer of blue paint to the convex part of the decor using a flat synthetic brush and dry.
10. On the clock hands, strips of balls and candies, the “ribs” of the convex part, coated with a flat synthetic structural paste, apply individual strokes of acrylic paint with glitter. Dry.
11. Use a gold acrylic outline to write the inscription “Happy New Year!” and the dots are snowflakes on the surface of the bottle. Decoupage of the bottle is complete.
New Year's decoupage bottle "Snowmen" - napkin technique
You will need:
- Champagne bottle
- Acrylic paints in white and blue colors
- Three-layer paper napkin with drawings of a Christmas tree and a New Year's gift
- Decoupage card or magazine drawing with snowmen
- Glue varnish for decoupage with glitters (sparkles)
- Acrylic paint with gold glitters (sparkles)
- Acrylic contour pearl color
- Scissors, foam brush, flat synthetic brush No. 8, pencil
Lesson - 4 (Bottle Decoupage - Snowmen)
1. Using a foam brush, paint a clean, dry bottle white and dry.
2. Cut out motifs with a Christmas tree and a New Year's gift from a napkin. Cut out three snowmen from decoupage card.
3. Place the snowmen on the surface of the bottle and trace them with a simple pencil.
4. Using a foam brush, paint the surface inside the contours of the snowmen blue, applying the paint as densely as possible, then apply a thinner layer of blue paint around the contours, expanding the boundaries of the contour by about 0.5 - 1 cm. Dry.
5. Place the cut out snowman motifs in a bowl of cold water for 1 - 2 minutes, then carefully remove them from the water and glue them to the places painted blue, trying to ensure that the snowmen fit completely on the blue background.
When you do direct decoupage on glass, remember that the finished product is not subject to active use, but only carries a decorative load.
Apply glue to the wrong side of the motif, then attach the motif to the surface and apply another layer of glue from the center of the motif to its edges. Dry well.
6. Cut out motifs with a Christmas tree and a New Year's gift from a napkin. Separate the top paint layer from the motifs, then glue the motifs in the central part of the bottle just above the snowmen and dry.
7. Apply separate strokes of glitter paint to the sides of the snowmen, the gift bag and the Christmas tree. Dry.
8. Using a pearl outline, draw dots-balls on the Christmas tree. Dry. The creative process in this lesson is completed.
Bottle decor (decoration) in New Year's style
We will need:
- Champagne bottle
- Acrylic paints in white, blue and gold colors
- Three-layer paper napkin with a pattern of bells and a New Year's ornament
- Glue varnish for decoupage with glitters (sparkles)
- Acrylic paint with gold glitters (sparkles)
- Acrylic structural paste
- Acrylic contour pearl color
- A sheet of white paper, scissors, a foam brush, a #8 synthetic flat brush, a pencil, a disposable plastic plate
Lesson - 5 (Bottle Decoupage - New Year's Chime)
1. Bottle decoupage, as in previous lessons, begins with cleaning the surface and washing. Paint a clean, dry bottle white with a foam brush. Dry.
2. On a piece of paper, draw an arch-shaped template the size of a large label and cut it out along the outline.
3. Attach the template to the bottle, apply structural paste around it with a palette knife or knife. After 5 minutes, remove the template by carefully prying it off with a toothpick. Dry for 3 - 4 hours.
4. Paint the surface of the bottle, with the exception of the arch-shaped window, blue with a foam brush and dry.
5. On a plastic plate, mix white and blue paints until a lighter tone is obtained.
Acrylic paints and pastes dry quickly, so immediately after work, close the jars and rinse the tools with water.
6. Using a foam brush, use a tamping motion to apply light blue paint to the part of the bottle covered with the structural paste. And then further, 3 - 5 cm around it, creating a smooth transition from light blue to dark blue. Dry.
7. Cut out the bell motif and ornament. Separate the top paint layer from the cut-out motifs, then stick them into the window in the form of an arch. Dry.
8. Apply separate strokes of acrylic paint with gold glitter to the “ribs” of the part covered with structural paste, as well as to the bells with a flat synthetic brush and dry.
9. Decorate the blue part of the bottle with snowflake dots made with a pearlescent acrylic outline. Dry. The bottle is decoupaged.
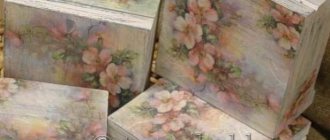
DIY New Year bottle decor for Christmas
You will need:
- Champagne bottle
- Acrylic paints in white, blue and gold colors
- Three-layer paper napkin with poinsettia pattern
- Glue varnish for decoupage with glitters (sparkles)
- Acrylic paint with gold glitters (sparkles)
- Gold acrylic outline
- Sheet of white paper, scissors, foam brush, flat synthetic brush No. 8
Lesson - 6 (Christmas star)
1. Using a foam brush, paint the surface of a clean, dry bottle blue and dry.
2. Cut out several poinsettia motifs from a napkin. Place the motifs on white paper and draw circles around them, leaving about 2mm from the edge of the motif.
3. Carefully cut out circles. Use the resulting holes in a sheet of paper as a stencil: place the circle on the surface of the bottle and, using a foam brush, paint the background inside the circle with white acrylic paint, trying to apply more paint in the center and less paint closer to the edge of the circle. Dry.
4. Separate the top paint layer from the cut-out motifs, then glue the motifs onto white circles of appropriate sizes using a synthetic brush and decoupage glue. Dry the work.
5. Paint the neck of the bottle with gold acrylic paint, and on the “shoulders” of the bottle, draw triangles of different lengths with the tip of a brush, and then paint over them with gold acrylic paint - this will give you a real Christmas star at the top of the bottle. Dry.
6. Apply acrylic paint with glitter to the corners of the rays of the golden star and to the white background around the poinsettias.
7. Decorate the outlines of triangles (star rays) and white circles (New Year’s balls) with lines consisting of dots drawn with a gold acrylic outline.
8. Using the same outline, draw strings for the balls and dry them. The decoupage of the bottle with the design of Christmas stars is finished.
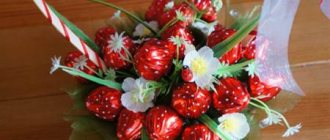
Champagne box
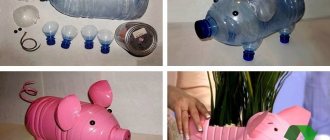
If for some reason you would not like to cover a bottle with a sparkling drink, then try making the following decor. In this option, the champagne will be framed with candies on skewers resembling flowers. But first things first.
To make a packaging bag you will need: champagne, satin ribbon, craft paper, heart-shaped candies, glue gun, foam rubber, wooden skewers, scissors, transparent wrapping paper and a small box.
- First, you need to prepare a box in which, in fact, the bottle and sweets will be placed. If you don’t find a suitable one, you can make it yourself from any box and cover it with paper.
- Take transparent paper and cut it into squares. Now wrap the candies in them, sealing the ends of the paper with a glue gun on the bottom of the candy.
- Once all the candies are wrapped, you can start gluing them onto the skewers. Try to make sure that all the candies are holding up well.
- Cut rectangles from craft paper a little longer than the height of the skewers and about 8-10 cm wide. Wrap each candy on a stick with paper and secure the ends.
- Cut the foam to fit the bottom of the box and place it in it. For greater stability, you can cut a circle in the center of the foam rubber with a diameter equal to the bottom of the bottle. Place champagne and insert skewers with sweets. Flatten the ends of the craft paper to make the gift look lush.
- At the end, tie a satin ribbon on the box and tie a beautiful bow. This is a great example of how to decorate a champagne bottle with candy without using glue.
Decorating a bottle of champagne with Santa Claus for the New Year
You will need:
- Champagne bottle
- Acrylic paints blue and white
- Three-layer paper napkin with a pattern of Santa Claus
- Glue varnish for decoupage with glitters (sparkles)
- Acrylic paint with gold glitters (sparkles)
- Acrylic contour pearl color
- Silver foil paper
- Figured hole punch “snowflake”, scissors, foam brush, flat synthetic brush No. 8
Lesson - 7 (Santa Claus)
1. Make the surface of the bottle clean and dry. Using a foam brush, paint the surface of the bottle blue and dry.
2. Paint the part of the bottle on which the picture will be placed with white acrylic paint, applying the paint as densely as possible in the center, and in a thin layer closer to the edges. This is so that the picture from a thin napkin does not disappear on a dark background after gluing.
3. Cut out the desired motif from a paper napkin and separate the top paint layer.
To glue the napkin you need very little glue.
4. Attach the motif to the white painted part of the bottle and glue using decoupage glue and a flat synthetic brush. Dry.
5. Apply acrylic paint with gold glitter to individual parts of the motif. Dry.
6. Using a shaped hole punch from foil paper, cut out snowflakes and stick around the glued pattern on a white background.
7. On a blue background not occupied by the picture, draw dots, stars or snowflakes here and there with a pearl outline. Dry.
Keeping New Year's traditions
Can you imagine a New Year's table without a bottle of champagne? May those who do not drink alcohol forgive us, but the absence of sparkling wine in the characteristic green bottle for the New Year is equivalent to the fact that not everything in the house is ready for the celebration.
Since the 1960s, the tradition of clinking glasses of champagne during the chiming clock on the night of December 31st has become a tradition among our compatriots.
Get ready for an extraordinary serving of fizz on your holiday table. Uncorking a bottle of sparkling and invigorating drink in decoupage style and just like that is not the same thing. Breathing a “second” life into a thing - this is the highlight of the “decoupage” technique. The word is French, but they came up with the idea of decorating household utensils back in the distant Middle Ages, and in Germany. Today, ancient technology is taking on unprecedented proportions: people of all ages are “infected” with it. The original design is expressed in different styles: from Provence to military and ethno. We are sure that you will not resist trying champagne decor for the New Year, when everyone gives each other gifts. YOURS can become the most original, New Year's and sincere!