Penguins are funny animals that are loved by children thanks to popular cartoons. A bright paper penguin applique will help you spend quality time with your child. This will require simple materials and a little time. The baby can use the finished craft for games. And also a picture with your favorite hero will become an element of the decor of the children's room. In order not to waste time creating an image of a penguin, you can print a ready-made template.
- How to make penguin appliques
- Required materials and tools
- Options with instructions on what can be done
- Application of circles and semicircles
- Penguin applications made from colored paper
- Volume craft
- Templates for printing and cutting
- Assembling geometric shapes with children
- Tips for working on applications with preschoolers
How to make penguin appliques
The penguin applique is done in different ways. The technology depends on the age of the children. In the nursery group, preschoolers work individually. At 3-4 years old, spatial thinking and precision of movements are still poorly developed. That's why children need help.
The older group consists of children aged 5-6 years. They can now independently lay out the elements on the sheet and glue them. Some preschoolers can already cut out simple elements. For clarity, children are shown a sample of what a finished paper penguin applique looks like.
Required materials and tools
Supplies for paper art are stored in a box or special organizer. The table before work is covered with oilcloth. Wet wipes will come in handy for your hands.
Required accessories:
- Paper of different colors and textures.
- Cardboard is thick, corrugated.
- Scissors, stationery knife.
- Cutting board.
- Pencil, ruler.
- Colored pencils, markers, paints, plasticine.
- Decorative elements for decoration.
Work with cutting tools should only be carried out under adult supervision. The use of a stationery knife by children is not allowed. All necessary manipulations are performed only by adults.
Master class: funny penguin from a plastic bottle
In order to make an original garden penguin figurine, you will need the following tools and materials:
- 2 liter plastic bottle;
- acrylic paints (black, white, yellow);
- toy eyes;
- black cardboard;
- glue.
So, let's look at how to make a penguin from a plastic bottle. Let's take a transparent container, wash it and remove paper labels from it. Now let's pour black paint into it and close the bottle with a lid. Lightly shake the plastic container so that the paint gets onto all the walls of the container. After this, open the bottle and leave it alone for a while.
Options with instructions on what can be done
Various techniques are used for crafts. It could be:
- A simple penguin applique made from colored paper using a template.
- Picture of geometric shapes.
- Volumetric crafts.
Volumetric crafts using cardboard tubes allow you to create different characters for children's board games.
Possible options for children's applications:
- penguin against a snowy landscape;
- friendly family;
- popular cartoon characters Madagascar.
- figures in the form of three-dimensional appliqués.
Application of circles and semicircles
To work, take colored paper, scissors, compasses, and glue. If it is still difficult for your child to cut out on their own, an adult will need to prepare the parts in advance.
Sequence of work:
- Make blanks: 1 white circle with a diameter of 10 cm (body), 1 black circle with a diameter of 5 cm (back), 5 black circles of 3 cm each (legs, wings, head), 1 orange circle for the beak.
- Fold all the circles in half.
- Cut off a little black circle measuring 5 cm to create an elongated part. Glue it onto the white circle so that the fold lines match.
- On the bent head blank, cut off one corner. Glue in a beak from a folded orange circle on the pointed side. Glue the head to the body.
- Eyes can be drawn, made from colored paper, or glued on ready-made decor.
- Make legs and wings from the remaining elements.
Penguin applications made from colored paper
You can make a slightly sad bird under an umbrella in a puddle if you print out the finished template and transfer the drawing to colored paper.
If you remove the umbrella and add a snowy landscape with snowflakes, you will get an applique of a penguin on an ice floe.
Progress:
- Print the template (or draw it).
- Cut out colored parts.
- Collect the picture in the following sequence: puddle, body, white part for the abdomen, paws, beak, eyes, umbrella, raindrops.
Volume craft
A picture made from colored paper can be not only flat. It can also be voluminous. In this case, they do not use a base; the elements are simply glued together. You can make a whole family this way.
Making a craft:
- Cut a strip 5-6 cm wide along the length of a black A4 sheet. Cut 5 cm from the edge of the strip, bend the resulting part in half.
- Glue the edges of the strip, make 2 folds so that the figure stands stably on the table.
- Cut wings from the folded black piece. Round a square with a side of 5 cm on one side to make an abdomen.
- Cut out blanks for eyes and legs.
- Glue all the parts onto the body.
Templates for printing and cutting
The convenience of ready-made templates is that no time is wasted on creating an image. It is enough to cut out the stencil and transfer the contours to colored paper.
Assembling geometric shapes with children
Modeling from geometric shapes is used to develop children's imagination, spatial, and logical thinking.
You can make a family portrait like this from figures of different shapes. While creating characters, children will simultaneously learn the names of geometric shapes.
You can make a whole set of different geometric shapes from colored cardboard and construct models of varying complexity from them. For example, this option may appeal to younger students.
How to make a penguin from a plastic bottle?
It is necessary to cut off the neck of the plastic bottle so that the narrowing residue remains intact. Now the penguin's body is almost ready.
To make a penguin head, you need to take a bottle of the same size. A bottle of 1, 1.5 al2 liters is suitable for this. You need to cut it into two parts so that the upper part has a small margin, for a tighter connection of the parts.
Penguins will not have any problems with their paws, since all plastic bottles have a wavy bottom.
Sometimes all the parts for the craft will be ready, all that remains is to fasten them together. A glue gun is ideal for these purposes, but we need to do this very carefully so as not to melt the plastic blanks. If you don’t have such glue at hand, you can connect them as follows: you need to make holes with a hot nail in the places where you need it, and stretch the wire through them. Unfortunately, this option will be illiterate and very beautiful.
We give the penguin a natural look, for which we need to paint it. Whoever needs this will need paint in three colors - red (for the paws and beak), white and black. For painting a penguin, acrylic paint is best, as it will hold up well on the penguin both under the scorching sun and in the pouring rain. In order for the paint to apply well and evenly, the surface must be primed.
To beautifully draw a penguin breast, we will make a blank from paper, which we attach to the blank and outline with a marker.
We paint over the scotoma that we drew with a marker with white paint.
The body and legs need to be painted black.
You and I will paint the hat red. Although here you can use any other, for example egg, blue, green, etc.
You can decorate the cap in any way, for example, simply by placing dots in a different color.
To please someone's beak, you need to pick up something sharp. One of the simplest options is a fully sharpened wooden peg. Or you can simply paint it with paint. We also draw eyes.
(as soon as the paint dries, the craft needs to be opened with several layers of varnish.
But that’s not all. For a hat, it’s tedious to make a pom-pom. You will need an exceptionally thick knitting thread. See the photo for how to do this.
And the swan song of the decorative element is the scarf. We take any strip of fabric and wrap it wherever the penguin’s eyes look.
To give the scarf more naturalness, we make serifs at the end.
Let's say how penguins from plastic bottles turn out to be very light; they need to be somehow fixed in place. They can be nailed or tied, or they can be simply weighted. To do this, you can pour sand or small pebbles inside the bottle.
Bottle penguins are cute and simple crafts for the garden and kids. You can create interesting and cute penguins with your own hands from plastic bottles. Also, a child will be able to participate in their creation, because they are very easy to make. On the site you may have already seen a master class on creating penguins from plastic bottles and plastic film, if you haven’t seen it, I advise you to watch it. Bottle penguins can be used as garden figures or as toys for a child. Penguins can decorate your garden or your terrace, as well as your playground. Be sure to create cute penguins from bottles, in the process you will get a lot of pleasure from the work done, as well as a decoration for your garden. Penguins look very beautiful in the snow and with their whole appearance they remind us of the imminent arrival of the New Year. Let's start making them.
How to make a penguin from a bottle:
To make a penguin we take a plastic bottle. The bottle will determine what kind of little penguin you get. If the bottle is pot-bellied, then the penguin will turn out to be pot-bellied, and if it is thin, then the penguin will be thin. The bottle penguin has a very lightweight design and it will take you two bottles to make one craft.
We take the bottles, remove the labels, wash them and dry them well. We cut off the base of the bottle; we don’t need the top. How much to cut, see for yourself, it is better to cut off more and measure, if there is a lot you can cut off the excess. These are about two blanks for making a penguin you should get.
Next we need to glue these halves together. We use glue at your discretion, I work with a heat gun or glue for a second. Now we are starting to create the penguin, this is the most interesting stage. First, we need to paint the resulting blank with white paint. The most convenient way is to take paint in a can and spray it on the workpiece. If you don’t have such paint, it doesn’t matter, you can paint it with regular acrylic paint and a brush.
When the paint dries, we begin to draw the penguin. First, we determine where our head and body will be and begin drawing the eyes and beak. It is best to draw the outlines with a pencil to make drawing more convenient. We draw bright clothes so that the penguin turns out bright and beautiful.
When the little penguins are drawn, you and I will also make a pompom for them. I don’t think it’s a secret to anyone how to make a pompom. To do this, we make two rings from cardboard and put them together. Then we cut the threads along the outer circumference. We insert one part of the scissors into the gap formed by two cardboard circles and cut the threads in a circle without touching the layer of threads along the inner circumference. We don't remove cardboard! Now take a thread, insert it between two pieces of cardboard and tighten it. Uncut threads along the inner circumference are intercepted and collected into one “sheaf”. Now remove the cardboard and straighten the threads. It turns out to be such a funny pom-pom. That's it, a funny penguin made from bottles. We thank the author for the material.
We continue to contribute to preserving the environment by using discarded plastic bottles as materials for crafts. This time we offer you the idea of making a charming penguin with your own hands to create a beautiful winter decoration at home, in the garden or in the country.
Below are two options for implementing the idea for your consideration. You can choose either of them or both at once, depending on your desire. If you have children, they will become excellent helpers in the process of making products from plastic bottles, since this is a very simple job that does not require special skills (especially option 2).
You are ready? – Then go ahead to the photo master class!
Tips for working on applications with preschoolers
Application is one of the most popular methods for the development of preschool children in kindergartens. Children's development occurs gradually and this must be taken into account when conducting classes with different age groups.
Basic operating principles:
- A game form is used to teach children. Otherwise, children quickly lose interest. In younger groups, the creative process is accompanied by an interesting story.
- Co-creation with an adult is an important moment for creating crafts.
- The older a child gets, the more skillful he is. Children begin to think spatially and make figures based on patterns. They learn to cut out and glue pieces onto a piece of paper. These features are taken into account when choosing manufacturing methods and the complexity of the craft.
- It is important to allow the preschooler to do the craft independently and help if necessary.
Application is both a creative and educational activity. Children are always enthusiastically engaged in creating color pictures.
Penguin is a bright image that consists of simple elements. This craft is available for both younger and older preschoolers. A carefully executed picture can be an addition to children's games or serve as a pleasant holiday gift.
Making a large penguin from a 10-liter plastic eggplant: necessary tools and materials
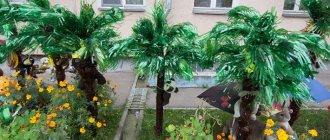
If you want to decorate your garden, make beautiful crafts from large plastic bottles. Penguins from large containers turn out to be very interesting. Such products will decorate a stone or alpine slide and fit perfectly into any landscape. So, let's look at how to make a penguin from plastic bottles. To make one large bird, you will need two plastic containers, one with a capacity of 10 liters, and the second with a capacity of 1.5 liters. You also need to prepare a sharp knife, acrylic paints (black, white and red), sand to weigh down the bottle and a wooden peg for the beak.
