A cluttered closet negatively affects everyone. Necessary things get lost, searching for them takes time and makes you nervous. It’s impossible to find the right item, your mood deteriorates, and this affects your work and relationships with people. In such a situation, an organizer will help. For storing any small items, an organizer is the best solution.
Previously, women's underwear was of a respectable size, it was easy to store it in the closet and it was difficult not to notice it there. Now the underwear is miniature, in the chest of drawers, no matter how you fold it, it gets mixed up, hooks cling to each other, the straps intertwine. That's why we came up with laundry organizers. Don't buy them from the store; they are expensive and may not be the right size for your cabinets. your own underwear organizer .
Cardboard box organizer
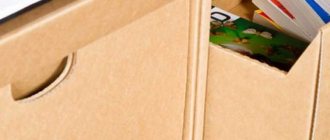
How to make an organizer? The classic version of a DIY organizer is made from a cardboard box.
Step-by-step instruction.
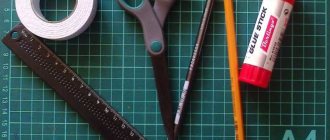
For this you will need:
- cardboard box;
- ruler;
- pen;
- glue;
- scissors;
- paper or fabric for pasting.
First you need to measure your dresser drawers. Then choose an appropriate box that is slightly smaller than the internal dimensions of the box, so that the box fits easily and does not break. If you don’t find the box you need, then it’s easy to make it from large pieces of cardboard. You can ask for a box at any nearby store. Pay attention to the quality of the cardboard so that it is dense but cuts well.
When the box is selected and easily fits in the box, you need to cover it with cloth or paper. The fabric is more durable and the organizer will last a long time. We glue the box on all sides. It is advisable to choose fabric or paper of light colors, but not easily stained.
Next step : think about what things you will store here, what size cells you need to make for them and how many of them you will get in this box.
Mark the box. Try on what size partitions you need; their height should be 1 cm below the box. Cover them with the same cloth or paper. Make slits in the transverse partitions, leaving 1-1.5 cm to the end of the strip. Assemble the inside of the organizer. First, install the longitudinal partitions and glue them to the base of the box, put the transverse partitions on them.
Insert the organizer into place , lay out your underwear. Place one item in each cell. Place the cups of the bras one inside the other, place the straps inside, place the bra on the edge. Roll panties and socks into neat rolls and insert them into the cell.
Now in a matter of seconds you will find your item. To store bodysuits and T-shirts, you need to make another organizer with large cells.
What you need to make your own from fabric
To make a sock organizer with your own hands, you will need the following materials and tools:
- cardboard boxes or large sheets of cardboard;
- fabric (can be shreds);
- glue, it is better to use a silicone gun;
- wallpaper or sheets from magazines to decorate the organizer;
- ruler and pencil to measure and mark everything exactly.
You can make your own organizer for tights from a shoe box. Boxes from household appliances are also suitable. The main thing is to have a base in which the laundry compartments will then be installed.
You may be interested in this: Patterning and sewing beautiful clothes for small dogs
The number and size of cells are prepared as desired. You can store one thing in each compartment, or arrange them by color. For example, white panties will be stored in one cell, black socks in the second, etc. For small children, it is better to put one thing in each cell, so that it is more convenient for the baby to take clean laundry on his own, without outside help.
Fabric organizer
Anyone who knows how and loves to sew can make an organizer out of fabric.
You will need:
- thick colored fabric;
- padding polyester;
- threads, scissors;
- centimeter.
Cut two rectangles from thick fabric slightly smaller than the bottom of the box and one rectangle from padding polyester. This will be the bottom. Now, in accordance with its dimensions, cut out the side panels from fabric and padding polyester. Cut the fabric to such a height that you can fold it in half, insert the filling inside and you will get double sides. We also sew long longitudinal partitions. First, fold the cut out rectangles with the front side inward, stitch along the sides, insert the filler, turn it inside out, stitch around the perimeter.
Then we measure what size the small transverse partitions will be and sew them according to the same principle. The edges of all partitions must be edged with braid.
We sew the bottom on three sides , turn it inside out, insert the filling, and sew around the perimeter.
We sew on the sides, then the longitudinal partitions, using your hands. We sew small transverse partitions by hand between the longitudinal partitions. We hand-edge the corners and outer edges with braid.
Fabric hanging organizer
To unload the drawers in the closet , you can make a hanging organizer from fabric. You need to take colored thick fabric of any size. Mark on it where the pockets will be. Then, along the marked lines, sew strips of 12-15 cm onto it.
Before sewing on the stripes, edge the top edge with braid or contrasting fabric. We sew the strips onto the fabric on three sides, leaving the top edged edge free. Sew the strips crosswise to create pockets. Cover the entire product with braid, throw the top edge over a regular clothes hanger and stitch.
Now you can hang it inside the closet next to your clothes. This organizer can be used in the hallway to store small items: mittens, ribbons, comb. Can be hung on the bathroom wall to store tubes of creams, pastes, and body care products.
Advice . If you plan to use it in the bathroom, then it is better to make it from transparent waterproof materials.
A hanging organizer is also needed in the kitchen. You can only change the size of the pockets according to the size of your kitchen utensils.
Ways to create organizers without boxes
An organizer for underwear in the form of hexagons - honeycombs - . To do this, you need to cut out as many hexagons from thick cardboard as will fit on the bottom of the chest of drawers. Then cut strips of cardboard twice as high as the sides of the box. Fold the strips in half. If the double strip is higher than the sides, then the excess must be cut off. Place hexagons on the bottom of the box. Lay the strips around them, fixing them with glue to form hexagonal cells similar to honeycombs.
There are other options for organizers in the chest of drawers. As cells, you can use identical empty plastic jars, which can be glued to a cardboard base so that the jars do not move, and place the entire structure in a box.
How to make an organizer for absent-minded people . People often leave the house in a hurry and then remember that they forgot to take important and necessary little things. We have to go back. In such a situation, an organizer that can be hung on the handle of the front door will help. Keys, glasses, business cards are placed in his pockets. Walking past the front door and holding its handle, no one will forget these little things when they see them in their pocket.
Instructions:
- What you need is thick fabric, braid, bias tape, and a plastic folder.
- Product size 13x25 cm.
- Cut out two parts.
- We make pockets, cut out two rectangles and fold them in half, it turns out to be 13x10 cm. We sew them, turn them inside out.
- The second pocket is 13x18 cm, we sew it in the same way.
- We make a back pocket 12x28 cm, fold it in half and sew it too.
- We assemble the organizer and put a plastic base inside so that it does not lose its shape.
- We sew all the parts together with the braid to make a loop, and hang our product on the handle of the front door.
- We process the edges around the perimeter with bias tape.
When preparing to leave, we put all the little things in our pockets in advance; when we leave, we will no longer be able to forget them when we take hold of the door handle.
To maintain a good, friendly mood in the family, order in the house, in the closet, in all rooms . A little ingenuity, imagination, time and order will be restored, thanks to such a little thing as a DIY organizer out of the box.
Let's not leave chaos a chance!
Linen house made of cardboard
You can buy a ready-made laundry organizer in a store, but it’s much nicer and more creative to make it yourself. In addition, this is a less expensive way to obtain a case.
Boxes for storing linen can be textile or cardboard. This is an individual preference of each individual person.
A simple master class on making an organizer for underwear from cardboard will inspire you to create this storage unit.
To create the product we will need any boxes. This could be packaging for shoes, household appliances or toys.
The size of the future linen chest depends on the place where it will be located. Based on this, we choose a suitable box or glue it ourselves.
Also for work you will need:
- Paper for decorating the box: old wallpaper, newspapers, pages of a music book, sheets from glossy magazines, colored paper;
- Long ruler. It is more convenient to use than a short-length tool;
- Brush and PVA glue;
- Stapler with staples;
- Simple pencil;
- A utility knife or sharp scissors.
Related article: DIY Christmas garlands - 39 ideas
Let's start tinkering. First, let's think about how many things will be stored in this box. The number of cells into which we will divide the organizer depends on this.
Based on the size of the cabinet where the linen chest will be stored, we determine the height of the box. Measure out what you need and trim off the excess with scissors.
Don't throw away the rest of the box. They are useful for making partitions. The lid will also serve this purpose. The optimal cell size is 7x7 cm or 8x8 cm. Based on these data, we mark the box and cut out blanks for the walls.
We decorate the details at our discretion. A box covered with old newspaper clippings or sheets of music will look impressive. For a classic, simple design, you can choose plain wallpaper.
The inside of the box itself is glued to match the partitions. It is better to choose wear-resistant paper for decoration. A bright and contrasting design with several colors and paper textures will look interesting and unusual. It is better to start work from the sides and finish with the bottom.
We decorate the outer side of the organizer with scrap paper, fabric or thick packaging material. Small allowances and folds made from paper of a different quality and color look beautiful.
We assemble a grid from blanks for cells. To do this, we make cuts on the parts to the middle of the height and connect them as shown in the photo.
We insert the grille into the box and secure it with a stapler or glue. The product is ready!
The video will help answer the questions that arise when making a linen organizer with your own hands.


