Today it is difficult to answer the question of who and when first began to use plants to decorate the house. According to archaeological excavations, the first flower pots appeared in China about five thousand years ago. Apparently the first placement of plants in houses dates back to this period.
The second surge of interest in green decoration of apartments dates back to the end of the 16th century - the era of colonial conquests. Along with spices, precious metals and stones, exotic fruits and flowers began to reach Europe.
Greenhouses began to appear at the courts of royalty and representatives of the highest aristocracy. At first, only fruit trees were located there, and then decorative flowers and plants began to appear. Some plants that the owners especially liked received a “registration” in the bedrooms and dining rooms of nobles and kings.
Since then, indoor plants have become an integral part of interior design, not only of garden plots, but of city apartments.
DIY bonsai
The obvious advantage of beads and similar materials is that they are always available and inexpensive, and also allow you to create literally any objects in different colors. You can even make a whole garden of dwarf trees!
If you are wondering how to make a beaded bonsai tree with your own hands, use the numerous tips on the Internet, in craft magazines, or the instructions below.
Beaded branches for bonsai
The base or frame of any bonsai is made of wire, which is tightly wrapped around the top with thread or covered with tape. The stability of the structure is ensured by a container filled with hardened gypsum mixture.
Thin leaves and inflorescences of bonsai are woven from glass beads, the color of which depends on the type of tree. For example, various shades of green are suitable for pine trees, yellow and red tones are inherent in maples, pinkish colors are in the lead in sakura, white and pink notes are in chestnut flowers, and brown and gold tones are in the catkins of Russian birches.
However, for each species, use a leaf weaving pattern specific only to them, and the method of creating a tree as a whole is common to all.
Those who are planning to make a beaded bonsai with their own hands for the first time should first use simple weaving patterns for beginners.
The looped method of weaving branches is the simplest, but suitable for creating a luxurious tree crown, and is suitable for beginners.
In addition, it would not be amiss to attend a master class on beaded bonsai or view it on the Internet, where you can learn the basics of creation and technical techniques:
- prepare a thin wire 45 cm long and string 8 beads on it,
- move the beads to the center and fix them in the shape of a loop,
- repeat several times, making a wire loop from each row of beads,
- there should be 6-10 loops on the branch, and the remaining wire is straightened and shortened in length by 10 cm,
- As a result, the top turns out to be fluffy, thanks to the connection and twisting of the ends.
In total, the composition should contain 50-200 miniature branches in which parts of the tree are connected together (branches, shoots, twigs).
Don't forget about the formation of the tops of the branches, which each of them has. To do this, you need to twist three blanks together, and then add the remaining elements to them.
In order for the resulting frames to take on a more believable and aesthetic appearance, you need to wrap them with a special tape or strong threads, this will smooth out the relief outlines and make the branches more elastic.
In addition, in the process of creating branches, you can pay attention to the shape of the knots, the bends and straightening of the leaves. Each branch needs to be given special attention so that it comes to life and sparkles with color in the sun. The instructions will tell you in more detail how to make bonsai branches correctly.
Materials
To make one bonsai you will need the following materials:
- copper wire or special wire for decorative work (thickness - 35 mm) for the trunk and branches;
- beads - brown and green, you can collect several colors to create shades and tints on the “leaves” and “branches”;
- glue for plastic (it’s better to use “superglue”);
- threads for tying, ordinary cotton;
- small scissors;
- decorative details to choose from.
Instructions: how to make branches
Any instructions on how to properly make a bonsai, as a rule, contain the following recommendations. Step-by-step implementation of all points can guarantee a successful result even for those who are not at all confident in their abilities. Everything will work out!
We proceed as follows:
- Take a wire (about 50 cm) and put 8 beads on it.
- Make a loop and twist it 2 turns.
- We create a loop from the other edge, having previously also strung 8 beads onto it.
- Then you will need a couple more loops. The result should be 8 loops with 8 beads each.
- To form a bud, you can twist the two ends of the wire together. Leave the ends approximately 10 cm long, trim off the excess.
This way we get a tree leaf. You can make about 100-150 of these leaves. Then we continue to form the tree:
- We combine the leaves into one large bunch of 3 buds, they need to be twisted together. Important: when forming a branch, we connect the bundles by tying them with threads. This will be the base of the branches.
- Using the same method, we create about 30-50 buds.
- Connect the resulting branches in twos, wrapping them with threads.
- We attach all the bundles to the main large branch.
When forming a tree, you can refer to photos of bonsai trees on the Internet to adjust your actions and get additional inspiration.
The birth of bonsai
Detailed instructions with step-by-step photos will help you create a beaded bonsai with your own hands. Before doing the work, select a suitable sketch or draw it yourself. Take a look at the variety of forms traditional Japanese art offers:
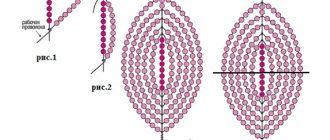
Having decided on the style of the miniature, you can start working. First, form the branches according to the pattern described above. Form a loop of 8 beads on the bead wire. Their number can be arbitrary, it depends solely on your imagination. Place the beads again on the free end and form the next loop. There should be a total of 8 green loops at the top of the branch. Twist the ends of the wire and shorten the length to 10 cm using wire cutters.
Related article: Master class on beaded daisies: weaving pattern for beginners with photos and videos
To create a bonsai you will need at least 150 of these branches. Form them into larger branches by connecting bunches of three. Make branches according to the chosen sketch.
After connecting the wire pieces, wrap the surface with floral tape or yarn. You should end up with several large branches that should be tied to the trunk using thick wire.
The creation of a miniature does not end there.
Forming the crown
We have already made branches for the bonsai tree. Then you will need another pile of branches.
To do this, we create a similar branch and connect the bundles on it, simultaneously weaving a wire 12-15 cm long into their thicket. Having wrapped a thread around the base of this large bundle, we attach 3 branches (each of 2 bundles, respectively).
As a result, we should have 4 branches on one branch. We make the third batch of branches with another bunch - now there will be 5 branches.
The final number of branches and the splendor of the “crown” depend on your taste and capabilities, initial plan and imagination.
Connecting the tree
Having made all the branches, we can form the tree itself. Here we need a weaving diagram, which shows how the branches of different batches are connected. First, the first batch is attached to the “main” wire of the barrel, then the second and third batch are connected.
All this is wrapped together with thread. The remaining ends of the wire can simply be bent and hidden.
Planting a tree in a pot
A living plant requires a container of soil. We can make a complete imitation of a bonsai - for this we will need a vessel that can keep our work in its original state for many years:
- Prepare a plaster solution and pour it into a mold previously covered with cling film.
- Place the wood in the solution and keep it until the composition dries completely.
- While the mass is still hardened, you can draw a match along the base of the trunk in plaster and draw lines of roots and bark.
- After the plaster has dried and hardened, you can paint the trunk with brown paints - watercolors, acrylics. Tip: You can coat the trunk with white paint first, which will create an interesting bark effect once the color is applied later.
- A dry brush can be used to apply textured strokes.
- The stand itself can be painted black or red and varnished.
As a result, we should get a miniature in the oriental style, where even the pot corresponds to the aesthetic canon of antiquity.
Assembly and decoration
Now you need to root the bonsai and add decorations to it. A small master class with photos will help you with this.
For planting, you can use either a traditional low rectangular pot or create a small island made of alabaster.
To make an island, select a container of the appropriate size and line the bottom with a plastic bag. Dilute the alabaster, place the base of the tree in a pot or mold and fill with the solution. Hold the bonsai until the plaster sets. Remove the miniature from the mold.
Now it's time to work on the barrel. To do this, mix alabaster with PVA glue and apply the paste to the trunk and branches. Using a wooden skewer, shape the bark by making small indentations.
Leave the trunk until completely dry. As a result, it should look like this:
To paint the trunk, use gouache or acrylic paints. Apply darker colors into the cracks and apply a lighter shade on top. Walk a slightly damp cloth over the surface, as if wiping off the paint. Paint the island in the desired shade, add decor and varnish. Not only will it add durability and make the miniature easier to care for, but it will also make the colors come to life and shine.
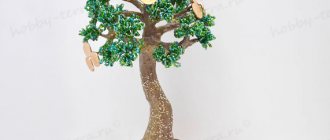
The beaded bonsai is ready! It will organically fit into the interior of your home, adding a touch of sophistication and sophistication to it, and can also be an excellent gift for a loved one.
Related article: How to make an ottoman from plastic bottles with your own hands
You can see design ideas below:
Typical schemes for work - your choice
Even if you have virtually no experience working with such material, it’s okay. Today there is a large selection of simple weaving patterns for beginners.
Industrial vacuum pumpDIY stencils of beautiful snowflakes from A4 paper
- DIY paper crown: ideas, templates and tips on how to make a real crown (video + 130 photos)
There are interesting master classes and video lessons. And the decor style is up to you – you don’t have to stick to the classics.
We hope that our step-by-step tree making with a description of the entire work cycle will help you create an elegant and unique beaded plant. Let it delight you and your surroundings with its beauty and bring good luck to your home or work space!
From the history of beads
Modern craftswomen can create miniatures from various materials, both natural and synthetic, but most often the choice is made with beads. Why? The answer is very simple - tiny beads can stand the test of time and not lose their decorative value. Archaeological excavations testify to this.
Beads were invented by ancient Egyptian craftsmen. They were the first to reveal the secret of glass making and create small beads. The ancestor differed from modern material in its turbidity, uneven surface, and dull colors. However, the green bead discovered by Egyptologists has not lost its appearance, although according to scientists, it is already more than 5.5 thousand years old! It was the Egyptians who contributed to the creation of crafts and the development of beadwork as an independent form of creativity. They invented the netting technique, which made it possible to decorate crafts without a base.
Related article: Wood burning patterns: beautiful and simple patterns for beginners
Modern material is produced everywhere, but the main centers specializing in the production of quality glass are Czech Bohemia, Italy and Japan. When purchasing beads from these manufacturers, you can rest assured of their quality. The Japanese not only mastered the creation of glass beads to perfection, but also played with their shape. It can be either simple or corrugated, or have complex geometric shapes - cubic, teardrop-shaped, triangular, curved (magatama).
When choosing a material, know that its number is higher, the smaller the bead itself. And for the work to be accurate, the tool must be selected in accordance with the number.
Photo of DIY beaded bonsai
How to make a three-dimensional paper house: step-by-step master class and instructions for making a doll and toy house (155 photos + video)Making peony flowers from corrugated paper - a guide for beginners and a step-by-step master class on how to make a flower with your own hands
How to make a beautiful tree of happiness with your own hands: step-by-step master class for beginners (100 photos + video tutorials)
How to make a beautiful lampshade with your own hands: simple ideas for table and floor lamps (125 photos + video)How to make polymer clay at home: DIY master class (125 photos + video)
How to make a paper hat with your own hands - templates, design ideas and tips for those who are making a hat for the first time
