Kristina Zolotareva creates collages for Vogue Ukraine and ArtHuss publishing house. She took a short course in the Illustration Workshop at the London College of Art, but is sure that observation and non-stop development of visual taste are more important than diplomas.
Christina told SKVOT where the art collage came from and how to make the first project.
Nowadays, everything is called collage: from boringly layered photographs in a school album to mood boards and “wish cards.” But an artistic collage is more than just an assemblage of images. The idea is primary here. When the end result can say more than the original images. When new meanings and ideas pour out of a picture - and for everyone, their own.
What you need for a DIY photo collage
If you prefer to do your work the “old fashioned way” – i.e. pasting photos by hand - expect a lot of headaches before you achieve results. Any mistake - and the project can be ruined, along with the photographs dear to your heart. Before you make a photo collage with your own hands, you need to plan everything well in advance.
Choice of shape and dimensions
Immediately think about how you want to use this collage. Hang it on the wall? Then carefully select a place and measure it - these will be the parameters of the final work. Gift to friends? Go and make sure there is adequate space in their room. Do you make it to order? Find out the exact shape and dimensions from the customer.
Choosing the theme of the composition
Go through your photo archives and sort the pictures in advance by time, place or mood. Choose one common idea that will unite all the images: one person, some event, a certain time of year. A photo collage made with your own hands must have not only decent execution, but also an idea.
Selecting Photos
For overall integrity, it is advisable to take photos of the same color scheme and similar mood. However, playing with contrasts sometimes gives unexpectedly pleasant results. Here we can only advise you to experiment.
Choosing a manufacturing method
The manual production method is always the same - sticking photographs onto a base - but there can be hundreds of variations. You can use a sheet of Whatman paper, a piece of fabric, wood, cardboard, etc. as a basis. Selected photographs must be glued to the “canvas” so that they correspond to the original idea. You can decorate the project with colored paper, household items, newspaper clippings, natural materials, etc.
But think about how much time and effort it will take to create such a collage:
- You will need to prepare a workplace, look for suitable materials, estimate their location in advance with maximum accuracy, and then work for several more hours by hand;
- At any moment you can make a mistake in cutting or gluing - and all the work will go down the drain. In addition, there is a risk of permanently ruining valuable personnel;
- Limited materials - you can add anything to the collage, but first you have to look for it. Not everyone wants to rummage through distant dusty shelves or wander the streets in search of a suitable element;
- If you have a great idea in your head, it’s far from a fact that it will remain the same when implemented. Perhaps, already making the last strokes of the glue brush, you suddenly realize that you should have chosen different positions for the photographs;
- A homemade collage is a valuable gift because it exists in a single copy. But what if you need several copies? What if they are also different sizes? You can't just copy it.
Unfortunately, handmade crafts are full of flaws. But there is a high-quality solution that will solve all the above problems and make your life much easier - create a collage on your computer using specialized software. The Photo COLLAGE program from AMS Software is a high-quality and convenient editor that allows you to prepare a bright photo collage with your own hands in just a couple of minutes. The procedure for creating a collage is quite simple and consists of several simple steps.
Create your best photo collages easily!
Works on Windows 10, 8, 7, XP, Vista
How to create a collage
Work on a collage is difficult to plan - it is not always possible to make a sketch and then implement it. It is important to allow the process to be spontaneous. You have a rough idea of what you want to express visually, but you must be prepared that in the end you will end up with something different.
For example, the brief for one of the collages in Vogue was: “To play with the theme of rock crystal jewelry.” From the image I originally conceived of a female image against the backdrop of a crystal mountain, the result was a mix of hands and jewelry.
View this post on Instagram
Posted by christina zolotarova (@chrs.z) Mar 30, 2021 at 10:51 am PDT
In commercial orders, the flight of imagination is usually limited to specific sources (“Here are three photographs, put something together from them”). But even there, the collage leaves a lot of room for experimentation.
Now I’ll tell you how the process goes - step by step.
#1. DIRECTION
My collages are often “self-portraits” of an internal state, visual reflections on the theme of mood. I'm interested in delving into issues of physicality, self-identification, acceptance, diversity. I like working with pieces of the human body - being like Victor Frankenstein, who assembles a new creature from fragments.
To start the process, you need to choose a topic of interest or give in to your inner feeling. And then turn on the selection mode (more on this later) and see what you find will respond.
#2. SEARCH FOR MATERIAL
At this stage, the hunt for pictures and other materials begins. You can do research before creating each new collage, starting from the idea. Or save material, and only then create collages from it.
Over the years, I have accumulated a decent stack of magazines at home - National Geographic, Esquire, a lot of glossy magazines like L'Officiel and Pink. Once I collected them to hand over for waste paper - but before taking them, I leafed through and tore out the pages that caught my eye, for the future. Much has already been lost, but having such a source buffer on hand is a good move, even if you work mainly with digital.
Whether it’s leafing through a magazine or searching for photos on the Internet, immediately mentally break down the picture into elements, perceive it as raw material. For example, you think: “Now I need a leg,” and you focus only on your legs. Alternatively, you can use your own photographs as sources.
Having selected several images, I create a new file in Photoshop and transfer them there, in layers.
Preparing to create an art collage, author - Kristina Zolotareva
#3. CUTTING
This is where the fun begins. I review my catch, cut out parts of the images I need and start scaling, twisting, distorting and moving them.
In the process of such a visual game, many options are born, the idea is transformed and acquires visual flesh. Be open to experiments and any results, even unexpected ones.
What came together perfectly in your head can be completely disharmonious on the screen. Try until you find it. Cut along the contour or in random pieces, combine contrasting shapes and colors, play with scales, combine incongruous things.
The process of creating an art collage, author - Kristina Zolotareva
You need to reach the realization that “that’s it, this is it.” But you don’t have to stop there either.
Stages can be repeated, intertwined, and looped. I often add new images as I go and discard the original ones. As a result, from the material that accumulates during the work, you can assemble not one, but two or three different collages.
How to make a collage with your own hands
Photos
Choose the most beautiful and interesting pictures for your collage. Old photos can be scanned and also used in a collage. The Photo COLLAGE program allows you to add an unlimited number
of photos, select the angle of inclination and their location on the canvas. Just find the photos you want in the menu on the left and drag them onto the sheet - you're done!
Place photos on a sheet
Background
How your photo collage of photographs will be perceived as a whole depends on what background you choose. The role of the background can be any color from the palette, a gradient, a texture from the program catalog, or any picture from your computer. At the same time, you can edit the parameters of the background: adjust its brightness and blur.
Adding a suitable background
Decor
As you probably guessed, this stage of work depends entirely on your imagination and the chosen topic
.
For example, if your idea is a DIY photo collage to celebrate a birthday, use appropriate decorative elements to give the collage a festive feel. You can decorate your photos with stylish frames
or effectively blur the edges of your photos using a collection of masks.
And thanks to the presence of special filters
for editing, the pictures will acquire a unified style, and your collage will become even more expressive.
We select frames and masks for photos
Text and decorations.
These elements will help make the composition complete. Sign all the photos or add one, but bright inscription that characterizes your idea, select clipart from the collection. Just a couple of clicks - and your photo collage of photos will sparkle with new colors.
Decorate the collage with text and clipart
Use your imagination, bring your wildest ideas to life, and you can make your own photo collage the most unusual and memorable. This could be a bright travel collage, a Treasure Map collage, a colorful greeting collage, etc.
Create your best photo collages easily!
Works on Windows 10, 8, 7, XP, Vista
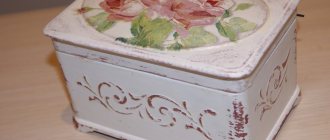
How to make photo frames yourself: stage 1
Geometric composition of motivating photos in graphic frames for a home office. A special feature of the photo framing is a passe-partout made of thick white cardboard in combination with a wooden frame.
A modern collage of chaotically placed graphic works made by hand
The interior of the room is made in light beige and brown tones. The photographs are hand pasted onto white paper and framed in dark brown wooden frames.
Photo frames for hanging on the wall for making collages can be bought at a specialty store or ordered from a framing shop. However, you can completely make the collage yourself, including photo frames. Fortunately, modern stores provide a wide range of necessary goods.
One of the original and yet simple ways to make photo frames is to use ordinary newspapers and magazines. As a result, no one will guess that the frame is not made from a real baguette. To create such a mini-masterpiece you will need the following materials:
Working with ready-made templates
If you want to save time and effort, you can use ready-made options
registration The program has more than 300 templates of various styles and designs: New Year's, wedding, abstract vintage, so any user will find something to his liking. Each template can be edited, adding new decorative elements and emphasizing the individual style of the project.
Window for selecting a ready-made collage design
You can also easily prepare stylish cards and invitations in the program. To do this, click on the “Collage Templates” item in the designer and go to the category you need. Select a suitable blank, adjust its size, and then edit it to your liking in the program editor. Add photos, text, clipart - everything is in your hands!
Collage template selection window
Do you want something unusual? Combine your photos into a spectacular photo book! Determine the format and style of the project and indicate your preferred mode of operation. You can instruct the program to automatically generate a book based on the downloaded materials, or you can work through each page yourself.
Window for selecting sheets for a photo book
At the final stage, all that remains is to print
finished collage. The program is equipped with a convenient printing module, where you can easily set the paper size or, for example, the type of image resolution.
Unusual applique
A collage is an applique of various materials glued to a base. Accordingly, a photo collage is an application of photographs. There are many ways to create and styles of such creativity. Photographs help us awaken memories of events in our lives. Looking through photos in an album, you are immersed in the atmosphere of an already forgotten event. To smile more often from contemplating the pleasant moments of life, make a photo collage on the wall. Here are some basic principles for harmoniously decorating walls with photographs.
Related article: How to secure a canopy to a crib
Place photos of the same style side by side. This will allow you to create a strict and harmonious composition. It is suitable for decorating a living room or library.
The complete opposite of such a photo collage is a collage using frames of different texture, size and color. Before mounting such beauty on the wall, carefully consider all the details and lay out the layout on the floor. The result of the experiment will perfectly decorate a child's room.
Tired of looking at a boring wall? Decorate it with a photo collage.
Take care of the future of your collage and leave room for adding photos. Such an unfinished style speaks of the dreaminess of its creator, of his faith in a bright future.
Eclecticism (mixing different styles) will help you select the ideal material for a particular corner of your home and make it much more comfortable. In the photo below, vinyl stickers are used as photo frames.
Using various photo mounts, you can achieve unusual results.
Create your own frames
To frame your photos beautifully, you can use the collection of Photo COLLAGE frames. Select “Effects and Frames” in the left panel and the built-in catalog will open. You can choose by categories: “Classic”, “Thematic”, “Children’s” and “My frames”. The last paragraph will store the frames you made in a special program designer.
To create your own photo collage design, open the frame editor. You can download a ready-made PNG file or create your own. To do this, upload an image into the designer that will frame the photos and select the “Fragmented” frame type. All that remains is to set the necessary parameters for the sides.
What is collage?
A collage is a composition of several photographs against a common background. Today, electronic collages are the most widely used. They are created using ready-made templates, where the background and location of the pictures are pre-selected - you just need to insert the frames into frames, or they are made independently in graphic editors.
To create electronic collages use:
- Online services.
- Programs installed on the PC.
- Mobile applications on smartphones and tablets.
Print from the comfort of your home
When your collage is ready, just click “Print” and select the print format you need. Even on the largest sheets, the project will be printed as quickly and efficiently as possible. And if you want to send the file by mail or post it on social networks, click “Save” and select the final file format that suits you. Many extensions are available, including JPG, PDF, PNG, GIF, BMP, etc.
Thus, making a collage of photographs with your own hands is quite simple. And the Photo COLLAGE program from AMS Software will become your indispensable assistant in this interesting and exciting activity!
Preparing the base
There are countless options for material for the base - from elementary Whatman paper to a wooden figure:
- The most affordable option is to use a paper collage base, which should then be signed and decorated.
- An excellent material for decorating the base is polystyrene foam. In this case, the photos need to be pinned using buttons, then they can be changed over time.
- It is worth highlighting the tree. A panel of wood or a cut from a trunk would be perfect. Wood will fit well into absolutely any interior.
You should accurately select the dimensions of the material for the base for convenient placement of all photographs on the surface.
To correctly calculate the size of the covering, you need to first arrange the parts as they should be in the finished version of the collage. When you have achieved the optimal location for the photo, you should begin cutting out the shape of the base. Again, each creator makes their own choice of figure. Finally, paint or varnish, depending on the initial choice of material.
The main materials that need to be used in the work: scissors or a stationery knife, glue, rags, plastic film to protect the surface being treated. Additional materials for creating crafts can be any little things lying around idle, for example, beads, buttons or coins. Everyone has them.
Even the smallest details will give the final composition a unique style, depending on individual preferences.
On video: how to make a base for a photo collage
Related article: How to make a basket from a wicker with your own hands: the easiest way (MK)
Creating a composition on the computer
Adobe Photoshop
Let's move on to creating a collage in Adobe Photoshop . Here we will not consider standard templates, since this program opens up limitless space for creativity. Let's try to create a collage from several photos from the trip. All photos will be in the same style.
- Let's open all the selected pictures and mark one that will serve as a background for the rest.
- Let's go to the next tab and select this image using the Ctrl+A combination. Copy it by pressing Ctrl+C to the clipboard and using the Ctrl+V keys, paste it on the tab with the main photo.
It turns out like this:
Now, if you want to move the photo, press Ctrl+T.
- It's time for the third photo. Let's capture it and repeat the actions, placing the frames in the right place. To prevent images from becoming deformed, hold down the Shift key while zooming in or out.
- When you decide on the location of the frames, deselect them. This is done with the Enter key.
- Now let's blur the boundaries of the photos a little. Create a layer mask in the bottom toolbar. Let's take a brush, set the opacity to low - about 25%, and the pressure - about 50-60%.
- Define the brush size in the left corner on the toolbar. If the pictures are small, it is better to work on the details with a small brush; for large ones, a large brush will work more effectively.
If you go beyond any boundaries, no problem. This can be easily fixed by changing the brush color from black to white. With these settings, the brush works like an eraser.
The result will be a collage something like this:
Picasa
The next program is Picasa. It automatically downloads all the photos from your computer, creating a library. To select pictures to create a collage, click on them with the mouse while holding down the Ctrl key.
- In the top toolbar, select Create and click Create Collage. The following window will appear:
- Change the angle and size of the photo by simply clicking on it. Use your mouse to grab and move your photos around the canvas.
- On the left side of the main Picasa window there is a panel with tools for detailed editing of the picture. To change the background of a photo, use the eyedropper or upload another image.
- At the final stage, add shadows to the objects or, conversely, remove them.
- When you save the collage, the retouching panel opens. Here you can remove red-eye, adjust exposure and hue.
- On the bottom panel of Picasa there are buttons for instant printing, reposting to a Google account, sending to email, and saving work to your computer’s hard drive.
Picture Collage Maker
Picture Collage Maker is another application with a large set of ready-made templates. To study its capabilities, we will create a collage from blanks, which we will find here.
- After launching the program, click on the “Create from template” pop-up window and select the category – collage.
- Click on the category and select a template. We get something like this:
- Clicking on the icons allows you to drag pictures around the screen, stretch them and delete them. To frame a photo, double-click on the selected window.
- The left panel allows you to use advanced settings, including various frames, shapes and blanks.
- To save the composition, right-click on the collage and get a pop-up window:
- We select the image format, save location and, if desired, share the work on social networks with friends.
This is what the finished collage looks like:
Here, as elsewhere, photographs of the same series or theme look most harmonious.
When selecting photos for a collage, focus on shots that have similar lighting, color, and theme.
Collage on mobile devices
On Android
collage app inCollage . With its help, you can create a beautiful, almost professional photo composition in just three steps.
- Open the application and select the “Collage” column.
- Select pictures - click on the folder name with the arrow. By the way, the application separately shows photos taken recently, which is very convenient.
- To select pictures, click on their icons. The maximum number of photos that can be inserted into a collage is 18. After making your selection, click the “Next” button and go directly to the editor.
- The panel below contains tools where you can change the background and layout, make inscriptions or lightly retouch photos.
One of the techniques of the luminaries of the genre is to choose the color of the canvas to match one of the leading colors in the composition. In our example, each of the pictures is dominated by shades of orange - the setting sun and traces of car headlights, so the reddish-colored frame fits well into the overall plan.
- Is the work ready? Tap the “Save result” button and select where to place the collage – on your phone or on social networks Instagram or Facebook.
The second application is Quick Collage , similar in structure to the previous one, but richer in functions.
- From the first step, the application offers to turn on the camera and take a photo right now, or select a ready-made one from the gallery by clicking on the bottom tile. Let's choose the second one.
- Let's go to the gallery and check out a few photos.
- Next, touch the turquoise arrow at the bottom of the screen and go to the settings of the future collage.
- Photo editing tools are also presented at the bottom of the screen. Here you can find layouts for arranging pictures, adjusting frames and canvas size. All parameters are adjusted using sliders, as shown in the screenshot.
On the screen of mobile devices, collages with thin frames look most advantageous.
- The first photo is used as the background. If desired, it can be replaced with a blank from a set built into the program. By the way, you can easily use the default background - it fits harmoniously and atmospherically into the composition.
- To add text to your layout, tap the Text tool and enter it on your phone's keyboard. Color, font and shadows are at your discretion.
- To position the lettering in the desired location, simply grab it with your finger and drag it.
- To save the photo, click on the arrow in the upper right corner. By the way, compared to the previous program, the choice here is much greater: WhatsApp, Instagram, VKontakte and others.
For iPhone
One of the most popular apps for creating collages on iOS is Moldiv. This application has very great capabilities for a mobile device: it allows you to change the background and outline of pictures, the distance between them, add stickers and much more.
- To create a collage in Moldiv, we will upload pictures from the Gallery and select the options for layouts and frames. By moving the sliders, you can change the aspect ratio of the future composition.
- The toolbar is traditionally located at the bottom. It contains tools for working with text, color, various frames, etc.
To make the collage successful, focus on one thing, as in the example of the layout with the bridge, and leave the rest secondary, forming a kind of background.
- To save the result, click on the outermost button with the image of a floppy disk.
Another successful application from the developer Big Blue Clip is called Pic Stitch. It is popular due to its simple interface and a large number of built-in layouts, the number of which exceeds two hundred.
- Let's start by choosing the desired frame for the collage.
- Then, if desired, we will edit its parameters: change the color, smooth the corners, adjust the size. The settings panel is located at the bottom of the screen.
- The application allows you to crop photos. In the settings of the crop tool (crop) there are several templates with a given aspect ratio, but you can determine the position of the cutting line yourself.
- To share the finished collage on social networks, click on the circle with the arrow below. To save it on your mobile device, there is an icon in the lower right corner with three dots.
Other articles on the site
- How to rotate a video 90 degrees and save the result
- Transfer contacts, photos and other data from Android to iPhone
- 10 reasons why your Android gadget's battery drains quickly
- The best services for facial recognition in photos