Why is this practical?
Even before the cold season sets in, the question arises - how to make a shirtfront yourself? How is this wardrobe item better than the usual everyone’s favorite scarf?
There are many advantages. The shirt front does not slip, it does not need to be adjusted, and most importantly, it fits perfectly to the neck and prevents cold air from damaging the little person’s throat.
Despite the apparent complexity and unknowns that knitting needles and needlework conceal, everyone can cope with such a task!
Note!
Knitted raglan - step-by-step instructions, patterns, recommendations. Photo review of the best works and new products from craftswomen
Knitting a shawl - step-by-step instructions for making a shawl with your own hands. Tips for beginners on knitting + photo reviews
Amigurumi ring ⭕: features of the amigurumi technique. Step-by-step DIY master class with simple knitting patterns + 180 photos
What are the advantages of a shirtfront?
Dickies, like any other wardrobe item, have their own positive features. Here are the main ones:
- The collar, also known as a golf collar, ensures a tight fit;
- The wide part allows you to cover not only the neck, but also the baby’s chest and shoulders;
- Does not slip or change its position even with active movements of the child;
You can knit such a wardrobe item with both circular and straight knitting needles. At the same time, circular ones are necessary for seamless knitting with raglan - a variation for experienced needlewomen. But even if you're just starting out on your DIY journey, this setup shouldn't be intimidating.
The main difficulty can only arise in calculations, which are not so difficult to overcome. This shirt-front does not need to be sewn and can be used immediately after finishing the work.
If you still don’t want to get such an experience, knit on simple knitting needles. This method produces a two-piece product, which will have a front part and a back part.
Dickey for a boy
This version of the shirtfront is even simpler. His description is suitable even for those who decided to knit almost for the first time in their lives. An experienced needlewoman will spend only an hour on the work.
To begin, cast on twenty chain stitches and knit an elastic band. The child's head should fit freely through the collar, but it should fit snugly around the neck. Sew the elastic band into a ring. Do not break the thread, but cast on loops horizontally around the neckline. Their number must be divisible by four.
Let's move on to knitting a cape. Divide the shirtfront into four zones and place markers. In the next row, knit double crochets; in place of the markers, knit two from one loop. Continue this pattern until the cape begins to cover the shoulders. Add a couple more rows of double crochets at the front, tighten the loop and hide the thread.
A simple, but warm and beautiful shirtfront for a boy is ready!
What will you need for work?
Before you start creating the perfect scarf for your child, check that you have all the materials and tools:
Note!
- Knitted braids: simple patterns and the best master class for creating patterns with knitting needles. How to knit braids with your own hands + photo reviews
- Knitting booties for newborns: detailed patterns for knitting booties for beginners + 150 photo reviews of the best products
Mittens - TOP 100 photos of the best creation ideas. Description of the technique + instructions for knitting mitts with your own hands for beginners
Yarn
Before starting work, choose yarn. You can choose any color or combination, make patterns. Choose shades for a reason, but focus on outerwear and the general color scheme of your baby’s wardrobe. This will make the item really beautiful and easy to combine with existing items.
It is best not to skimp on yarn and choose only natural ingredients. Wool that contains merino or alpaca fibers is ideal. This wool has excellent warming properties and will not prick the baby’s neck. Another best option is to use a combination that contains a percentage of acrylic.
Advice: do not make a shirtfront from 100% acrylic; it warms you up very poorly outdoors, increasing sweating indoors. As a result, the baby will not be comfortable, and there will be no health benefits at all.
Making things more interesting
Experienced craftswomen can show their imagination and diversify even a boy’s product with an interesting design. If you add an ornament during the knitting process, you can end up with a fashionable accessory for a boy.
A pattern in the form of intertwined braids or a three-dimensional graphic pattern will fit perfectly here. Beginners should experiment with yarn colors or additional embroidery on plain satin stitch.
Related article: DIY paper disk envelope: templates for scrapbooking
In the first case, the shirt-front made with melange thread looks bright.
Embroidery is suitable for preschool children. A drawing in the shape of a car will attract the child's attention and make such a shirt front the baby's favorite thing.
Older boys will love the shirtfront, decorated with a zipper. It can serve as an imitation of a coarse knitted sweater. A variety of options suitable for boys of different ages and tastes is demonstrated in the corresponding video.
If the boy has already expressed his preferences, then it is better to focus on them, since only in this case will the child wear a knitted item with pleasure.
Sample
Having selected all the necessary tools and materials, make an experimental version. To do this, cast on about thirty stitches on the knitting needles and make the intended pattern. Do the work until the product sample reaches ten centimeters in length.
Having completed the work, close all the loops and wash the sample product. After drying, measure the workpiece with a centimeter. The task of such a sample is to calculate the number of loops and rows in one centimeter.
Shirt knitted with raglan knitting needles
I think every knitter, at the height of the autumn-winter season, has a question about what product to insulate herself and her loved ones. One of the most irreplaceable things is a shirtfront. This accessory can be worn by both adults and children, and it is not gender specific. A shirt front is a kind of collar that covers the neck, shoulders and chest, or rather its upper part.
I would like to offer you a master class on a shirtfront knitted for a two and a half year old girl. That is, based on my calculations, you can knit the same shirt front for an adult, calculating the required number of loops.
We will need:
- yarn for hand knitting, I knitted with wool yarn “Pekhorka. Rural" in one hundred grams, two hundred and fifty meters about three hundred grams of gray;
- knitting needles number two and a half;
- hook number three;
- scissors;
- ruler or measuring tape;
Knitting density, determination of the degree of stretch and number of loops:
- I folded the yarn into two threads and put twenty loops on knitting needles using a simple cast-on method. Next, I knitted about fifteen rows with a simple elastic band.
- We place a measuring tape on a horizontal surface, place the top edge of our sample on it, I got nine centimeters in an unstretched form. Now we stretch the sample and measure again, my number is fourteen centimeters. Now let's calculate the stretch coefficient: the number of centimeters in the unstretched state must be divided by the number of centimeters in the stretched state. That is, in my case, it is nine centimeters divided by fourteen centimeters, then the coefficient is equal to sixty-four hundredths of centimeters.
- We measure the circumference of the head, for my daughter it is fifty-one centimeters, which in turn is multiplied by the degree of stretching and we get thirty-two and eight tenths centimeters. In order for our shirtfront to fit freely over the head, it is necessary to add another four to five centimeters to the resulting figure. In total, we need our shirtfront to reach a size of thirty-six centimeters at the collar.
- Now we calculate the required number of loops for casting on, for this we do the following: twenty loops are equal to nine centimeters in an unstretched form, and we need thirty-six centimeters. We make a simple mathematical proportion: multiply thirty-six centimeters by twenty loops and divide by nine centimeters, I got eighty loops. Since we are knitting the shirtfront with raglan, for the raglan lines we need to add four more loops, making eighty-four loops.
- Let's calculate the number of loops on each knitting needle, since this may change the total number of loops. In order to correctly distribute the loops in a circle, for a good fit of the shirtfront on the shoulders and in order to avoid bumps on the chest and back, the calculation should be carried out according to the following rules. We divide all the loops into eight parts, that is, my eighty-four loops are divided by eight and we get ten and a half loops. Conventionally, we take one piece for the sleeves and three pieces for the front and back. We round the number of loops for the shoulders to eleven and the number of loops for the front and back to thirty-two. Also, don’t forget about the raglan loops, which I already took into account when rounding. The pattern of distribution of loops in a circle is as follows: ten loops for the left shoulder, one raglan loop, thirty-one loops for the chest, one raglan loop, then ten loops for the right shoulder and plus one raglan loop, the circle is closed with thirty-one loops for the back and one raglan loop .
Pattern for shirtfront:
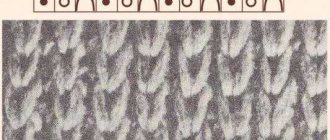
We will knit the neckline with a simple elastic band: one knit stitch, one purl loop. The main fabric of the shirt front will consist of knit stitch, that is, all the loops in the circle are knit, and in the reverse rows - purl. All four raglan stitches are knitted in the stockinette stitch with purl stitches, and in the reverse rows with knit stitches.
Progress:
- On knitting needles number two and a half with a thread in two folds, we cast on eighty-seven loops, we will need the extra loop to close the knitting in a circle more evenly. So, we start the first row of knitting with a simple elastic band and distribute the loops in a circle onto the knitting needles, distribute all the loops equally onto the stocking needles, that is, there will be twenty-one loops on two knitting needles, and twenty-two loops on two knitting needles. At the end of the first row, when there is one spare stitch left on the left knitting needle, we begin to close the circle, making sure that the loops of the knitting needles do not twist. We change the spare loop from the left knitting needle over the first loop of the right knitting needle and tighten the thread. I recommend that you do this manipulation every time you knit a product in the round. Since this does not delimit the beginning and end of the row in circular knitting, making it more even.
- So, we knit the collar of the shirtfront with an elastic band to the required height, I knitted it with a collar for a child and it turned out to be fifteen centimeters in height.
- After knitting the elastic, we move to the front stitch and begin distributing the loops in a circle, as described above. First, determine for yourself how it is more convenient for you to continue knitting on stocking or circular knitting needles. If you knit on circular stitches, mark the raglan stitches with markers. On stockings this is more obvious, but someone can mark it for the greatest comfort in knitting. So, I knitted with stocking needles and distributed the stitches as follows: eleven loops on the left knitting needle for the left shoulder, thirty-two loops for the front, eleven loops for the right shoulder and thirty-two loops for the back. The number of loops on each knitting needle already includes raglan loops, one for each knitting needle. Don’t forget that raglan loops are knitted in the opposite pattern to the main fabric. For you, a raglan loop on a knitting needle can be either the first loop on the knitting needle or the last. This doesn’t really matter, since the raglan line will still form.
- We knitted the first row of the main fabric while distributing the loops onto the knitting needles. Next, every second row we make increases on both sides of the raglan lines. I recommend that you do this in the following way: by pulling a loop between the loops of the previous row. This way, no extra holes are formed in knitting; it is worth mentioning that we knit the stretched loops with facial loops.
- When the knitting from the base of the neck reaches five centimeters, we begin to make increases not in every second, but in every fourth row. We knit until adding loops until the back is equal to fifteen rows. Next, we begin to form the rounded lower part of the shirtfront. We close the middle fifteen loops of the back. And we continue knitting in reverse and straight rows, making decreases in every second row. To beautifully round the bottom of the shirtfront, it is better to do this at the beginning of the row, that is, somewhere there will be decreases in the front row, and somewhere in the back row. The decrease pattern is as follows: in every second row, decrease four loops once, then three loops six times, then six loops once, and then ten loops until there are about twelve to fifteen loops left on the knitting needles that need to be cast off straightaway.
- After closing all the loops, do not cut the thread, but insert a hook, number three, into the loop and tie the bottom edge of the shirtfront with a “crawfish step” pattern.
Now the shirtfront is ready, I hope that by following all my recommendations you will get a wonderful, warm and beautiful shirtfront. Good luck to you in your creative endeavors and easy luck for you.
Did you like the article?
Share on Social Networks with your friends! Facebook
What needs to be done before starting work?
Take measurements. This is the second step after checking all the required materials. When preparing, it is important to understand that the neck should easily pass through the head, but also fit snugly to the neck. We measure the circumference of the head, and also do not forget about the circumference of the chest.
Carry out calculations. Using measurements, we multiply the result by the number of loops in one centimeter and as a result we have the required number of loops for the neck. We calculate the number of rows depending on the desired length of the future product.
Step-by-step instruction
Let's start the knitting process using the example of an ordinary women's shirtfront. We follow the entire sequence of steps.
We make a sample according to the previously stated principle. We cast on the required number of loops. In this case it is 84. We divide them into four double needles. This makes twenty-one loops for each. You can also work with circular knitting needles.
We make the necessary elastic band, consisting of two front and two back blocks. In the example, this will take 13 centimeters. We use circular knitting needles and use markers to mark the beginning of the raglan. This line will consist of two loops. The result is the following picture: 19 loops, then a marker, then two loops and again 19 loops and so on in a circle until the next marker.
Making the front beautiful part. Each time we add one loop before and after our raglan line in every second row. In the example it will take twelve centimeters.
The last two rows of the product are made using garter stitch. This will allow the edges to curl up. Then close all the loops.
We wash and dry the product so that it no longer shrinks, then steam it, and now the shirtfront can be used for its intended purpose.
LiveInternetLiveInternet
Friday, November 22, 2013 23:58 + to quote book
We will need: 100 g of wool yarn (thread length 100 m), stocking needles.
Cast on 48 stitches (4*12) on double needles. From the opposite side of the protruding thread ends, remove 12 loops on one knitting needle and another 12 loops on the other. All the loops will be on 3 knitting needles for now (it’s more convenient to knit one row so as not to climb on the floor looking for dropped knitting needles. Close the knitting needles in a circle. Make sure that the cast-on braid does not turn over. Knit 1 row.
Insert the 4th knitting needle and knit the height of the collar in a circle. We measure with tape or something else.
We switch to larger circular knitting needles than we used for knitting elastic. We knit loops from each knitting needle like this: purl 2 loops, knit 10. Purl loops form a raglan line. In every second row to the right and left of the raglan lines we make increases. Red - raglan line, blue - increases.
Here you can see that the loops are gradually being added. Having knitted 5-6 cm, we begin to knit only the front part of the shirtfront in short rows. In each row we will under-knit to the left and right raglan lines 3 times, 2 and 3*3 loops. Along the middle line we continue to make increases in each front row.
Shortened purl row: Knit a knit row, turn the knitting, yarn over and knit a purl row. Short knit: Knit a purl row, turn the knitting, yarn over and continue knitting. A yarn over is made at the beginning of each shortened row so that later there are no holes in the connecting row. This is what the shortened rows will look like. Arrows indicate yarn overs.
The front is finally knitted. Next, we will knit 1 row of knit stitches on all stitches, the so-called connecting or smoothing row. In this smoothing row, pay special attention to the yarn overs on the front. The yarn over must be knitted together with the NEXT loop on the left side of the knitting (or with the previous one on the right side).
This is what a knitted loop looks like together with a yarn over. All yarn overs are knitted with adjacent loops. This is what our knitting looks like. There are no holes, and this is the main thing.
Now we will knit 3 rows with a 1*1 elastic band and tuck the ends of the threads. This is what should happen. We steam our cape. On the master's shoulders. vasilissa.ru *** Openwork shirtfront for girls 2-4 years old. Yarn “Pekhorka magnificent” 300m/100g. Sock knitting needles No. 1.5, circular knitting needles No. 2.
Description for those who do not understand the diagram. From * to * is a repeat of the pattern. I indicated how to knit a broach in brackets in the first row. 1st row - *broach (1 stitch removed, 1 stitch knitted and pulled through the removed stitch), k2, 2vm. knits., yarn over, 1 knits. cross, yo, broach, 2 knits, 2 inm. knits, yarn over, 2vm. knits, yarn over* (from *to* repeat until the end of the circle) Row 2 and all even ones - knit stitches Row 3 - * broach, knit 2, yo, knit 1, yo, knit 1. cross, yarn over, 1 knit, yarn over, 2 knit, 2 inm. knits, yarn over, 3inm. knits. (1 p. remove, 2 knits. and stretch through the removed one), yo* 5th row - * broach, 2 knits., yo, 2 knits., yo, 1 knits. cross, yarn over, k2, yarn over, k2, k2. knits, yarn over, 3inm. knits, yarn over* Row 7 - *broach, knit 2, yo, knit 3, yo, knit 1. cross..., yarn over, knit 3, yarn over, knit 2, knit 2. knits, yarn over, 3inm. knits, yarn over* Row 9 - *broach, knit 2, yo, knit 4, yo, knit 1. cross, yarn over, knit 4, yarn over, knit 2, knit 2. knits, yarn over, 3inm. Knits, yarn over* Row 11 - * broach, knit 2, yarn over, broach, knit 7, inm 2. knits, yarn over, 2knits, 2vm. knits, yarn over, 3inm. knit, yarn over* Row 13 - *knit 2, yarn over, knit 5, knit 2. knits, yarn over, 2knits, 2vm. knits, yarn over, 3inm. Knits, yarn over* Row 15 - *knit 2, yarn over, knit 3, k2. knits, yarn over, 2knits, 2vm. knits, yarn over, knit 3, yarn over* Row 17 - *knit 2, yarn over, knit 1, knit 2. knits, yarn over, 2knits, 2vm. knits., yarn over, 1 knits. crossed, yarn over, 3 in. knits., yarn over, 1 knits. cross, yo* 19th row - *broach, 2 knits, yo, 3 inm. knits, yarn over, 2knits, 2vm. knits, yarn over, 3 knits, yarn over, 1 knits. cross, yo, 3knit, yo* 21 row - *broach, 5knit, 2vm. knit, yarn over, 1knit. crossed, yarn over, 3 in. knits, yarn over, 3 knits, yarn over, 3 inm. knits., yarn over, 1 knits. cross, yo* 23rd row - * broach, k3, k2. knits, yarn over, knit 3, yarn over, knit 2, yarn over, knit 3. knits, yarn over, k2, yarn over, knit 3, yarn over* Row 25 - *broach, k1, k2. knits., yarn over, 1 knits. crossed, yarn over, 3 in. knits, yarn over, 3 knits, yarn over, 3 knits, yo, double yo, 3 knits. knits., yarn over, 1 knits. cross, yo* 27th row - * 3inm. knits, yarn over, 3 knits, yarn over, 1 knits. cross, yo, (knit 1, yo, knit 3, yo) – repeat 3 times, knit 1, yo, knit 1. cross, yarn over, 3 knit, yarn over* stranamam.ru
Series of messages “Children's accessories with knitting needles”:
Part 1 - Ugg boots Lapland Part 2 - Booties knitted with knitting needles ... Part 8 - Collar-scarf knitted Part 9 - Children's socks Part 10 - MK on knitting a baby shirt-front. Openwork shirtfront for girls 2-4 years old Part 11 - Dickies for beginners Part 12 - Booties with knitting needles in solid fabric Part 13 - Booties with knitting needles from Larisa Karedina Part 14 - 50 knitted booties and socks. Written by Zoë Mellor
Tags:
knitted shirt front
Cited 74 times Liked by: 11 users
Like share
0
Like
- 11
I liked the post - Quoted
- 2
Saved
- Add to quote book
- 2
Save to links
Liked11
0
Instructions for a child aged five years
If you lack experience and knowledge, you can look at the exact instructions for the child’s age. It is worth remembering that each child is individual and sizes may vary, check this at the initial stage of preparation.
Children's shirtfronts for beginners will not be difficult for real needlewomen, even if they have not tried to work with knitting needles.
What knitting do we use?
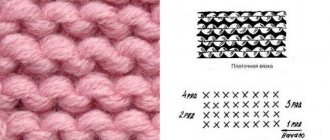
- We use garter stitch on the front and back sides.
- Knit stitch also knit and purl rows.
- For a 2*2 elastic band, we alternately use 2 knit and 2 purl rows;
- For an elastic band 2*1 - alternately 2 purl and one knit.
In this case, we use a knitting density at the rate of 15 stitches per 22 rows, equal to 10 * 10 centimeters.
If in doubt, you can read the description of step-by-step actions for each size and age. It all depends on the measurements and size of the child. The smaller the baby, the faster you can make a shirtfront with your own hands. This wardrobe item can easily be worn until school age. This will perfectly and reliably protect the child from unnecessary colds and cold winds.
Today you can find a huge number of useful offers on the Internet. For example, find a master class, a children's shirtfront - this will allow you to create a wardrobe item under the guidance of real craftswomen.
A baby shirt for a year can be an excellent gift, and the process of knitting baby shirts is not a bad way to distract yourself and relax in silence. This kind of work perfectly relaxes, adds creativity and makes the world more beautiful!
When choosing a shirtfront, you don’t have to limit yourself to just the scarf itself. It would be ideal to knit a kit that includes a hat. A more extensive version of the set may also include a warm jacket.
A single style solution and one pattern repeated on all items of clothing will become a stylish solution that pleases the eye of the family and instills a sense of beauty in the child.
The shirt-front can be made by both the child’s mother and other relatives - grandmothers, aunts and cousins. This is truly the thing that will not remain lying at the bottom of the chest of drawers, but will delight the eye during all winter walks, and most importantly, give warmth and care.
Create with pleasure, be inspired by beautiful pictures and create only those things that you would be happy to keep for yourself. Remember the evenness of lines and rows, and may there be enough creative inspiration for many wardrobe items for your own kids!
Striped collar
Such a collar will be easy to put on and take off if it is made not in a circular manner, but with a button closure.
To work on the product you will need:
- brown and blue yarn (it is better to use merino wool);
- knitting needles with elastic connection No. 2.5;
- buttons.
The number of starting loops depends on the size of the child. The only thing that needs to be taken into account is their multiple of two.
Work on the product begins with blue yarn. The loops are put on a knitting needle.
A 1×1 elastic band is knitted: alternating knit and purl stitches.
After two rows, the color of the thread changes to brown. The work continues in a similar manner.
During the knitting process, the color of the yarn changes in any form. The neckline is knitted to the desired height, taking into account the lapel.
It's time to read the description of working on the shoulder part of the shirtfront.
At this stage, loops are added. There is a blue thread in the work. Each knit stitch on the next row is knitted twice to form a 1×2 rib.
In this way, 5 rows of the product are made. Then the knit stitches are doubled again.
The output should be a 2×2 elastic band. This elastic band is used to complete the rest of the shirtfront. During the work process, you should not ignore the alternation of thread colors.
The length of the shoulder line is approximately 16-18 rows. When the knitted fabric is ready, you should make a flap at the neck and fasten it on both sides with threads.
Related article: DIY fabric yo-yo flowers for the interior
All that remains is to create the button strips. To do this, the appropriate number of loops is cast on from edge loops and additional thread.
Knitting is done using the 1×1 rib technique over 7 rows. The hinges are closed.
The work is done in a similar way on the second side of the product. Here you just need to take into account that after two rows of elastic, holes for buttons are created.
At the site of the emerging hole after the front loop, yarn over onto a working knitting needle.
The next pair of stitches are knitted together. The wrong side is made in accordance with the drawing. Using this method, holes are made along the entire strip according to the number of prepared buttons.
Lastly, the buttons are sewn on. The shirtfront is ready! Fans of circular knitting can please their child with a one-piece collar made in a laconic style.
