/Accessories and decor/Decoration/
Autumn is a great time for needlework, because it gives us so many wonderful materials: leaves, vegetables, fruits, flowers, acorns, pine cones and twigs. And how cozy a house becomes if you decorate it with yellow and purple tones. In this material you will find 6 ideas for DIY autumn crafts for adults and children with step-by-step master classes and a selection of photos for inspiration.
Idea 5. Candlesticks in the shape of autumn leaves made from salt dough
Leaves can be used not only as a decorative or finishing material, but also at the same time as a template and stamp for creating crafts from any modeling mass. Take note of the idea of autumn crafts with children in the form of these cute salt dough leaves. By the way, they are not only beautiful in themselves, but can also perform a practical function, for example, you can store various decorations on them or put candles on them.
Salt dough candlestick
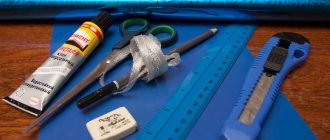
Materials:
- Ingredients for kneading salt dough: ½ cup salt, ½ cup water, 1 cup flour;
- Container for kneading dough;
- Glass bowl;
- Rolling pin;
- Knife;
- Large leaves;
- Vegetable oil;
- Acrylic paints in yellow, red, orange and brown.
Instructions:
Step 1. The first thing to do is go for a walk with the whole family and find at least two beautiful large leaves.
Step 2. Then knead the salt dough. To do this, simply mix all the ingredients and roll out the dough to about 6mm thick (no less), so that it is not too thick, but not too brittle.
Step 3: Place your leaves on the dough and run a rolling pin over it using light pressure.
Step 4: The next step is to cut out the shape around the leaf. Use a sharp knife and, of course, take this part of the work yourself.
Cutting out the shape
Step 5. Remove the leaves. Invert the glass bowl and coat it with a thin layer of vegetable oil.
Step 6: Carefully lift the sheets and place them on the bowls.
Place the dough on a bowl coated with oil
Step 7. Place the bowls with the dough in the oven preheated to 250 degrees and leave them to bake for 2-3 hours.
Baking salt dough
Step 8: Remove your pieces from the oven and let them cool in the bowls for about 15 minutes. Then carefully lift the leaves and leave to cool completely.
Blanks
Step 9. Once the bowls have cooled, start painting. To do this, pour paints of each color into cups and let the children mix them themselves and paint the inside of the leaves first, and then the outside. Crafts made from salt dough are quite fragile, so you need to paint them carefully, without pressing. Wait for the paint to dry and, if desired, cover the bowls with a layer of PVA glue. It will give the craft a matte finish and make it a little stronger.
Painting the bowl
Leaf shapes may vary.
Salt dough leaves
By the way, if you don’t want to bother with salt dough, you can replace it with soft plasticine. The photo below shows an example of such a craft.
Autumn craft from plasticine
See also the material: How to make a candlestick with your own hands: 70 photos, 7 ideas and master classes.
Crafts made from colored paper and cardboard
The most popular materials for crafts are colored paper and cardboard. The paper can be:
- corrugated;
- sticky;
- double-sided;
- velvet;
- metal.
Having such freedom in choosing this material, you can create an equally interesting craft, and also not worry about collecting the necessary materials.
Using paper and cardboard, you can create a colorful autumn composition, a three-dimensional picture, and even an unusual garland. Stationery stores also sell stencils in the shape of leaves and animals, so you don’t need to have any special artistic abilities.
The most popular paper crafts among preschool children are trees. To make a basic applique you will need:
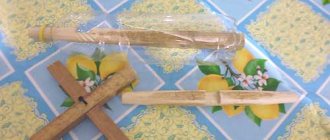
- one sheet of colored cardboard;
- scissors and pencils;
- ruler;
- glue.
Let's follow a few simple steps and get a bright autumn tree with a lush crown:
- We glue the trunk and branches of the future tree onto cardboard;
- We cut out strips of the same width and length from colored double-sided paper, roll them into a ring and seal the ends;
- In a chaotic manner we glue multi-colored rings onto the tree trunk.
Using this technique you can create not only a tree, but also other autumn compositions.
How to dry leaves and flowers
Method 1. This method is suitable if you want to create panels, appliqués or other non-voluminous crafts. Place leaves or flowers between the pages of the book at a distance of about 3 mm from each other and move them to other pages every day (also maintaining an interval of 3 mm). Within a week, the paper will absorb all the moisture from the plants, and you will be able to use them for creativity.
Method 2. If your craft does not involve the use of flat leaves, then you can dry them by simply collecting them in a bunch and hanging them upside down in a dry but ventilated area. At the same time, keep in mind that the leaves will lose their color completely in the sun, but will retain their color in the shade.
Method 3. This method is suitable for drying and preserving the color of leaves and cornflowers. Blot fresh, just picked leaves/cornflowers with a napkin if they are wet. Place each sheet between two layers of wax paper, and place a paper towel on top of the resulting “sandwich.” Preheat your iron and make sure the steam setting is off. Using pressure, iron the paper towel for 2-5 minutes. Turn the sandwich over and pat it again through the paper towel, then carefully remove the wax paper.
- To prevent dried leaves and flowers from breaking, they must be dipped in a solution of water and PVA glue, diluted in a ratio of 4:1, and then left to dry.
Support the project - share the material with your friends on social networks:
Crafts from unusual materials
The most unusual way to make autumn crafts interesting is to use absolutely all available materials: disposable tableware, cotton swabs and disks, toothpicks, drinking straws, old toys and much more.
Often, a lot of unnecessary things accumulate at home and lie idle, but it’s impossible to throw them all away. Making crafts at home will help you use all these things usefully, as well as give them “new life.”
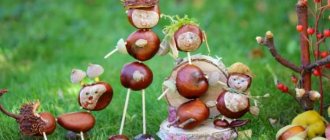
To create a beautiful autumn forest fairy for an exhibition in a kindergarten, invite your child to use an old doll. Cover the toy's old dress with golden leaves and make a beautiful crown from the flowers.
The process of creating crafts with your own hands will contribute to the development of artistic abilities in a child. Therefore, when making autumn crafts for kindergarten, you need to try to interest the child in the process. So that in the future he can spend his leisure time fun and usefully.