A simple diagram for beginners
For those who have never picked up beads, you can use a simple diagram to create a flat model. It can be used to make a keychain.
Required materials and tools:
black and red beads;- lace with a diameter of 0.5−1 mm;
- ring for keychain;
- scissors.
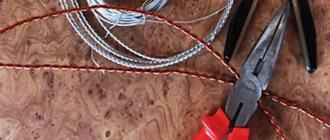
Beading of insect figures is always done parallel to the center. For ease of shaping and preserving the shape of the finished work, copper wire is used.
You can use cord to weave small items. Its thickness is selected according to the diameter of the bead hole. Since this tutorial uses a small number of parts, the shape holds up very well.
Step-by-step instruction:
- Work begins by preparing a cord about 80 cm long and securing it to a ring. Two black beads are strung on it and secured in the center.
- The two free ends are crossed, threaded through the beads and pulled tight.
- Then the cord threads are crossed in three black beads. Their number grows with each new row.
- The spots are made of red beads, which are replaced in several places with black ones. In this way, the back is gradually formed according to the diagram.
- At the penultimate stage, the threads are crossed into two red and two black beads.
- The final step is to form a strong knot. The remainder of the cord is cut off.
The result is a miniature bug that can become a spring souvenir for a young lady.
DIY beaded ladybug (diagrams)
Beads are a material from which many beautiful crafts and decorations are created. Small pieces of living nature often become inspiration for our work. Today we will look at the lesson of creating a ladybug in two of its variations.
Master class on ladybug weaving
Necessary materials:
- red beads - 60 pieces and black - 80 pieces;
- wire.
Step-by-step execution
Head work
- Place 3 large black beads and 2 small ones of a similar shade onto the wire.
- Take close to small encores. end of the wire and, on the opposite side, insert it into the hole of the large beads.
- Tighten the wire into a ring. You have two rows of large and small beads.
- String five beads (black) onto the wire and pull the free edge through all the elements towards the first end, carefully tighten. The third row is located under the first.
Paws
- Collect 5 black beads.
- Pull the desired end of the wire through their holes in the opposite direction.
- To ensure that the insect's leg fits tightly to the body, hold the beads.
- The second is woven at the opposite end of the wire.
Working out the torso
- Work the top row of five dark colored beads.
- We weave the next bottom row from 9 black beads, and the top row from 4 K, 1 H, 4 K (as in the photo).
- We braid another legs in the same way as the previous ones.
- We make the lower tier of 8 black glass pieces, and the upper one in the following order: 1 K, 1 H, 1 K, 1 H, 3 K, 1 H, 1 K, 1 H, 1 K.
- We weave a row of the lower tier from eight dark-colored beads, and a row of the upper one from nine red beads.
- The next lower tier consists of 8 red ones, the upper one - in the following order: 2 K, 1 H, 1 K, 1 H, 2 K.
- We complete the lower tier of 4 black ones.
- We form the last pair of legs from 4 bis. black color.
- Create the top row of 5 red beads. and move on to weaving the final ones.
- For the bottom row we string 2 black beads, for the top row - 1 K, 1, H, 1 K.
- We fasten the wire, pass one end through the beads of the previous row and twist it with the second. We cut off the unnecessary ends, twist them and hide them inside our ladybug.
Mustache
- Insert a small piece of wire into the second row.
- Make a loop on each side and twist the tendril (length - about one centimeter).
- Tie the loose ends of the wire and carefully “hide” them.
The result is a nice three-dimensional ladybug.
Flat insects with open wings.
Keychain bug
- String one bead onto the wire, fold it in half and weave in nine more pieces. Connect the ends.
- Type 1 more element, and then three more things on one of the sides. Weave both sides towards each other, grabbing 2 beads each time.
- Having threaded one element onto the free end, fold the wire in half and twist it into a spiral. This will be the first mustache. Do the second one in a similar way.
- Continue weaving, adding one element from each edge. There must be at least six beads on any side.
- After this, gradually decrease one encore at a time. from each side. There will be five elements left on the wire.
- Secure the wire, pass it through the rows, and then get rid of the excess.
Work of average complexity
This master class suggests weaving a ladybug from beads according to the pattern. Her wings will be movable.
This bug can be used as a decoration, as it looks cute with its wings raised, as if it is about to fly away.
To make it you will need:
- red glossy beads No. 8 (10 g);
- black beads of similar size (5 g);
- wire 1.5 m long;
- wire cutters
Beaded ladybug: weaving pattern (video)
The content of the article:
Today, bead weaving is becoming more and more popular, and products made from it are simply incomparable. There is no special investment of time, finances also allow you to do what you love, and how much pleasure you can get from the work done! A beaded ladybug can be the beginning of creativity for beginners and a wonderful figurine for the table, or just a decoration for your neck or favorite outfit.
Options for weaving ladybugs from beads
Required materials:
- beads No. 10 in red, black and white colors;
- scissors;
- wire;
- fishing line;
- bead needle;
- wire cutters
In order to start weaving this cute little “God’s creation”, you need to prepare in advance beads of all the colors listed above. The red tone of the cow beads can be replaced with any other, this is optional. You should first buy 0.3 mm thick wire, as well as regular wire cutters for cutting. According to the demonstrated pattern, you need to create a ladybug using parallel weaving. In this regard, the product should come out large. However, to get this result, you need to make all the rows of the cow correctly. To do this, it is better to bend the strung lines of the “God’s” queen alternately. That is, the cow’s tummy is towards you, and the back, on the contrary, is away from you. To prevent the God's insect from changing later, it should be filled with small beads, a piece of polymer clay or cellophane. Only after this will the ladybug retain its appearance.
It is advisable to start making a God's beetle from its head. To do this, you need to bite off a piece of wire thread for weaving a cow, put on 3 black beads, and also place them at the central point of the segment. Next, make antennae for the cow: collect 3 more black beads and 1 white bead on both edges. Passing the light bead, you should return the ends back to the original 3 beads, pushing the fishing line through the openings of the recently strung black beads for the cow.
Now the second step of weaving an unusual divine insect. You need to collect 4 black beads in order to thread the ends of a wire thread through them, and also cross them, as the cow diagram shows. Carefully pull off the fishing line and repeat the last process. Next, the ladybug handicraft continues according to the drawing. Now you need to make legs from beads, bend the lines of the back and abdomen of the ladybug in the proper direction. Upon completion of the work, the fishing line must be accurately fixed, retracting the ends into the middle of the lady insect.
There are various methods of weaving this cow. For variety, you can even create a flattened example of “God’s” creation with open wings. First you will need to make antennae using beads, then the cow’s head, as in the last skill, weave row after row of legs, as well as the body. Now you need to make a pair of equidistant wings from beads in order to firmly attach them to the body of the “God’s” beauty.
Ladybug pendant
What you need for work:
- 1 g black beads;
- 5 g red beads;
- cow hanging clip;
- wire thread with a diameter of 0.3 mm.
In the first option, the work of weaving a ladybug must begin with the head and body, changing the tones of the beads proportionally. The lighter the beads, the brighter the product will be. Now you can make the right and left wings of “God’s” craft, as shown in the diagram. Next, install the wings on the cow’s body, and also secure the pendant to the clip. You can use wire of various shades.
The production of the second version of “God’s creation” from beads is done from the bottom up. At the beginning of work, you should cut the wire thread approximately 40 cm in length and put on 1 bead. Next, bend the wire in half, weave in 9 more pieces of beads with both edges of the fishing line so that they touch each other, as reflected in the diagram of the cow. Then you need to collect 1 bead on the two ends of the wire, then on one of the bases 3 more beads and weave them towards each other, picking up 2 beads with each piece of fishing line.
To make antennae for a cow, you need to string a bead onto a metal thread, close it in half, keeping one antenna 1 cm long, and roll it into a spiral, like a curl. The second tendril of the “God’s” product is made in the same way. Arbitrary ends of the fishing line are inserted through the last beads of the completed cow, tightened and straightened. You need to make sure that the ends of the ladybug are on the outside, and also stretch them towards each other one more time through the bottom row of beads for this ladybug.
Further, the weaving of “God’s gift” follows the same style. The colors of the beads, red and black, vary according to the pattern. You should weave the cow until there are exactly 6 beads on all bases. The line following it is repeated in the number of beads without adding any. Only after this row can you begin to reduce the number of cow beads (in each line, remove 1 bead from all directions until there are 5 pieces on the wire). The fishing line should be pulled up, leading it through the lines above, screwed in, and cut off the excess. And arbitrary edges of the wire need to be hidden in the overlying rows, as the diagram shows. For the durability of the insect, you can make auxiliary legs in the same way as antennae. “God’s” creation is ready!
Video: Volumetric ladybug made of beads
vishivashka.ru
Creating a volumetric model
In this master class on weaving a ladybug, the task becomes more complicated, as three shades of beads are used. You can select beads according to your wishes, because an insect can be not only red, but also yellow. Due to such variations, interesting compositions of cute insects are created.
Using wire
For weaving, copper or brass wire with a length of 30 cm and a cross-sectional diameter of 0.3 mm is used. Assembling the figure begins with the head according to the diagram. Then the body, paws and antennae are performed.
Instructions:
- Two antennae 7 mm long are made. A piece of wire is folded in half, a black bead is strung on it and secured by twisting. The base of the muzzle is laid from two black beads, and the second tendril is twisted in the same way as the first.
- The second row consists of 4 beads, two of which are white (eyes). The second end of the wire is pulled through them in the opposite direction.
- The next rows are assembled according to the same pattern. To form points on the wings, the colors of the beads alternate.
- Paw weaving is performed on 4, 6 and 8 arcs. 3 beads are strung on one end of the wire, then it is returned through 2 beads.
Beauty from the simple
This insect can also be used as a keychain for keys or something else.
Let's take:
- 5 g red beads;
- 1 g black;
- carabiner for keychain;
- wire for beads 0.3 mm.
All the necessary materials can be easily found in any specialized store.
- Let's start with the torso. A diagram will help to make it easier. We alternate colors.
- We perform the right wing according to the picture.
- Then the left wing.
- Let's attach them to the body of our insect.
- Let's attach the carabiner for the keychain.
Some tips
You can also use this diagram. The paws are drawn in detail here, which will help for beginners. For weaving, it is best to use dense copper wire, which will help keep the shape of the product.
Let's take a closer look at the product with antennae:
The insect will be large and voluminous. Try to pull the wire tightly, straightening it with your fingers and carefully straightening all the beads. In this way we create a convex back, because it will be quite difficult to do this at the final stage of work.
Let's start weaving
- We weave from bottom to top. Let's cut the wire, approximate length 40-45 cm. We begin to string it on it. First, one bead, fold the wire in half, weave another 9 beads. Try to do this towards each other, watch the diagram all the time so that it turns out smoothly.
- We string 1 bead on each end. Next, on one side we will add 3 more, weaving towards each other, not all the way through. We grab all the segments with 2 beads.
- Let's take the antennae. First, string one bead and fold it in half. Don't forget to leave 1 cm on the tendril, twist it into a spiral. Let's repeat the same steps with the second antennae. We pass all the ends through the outer beads, pull and straighten. Don’t forget to guide them towards each other, weaving them through the bottom row.
Article on the topic: Fashion magazine No. 607 - 2021. New issue
- Then we weave in exactly the same way until the end of the product. Don't forget to alternate colors to create a beautiful backdrop.
- Now you need to add 1 bead. We weave until there are 6 beads on all sides. We repeat the subsequent rows of beads without adding, then we begin to decrease them. There should be a total of 5 pieces left on the wire.
- Let's fasten it, pass it through the top rows, twist it, trim off the excess. And in the upper rows we will hide the ends.
We will have such a cow:
Don't forget to make legs so it can stand like a real insect.
Combined options
The bug figurine can be assembled from beads and yarn. First, a red base is knitted, and then black beads are sewn onto it, acting as dots.
Foam can be used as a base. It is covered with plasticine or polymer clay. Then the body is decorated with beads. Using this technology, a product of any size can be manufactured. Original compositions with ladybug are used to create hairpins, bracelets, and also to decorate beaded bouquets.
For example, the insect can be placed on green foliage or attached to a fruit basket.
Tips for beginners:
- To create a three-dimensional figure, you need to adjust each row.
- To add volume, the space between the back and tummy is filled with a piece of cellophane or polymer clay.
- In order to create the effect of a “living” ladybug, you need to select high-quality beads and alternate them correctly.
