Ancient crafts have always been of interest to lovers of creativity; thanks to the uniqueness of handmade products, such things have always been in demand. Felting wool, clothing, and its exclusivity represent a new trend in fashion these days. Modern needlewomen create not only clothes and all kinds of accessories from wool. Interesting, bright toys, elegant sweaters, scarves and coats come to life in their hands.
Felting, felting, stuffing is felting from wool. Clothing that has undergone this treatment is particularly soft and dense.
The creation of felted products involves two methods: wet and dry. Craftswomen, using one method or another, describe it in detail using examples of things they have created.
Limitless possibilities of felt
The revival of the felting technique especially appealed to today's fashionistas. Items made by felting from natural wool are not only fashionable, they are very warm. In addition to clothing items, today's craftswomen felt everything from wool. Any element of the interior, children's toys, everything is in the hands of needlewomen.
Felting wool, handmade clothing and many useful things made using this method represent a real art these days. At the same time, this is an interesting, simple and convenient creative creation of warm, unique wardrobe elements.
For beginning craftswomen, it is recommended to choose wool with obvious properties of good adhesion of its fibers to each other. In addition, this wool must be unspun. You can buy the unspun material you need for your work in specialized stores or using catalogs and recommendations from online stores. As a rule, this purchasing option provides guarantees of the purity and quality of the product.
Depending on the purpose, you need to choose coarse or fine wool. Coarse wool can be used for bags, slippers or home furnishing accessories.
Items of clothing and accessories, children's toys will require the use of semi-fine and fine wool structure.
The portal “Fair of Craftsmen” provides significant assistance to needlewomen: wool felting and handmade clothing are presented there through master classes by experienced needlewomen with step-by-step execution of products.
Laboratory 9. Felting clothes! From smart layout to perfect fit
June 13, 2021 News
Video recording of the Felt Ideas Laboratory No. 9. Felting clothes. From smart layout to perfect fit.
Features of patterns for felted products: modeling of silhouette with layout. We use the properties of wool 100%! perfect fit. How to achieve it? sleeve patterns. Set-in, solid felted, conditionally solid felted? Or maybe knitted? combining different materials when felting clothes and many more original ideas from professional craftsmen!
Only practical information! Maximum concise, concentrated, dynamic. The opportunity to compare the experience of different masters and choose the most interesting for yourself.
The cost of video recording Laboratory 9. Felting clothes is 1000 rubles.
4 hours of video.
You will meet a wonderful seven professional felt makers.
More information about the topics of presentation of each master:
"Perfect product fit"
Elena Naydenova (St. Petersburg), a professional cutter with extensive experience working with textiles and conducting master classes on felting clothes, in her speech will clearly share with you simple and understandable techniques for fitting a product to a figure. Speech plan: Achieving an ideal fit - by cutting - by laying out - by pressing down problem areas of the product
Svetlana Bolyukh (Korolev) is a professional artist, felt-maker. Topic: Modeling a silhouette with a layout. - when you need a pattern, and when you can use the properties of wool - how the angle of the wool layout affects the silhouette of the product - dress, vest, jacket... which layout to choose? At the Laboratory, Svetlana will present her new course.
Yana Petrik (Yuzhno-Sakhalinsk)
Topic: Your own “couturier”
At my presentation, I would like to consider with you the possible types of sleeves; advise in which models to use one or another type. Having understood the basic models of sleeves, you can easily model your products at your own discretion, so that the item emphasizes your figure, and not vice versa. I want to consider 4 (basic) types of sleeves:
— sewn in — conventionally whole felted — whole felted — whole felted hemmed
In which cases, what type of sleeve do I use in order to “fit” the sleeve as well as possible, using the capabilities of felt - plasticity, pliability, density. Using the listed types of sleeves in my products, I want to share with you the advantages (or not always) of each of them. You will then choose for yourself which of them and in which products to use, so that the product “fits you perfectly.”
Regina Zhuravleva (Naberezhnye Chelny), a professional felt maker from Tatarstan with extensive successful teaching experience, will talk about the features of felting patterns. What do templates leave out? And he will dwell in detail on the construction of a pattern with a full-felted sleeve of a loose style.
The topic of the presentation by Elena Smirnova (St. Petersburg) is “Knitted sleeves in felt clothes.” I have been making knitted sleeves for felt jackets for a long time. And, as always, I do it very quickly, easily and conveniently. Naturally, I found creative ways for myself, I have secrets, I made everything as easy as possible. It only takes me one evening to make and sew in the sleeves!!! I’m ready to show you this whole magical process - how I do it. Creating a sleeve, the technology of connecting it to the product, and ways to achieve the best result - I will show all this at the meeting. You will be convinced that my way of working, as always, is the most productive, because I am given 20 minutes to speak and in these 20 minutes I will have time to show you what I promised. Creativity should be enjoyable, and I wish that for you too. See you later, my felt colleagues.
Irina Sadykova (Bashkortostan)
Using dyed and undyed wool of different fineness in one product. The influence of the choice of wool and fabrics on the seasonality of the product. What fabrics, fleece and fibers are desirable to use in one product. How the combination of materials can affect the shrinkage of the product.
Victoria Kupriyanova (Irkutsk) Features of constructing a set-in sleeve pattern, its pros and cons of using it in felted products.
Three masters - Elena Naydenova, Svetana Bolyukh, Irina Sadykova will come to the Shkatulochka studio and bring their works. Yana Petrik, Victoria Kupriyanova and Regina Zhuravleva, Elena Smirnova will go live from their cities.
The cost of video recording Laboratory 9. Felting clothes is 1000 rubles.
4 hours of video.
Brooch made of Margilan silk
Previous post
Irina Spasskaya. Hat. Lightweight double-layer field technology
Next entry
Comments for the site
Cackl e
Basics of wet felting wool
The essence of wet felting wool fiber is to wet it with a soap solution and then gently smooth it in different directions. The finished product is a dense material - felt.
In wet felting, you should make the necessary increase in the pattern of the product, since wool shrinks up to 40%.
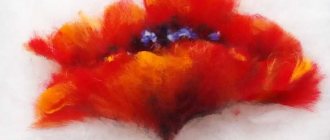
To obtain small volumetric objects, a ball of wool is crushed in your hands. A flat fabric is obtained when wet felting of wool is used. Clothes and accessories that represent the openwork fantasy of the craftswoman can only be made by rolling the workpiece for a long time or smoothing it with hand effort. Only this method allows you to get a bright thing with all kinds of color transitions.
Effective felting of clothes: wet method
Wet felting wool involves wetting it with a soap solution and then gently smoothing it in different directions. When making a vest or other product using this technique, it is necessary to increase the pattern by about 40%, because wool shrinks.
To make small three-dimensional objects, the wool ball is kneaded by hand.
A flat fabric comes out when wet felting of wool is used. Clothing and objects that represent the extraordinary imagination of the needlewoman can only be made by prolonged rolling out of the workpiece or smoothing it by hand. The main material for felting a children's jacket or other product is unspun wool. Different types of material are used for work.
The wet felting method from wool makes it possible to obtain a stylish item with various color tints
Depending on the established plan, you need to take one of several types of fiber:
- The coarsest wool is combed;
- Semi-fine wool;
- Very thin.
To work, you need to prepare a flat surface with certain dimensions, PE film with bubble finishing, a mosquito net, soap solution, water, a spray bottle, and finishing accessories. The force of the craftswoman’s hands is the main tool in wool processing. As a result, the use of wet felting makes it possible to realize the most original ideas. The traditional scheme for performing this technique is simple - laying out the woolen material, the procedure for making the base for felting (prefelt), processing the original material, previously soaked with a soap solution, into a homogeneous needle-punched fabric. Next comes the shrinking of the prefelt, highlighting the texture of the material, and eliminating the wetting component. Folding patterns become a defining feature of the future product range.
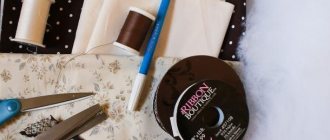
Necessary and auxiliary tools and materials
The main material for felting is unspun wool. For felting, different types of material are used. Depending on the planned product, you need to purchase one of several types of wool fiber:
- The coarsest wool is the so-called combed wool.
- Semi-fine wool.
- Very thin.
- A flat working surface with certain dimensions.
- Polyethylene film with bubble finishing.
- Mesh with a dense structure (mosquito).
- Soap and water solution.
- Water.
- Spray.
- Accessories for finishing the product.
Necessary materials
Any method of felting requires a lot of time, labor and patience. If you are already ready for this, then we will collect materials.
An original wool skirt, suitable for any fashionista
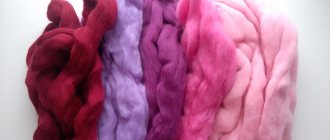
First of all, you need unspun wool. For clothing, coarse combed tape or carded wool is used, semi-fine wool and very fine wool to create a pattern.
For dry felting:
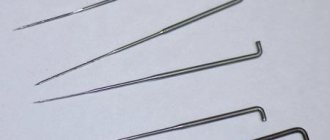
- Needles of three types (thick, medium and thin) with special serifs.
- The backing is made of dense foam rubber, felt or rubber.
- Yarn of different colors (if there is a pattern).
- Attributes for decorating the finished product.
Materials and tools for dry felting
For wet felting:
- Soap solution (water and soap).
- Dense mosquito net.
- Oilcloth for pattern.
- Film with pimples.
- Water, scissors, towels.
- Rolling tool (rolling pin, wooden massager or bamboo mat).
- Viscose for backing.
Materials for wet felting
Wet felting technique
The effort of a needlewoman’s hands is the main tool in processing an amazing material called “wet felting from wool.” Clothing, as a result of using this procedure, allows you to bring the most incredible ideas to life. The basic scheme for implementing this technology:
- Formation of a fibrous web of a certain orientation, that is, laying out wool.
- The procedure for obtaining a base for felting (prefelt), processing the original material, pre-moistened with a special composition, into a single needle-punched fabric.
- Shrinking of prefelt by performing special processing techniques, which results in an increase in strength and highlighting the texture of the material.
- Removing the wetting component. Layout patterns largely determine the future range of products.
Stages of work
The modern felting process has many techniques. Wet felting of wool clothes, a master class of one of the options, is presented in the following stages.
- Layers of wool are spread in a thin layer overlapping onto the oilcloth with the dimensions of the product marked. The wool is laid out in a checkerboard pattern: horizontally, then transversely. It is necessary to control the thickness of the layer; it should be the same in all areas. In addition, felt shrinkage should be taken into account, increasing the initial wool thickness by 2-3 times.
- Moisten the spread out wool with water from a spray bottle.
- The wetted workpiece should be covered with mesh material. It is convenient to use a mosquito net for this purpose. The layout is carefully moistened with soapy water through a mosquito net, avoiding displacement of the pattern.
- Gently press the treated product onto the oilcloth with your hands, ensuring that the base is well saturated with soapy water; remove excess solution with a towel.
- The process of felting, namely intensive smoothing and friction of each section. Continue felting, carefully rubbing each section, gradually removing the mesh, turning the fabric over.
- The fabric is considered ready if, when pulling it upward, the entire layer is removed without separating the strips.
- Rinse the resulting felt in cool water until the soap suds are completely removed.
- Lay out the fabric and dry it in a horizontal position.
Wet felting of wool is completed. The product or canvas can be considered finished.
Breaking down the basics
First, we recommend watching a video tutorial on felting a dress, this will be especially relevant for beginning needlewomen. And after watching the lesson, start felting your own clothes according to our instructions.
Now that you already know a little about the terms and visually imagine the process of work and movements that you will need to perform, in our master class you can supplement your knowledge with interesting ideas.
We will make such a beautiful dress, you can also make a set for mother and daughter, it always looks very cute, this outfit is perfect for walking together in the park. You will surely receive admiring glances and compliments from others.
To work you will need:
- Gauze;
- Wool of different colors;
- Silk in a skein;
- Viscose;
- Pattern according to your measurements;
- Hot water;
- Soap solution;
- Bubble film;
- Felting machine (optional).
First you need to cut a piece of gauze into two pieces in half. First, we place the first piece of gauze on the pattern and wrap the pattern in it. Now you need to wet it all a little with some water and distribute the moisture along the entire perimeter of the product. We make extra gauze around the edges.
Now you need to lay out the wool on the pattern wrapped in gauze. We start with the armholes and neckline.
On top of the product, the wool should lie in a vertical direction.
Related article: Lampshade made from toilet paper rolls
Starting from the waist and further to the bottom, we place the wool horizontally.
Now thoroughly moisten the product with soapy water and cover it all with film.
If you have a felting machine, we begin to process the future dress; if there is no machine, then begin to knead the product with your hands, the movements should be strong and confident.
Now we remove the film, correct all the places where it is required, and tuck the wool protruding beyond the edges.
Now you need to cover the dress with a second piece of gauze, carefully straighten the gauze so that there are no folds or extra waves. Also, do not forget to leave a small amount of gauze.
We wet the product again with soapy water, cover it with film and work with our hands; if you have a felting machine, then we work with a machine.
Now we use wool to lay out the pattern that you want to make on your dress.
The drawing also needs to be moistened in a hot soapy solution.
We cover the product again with film and begin to properly felt the dress, using a machine or by hand, but here you need to work harder and more confidently so that the pattern is securely connected to the dress.
Now our dress needs to be turned over. We need to put a little fur in the places where we had increases.
Fold the edges of the product and carefully trim the edge of the hem.
Now cut the neck to the depth and shape you need.
All cut areas need to be thoroughly rolled, again we resort to the help of our machine or pens.
Then our dress needs to be wrapped in a so-called “sausage” and rolled back and forth a lot of times (about eight hundred times).
After which we unroll the roll and remove our product from the pattern.
We carefully inspect the product (we pay special attention to the side parts and places of cuts). If something is wrong, take a piece of wool and place it on the wrong side, then process it with a felting machine or by hand.
Now you need to put bubble wrap on the table and the most “cruel” moment in relation to the dress begins - it needs to be beaten off properly. We begin to crush the product with force, you can knock on the table, while soaking the dress in a hot soapy solution.
Related article: How to sew a felt horse
You can run the dress in the washing machine for five minutes and rinse, but you can bypass this step and continue felting the dress yourself until it is the size you want.
Now we straighten the dress, smooth out all the irregularities, and give it the shape you want. The dress is ready, you can immediately put it on and run to your friends to show off.
Don’t be alarmed by the fact that the item is made of wool and the dress is for summer, because wool allows air to pass through and maintains body temperature, which means you won’t be hot. In the summer heat, a woolen dress will be much more comfortable than a light synthetic one, which does not allow air to pass through at all, and accordingly, the body will sweat.
Dry felting option
The essence of the technique is to tangle and compact wool fibers with special needles with notches. Felting begins with processing the fibers with the thickest needle. During the process of compacting the felt fabric, the needle is replaced with a thinner one.
Those who are starting to felt their first product need to remember that the wool changes in volume during the process, decreasing by almost three times. Therefore, for felting, a beginning felter needs to take wool in a much larger volume.
The difference between wet and dry felting is the replacement of the soap solution with special needles, which are used to perform the felting procedure. Dry felting from wool is not recommended for beginners: clothes and items require the use of a flat felt cloth. Experienced craftswomen use this type of felting to make voluminous accessories, jewelry and toys.
Many craftswomen have turned felting into an opportunity to have in their wardrobe not only warm, cozy clothes, but also accessories for them. In addition, for some, felting began to provide a good income for the family budget.
Tools and auxiliary materials
The dry method of folding wool fibers is unique and has its own characteristics. For dry felting, you will need special tools to perform the process of felting the wool fiber. These include:
- Special needles of different sizes for dry felting, made of high-quality hardened steel, with high strength, sharp edges and durability. When working with wool, needles, thanks to the practical notches located in their lower part, capture the fibrous mass well and push it into the depth of the layer. This operation ensures that the fluffy layers are tangled, matting and compacting them.
- Level, smooth working surface.
- Foam or rubber backing.
- Accessories for decorating the finished product.
Stages of dry felting
Creating beautiful three-dimensional things will require a detailed study of such techniques as dry felting from wool. Clothes, a master class on how to make them - all this is described in detail by experienced felters. With their help, it is possible to manufacture products of any complexity.
Preliminary preparation is the basis of any work. Before you start felting, you should make a sketch or pattern of the future product:
- The wool, distributed according to the prepared template, must be pierced often and a lot with a serrated felting needle, achieving felting and compaction of the material.
- The resulting felt fabric must be constantly rotated, achieving uniform density, repeatedly treating each area with a needle.
- As you work, you can add new pieces of wool, creating the planned composition and ensuring it matches the pattern.
In the production of any items and toys, you can combine dry and wet felting, adding finishing elements such as lace, ruffles, beads, beads, braid and ribbons. This creates additional opportunities to obtain unique, creative items.
Dry felting requires a lot of time. However, after spending a little time studying the master class of a couple of small toys, you can start making a larger thing. The work will be crowned with success.
Do-it-yourself felting from wool: master classes for beginners
Felted toys turn out no worse than factory ones PHOTO: livemaster.ru
Before you begin the chosen technique of this art, having the appropriate diagram, you should choose the right set, which differs in the method of felting.
Inventory preparation
According to statistics, newcomers have interesting masterpieces PHOTO: old.mgazeta.by
Typically, tools are used only in the dry felting technique, but sometimes also in the wet method, when you need to wrap something. The creativity set consists of:
- needles (this includes various numbers that differ in size, cross-section and shape);
- folding machine (it is not always included, but it significantly reduces the processing time for wool. However, you need to get used to this device);
- substrates (such components are included in the kit without reserve, and if they are completely leaky, you can use an ordinary dish sponge or small fragments of foam rubber).
When all the materials are at hand, you can begin to create interesting crafts. Let's look at several options with step-by-step descriptions.
On a note! Needles for woolen fabrics can be replaced with a set of awls. Such tools are much more convenient to use.
Toys
What else can please a child if not with a homemade toy? You can always be sure of the safety of its composition, since only natural raw materials were used during production.
Children really like woolen toys; they are often used to attract children to creativity PHOTO: acicularis.com
Sleeping cat
The toy will require two types of wool: combed and carded. We also prepare a sponge and two special needles in advance.
A decorative cat can be striped by alternately adding woolen cloths of different colors PHOTO: yandex.uz
| Illustration | Description of action |
| Take a small piece of combed wool and fold it in half. The width of the strip should be at least 10-12 cm | |
| We roll the workpiece into a bandage (cylinder), at the same time bending the free edges so that they do not stick out | |
| We place the finished cylinder on a sponge and begin to pierce it with a needle often and often. We try to turn the product regularly | |
| We wrap the workpiece in a semicircle, pressing it in the center from the inside. And we continue to fill the fibers with a needle | |
| We also form the head using this needle. We go around in a circle | |
| We take a fairly thin layer of carded carding and wrap the already prepared body figurine in it | |
| We take the middle needle and begin to roll the top layer of wool onto the future body. All that remains is to apply a piece of carding to the forehead and back of the head of the future cat to increase its shape. We're starting to roll over again | |
| We take white carded wool and roll it into a tube. Apply to the muzzle. We will use it to make the bridge of the nose and cheeks | |
| As a result, you should get a product like the one in the photo. | |
| Then we form the ears: take a triangular piece of red wool and a slightly smaller piece of white wool. We put two parts together using a needle | |
| We attach the finished ears to the back of the head and roll them in the same way. If necessary, add missing fibers | |
| Making an airy tail, combining orange and white wool | |
| We attach the tail to the body, then glue the eyes, nose and tongue. Plastic parts can be used |
This can be done on any animal, the main condition is to use the right tools.
Hedgehog
Instead of a gray tone, you can use brown for the hedgehog's face. It will be even more original PHOTO: livemaster.ru
To create this toy, you can use dry and wet felting in a complex manner. Let's look at the step-by-step instructions.
- Prepare wool of three colors: gray, black and white. We take a black piece and form the legs using the wet felting technique. You need to make 4 pieces, then rinse and leave to dry.
- In the meantime, take a larger piece of black wool, lay it in the shape of an oval on the backing, and begin to roll it until it is sufficiently dense.
- Then we process the top layer in the same way, using gray wool. At this stage it is better to use a thin diameter needle.
- Let's work on the nose. Take a piece of gray wool and form a triangle out of it. Carefully roll it in.
- We form a felted circle from white wool and attach two petals of the same shade to it on top.
- We fasten the bridge of the nose, roll up a black ball and make a nose. We attach the finished “travel knot” of white wool to the hedgehog’s body.
- We attach the arms and legs by carefully pushing the fibers through with a thin needle.
- We make eyes with beads or use black and white pieces of wool.
We process the finished product from all sides with a needle with reverse petals. This will help form spines on the animal's back.
Souvenir crafts
Many young needlewomen try to make souvenirs that have a protective effect. There are many such accessories, but for beginners we will consider a few simple master classes.
When making three-dimensional crafts using wet felting, you should use the correct templates PHOTO: teplyystanmedia.ru
Felt boots
For this product you will need wool, bubble wrap, soap solution, scissors and decorative supplies.
- We create a template of felt boots on a protective film, cut it out and fold it in half.
- We put oilcloth on the table, then lay out the template and take several layers of wool the size of the diagram.
- We moisten with a soap solution and gently press the wool fibers through the mesh, forming the shape of felt boots, and then wrap them in a template.
- It is better to lay out the next layer of wool material crosswise in the same way.
- We take orange carded wool and do the final felting using the wet method.
- We wrap all protruding tails onto the opposite side of the template. Cut the workpiece in half.
- As a result, we get voluminous felt boots that can be painted and further decorated.
Wool shoes can be real. Felt boots and slippers for children are often made using a similar technique. PHOTO: kitchenremont.ru
You can put these souvenirs up for sale or simply decorate your home (hallway or kitchen).
On a note! You should not clutter your home too much with felted accessories. They are very good dust collectors.
Video: how to make a brooch hairpin
To work, you will need to prepare decorative elements, wool for wet felting in different shades, but of the same color. A pin, needle and thread, scissors, and soap solution will also come in handy. We offer a detailed master class in the video below.
Decorations
Various decorations for clothing or interior design can also be made using one of the wool felting techniques. Often, beginning craftswomen create chic jewelry, which we’ll talk about in this section.
Women's beads
Multi-level beads are always suitable for a dress with an open neckline PHOTO: kitchenremont.ru
Beads have always been considered a symbol of elegance and femininity. Hand-Made jewelry deserves great attention. The list of tools and materials remains the same. Let's take a closer look at the creation instructions.
- Let's take a few lumps of wool intended for wet felting. It is desirable that their diameter be 5 cm.
- Let's roll them into balls and then start felting them with a needle. It is worth making punctures carefully so that the distance between the holes is not more than 2 mm.
- Now you can complement a plain ball with wool of a different shade. Next, wet your hands and balls in the soap solution.
- We place them on bubble wrap and begin to gently knead them, giving them a more complete roundness.
- All that remains is to rinse the beads under running water and then dry them.
At the final stage, you need to thread each bead with a needle and strong thread (you can use a thin ribbon), and then attach the clasp. The beads are ready to use.
Advice for beginning craftswomen
Each product made from wool fiber has certain nuances that require additional refinement and correction. During operation, sometimes things require repair, so craftswomen share their experience:
- Some rules should be applied to products in the manufacture of which two technologies are combined: the semi-finished product must be absolutely dry. This will avoid its deformation, tearing and breaking.
- It is better to start dry felting with blanks of fibers of greater thickness: carded, combed tape. Use fine wool to finish the product.
- A thin needle must be pierced very often, to a shallow depth. Deep punctures will leave an unsightly mark on the surface of the product; rare punctures will create bumps on the surface of the felt.
- A bamboo mat on which the workpiece is laid out will help replace your hands in wet felting. The rug is rolled into a roll and rolled in different directions, achieving dense matting of the wool.
- In your arsenal of tools and equipment, towels will not be superfluous to collect excess soapy water.
- Plastic bags will be required for additional protection of the working surface, as well as for use as spacers between the elements of the product. This measure will prevent them from sticking together.
Felting is a very interesting, fascinating type of needlework, which is popular today. Unique, warm, cozy clothes are very comfortable to wear, caring for them does not require special procedures, since they practically do not get dirty. A regular clothes brush is enough to clean them. Washing and rinsing in cool water easily removes heavier stains.